70
4.
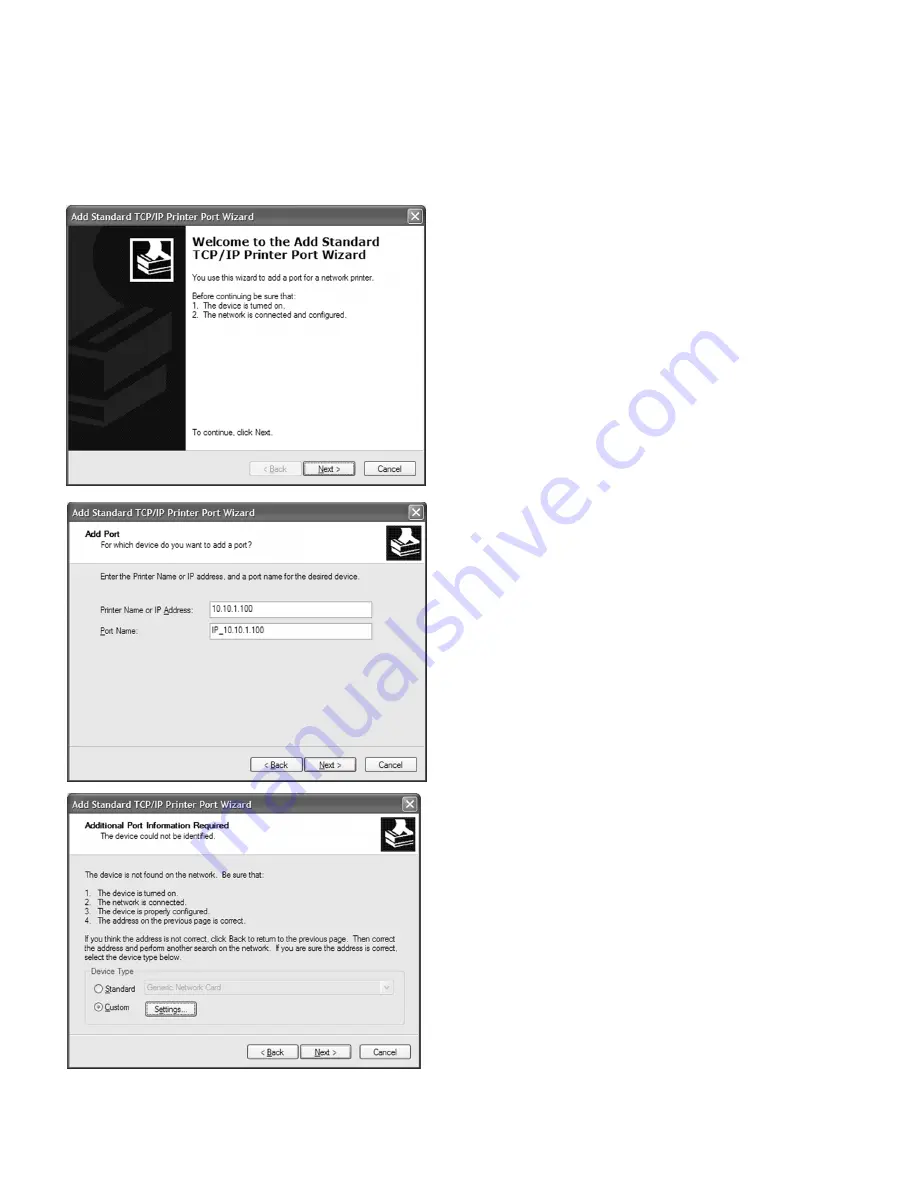
This will open the Windows TCP/IP
Printer Port Wizard. Make sure the PC
and printer are both properly connected
to the Ethernet network and that the
printer is powered on. Also, make sure
your printer has been assigned an IP
address according to the instructions in
Step 9 of this guide. Click Next.
5.
This window asks for the Printer Name or
IP Address for the printer. Fill in the
printer’s IP address in this field. A Port
Name can also be assigned in this window,
in order to more easily identify the port
when the time comes to select the
printer. A new name can be assigned, or
the system will automatically fill in a
default name. Click Next.
Note:
Avoid using slash (\), period (.) or
dash (-) marks as part of the name, as
these will cause problems on the network.
6.
The next window will ask for additional
port information. Under “Device Type,”
click on the “Custom” radio box and click
“Settings...”


