48
232001260G(10)
Chapter V - Operating the LaserPro X500 SERIES
Once you have installed LaserPro X500 Series Print Driver, and connected the LaserPro X500
SERIES to the computer, you will need to familiarize yourself with the control panel and LaserPro
Print Driver. The print driver will be where you spend most of your time configuring specific laser
parameters for your jobs, while the control panel will allow you to set repeat times, manipulate the
file order, configure the start point, and more.
NOTE
Be sure to power on your water chiller before starting to operate LaserPro X500
SERIES. Water chiller temperature is recommended to be set to 25
℃
. The laser will
not fire if the water chiller is not turned on. To solve this problem, just power on water
chiller then restart the LaserPro X500 SERIES.
5.1 Using the Hardware
5.1.1 Adjusting the LCD Display Screen’s Contrast Setting
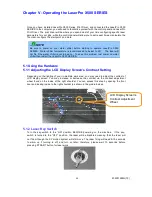
Depending on the lighting of your immediate work area, you may need to adjust the contrast of
LCD display screen. You may increase or decrease the contrast via the contrast adjustment
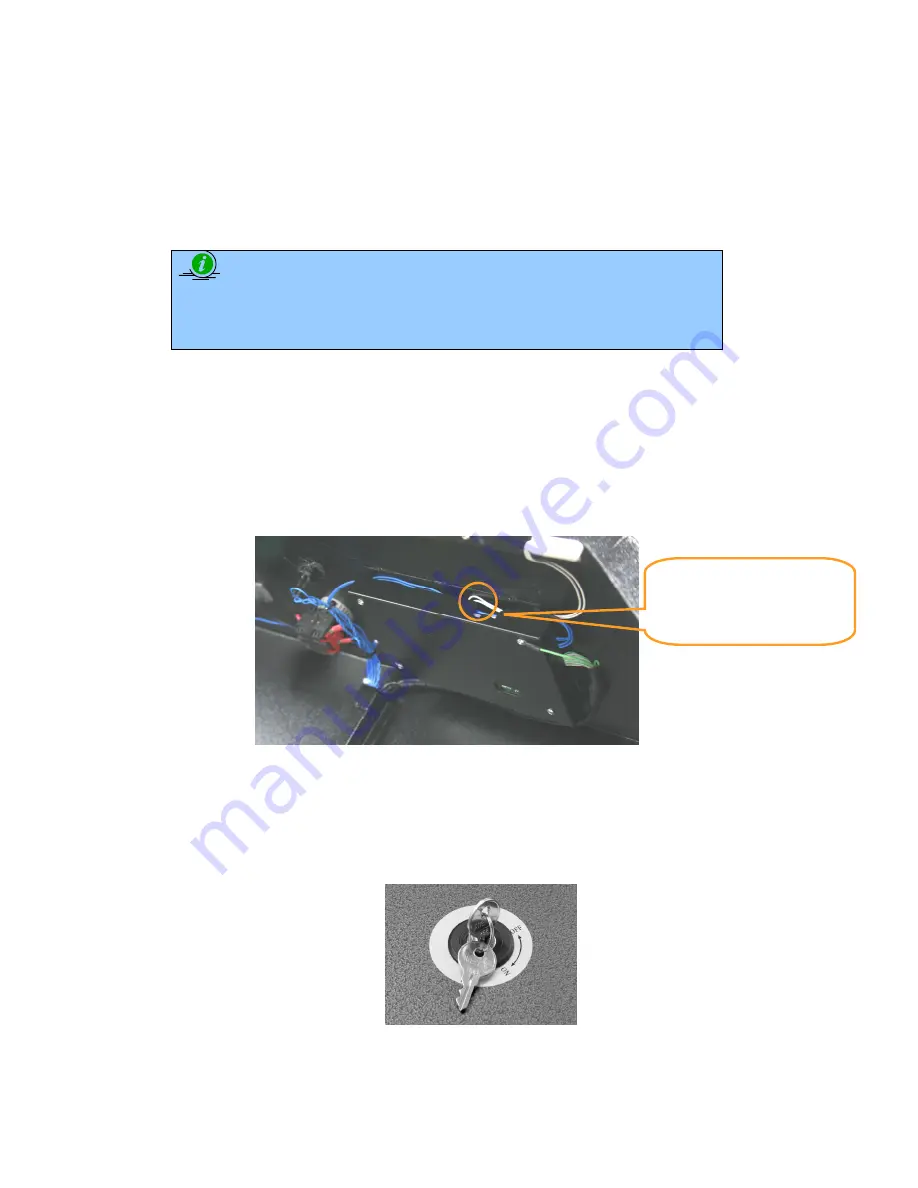
wheel found on the inside of the right shoulder. You can access this area by opening the front
door and looking inside to the right shoulder (as shown in the picture below).
5.1.2 Laser Key Switch
Turn the key-switch to the “ON” position BEFORE powering on the machine. If the key-
switch is turned to the “OFF” position, the laser will be disabled meaning that the laser will
not fire although the XY motion system will still move. The laser firing will need 8-10 seconds
to warm up if turning to off, and turn on later, therefore, please wait 10 seconds before
pressing STRART button for laser work.
LCD Display Screen’s
Contrast Adjustment
Wheel
Summary of Contents for LaserPro X500 III-80Y
Page 1: ...0 232001260G 10...
Page 7: ...6 232001260G 10...
Page 8: ...7 232001260G 10...
Page 9: ...8 232001260G 10 CDRH Label This label indicates the class level of CDRH...
Page 31: ...30 232001260G 10...
Page 32: ...31 232001260G 10...
Page 37: ...36 232001260G 10...
Page 38: ...37 232001260G 10...
Page 82: ...232001260G 10 81...
Page 83: ...232001260G 10 82...
Page 103: ...232001260G 10 102 Step 1 Produce the gray level background...
Page 105: ...232001260G 10 104 Step 2 Produce three dimensional characters...

