background image

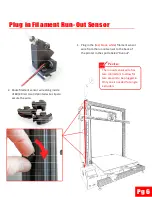
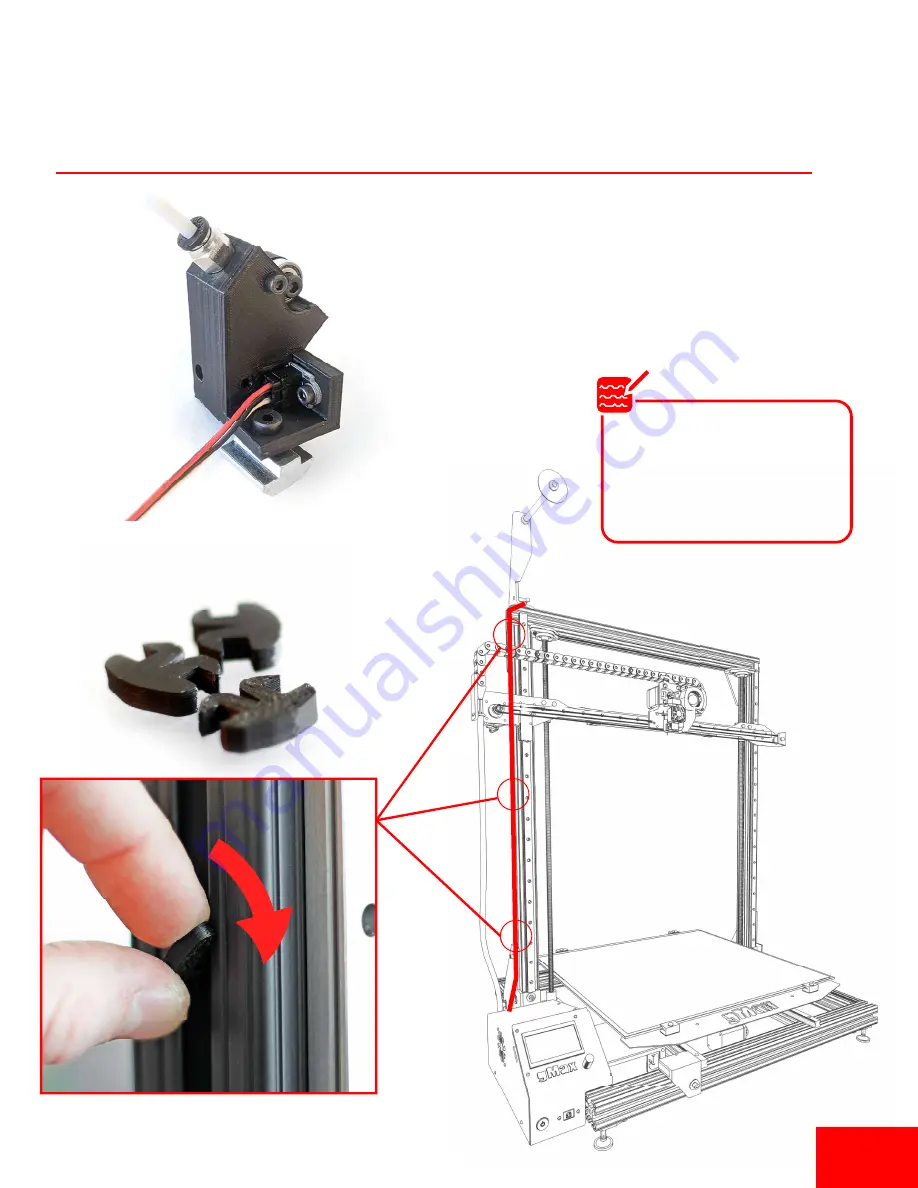
Plug in Filament Run-Out Sensor

2.  Route filament sensor wire along inside 

of 80/20 rail. Use 3d printed wire clips to 
secure the wire.

1.  Plug in the (

red, black, white

) filament sensor 

wire from the runout sensor to the back of 
the printer in the spot labeled “Runout”.

The runout sensor wire has 
two connectors to allow for 
two sensors to be plugged in. 
Only one is needed for single 
extruders

Note

Pg 6

Summary of Contents for gMax 2 PRO

Page 1: ...i al unboxing and setup of your gMax2 3D printer Please Use the addi onal guide for the rst use of your printer Make sure to inspect the printer through the unboxing process for loose wires or damage...

Page 2: ...er needs to be installed on the linear block using 3 M3x8mm socket head screws The extruder will go over the belt bracket already installed 2 Use the supplied 2 5mm hex driver to install 3 screws on e...

Page 3: ...cable 1 into the socket closest to the motor and 2 in the other socket 3 Plug the green extruder hea ng wire connector into the 4 pin green connector Make sure to plug it into the black and red wires...

Page 4: ...ate Upper Gantry TallRubberSpacer ShortRubberSpacer UseM5hexkey toloosenboltson bothsides SeenextPage Make sure T Nut rubber spacers are in place They can be easily reinstalled if they fall out Note P...

Page 5: ...box open the bag containing the M6 bolts washers and set screws 3 Screw in the M6 Bolts and washers into the T nuts already in the ver cal rail 4 SetScrews 4 M6SocketHeadBolts 4 1 4 Washers 1 M6Bolt 1...

Page 6: ...ws Matchsetscrew loca onwith the atspoton theleadscrew Insertand ghtensetscrew Insertand ghtensetscrew 1 Line up the coupler set screw with the at spot on the lead screw and ghten both set screws on e...

Page 7: ...inted wire clips to secure the wire 1 Plug in the red black white lament sensor wire from the runout sensor to the back of the printer in the spot labeled Runout The runout sensor wire has two connect...

Page 8: ...e side of the top rail and ghten the knob to secure it 3 Install the runout sensor on the top rail with M6x16mm and tnut Make sure it lines up with the spool Tighten2 Arm KnobonRail Runoutsensor The r...

Page 9: ...from the accessory box and plug in the printer 2 Make sure to turn on the power supply and push the power bu on on the printer 3 Refer to the Ge ng Started Manual to start using your gMax 3d printer...

Reviews: