User Manual 9050/9050plus
78413010-003 6
Table of Contents
Compuprint Product Information
1
Entering the Power-On Configuration
42
Safety Information
2
Resetting to Factory Default Values
65
FFC Notes
5
Program Setup
66
Canadian D.O.C. Radio Interference
Regulation iv EEC Regulations
5
Entering the Program Setup
66
5 Hexadecimal
Dump
81
Table of Contents
6
ANSI Emulation
82
Getting to Know Your Printer
7
DEC Emulation
88
Printer Features (9050plus)
7
How to Select the Paper Path
92
Printer Features (9050)
7
How to Use the Tear-Off Function
92
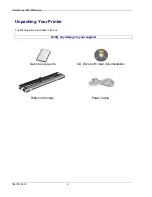
Unpacking Your Printer
8
Selection of the Paper Size
92
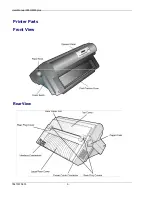
Printer Parts
9
Adjusting the Tear-Off Position
93
Front View
9
Selection of the Tear-Off Mode
93
Rear View
9
How to Lock/Unlock the Printer Setups
94
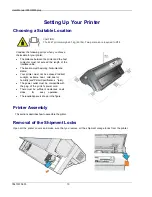
Setting Up Your Printer
10
How to Handle the Paper Parking
95
Choosing a Suitable Location
10
Paper Handling
99
Printer Assembly
10
Paper Paths
99
Removal of the Shipment Locks
10
Paper Specifications
100
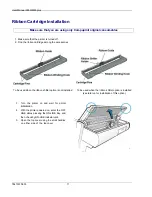
Ribbon Cartridge Installation
11
Fanfold Paper
100
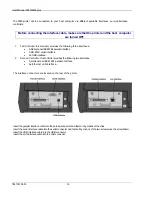
Host Computer Connection
15
Fanfold Paper Loading
100
Driver Installation
17
Loading Paper Using the Front1 Push Tractor
100
Windows Environment
17
Printinga Configuration Sheet
103
Lan Connection
20
Printer Maintenance and Troubleshooting
104
Monitoring Printer & Remote Printer
22
Cleaning the Printer
104
Configuration in LAN
Replacing the Ribbon Cartridge
105
NetViewMaster Utility
27
Printing the Self Test
106
UNIX Environment
28
Error Handling
107
Linux 7.x & Solaris 7.x Operating Systems
30
Problems List Index
109
AS/400 Environment
31
Clearing Form Jams
112
Power Connection
35
Options
113
Selecting the Display Language
35
The Controller Board (9050 only)
113
Configuring the Printer
36
Installing the Controller Board
113
Operator Panel Presentation
36
The Front2 Push Tractor
115
Display Messages
36
Installing the Front2 Push Tractor
115
Indicators
38
Removing the Front2 Push Tractor
116
Function Keys
38
Loading Paper Using the Front2 Push Tractor
117
Printer Setups
41
(option)
Entering the Printer Setups
41
Loading Paper Using the Front1 Push Tractor
119
Moving within the Printer Setups
41
when the Front2 Push Tractor (Option) is
Leaving the Printer Setups
41
Installed
Power-On Configuration
42
The Printer Pedestal
120
Ribbon Shifter Installation
121
Printing
Characteristics
122
Printer
Specifications
122


