– 26 –
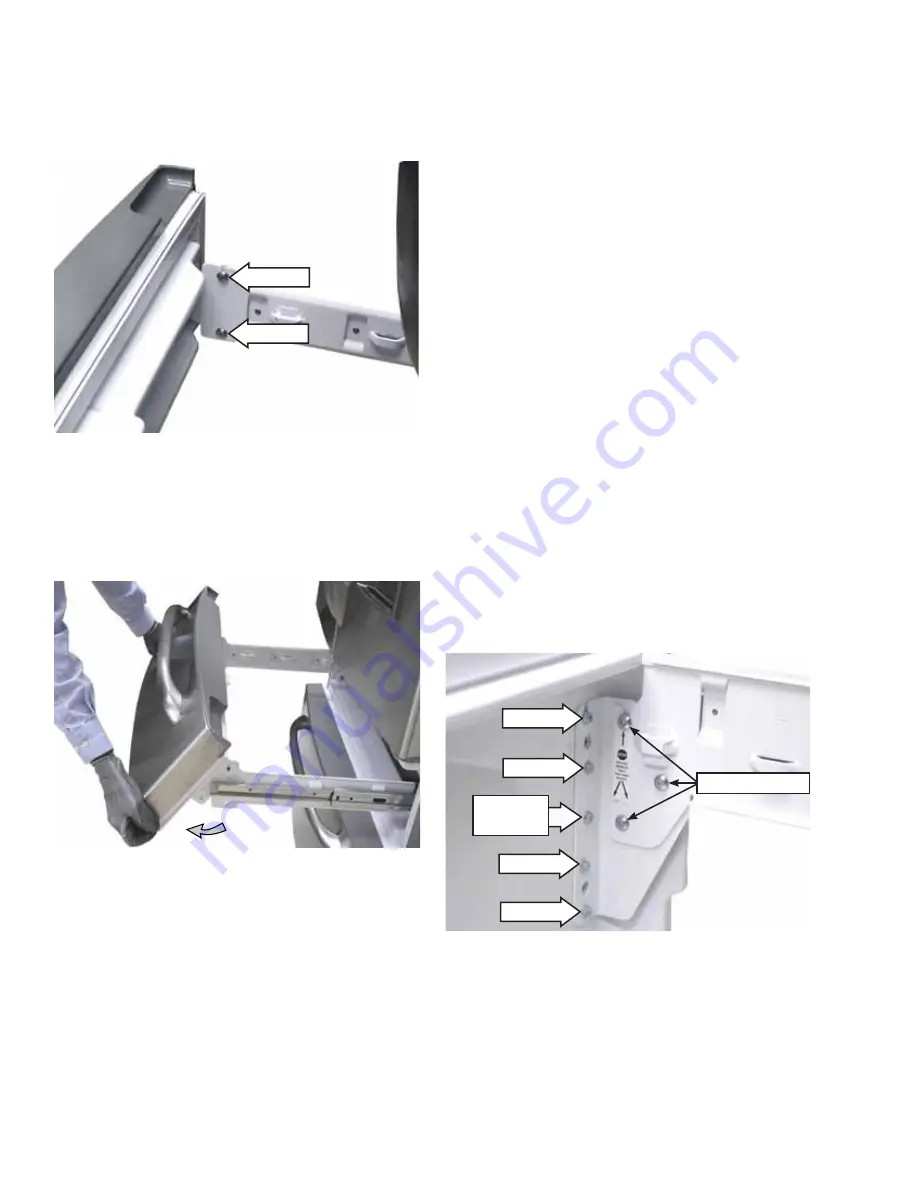
Loosen
Remove
Remove
Remove
Do Not Remove
Left Side Bracket Shown
Pilot Screw
Remove
4. Lift the drawer front from the rail assemblies.
5. Push the rail assemblies back into the cabinet.
Note:
The pilot screw location helps to provide
proper drawer-to-rail alignment. When installing
the drawer front, lower the drawer front on the rail
assemblies, then insert the pilot screw
fi
rst.
2. Loosen (do not remove) the T-30 Torx screw at
the top of the left side door bracket.
3. Remove the two T-30 Torx screws from the
bottom of each door bracket.
4. Tilt the drawer front 45° out from the bottom,
then lift up and remove the drawer front from
the rail assemblies.
5. Push the rail assemblies back into the cabinet.
Lower Drawer Front Vertical Adjustment
Note:
This following instruction is for adjusting the
lower drawer front vertically to meet appearance
needs of the customer. Both the right and left side of
the drawer front can be adjusted independently.
To adjust the lower drawer front vertically:
Remove the upper and lower full-width baskets.
1.
(See
Freezer Basket Removal
.)
Loosen
Remove
Left Side Bracket Shown
2. Remove the pilot screw (center screw) on
the side of the drawer front that needs to be
adjusted. Do one side at a time if both need
adjustment.
3. Loosen the remaining four 10-mm hex-head
screws, on the side that needs to be adjusted, 3
full turns.
4. Raise or lower the side of the drawer front
to be adjusted to the desired position. Once
positioned, tighten the 4 screws.
Note:
Do not replace the pilot screw once the
drawer front is adjusted. It is no longer needed.
Lower Drawer Front Removal
To remove the lower drawer front:
Remove the upper and lower full-width baskets.
1.
(See
Freezer Basket Removal
.)
2. Loosen (do not remove) the two 10-mm hex-
head screws (1 on each side), at the top of each
door bracket.
3. Remove the three 10-mm hex-head screws and
the 10-mm hex-head pilot screw (on each side),
located under the top screw loosened in step 2.
Note:
Do not remove the Torx screws.


