


6
Setting the temperature
•
When pressing the Fabric Selector, the temperature setting will cycle in the
following sequence:
STAND BY
→
RAYON
→
SILK
→
WOOL
→
COTTON
→
LINEN
→
STAND BY
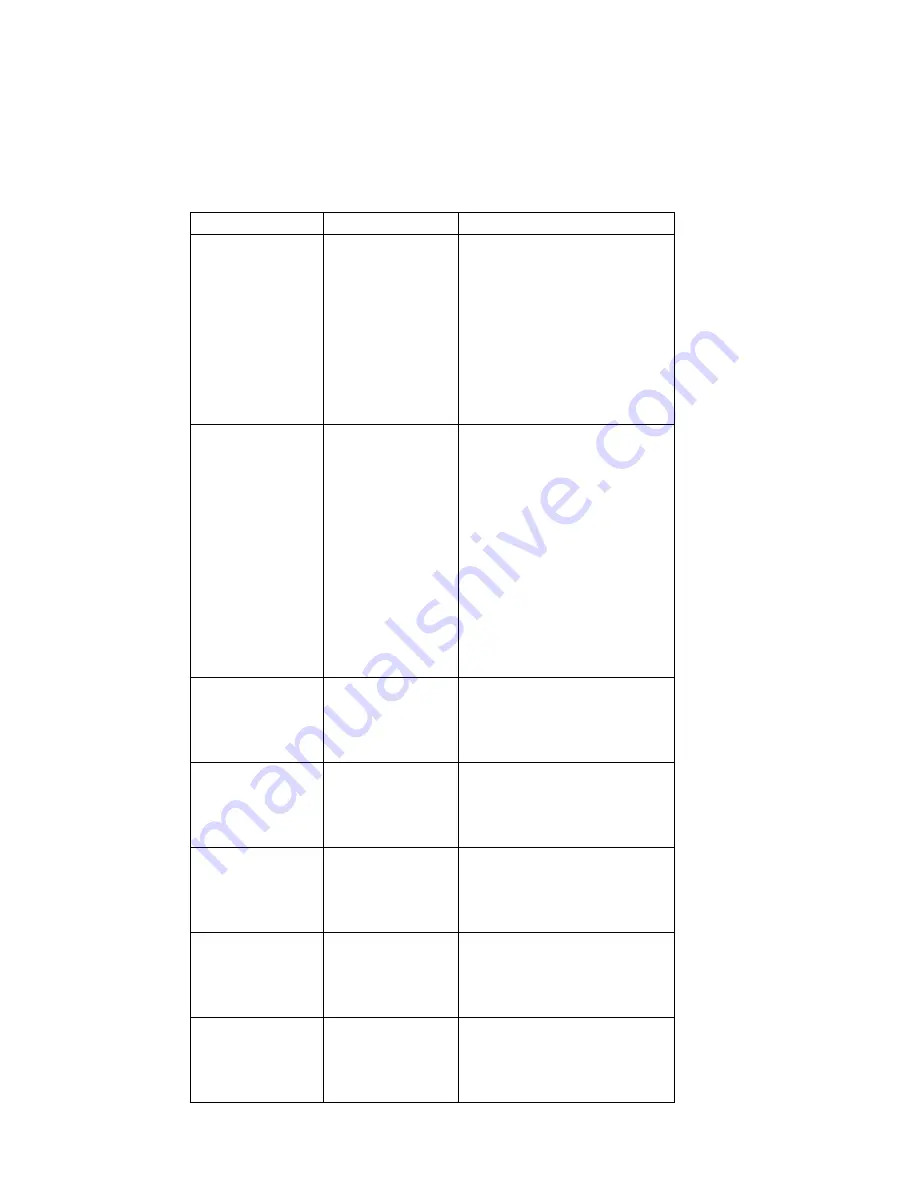
Setting
Temp. Range
LCD display action
Full display at
initial
stage
Power lamp will light and
the system
resets with
LCD background ON and
flashing once. Then the
buzzer beeps once and it
goes to the stand by
condition with the Sleep
Indication Lamp flashing
blue.
Stand by
condition
Hold Button for 3 Seconds
to turn to Stand by.
Background lamp turns
off; the LCD will read
“STAND BY” and Sleep
Indication Lamp will flash
blue. Under this
condition, the relay has
no output. If pressing on
setting button, the system
now goes to the ready
operation status.
RAYON
195 – 250ºF
Push button once: RAYON
blinks until heat is
reached and is ready to
iron.
SILK
250-285ºF
Push button twice: SILK
blinks until heat is
reached and is ready to
iron
WOOL
285-320ºF
Push button 3 times:
WOOL blinks until heat is
reached and is ready to
iron
COTTON
320-355ºF
Push button 4 times:
COTTON blinks until heat
is reached and is ready to
iron.
LINEN
355-410ºF
Push button 5 times:
LINEN blinks until heat is
reached and is ready to
iron


