background image

www.GEappliances.ca

3

Safety Instructions

Operating Instructions

Tr

oubleshooting T

ips

Consumer Support

Installation Instructions

USE OF EXTENSION CORDS

Because of potential safety hazards under certain conditions,
we strongly recommend against the use of an extension cord.

However, if you must use an extension cord, it is absolutely necessary
that it be a CSA approved, 3-wire grounding type appliance extension
cord having a grounding type plug and outlet and that the electrical
rating of the cord be 15 amperes (minimum) and 120 volts.

HOW TO CONNECT ELECTRICITY

Do not, under any circumstances, cut or remove the third
(ground) prong from the power cord. For personal safety, 
this appliance must be properly grounded.

The power cord of this
appliance is equipped with 
a 3-prong (grounding) plug
which mates with a standard 
3-prong (grounding) wall outlet
to minimize the possibility of
electric shock hazard from 
this appliance.

Have the wall outlet and 
circuit checked by a qualified
electrician to make sure the
outlet is properly grounded.

If you have only a standard 
2-prong wall outlet, it is your
personal responsibility and
obligation to have it replaced
with a properly grounded 
3-prong wall outlet.

The refrigerator should 
always be plugged into its own
individual electrical outlet 
which has a voltage rating that
matches the rating plate.

This provides the best
performance and also prevents
overloading house wiring circuits
which could cause a fire hazard
from overheated wires.

Never unplug your refrigerator
by pulling on the power cord.
Always grip plug firmly and pull
straight out from the outlet.

Repair or replace immediately
all power cords that have
become frayed or otherwise
damaged. Do not use a cord that
shows cracks or abrasion damage
along its length or at either end.

When moving the refrigerator
away from the wall, be careful
not to roll over or damage the
power cord.

Summary of Contents for 2 Cubic Foot Series

Page 1: ...rigerator on the side wall Refrigerators 2 Cubic Foot Models 3 Cubic Foot Models 4 Cubic Foot Models Owner s Manual Installation Instructions Safety Information 2 3 Operating Instructions Care and Cle...

Page 2: ...t any servicing be performed by a qualified individual Turning the temperature control dial to the OFF position stops cooling but does not shut off power to the refrigerator When using electrical appl...

Page 3: ...let to minimize the possibility of electric shock hazard from this appliance Have the wall outlet and circuit checked by a qualified electrician to make sure the outlet is properly grounded If you hav...

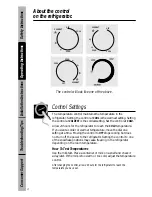
Page 4: ...rmer temperature move the dial one setting at a time Moving the control to OFF stops cooling but does not turn off the power to the refrigerator Setting the control to one of the snowflake positions m...

Page 5: ...evaporator cold surface in compartment Door Shelves Shelves on the door provide convenient storage for frequently used items Some models have doors that are deep enough to store large bottles About t...

Page 6: ...quality baked on paint finish With proper care it will stay new looking and rust free for years Apply a coat of kitchen appliance wax when the refrigerator is new and then at least twice a year Clean...

Page 7: ...ooling coil will cause serious problems and void the warranty We recommend using a plastic scraper Do not use any electrical device in defrosting your refrigerator To defrost remove foods and ice tray...

Page 8: ...be 3 or more back from the edge of the countertop or stand to avoid accidental tipping of the appliance during normal use Do not install it closer than 5 13 cm next to a range Do not install it in a...

Page 9: ...tor cabinet back to remove the right leveling leg 7 Remove the screws on the bottom hinge right side and the left leveling leg Move the bottom hinge to the left side and secure it with the screws and...

Page 10: ...back to remove the right leveling leg 9 Remove the screws on the bottom hinge right side and the left leveling leg Move the bottom hinge to the left side and secure it with the screws and leveling le...

Page 11: ...cycles is first plugged in refrigerator to completely cool down Often occurs when This is normal large amounts of food are placed in refrigerator Door left open Check to see if package is holding door...

Page 12: ...s to refrigerator should be tightly wrapped Keep an open box of baking soda in the refrigerator replace every three months Interior needs cleaning See Care and cleaning Defrost water pan See Care and...

Page 13: ...orted within 48 hours following the delivery by contacting the retail outlet of where it was purchased Improper installation proper installation includes adequate air circulation to the refrigeration...

Page 14: ...it on line anytime or call 1 888 261 2133 during normal business hours Service Protection Plus will still be there after your warranty expires Parts and Accessories www GEappliances ca Individuals qua...

Reviews: