Summary of Contents for 2011 E - Star
Page 1: ...Dishwasher Training 2011 New Door Configuration 2011 E Star ...
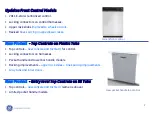
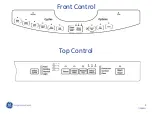
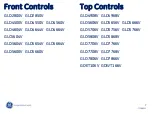
Page 5: ...5 7 28 2011 Front Control Top Control ...
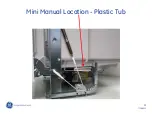
Page 11: ...11 7 28 2011 Mini Manual Location Plastic Tub ...
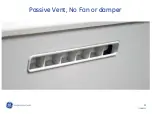
Page 12: ...12 7 28 2011 Passive Vent No Fan or damper ...
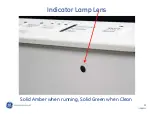
Page 13: ...13 7 28 2011 Indicator Lamp Lens Solid Amber when running Solid Green when Clean ...
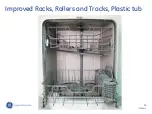
Page 14: ...14 7 28 2011 Improved Racks Rollers and Tracks Plastic tub ...
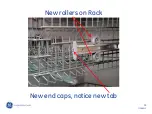
Page 15: ...15 7 28 2011 New rollers on Rack New end caps notice new tab ...
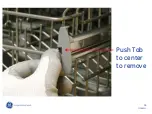
Page 16: ...16 7 28 2011 Push Tab to center to remove ...
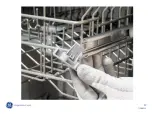
Page 17: ...17 7 28 2011 ...
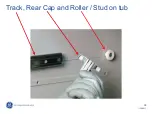
Page 18: ...18 7 28 2011 Track Rear Cap and Roller Stud on tub ...
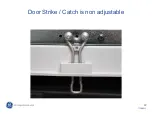
Page 19: ...19 7 28 2011 Door Strike Catch is non adjustable ...
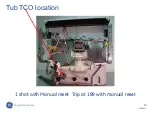
Page 20: ...20 7 28 2011 Tub TCO location 1 shot with Manual reset Trip at 189 with manual reset ...
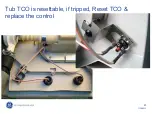
Page 21: ...21 7 28 2011 Tub TCO is resettable if tripped Reset TCO replace the control ...
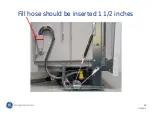
Page 22: ...22 7 28 2011 Fill hose should be inserted 1 1 2 inches ...
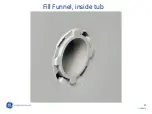
Page 23: ...23 7 28 2011 Fill Funnel inside tub ...
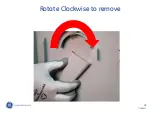
Page 24: ...24 7 28 2011 Rotate Clockwise to remove ...
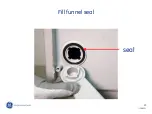
Page 25: ...25 7 28 2011 Fill funnel seal seal ...
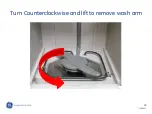
Page 26: ...26 7 28 2011 Turn Counterclockwise and lift to remove wash arm ...
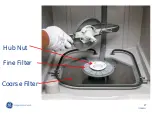
Page 27: ...27 7 28 2011 Coarse Filter Fine Filter Hub Nut ...
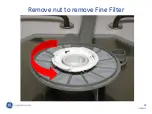
Page 28: ...28 7 28 2011 Remove nut to remove Fine Filter ...
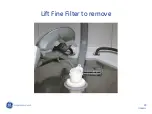
Page 29: ...29 7 28 2011 Lift Fine Filter to remove ...
Page 30: ...30 7 28 2011 To remove Top Wash Arm and Conduit remove Hex screw Conduit ...
Page 31: ...31 7 28 2011 Lift Tab continue to remove Conduit ...
Page 32: ...32 7 28 2011 Push Conduit back and to side to finish removal being careful to not break tab ...
Page 33: ...33 7 28 2011 To remove Sump Cover push in 4 tabs and lift cover ...
Page 34: ...34 7 28 2011 To Remove sump filter the tabs can be released with a screwdriver or putty knife ...
Page 35: ...35 7 28 2011 Push Sump Filter to right and lift to remove ...
Page 36: ...36 7 28 2011 Tab location for cover and filter removal Cover tabs Sump Tabs ...
Page 38: ...38 7 28 2011 With hub removed Coarse Filter can now be removed ...
Page 39: ...39 7 28 2011 Coarse Filter removal ...
Page 40: ...40 7 28 2011 Proper location of the Wash Arm Bearing or Thrust Washer ...
Page 41: ...41 7 28 2011 Make sure the Bearing or Thrust Washer is in place when re assembled ...
Page 43: ...43 7 28 2011 Float Dome to remove simply lift ...
Page 44: ...44 7 28 2011 Float Stem activates Flood Switch below ...
Page 49: ...49 7 28 2011 Shield folded back to show control TCO located on cover 1 shot Trip at 280 ...
Page 51: ...51 7 28 2011 Cover removal 1 lift top and pull out 2 push bottom down 1 2 ...
Page 53: ...53 7 28 2011 Model Select MUST be Transferred or new control will not operate just flash ...
Page 54: ...54 7 28 2011 Insulator between control board and console Must be installed ...
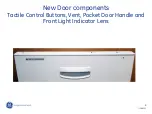
Page 56: ...56 7 28 2011 Handle can now be removed from the front ...
Page 57: ...57 7 28 2011 Tactile switch has 2 screws securing switch to console ...
Page 59: ...59 7 28 2011 Buttons and Silicone Pad come as an assembly ...
Page 60: ...60 7 28 2011 Notice buttons are keyed they fit one way ...
Page 62: ...62 7 28 2011 To Remove Door Switch assembly unscrew 2 screws Insulator MUST be used ...
Page 64: ...64 7 28 2011 Door Switch comes as an assembly 2 switches and bracket actuator ...
Page 66: ...66 7 28 2011 Pry the old vent louver off of the outer door ...
Page 67: ...67 7 28 2011 Remove any excess adhesive from the outer door Dispose old vent ...
Page 68: ...68 7 28 2011 Install new vent on clean panel ...
Page 69: ...69 7 28 2011 Console can be removed when Control Pocket Handle and Vent have been removed ...
Page 70: ...70 7 28 2011 Console removed ...
Page 71: ...71 7 28 2011 Lens Adhered with double back tape Console must be removed to access lens ...
Page 73: ...73 7 28 2011 Correct water level Main wash is suggested time to check for proper level ...
Page 74: ...74 7 28 2011 ...
Page 75: ...75 7 28 2011 ...
Page 76: ...76 7 28 2011 Schematic ...
Page 79: ...79 7 28 2011 Mini Manual Location Stainless Tub ...
Page 83: ...83 7 28 2011 Door catch is non adjustable ...
Page 84: ...84 7 28 2011 Door separated there are no hangers to balance the door as on previous models ...
Page 87: ...87 7 28 2011 Single door switch breaks line side ...
Page 89: ...89 7 28 2011 The vent is keyed but in the middle The vent can be installed incorrectly ...
Page 90: ...90 7 28 2011 SS Vent correctly installed Correct positioning ...
Page 94: ...94 7 28 2011 Service Mode SS ...
Page 95: ...95 7 28 2011 SS Schematic ...
Page 96: ......


