background image

39

Para Revisar Archivos Almacenados en la Memoria

1.  Asegúrese de que su teléfono esté en 

OFF

 (no en modo hablar).

2.  Oprima el botón mem para mostrar la indicación para seleccionar una 

localización de memoria 

SELEC MEMO 01-50.


3.  Oprima los botones cid/vol (

 ó 

) para recorrer los archivos o utilice el teclado 

del auricular para inscribir el número de la localización de memoria (01-50).

Para Cambiar Archivos Almacenados en la Memoria

Siga los ítems 1 a 7 para Almacenar Nombres y Números en Memoria

Para Borrar Números Almacenados en la Memoria:

1.  Asegúrese de que su teléfono esté en 

OFF

 (no en modo hablar).

2.  Oprima el botón mem para mostrar la indicación para seleccionar una 

localización de memoria 

SELEC MEMO 01-50

.

3.  Oprima los botones cid/vol (

 ó 

) para recorrer los archivos que usted quiera 

borrar o utilice el teclado del auricular para inscribir el número de la localización 

de memoria. 

4.  Oprima el botón del para marcar archivos que serán borrados. La pantalla 

pregunta si borra 

BORRAR?.

5.  Oprima el botón del para borrar el archivo. La pantalla confirma 

BORRADO

.

NOTA:

 Si usted no quiere cambiar o borrar un archivo, simplemente 

oprima el botón *exit, o espere un minuto para salir del menú de revisar 

automáticamente.

Para Marcar un Número desde la Memoria

1.  Asegúrese de que el teléfono esté encendido - 

ON

 (en modo hablar) presionando 

los botones  TALK/END/call back  o SPKR.

2.  Oprima el botón mem para mostrar la localización de memoria # - -.
3.  Utilice el teclado numérico para inscribir el número de la localización de memoria 

(01-50). El número se marcará automáticamente.


-O-

1.  Asegúrese de que su teléfono esté en 

OFF

 (no en modo hablar).

2.  Oprima el botón mem para mostrar la localización 

SELEC MEMO 01-50

.

3.  Oprima el número de la localización de memoria del número que usted quiera 

marcar u oprima el botón cid/vol (

 ó 

) para recorrer la memoria hasta que 

aparezca el número deseado.

4.  Presione los botones TALK/END/call back o SPKR.  El número se marca 

automáticamente.

Summary of Contents for 21029

Page 1: ...2 4 GHzTriple Cordless Handset Call Waiting Caller ID Phone System User s Guide 21029 ...

Page 2: ...tible modular jack that is also compliant See installation instructions for details Notes This equipment may not be used on coin service provided by the telephone company Party lines are subject to state tariffs and therefore you may not be able to use your own telephone equipment if you are on a party line Check with your local telephone company Notice must be given to the telephone company upon ...

Page 3: ...ver there is no guarantee that interference will not occur in a particular installation If this equipment does cause harmful interference to radio or television reception which can be determined by turning the equipment off and on the user is encouraged to try to correct the interference by one or more of the following measures Reorient or relocate the receiving antenna that is the antenna for rad...

Page 4: ...10 INSTALLATION 11 INSTALLATION GUIDELINES 11 INSTALLING THE HANDSET BATTERY 12 INSTALLING THE PHONE 12 CONNECTING THE AC POWER 13 CONNECTING THETELEPHONE LINE 13 SETTING THE VOICE PROMPT LANGUAGE13 ANSWERING SYSTEM SETUP 14 VOICETIME DAY STAMP AND REALTIME CLOCK 14 SPEAKER VOLUME 14 VOICE INSTRUCTION 15 RECORDING THE OUTGOING ANNOUNCEMENT 15 REVIEWING AND CHOOSING THE ANNOUNCEMENT 16 ANSWERING SY...

Page 5: ...38 INSERTING A PAUSE IN THE DIALING SEQUENCE OF A STORED NUMBER 38 REVIEWING RECORDS STORED IN MEMORY38 CHANGING RECORDS STORED IN MEMORY39 DELETING RECORDS STORED IN MEMORY 39 DIALING A NUMBER FROM MEMORY 39 CHAIN DIALING FROM MEMORY 39 CALLER ID CID 40 CID ERROR CODES 40 RECEIVING CID RECORDS 41 STORING CID RECORDS IN CALLER ID MEMORY 41 REVIEWING CID RECORDS 41 STORING CID RECORDS IN INTERNAL M...

Page 6: ...y instructions that should always be followed Refer to the IMPORTANT SAFETY INSTRUCTIONS provided with this product and save them for future reference Congratulations on purchasing the GE Triple Cordless Handset Telephone System This system operates in the 2 4 GHz frequency range and is unique to conventional cordless telephones When the base is connected to electrical power and a telephone line y...

Page 7: ...oming call Record up to 40 Caller ID messages sequentially Know who called while you are on the other line or when you were away Screen unwanted calls eliminate harassment from annoying calls or to get prepared before answering a call IMPORTANT Because cordless phones operate on electricity you should have at least one phone in your home that isn t cordless in case the power in your home goes out ...

Page 8: ...skip button pause ringer button mem memory button erase button flash answerer button mute prog mute program button page int page intercom button redial button exit button play stop button review button TALK END call back button cid vol caller ID volume button del delete button Speaker ...

Page 9: ...f button announce 1 button announce 2 button del button REVIEW button PLAY STOP 1 button indicator SKIP button DO NOT DISTURB button memo button vol buttons PLAY STOP 3 button indicator PLAY STOP 2 button indicator Message counter PAGE button SPEAKER DAY CHECK HOUR MINUTE LANGUAGE button Microphone ...

Page 10: ...hone telephone jack which might look like the one pictured here installed in your home If you don t have a modular jack call your local phone company to find out how to get one installed Modular telephone line jack Wall plate Base 3 Handsets 3 Belt clips AC power adaptor Telephone line cord 2 Handset Charge Cradles 3 Batteries and battery compartment doors ...

Page 11: ...ge cordless telephone systems Never install telephone wiring during a lightning storm Never install telephone jacks in wet locations unless the jack is specifically designed for wet locations Never touch non insulated telephone wires or terminals unless the telephone line has been disconnected at the network interface Use caution when installing or modifying telephone lines Temporarily disconnect a...

Page 12: ...e is compromised NOTE If the battery is not properly installed in the handset or if the battery pack is not properly connected to the jack inside the battery compartment NO BATTERY shows in the display when the handset is placed in the charging cradle Installing the Phone Choose the best location to install your base and handset charge cradle Your base and handset charge cradle should be placed on...

Page 13: ...et charge cradle turns on to indicate the handset battery is charging Connecting the Telephone Line On the base plug the one end of the telephone line cord into the jack on the back of the base and the other end into a modular wall phone jack Setting the Voice Prompt Language The default voice prompt language is English To change the answering system s voice prompt language Press the LANGUAGE butt...

Page 14: ... 1 Make sure the answering system is ON 2 Press and hold the DAY CHECK button to set the day of the week 3 Press and hold the HOUR button to set the hour a m or p m Example 12AM 1AM or 12PM 1PM 4 Press and release the MINUTE button to advance the clock in one minute intervals Press and hold to increase by 5 minute increments 5 After the time is set the real time clock will be displayed on the hand...

Page 15: ...o record an outgoing announcement a default announcement plays instead To return to the default announcement after you have recorded your own outgoing announcement press the announce 1 or 2 button and release it when you hear the beep Sample Outgoing Announcement 1 Sample Single Mailbox Outgoing Announcement Hi this is use your name here I can t answer the phone right now so please leave your name...

Page 16: ... has an F flashing on the display Memory is full e Message counter has a CL flashing on the display Clock is not set since power up or after power failure f Message counter has a six horizontal bars flashing on the display MEMO recording g Message counter has a AN flashing on the display Answering incoming calls and recording an incoming call h Message counter has LA The answering machine is being acc...

Page 17: ... a message to determine who is calling 2 To speak to the caller pick up the handset and press theTALK END call back or SPKR buttons The answering system automatically stops recording when you activate the handset or pick up an extension phone TIP Make sure the volume on the base is set loud enough to hear your incoming calls Mailbox Indicator The mailbox button indicators inform you of messages fo...

Page 18: ...P 3 2 Press REVIEW and SKIP button to select and play the message you want to erase 3 Press the del button the current message is erased and the next message plays To erase all previously played Messages in a mailbox 1 Make sure the phone is OFF not in talk mode 2 Press the del button the answerer will announce TO ERASE MESSAGES PRESS MAILBOX 3 Press the mailbox button PLAY STOP 1 or PLAY STOP 2 o...

Page 19: ...n finished Telephone Setup Programming the Telephone Standby Screen The handset displays the handset number and user name Programmable Functions The system uses a menu structure to give you access to all of the built in features You may program the following items in main menu Room Monitor and Handset Setup Room Monitor 1 Make sure your phone is OFF not in talk mode 2 Press the mute prog button to ...

Page 20: ...ms Language Handset Name RingerTone Ringer Volume VIP Melody Key Tone ON OFF Message Alert Ring Select Security Code Area Code Registration De Registration and Default Setting During programming you may press the exit button at any time to exit the menu and go to the sub menu and keep the previous setting 5 Press the handset number of the handset being monitored NOTE When this phone system is expa...

Page 21: ...t in talk mode 2 Press the mute prog button to go to the main menu 3 Press cid vol or button to scroll to HANDSET SETUP 4 Press mute prog button to confirm 5 Press the cid vol or button to scroll to the HANDSET NAME menu 6 Press mute prog button to enter the menu HANDSET NAME shows in the display 7 Use the touch tone pad to enter a name up to 15 characters More than one letter is stored in each of ...

Page 22: ...INGERTONE menu 7 Press mute prog button to enter the menu SET RINGERTONE 01 shows in the display 01 is default setting 8 Use the cid vol or button to scroll to the desired setting You will hear a sample of the ringer tone you select 9 Press the mute prog button to save your selection You will hear a confirmation tone and the selected ringer tone shows in the display NOTE Numbers 1 through 10 are fo...

Page 23: ...ng conditions are met You have subscribed to caller ID and you have your caller ID record transferred to the memory Refer to Transferring CID Records To Memory Storing VIP Melody 1 Make sure your phone is OFF not in talk mode 2 Press the mute prog button to go to the main menu 3 Press cid vol or button to scroll to HANDSET SETUP 4 Press mute prog button to confirm 5 Press the cid vol or button to s...

Page 24: ...dy procedure from item 1 to 12 2 Then REPLACE VIP shows in the display you must press mute prog button on the handset to confirm replacement NOTE To change a stored melody in a VIP melody location you must first delete it and then re enter a new melody Reviewing and Deleting Stored VIP Melody Record 1 Press the mute prog button to enter VIP MELODY menu 2 Use the cid vol or button to scroll to the de...

Page 25: ...s OFF not in talk mode 2 Press the mute prog button to go to the main menu 3 Press cid vol or button to scroll to HANDSET SETUP 4 Press mute prog button to confirm 5 Press the cid vol or button to scroll to the MESSAGE ALERT menu 6 Press mute prog button to enter the menu NEW MSG ALERT 1ON 2OFF shows in the display 7 Use the touch tone pad to enter the selection or use the cid vol or button to scro...

Page 26: ...es Security Code for answering machine You can access the answering system from a tone dialing telephone in another remote location The security code is required for remote access and it prevents unauthorized access to your answering system 1 Make sure your phone is OFF not in talk mode 2 Press the mute prog button to go to the main menu 3 Press cid vol or button to scroll to HANDSET SETUP 4 Press...

Page 27: ... in the display Registration This setting may be made with the expandable handsets Your handsets are pre registered and ready to use It is not recommended the handsets be registered again unless absolutely necessary 1 Make sure your phone is OFF not in talk mode 2 Press the mute prog button to go to the main menu 3 Press cid vol or button to scroll to HANDSET SETUP 4 Press mute prog button to confi...

Page 28: ...n press mute prog button to enter the menu DEREGISTRATION 1YES 2NO shows in the display The default is 2NO 6 Use the touch tone pad to select 1 for YES or 2 for NO Or use the cid vol or button to scroll to 1YES or 2NO WARNING It is not recommended that a handset be de registered unless absolutely necessary because once a handset is de registered that handset s telephone features cannot be used unt...

Page 29: ...et all handsets sit idle for 20 seconds 1 Press and hold the PAGE button on the base until the in use charging indicator on the base flashes 2 Press and hold the PAGE button on the base again until the in use charging indicator on the base flashes rapidly 3 Press and release the PAGE button on the base once All handsets are de registered and HANDSET NEEDS REGISTRATION shows in the display Default Se...

Page 30: ...extra charger is lit the handset is correctly seated in the cradle and is charging Making Calls 1 Pick up the handset and press theTALK END call back button Listen for a dial tone 2 Dial the number you want to call or dial the number first then press the TALK END call back button 3 When finished press theTALK END call back button to hang up Answering Calls 1 When the phone rings pick up the handset ...

Page 31: ...K END call back again to end conversation Call Timer After you press the TALK END call back button on the handset the built in call timer shows on the display and counts the length of time of the call in minutes and seconds Pre Dialing 1 Make sure the phone is OFF not in talk mode 2 Enter the telephone number you want to call The telephone number shows in the handset display 3 Press theTALK END ca...

Page 32: ...Call Waiting calls During a phone call you will hear a beep to indicate another call is waiting on the line and the Caller ID information for the waiting call shows on the handset display To connect to the waiting call press the FLASH answerer button on the handset and your original call is put on hold To switch between the two calls press the FLASH answerer button TIP Don t press the TALK END cal...

Page 33: ... 1 HANDSET 2 and HANDSET 3 respectively 1 Make sure the phone is OFF not in talk mode 2 Press and release the page int button on a handset PAGING EXTENSION shows in the display 3 Use the touch tone pad to enter the handset number you want to page NOTE If more than 2 handsets have been registered you can page all handsets by pressing 5 4 To cancel the page press the exit button or press the page in...

Page 34: ...ing on the answerer at once even though the handsets have been set to High or Low To do this 1 In the standby mode press the DO NOT DISTURB button on the base The DND backlit indicator will turn on and DO NOT DISTURB shows in each handset display 2 To cancel press DO NOT DISTURB again NOTE You can also enable DND even when there is incoming call ringing in NOTE You can also enable DND to stop the ...

Page 35: ...NDSET 4 Receiving an Intercom Call When you receive an intercom call your handset beeps To answer the call press the page int button orTALK END call back button Advanced Intercom Features Receiving an Incoming Telephone Call During an Intercom Call If you receive a telephone call during an intercom call the intercom call is immediately terminated and all handsets ring Either handset user may press...

Page 36: ...ROM shows in the display on the receiving handset and the receiving handset presses the page int or TALK END call back button to answer the intercom 3 When the receiving handset connects press the FORMAT CONF button on the originating handset to conference with the receiving handset and the external caller CONFERENCE shows in the display on the originating and receiving handsets NOTE A handset can...

Page 37: ...o desired the memory location NOTE If the memory location is occupied the memory location number and stored name and telephone number appear in the display If the memory location is empty EMPTY appears in the display 4 Press the mem button The display shows ENTER NAME 5 Use the touch tone pad to enter a name up to 15 characters More than one letter is stored in each of the number keys For example ...

Page 38: ...ation tone NOTE If the redial number is longer than 20 digits the redial number cannot be stored in memory Inserting a Pause in the Dialing Sequence of a Stored Number Press the pause ringer button on the handset s touch tone pad to insert a delay in dialing sequence of a stored number when a pause is needed to wait for a dial tone for example after you dial 9 for an outside line or to wait for a ...

Page 39: ...mber from Memory 1 Make sure the phone is ON in talk mode by pressing theTALK END call back or SPKR buttons 2 Press the mem button to display memo 3 Use the touch tone pad to enter the memory location number 01 50 The number dials automatically OR 1 Make sure the phone is OFF not in talk mode 2 Press the mem button to display SELECT MEMORY 01 50 3 Press the memory location for the phone number you...

Page 40: ...For Caller ID to work on this system you must subscribe to Caller ID service To receive Caller ID information for a Call Waiting call you must subscribe to the combined Call Waiting Caller ID service This telephone system receives and displays CID information transmitted by your local telephone company This information may include the phone number date and time or the name phone number and date an...

Page 41: ...how as NEW in the display Reviewing CID Records As calls are received and stored the display is updated to let you know how many calls have been received To scroll CID records 1 Make sure the phone is OFF not in talk mode 2 Press the cid vol button to review the newest CID record 3 Press the cid vol button to review the oldest CID record first As you review CID records the display shows you the fol...

Page 42: ...r for example press 01 to store the record in memory location one NOTE If the memory location is occupied REPLACE MEMO is displayed and you must confirm replacement by pressing the mem button NOTE Press the exit button once to keep the previous setting and return to the sub menu Dialing a CID Number While reviewing CID records you may dial the phone number showing in the display 1 Make sure the pho...

Page 43: ...the telephone number is corrupted such as a number in a name field or an alphabetical character in a number field you will hear an error tone and the number is not dialed Deleting a CID Record 1 Make sure the phone is OFF not in talk mode 2 Use the cid vol or button to display the CID record you want to delete 3 Press the del button The display shows DELETE CALL ID 4 Press the del button to erase th...

Page 44: ... The display shows ANSWERER REMOTE ACCESS Press 2 PLAY STOP followed by the mailbox number to play the message in that mailbox For example press 2 and 3 to play the message in mailbox 3 When you are finished listening to your messages press the FLASH answerer button again Answering System Indicator The answering system is active when the indicator on the base is on Screening Calls from the Handset ...

Page 45: ...you perform the following functions To Press this button Review message 1 Play back messages 2 Select mailbox 1 or 2 or 3 Stop message playback 2 Erase message 0 during message playback Skip message 3 Turn off on answerer 4 Review voice menu options 7 Memory Full When answering system memory is full the system answers after 10 rings beeps and waits for you to enter the 3 digit security code If you...

Page 46: ...st set up the phone and or when you install a new battery pack the battery s long term performance will be compromised NOTE If the battery is not properly installed in the handset or if the battery pack is not properly connected to the jack inside the battery compartment NO BATTERY shows in the display when the handset is placed in the charging cradle NOTE If a battery is disconnected from the pho...

Page 47: ...ust the headset to rest comfortably on top of your head and over your ear Move the microphone to approximately two to three inches from your mouth 3 Press the TALK END call back button to answer a call or make calls using the headset 4 To return to normal operation unplug the headset from the jack Display Messages The following messages shows the status of the phone provides Caller ID information ...

Page 48: ... in the phone s memory END OF LIST Indicates that there is no additional information in CID memory NEW Indicates call or calls which have not been reviewed UNKNOWN CALLER Indicates incoming call is from an area not serviced by CID or the CID information was not sent NO BATTERY Indicates the battery is not properly installed in the handset or the battery pack is not properly connected to the jack i...

Page 49: ...are no CID records in memory NO DATA Indicates no CID information was received you are not subscribed to CID service or CID service is not working NEW CALL XX XX represents the number of new CID records not reviewed LOW BATTERY Indicates the battery needs to be charged LONG DISTANCE Indicates CID record is from a long distance call PRESSTALK KEY Indicates CID record is Direct Dial Number and canno...

Page 50: ...iring or local service The handset may be out of range of the base Move closer to the base Make sure the battery is properly charged for 16 hours Make sure the battery pack in the handset is properly installed The handset should beep when you press theTALK END call back button and the charge indicator on the base should be lit when the handset rests in the cradle If not the battery may need to be ...

Page 51: ...and the back of the base Remove the handset battery Wait for 30 seconds and plug the power supply back into the base and electrical outlet Reconnect the battery and charge for 16 hours Handset displays SEARCHING or OUT OF RANGE and cannot link up with the base whenTALK END call back button is pressed Handset may be out of range from the base Move closer to the base Make sure the power supply is pr...

Page 52: ...ery If you experience any of the following problems even after recharging the battery you may need to replace the battery pack Short talk time Poor sound quality Limited range In use charging indicator of the base or charge indicator of the extra charging cradle fails to turn on General Product Care To keep your unit working and looking good follow these guidelines Avoid dropping the handset as we...

Page 53: ...ropriate sales tax for each individual state country and locality to which the merchandise is being sent Causes of Poor Reception Aluminum siding Foil backing on insulation Heating ducts and other metal construction that can shield radio signals You re too close to appliances such as microwaves stoves computers etc Atmospheric conditions such as strong storms Base is installed in the basement or l...

Page 54: ... theTelephone Line 13 Cordless Handset 44 D Default Setting 29 Deleting a CID Record 43 Deleting All CID Records 43 Deleting Records Stored in Memory 39 De Registration 28 Dialing a CID Number 42 Dialing a Number from Memory 39 Display Messages 47 Do Not Disturb DND 34 E Equipment Approval Information 2 Erasing Messages 18 Exit 33 F FCC RF Radiation Exposure Statement 6 Flash Call Waiting 32 G Gen...

Page 55: ... Reviewing CID Records 41 Reviewing Records Stored in Memory38 Ring Select 25 Ringer HI LOW OFF Shortcut32 RingerTone 22 Ringer Volume 22 Room Monitor 19 S Screening Calls from the Base 17 Screening Calls from the Handset 44 Security Code 26 Service 56 Setting the Voice Prompt Language 13 Speaker Volume 14 Speakerphone Operation 30 Standby Screen 19 Storing a Name Number in Memory37 Storing CID Re...

Page 56: ... could void the user s authority to operate this product For instructions on how to obtain service refer to the warranty included in this guide or call customer service at 1 800 448 0329 Or refer inquiries to ATLINKS USA Inc Manager Consumer Relations P O Box 1976 Indianapolis IN 46206 Attach your sales receipt to the booklet for future reference or jot down the date this product was purchased or ...

Page 57: ...rated into other products Products purchased or serviced outside the USA Acts of nature such as but not limited to lightning damage Product Registration Please complete and mail the Product Registration Card packed with your unit It will make it easier to contact you should it ever be necessary The return of the card is not required for warranty coverage Limitation of Warranty THE WARRANTY STATED ...

Page 58: ...Model 21029 00006298 Rev 0 E S 05 25 Printed in China ATLINKS USA Inc 101 West 103rd Street Indianapolis IN 46290 2005 ATLINKS USA Inc Trademark s Registered Marca s Registrada s ...

Page 59: ...SistemaTelefónico de 2 4 GHz con Auricular InalámbricoTriple e Identificador de Llamada en Espera Guía del Usuario 21029 ...

Page 60: ...idad con dicho reglamento han sido provistos con este producto Están diseñados para ser conectados a un enchufe modular compatible que también esté en conformidad Para más detalles vea las instrucciones para la instalación NOTAS No se puede usar este equipo con un teléfono de previo pago proveído por la compañía telefónica Las líneas compartidas son sujetas a las tarifas del estado y por eso es po...

Page 61: ...rá en una instalación en particular Si este equipo causa en efecto una interferencia dañosa a la recepción de la radio o de la televisión lo cual puede ser determinado apagando y prendiendo el equipo le animamos a Ud de tratar de corregir la interferencia por medio de una o más de las sugerencias siguientes Cambie la posición o la ubicación de la antena quiere decir la antena de la radio o de la t...

Page 62: ...RIA LLENA 19 PARA BORRAR MENSAJES 19 PARA DEJAR UN RECADO 20 PROGRAMACIÓN DEL TELÉFONO 20 PANTALLA DE ALERTA 20 FUNCIONES DE PROGRAMACIÓN 20 MONITOREO EN HABITACIÓN 20 PROGRAMACIÓN DELTELÉFONO 21 IDIOMA 22 NOMBRE DEL AURICULAR 22 TONO DETIMBRE 23 VOLUMEN DELTIMBRE 23 MELODÍA VIP 24 PARA ALMACENAR UNA MELODÍA 24 CAMBIO DE UN REGISTRO DE MELODÍA VIP ALMACENADO 25 REVISIÓN Y ELIMINACIÓN DE UN REGISTR...

Page 63: ... DE VOLUMEN DEL AURICULAR34 NO MOLESTAR DND 34 OPERACIÓN DEL INTERFONO 35 PARA HACER UNA LLAMADA DESDE EL INTERFONO 35 PARA RECIBIR UNA LLAMADA DEL INTERFONO 35 FUNCIONES AVANZADAS DEL INTERFONO35 PARA RECIBIR UNA LLAMADA TELEFÓNICA ENTRANTE DURANTE UNA CONVERSACIÓN EN EL INTERFONO 35 PARA UTILIZAR EL INTERFONO CON LLAMADASTELEFÓNICAS EXTERNAS 36 CONVERSACIÓN ENTRE DOS PERSONAS 36 CONVERSACIÓN ENT...

Page 64: ...ADAS 44 ACCESO REMOTO 44 AURICULAR INALÁMBRICO 44 INDICADOR DEL SISTEMA CONTESTADOR 44 PARA FILTRAR LLAMADAS DESDE EL AURICULAR 44 PARATENER ACCESO AL SISTEMA CONTESTADOR DESDE OTRA LOCALIZACIÓN45 MEMORIA LLENA 45 CÓMO CAMBIAR LA BATERÍA 46 PRECAUCIONES DE SEGURIDAD PARA LA BATERÍA 46 PARA CONECTAR EL GANCHO DEL CINTURÓN Y AUDÍFONOS OPCIONALES 47 PARA SUJETAR EL GANCHO DEL CINTURÓN 47 PARA CONECTA...

Page 65: ...érase a la guía de INSTRUCCIONES DE SEGURIDAD IMPORTANTES provista con este producto y guárdela para referencia futura Felicitaciones por su compra de este Sistema Contestador deTres Auriculares Inalámbricos Este sistema opera en el rango de frecuencia de 2 4 GHz y es único comparado con otros teléfonos inalámbricos convencionales Cuando la base está conectada a una fuente de corriente y a una lín...

Page 66: ...ora y fecha de cada llamada entrante Grabe hasta 40 mensajes del Identificador de Llamadas en secuencia Sepa quién llamó mientras usted estaba en la otra línea o mientras estaba fuera Filtre llamadas no deseadas elimine molestias de llamadas no solicitadas o prepárese antes de contestar una llamada CUIDADO Como los teléfonos inalámbricos operan con electricidad usted debe tener por lo menos un telé...

Page 67: ... volver a marcar page int botón buscar intercomunicación del botón para borrar pause ringer botón para pausa timbre mute prog botón enmudecedor programa mem botón para memoria flash answerer botón para servicios contestadora exit botón para salir play stop botón para reproducir mensajes review botón para revisar SPKR botón de altavoz skip botón para saltar mensajes erase botón para borrar Altavoz ...

Page 68: ...DISTURB botón no molestar memo button botón de aviso vol botones para volumen PLAY STOP 2 button indicator botón indicador reproducir detener 2 Message counter indicador de conteo de mensajes PAGE botón buscar Altavoz DAY CHECK botón dia checar HOUR botón de hora MINUTE botón de minuto REVIEW botón para revisar SKIP botón para saltar mensajes PLAY STOP 3 button indicator botón indicador reproducir...

Page 69: ...fónico tipo RJ11C como el ilustrado aquí instalado en su hogar Si usted no tiene este tipo de enchufe llame a su compañía telefónica local para preguntar cómo conseguirlo Base Tres auriculares Tres gancho del Cinturón Cable de corriente AC Cable de línea telefónica Dos base para carga del auricular Enchufe telefónico modular Placa de pared Tres puertas del compartimento de batería y baterías ...

Page 70: ...inalámbricas sistemas telefónicos inalámbricos multiauriculares y algunos sistemas telefónicos inalámbricos de largo alcance Nunca instale cableado telefónico durante una tormenta de relámpagos Nunca instale enchufes telefónicos en localizaciones mojadas a menos que el enchufe haya sido diseñado específicamente para localizaciones mojadas Nunca toque cables o terminales no aislados a menos que la l...

Page 71: ...batería no está adecuadamente instalada en el teléfono o si la batería no está apropiadamente conectada al receptáculo dentro del compartimento de la batería NO BATTERY SIN BATERIA se muestra en la pantalla cuando el teléfono es colocado en la base para carga Instalación del Teléfono Escoja la mejor localización para instalar la base del aparato y la base para cargar el auricular Tanto la base com...

Page 72: ...se iluminan para indicar que la batería del teléfono está cargando Para Conectar el Cable de Línea Telefónica En la base conecte un extremo de la línea telefónica dentro del enchufe en la parte posterior de la base y el otro extremo en un enchufe telefónico modular de pared Para seleccionar el Idioma de Instrucciones de Voz El idioma de instrucciones de voz programado de fábrica es el Inglés Para ...

Page 73: ...rogramar el día de la semana 3 Presione y sostenga el botón HOUR en la base para programar la hora a m o p m Por ejemplo 12AM 1AM o 12PM 1PM 4 Presione y suelte el botón minute para avanzar el reloj en intervalos de un minuto Presione y sostenga para aumentar en incrementos de 5 minutos 5 Después de fijar el tiempo el reloj en tiempo real será mostrado en el teléfono en el plazo de 1 minuto NOTA Us...

Page 74: ...presione el botón announce 1 ó 2 y suéltelo cuando escuche el bip Ejemplo de Anuncio Saliente 1 Muestra de Anuncio de Salida del Buzón Sencillo Hola este es use su nombre aquí No puedo contestar el teléfono ahora mismo así que por favor deje su nombre número y un mensaje breve después del tono y yo la llamaré después Gracias NOTA El tiempo de grabación máximo para el anuncio de saludo es de 2 minu...

Page 75: ...El contador de mensajes tiene AN parpadeando en la pantalla y está respondiendo llamadas entrantes y grabando una llamada entrante h El contador de mensajes tiene LA la máquina contestadora está siendo accesada remotamente i El contador de mensajes tiene A1 ó A2 en la pantalla el Anuncio 1 ó el Anuncio 2 es seleccionado como el anuncio de saludo actual durante la selección de Anuncio y la grabació...

Page 76: ...té programado a un volumen suficientemente alto para poder escuchar las llamadas entrantes Indicador de Buzón Los indicadores botón de buzón le informan de mensajes para cada buzón individual y si estos son nuevos o anteriores El botón indicador de buzón está activado mensajes guardados El buzón indicador de buzón está desactivado no hay mensajes El botón indicador de buzón está parpadeando hay nue...

Page 77: ...mensaje es reproducido Para borrar todos los Mensajes reproducidos previamente en un buzón 1 Asegúrese de que su teléfono está en OFF no en modo hablar 2 Presione el botón del la contestadora anunciará PARA BORRAR MENSAJES OPRIMA BUZON 3 Presione el botón mailbox PLAY STOP 1 ó PLAY STOP 2 ó PLAY STOP 3 4 La contestadora anunciará TODOS LOS MENSAJES BORRADOS EN BUZON X seguido por un tono de confirm...

Page 78: ...el número de auricular y el nombre del usuario CARLOS AURICULAR 1 11 30AM MONITOR CUARTO PROG AURICULAR Funciones de Programación El sistema usa una estructura de menú para darle acceso a todas las opciones integradas Usted puede programar los siguientes elementos en el menú principal Monitoreo en Habitación Programación delTeléfono Monitoreo en Habitación 1 Asegúrese de que su teléfono está en OF...

Page 79: ...amar los siguientes elementos Idioma Nombre del Auricular Tono del Timbre Volumen del Timbre Melodía VIP Tono de Tecla Alerta de Mensaje Selección de Timbre Código de Seguridad Código de Area Registro Para Cancilar el Registro Para Cancilar el Registro Globalmente y Programación de Fábrica Durante la programación usted puede presionar el botón exit en cualquier momento para salir del menú e ir al ...

Page 80: ...LAR 4 Presione el botón mute prog para confirmar 5 Presione el botón cid vol ó para moverse al menú NOMBR AURICULR 6 Presione el botón mute prog para entrar al menú NOMBR AURICULR se muestra en la pantalla 7 Use el teclado numérico para ingresar un nombre hasta 15 caracteres Más de una letra es almacenada en cada una de las teclas numéricas Por ejemplo para escribir Bill Smith presione la tecla 2 d...

Page 81: ...scuchará un tono de confirmación y el tono de timbre seleccionado se muestra en la pantalla NOTA Los números del 1 al 10 son para tono de timbre y del 11 al 20 son para melodías Volumen del Timbre 1 Asegúrese de que su teléfono esté en OFF no en modo hablar 2 Presione el botón mute prog para ir al menú principal 3 Presione cid vol ó para desplazarse a PROG ARICULAR 4 Presione el botón mute prog par...

Page 82: ...para confirmar 5 Presione el botón cid vol ó para desplazarse al menú MELODIA VIP 6 Presione el botón mute prog para ingresar al menú NUM IMPORTANT 1 se muestra en la pantalla 7 Presione el botón cid vol ó para seleccionar la ubicación de memoria de melodía VIP VIP 01 a VIP 10 NOTA Si la ubicación de memoria está ocupada la ubicación de memoria y la melodía almacenada y el número aparecen en la pan...

Page 83: ...sted quiere eliminar la información presione el botón del en el teléfono mientras el registro se visualiza La pantalla muestra BORRADO VIP 4 Presione del otra vez para confirmar Usted escuchará un tono de confirmación y NUM IMPORTANT BORRADO se muestra en la pantalla Tono de Tecla Esta modalidad le permite desactivar el tono de tecla por la noche o en un ambiente silencioso 1 Asegúrese de que su tel...

Page 84: ...ionar el número de veces que usted quiere que el teléfono suene antes de que el sistema de la contestadora responda una llamada 1 Asegúrese de que su teléfono esté en OFF no en modo hablar 2 Presione el botón mute prog para ir al menú principal 3 Presione cid vol ó para desplazarse a PROG ARICULAR 4 Presione el botón mute prog para confirmar 5 Presione el botón cid vol ó para desplazarse al menú SE...

Page 85: ...dígitos La selección de fábrica es 123 8 Presione el botón mute proguevo código de seguridad se muestra en la pantalla NOTA Si usted comete un error use el botón del para retroceder y borrar el dígito erróneo Código de Area 1 Asegúrese de que su teléfono esté en OFF no en modo hablar 2 Presione el botón mute prog para ir al menú principal 3 Presione cid vol ó para desplazarse a PROG ARICULAR 4 Pre...

Page 86: ...localizador en la base hasta que escuche el tono OPRIMA LOCALIZ ESPERE AL BIP 8 Oprima y sostenga el botón localizador en la base hasta que usted escuche un tono largo en el auricular AURICULAR X REGISTRADO se muestra en la pantalla del teléfono donde X es el número del teléfono Usted escuchará un tono de confirmación NOTA Después de que haya registrado un teléfono espere 10 segundos antes de regis...

Page 87: ...oceso para cancelar el registro la pantalla le recuerda que debe volver a registrarlo NECESID AURICULAR REGISTRAR Para utilizar el auricular usted debe registrarlo Para Cancelar el Registro Globalmente Si uno o más auriculares se pierde usted debe cancelar el registro de todos los auriculares para asegurar la operación adecuada del sistema Siga los pasos a continuación para cancelar los registros ...

Page 88: ...ed escoge SI todas las programaciones en el menú regresan a las programaciones originales de fábrica 8 Oprima el botón para programar mute prog para salvar su selección Ud escuchará un tono de confirmación Operación Básica del Teléfono Indicador de Carga Cuando el indicador in use charging en la base o el indicador de carga en el cargador extra se iluminan el teléfono está colocado correctamente en...

Page 89: ... usted está usando el altavoz y quiere cambiar al auricular del teléfono presione el botón TALK END call back usted puede luego presionar TALK END call back otra vez para terminar la conversación Temporizador de Llamadas Después de que usted oprime el botónTALK END call back en el auricular el temporizador integrado aparece en la pantalla y cuenta la duración de la llamada en minutos y segundos Pr...

Page 90: ... combinados de Llamada en Espera e Identificador de Llamada a través de su compañía telefónica usted recibirá la información del identificador de Llamadas si ésta es disponible en Llamadas en Espera Durante una llamada telefónica usted escuchará un tono para indicarle que otra llamada está esperando en la línea mientras que la información del Identificador de Llamadas para la llamada en espera aparec...

Page 91: ...lar extraviado Para enviar y recibir señales del localizador todos los auriculares deben estar registrados Si sus auriculares no están registrados siga las instrucciones para registrarlos en la sección Para Registrar el Auricular en este manual Para Llamar de un Auricular a Otro Los auriculares dobles son llamados Auricular 1 Auricalr 2 y Auricular 3 respectivamente 1 Asegúrese de que su teléfono ...

Page 92: ...a su conversación telefónica Control de Volumen del Auricular Cuando el teléfono está ON en modalidad para hablar usted puede ajustar el volumen oprimiendo los botones cid vol ó Escoja entre los cuatro niveles de volumen Cuando el nivel máximo o mínimo de volumen ha sido alcanzado el teléfono emite dos tonos El nivel más bajo es VOL 1 y el volumen más alto es VOL 4 No Molestar DND DND le permite a...

Page 93: ...minado oprima el botón exit o el botón page int en cualquiera de los auriculares para desactivar el interfono NOTA Este sistema telefónico es expandible hasta a 4 auriculares mediante la compra del auricular opcional Modelo 21009A con base de recarga Cuando 4 auriculares están registrados el sistema puede manejar a la vez 2 operaciones de intercomunicación por separado Por ejemplo el AURICULAR 1 s...

Page 94: ...o 2 Cuando haya terminado oprima el botón exit o el botón page int para terminar la llamada del interfono volver a la modalidad para hablar y volver a su conversación telefónica original Conversación Entre Tres Personas 1 Durante una llamada externa oprima el botón page int El aparato le pregunta si pasa la llamada a la extensión LINEA EN ESPERA EXTENSION 2 Utilice el teclado numérico para selecci...

Page 95: ...MARCAR Si el auricular que origina la llamada no contesta en 20 segundos la llamada se desconecta automáticamente Memoria Usted puede almacenar cincuenta nombres de 15 letras y números telefónicos de 20 dígitos en la memoria del auricular Para Almacenar un Nombre y Número en la Memoria 1 Asegúrese de que su teléfono esté en OFF no en modo hablar 2 Oprima el botón de memoria mem para mostrar la ind...

Page 96: ... Para inscribir otro nombre y número en una localización de memoria diferente por favor regrese al paso 2 y repita el proceso Para Almacenar un Número de Volver a Marcar Asegúrese de que su teléfono esté en OFF no en modo hablar 1 Repita el Paso 1 al 6 para Almacenar un Nombre y un Número en Memoria 2 Presione el botón redial 3 Presione otra vez el botón mem para confirmar Usted escuchará un tono d...

Page 97: ...ón de memoria 4 Oprima el botón del para marcar archivos que serán borrados La pantalla pregunta si borra BORRAR 5 Oprima el botón del para borrar el archivo La pantalla confirma BORRADO NOTA Si usted no quiere cambiar o borrar un archivo simplemente oprima el botón exit o espere un minuto para salir del menú de revisar automáticamente Para Marcar un Número desde la Memoria 1 Asegúrese de que el te...

Page 98: ...l 07 3 Cuando usted escuche el tono de acceso oprima el botón mem y después oprima el 08 4 Al siguiente tono de acceso oprima el botón mem y después oprima el 09 Funciones del Identificador de Llamadas Caller ID El Identificador de Llamadas Caller ID es un servicio disponible a través de su compañía telefónica local Para que el identificador funcione en este sistema usted debe suscribirse al servici...

Page 99: ...borra automáticamente Usted puede revisar la información almacenada en cualquier momento Las llamadas recibidas desde la última revisión se mostrarán como llamadas nuevas NUEVA en la pantalla Para Revisar los Archivos del Identificador CID A medida que se reciben y se almacenan archivos del Identificador de Llamadas la pantalla se actualiza para hacerle saber cuántas llamadas se han recibido Para r...

Page 100: ...macenarlos en la memoria interna 1 Asegúrese de que su teléfono esté en OFF no en modo hablar 2 Utilice los botones cid vol ó para llegar al archivo deseado 3 Oprima el botón mem para mostrar la localización SELEC MEMO 01 50 4 Utilice el teclado numérico para inscribir un número de localización de memoria por ejemplo oprima 01 para almacenar el archivo en la localización de memoria uno NOTA Si esa...

Page 101: ...uede ser marcado como se muestra oprima el botón format conf Repita si fuera necesario hasta que el número correcto de dígitos aparezca en la pantalla 4 Oprima el botónTALK END call back en el auricular El número se marca automáticamente NOTA Si el número es corrupto como un número en un nombre o una letra del alfabeto en un número usted escuchará un tono de error en el auricular y el número no se...

Page 102: ...ondientes al auricular como si usara las teclas de la base ve ala sección de Para Programar el Sistema Contestador Las funciones de los botones se localizan en el auricular arriba de cada tecla numérica Por ejemplo para reproducir mensajes Presione el botón flash answerer La pantalla muestra la indicación de acceso remoto ACC REMOTO CONT Presione 2 play stop seguido por el número de buzón para repr...

Page 103: ...rol remoto le permite llevar a cabo las siguientes funciones Para Oprima este botón Para revisar el mensaje 1 Para volver a reproducir mensajes 2 Selección del buzón 1 ó 2 ó 3 Para detener la reproducción de mensajes 2 Para borrar mensajes 0 durante su reproducción Para saltar el mensaje 3 Para activar desactivar contestador 4 Para revisar las opciones del menú 7 Memoria Llena Cuando la memoria de...

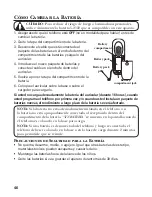
Page 104: ... usted programa el teléfono por primera vez y o cuando usted instala un paquete de baterías nuevas el rendimiento a largo plazo de la batería se verá afectado NOTA Si la batería no está adecuadamente instalada en el teléfono o si la batería no está apropiadamente conectada al receptáculo dentro del compartimento de la batería SIN BATERIA se muestra en la pantalla cuando el teléfono es colocado en ...

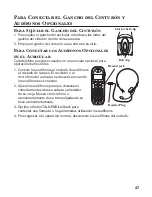
Page 105: ...ón manos libres 1 Conecte los audífonos al enchufe de audífonos al costado de la base El recibidor y el micrófono del auricular se desactivan cuando los audífonos se conectan 2 Ajuste los audífonos para que descansen cómodamente sobre su cabeza y alrededor de su oreja Mueva el micrófono a aproximadamente dos a tres pulgadas de su boca aproximadamente 3 Oprima el botónTALK END call back para contes...

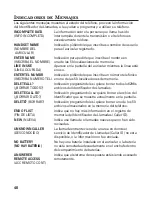
Page 106: ... ALL Indicación preguntándole si quiere borrar todos lo6298s BORRARTODOS archivos del Identificador de Llamadas DELETE CALL ID Indicación preguntándolo se quiere borrar el archivo del BORRAR DATO Identificador que se muestra actualmente en la pantalla DELETE BORRAR Indicación preguntándole si quiere borrar uno de los 50 archivos almacenados en la memoria del teléfono END OF LIST Indica que no hay má...

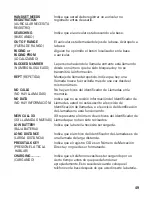
Page 107: ...r de Llamadas en la NO HAY LLAMADAS memoria NO DATA Indica que no se recibió información del Identificador de NO HAY INFORMACIÓN Llamadas usted no está suscrito al servicio de Identificación de llamadas o el servicio de Identificación de Llamadas no está funcionando NEW CALL XX XX representa el número de archivos del Identificador de XX LLAMADAS NUEVAS Llamada que no han sido revisados LOW BATTERY Ind...

Page 108: ...egúrese que el cable telefónico esté conectado a la base del aparato y a un enchufe de pared Conecte otro teléfono al mismo enchufe Si continúa sin haber tono de marcar en el segundo teléfono el problema puede estar en el cableado o en el servicio local El auricular puede estar fuera del rango de la base Acérquese a la base Asegúrese de que la batería ha sido cargada adecuadamente 16 horas Asegúre...

Page 109: ...mpie los contactos en el auricular inalámbrico Vea las soluciones para No hay tono de marcar Cambie la batería La función de Marcar por Memoria no sirve Programó usted las teclas de las localizaciones de memoria adecuadamente Siguió la secuencia adecuada para marcar El aparato se traba y no hay comunicación entre la base y el auricular inalámbrico Desconecte el cable de corriente del enchufe eléct...

Page 110: ...ectarlo Error en el Mensaje del Identificador de Llamadas Caller ID El aparato muestra este mensaje si detecta cualquier cosa que no sea información válida del Caller ID durante el periodo de silencio después del primer timbre Este mensaje indica la presencia de ruido en la línea No sirve el Identificador de Llamadas Caller ID Usted debe estar suscrito al servicio estándar de Nombre número a través ...

Page 111: ...de que necesite embarcar el auricular en el futuro Periódicamente limpie los contactos de carga del auricular y de la base con una goma de lápiz limpia Causas de una Mala Recepción Recubrimiento externo de la casa con aluminio Aislación con revestimiento de papel de aluminio Conductos de calefacción y otras construcciones de metal que paran las señales de radio Está demasiado cerca de los aparatos...

Page 112: ...pedirle que desconecte su equipo hasta que el problema haya sido resuelto Este producto puede únicamente ser reparado por el fabricante o sus agentes de reparación autorizados Cualquier cambio o modificación no aprobados expresamente por ATLINKS USA Inc podría ser motivo de anulación de la autoridad del usuario para operar este producto Para recibir instrucciones sobre cómo obtener servicios de man...

Page 113: ...da 57 I Idioma 22 Indicaciones para la Instalación 12 Indicador de Buzón 18 Indicador de Carga 30 Indicador del Sistema Contestador 44 Indicadores de Mensajes 48 Información de Interferencias 3 Información sobre la Aprobación de Equipo 2 Instalación 12 Instalación delTeléfono 13 Instrucciones de Voz 15 Introducción 7 L Licensing 3 Lista de Partes 11 Localizador33 M Marcado en Cadena desde la Memor...

Page 114: ...dor de Llamadas 42 Para Marcar un Número desde la Memoria 39 Para Recibir Archivos del Identificador de Llamadas 41 Para Recibir una Llamada del Interfono 35 Para Recibir una LlamadaTelefónica Entrante Durante una Conversación en el Interfono 35 Para Responder Una Llamada con el Altovoz 31 Para Revisar Archivos Almacenados en la Memoria 39 Para Revisar los Archivos del Identificador CID 41 Para Revi...

Page 115: ...s Estados Unidos Desastres naturales por ejemplo y sin limitarse a ellos daños por relámpagos Registro del Producto Por favor llene y envíe por correo la Tarjeta de Registro del Producto que se embarcó con su producto Hará más fácil que hagamos contacto con usted si fuera necesario No se requiere la devolución de la tarjeta para tener la cobertura de la garantía Limitaciones sobre la Garantía LA G...

Page 116: ...Model 21029 00006298 Rev 0 E S 05 25 Printed in China ATLINKS USA Inc 101 West 103rd Street Indianapolis IN 46290 2005 ATLINKS USA Inc Trademark s Registered Marca s Registrada s ...

Reviews: