background image

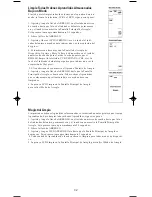
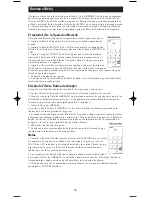
La televisión o el Puñetazo del Volumen de la Audiofrecuencia Por

Su Puñetazo RM24941’s por la orden permite que usted escoja cuál modo de dispositivo (o
televisión o la AUDIOFRECUENCIA/AUX) controla el VOL +, el VOL, y llaves de MUDO
en el teclado numérico de caucho. Con esta característica, su volumen de la televisión puede
trabajar aún cuando usted está en el Modo de VCR, porque “los puñetazos por” de un dis-
positivo a otro. El dispositivo que usted escoge para el Puñetazo del Volumen por el control
debe ser o la televisión o la AUDIOFRECUENCIA/dispositivo de AUX programado con la
unidad de la Audiofrecuencia. Cualquier otra selección (VCR, el DVD, SENTADO/CBL) es
negado y los destellos de la luz del indicador delantero de indicar un error. El poder en la
rebeldía para el control del volumen es el Puñetazo del Volumen de la televisión por. 

Nota: Todos Modos de la Audiofrecuencia toman cualquier Volumen/las órdenes Mudas de keypress del
código de la Audiofrecuencia, aún cuando la televisión se programa como el Puñetazo por dispositivo.
Todos los otros dispositivos dan un puñetazo por al Volumen de la televisión/el control de Mudo. Cuándo
la opción de Audiofrecuencia se escoge como el Puñetazo por dispositivo, todos modos toman cualquier
Volumen/las órdenes Mudas de keypress del código de la Audiofrecuencia. 

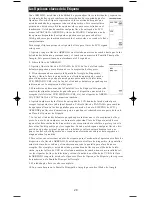
Para cambiar el dispositivo que controla el VOLUMEN y el Puñetazo de llaves de MUDO
por, siga estos pasos:

1. Apriete y tenga la llave de ARREGLO en el teclado numérico de caucho hasta que la luz
del indicador delantero permanezca en y la Pantalla Principal de Arreglo se muestra. Este
proceso toma aproximadamente 2-3 segundos. 
2. Libere la llave de ARREGLO. 
3. Apriete y tenga la llave de dispositivo en el teclado numérico de caucho por aproxi-
madamente 5 segundos (la televisión o la AUDIOFRECUENCIA/AUX) para el control del
volumen hasta que la luz del indicador delantero parpadee y la Pantalla Principal de
Arreglo se muestra. 
4. El control del volumen de la rebeldía ahora se pone para el modo que usted ha escogido.

34

24941manual 8/13/03  8/19/03  8:42 AM  Page 35

Summary of Contents for 24941

Page 1: ...Universal Touchscreen Learning Remote RM24941 INSTRUCTION MANUAL ...

Page 2: ...earned Key Reference Page 8 Learn Commands 9 Learning Tips 9 Code Learning 9 Learn Commands 10 Clear All Stored Learned Commands Under A Mode 11 Master Clear 11 Sleep Timer 12 Method 1 From Normal Operation 12 Method 2 From Setup Routine 12 TV or CD Audio Volume Punch through 13 VCR Punch through 13 Record Key 14 Additional Features 14 Keypress Beep Feature 14 LCD Touchscreen Display Time 14 Backl...

Page 3: ... remotes and the Smart Macro feature allows multiple commands to be executed with a single keypress The RM24941 is easy to use easy to program and it gives you total control at the touch of your fingertips Battery Information Your RM24941 remote requires four AA alkaline batteries sold separately The LCD Liquid Crystal Display touchscreen on your RM24941 acts as a virtual key pad This touchscreen ...

Page 4: ...omatically exits from the Setup process The LED indicator light flashes an error in this instance and any operation not completed when the time out occurs is not programmed During the Setup function if you press any key not shown on the touchscreen or a key not expected as part of a Setup routine the RM24941 ignores that keypress Pressing the LCD CLEAR key in a Setup routine returns the touchscree...

Page 5: ...ously Learned functions for that mode are deleted The mode is reset to its power on default state To enter a code directly from the Code List follow these steps 1 Manually turn on the device to be controlled TV VCR DVD etc 2 Press and hold the SETUP key on the rubber keypad until the LED indicator light remains on and the touchscreen shows the Main Setup Screen This process takes approximately 2 3...

Page 6: ...s are displayed on the touchscreen and any previously Learned functions for that mode are deleted The mode is reset to its power on default state To search for a specific code in the Code List follow these steps 1 Manually turn on the device to be controlled TV VCR DVD etc 2 Press and hold the SETUP key on the rubber keypad until the LED indicator light remains on and the touchscreen shows the Mai...

Page 7: ...tc The LED indicator light blinks once to indicate acceptance of the keypress 6 For AUX1 or AUX2 press and release the AUX device key Select the desired device key to be programmed under AUX TV VCR SAT CBL etc 7 The LCD touchscreen shows the Code Setup Screen Press and release the LCD SEARCH key 8 The LCD touchscreen shows the Search Setup Screen Press the ON OFF key on the rubber keypad just once...

Page 8: ...e keypress 5 The touchscreen now shows the Code Setup Screen Press and release the SETUP key The LED indicator light blinks once to indicate acceptance of the keypress 6 The touchscreen now shows the Code ID Setup Screen initially blank except for LCD SETUP INFO and CODE keys The touchscreen then shows the code using the LCD digits The digits in the three digit code are shown in sequence for one s...

Page 9: ...n labels for the device you have chosen TV VCR SAT CBL etc The LCD SETUP and SCREEN labels are also shown 6 Press any of the LCD panel keys within the current mode to select the individual key label desired Use the SCREEN key to switch back and forth between the two screens for that mode Note The LCD SLEEP and LEARN keys are displayed but cannot be edit ed as part of the Key Label Options routine ...

Page 10: ...Learned Key Reference Pages IMPORTANT NOTE You cannot learn any commands under the LEARN SCREEN SETUP or any device key Device Device Device Device 8 ...

Page 11: ... LED indicator light remains on which takes 2 3 seconds 8 No commands may be learned under the LCD LEARN SCREEN or SETUP keys or the device keys on the rubber keypad such as TV VCR DVD SAT CBL or AUDIO keys 9 If there is a problem with the Learning process the LED indicator light flashes for two seconds but still remains in Learning Mode 10 All Learned keys are saved automatically Code Learning Co...

Page 12: ...c The LED indicator light blinks once to indicate acceptance of the keypress 6 The touchscreen now shows the Learn Setup Screen 1 which displays the current screen keys for the mode you have chosen The LCD SETUP and LEARN keys are also shown 7 Press and release the key on the RM24941 to be taught Remember You can switch between the screens displayed by pressing the LCD SCREEN key The LED indicator...

Page 13: ...ate acceptance of the keypress 5 The touchscreen now shows the Learn Setup Screen 1 Press and hold the SETUP key until the Main Setup Screen is displayed All Learned commands that were pre viously stored under that mode are now cleared 6 Press LCD CLEAR on the Main Setup Screen to exit Setup Mode Master Clear Clearing all stored Learned commands is recommended before first time Learning To clear a...

Page 14: ...tructed path 12 Method 2 From Setup Routine To set your Sleep Timer from the Setup routine follow these steps 1 Press the TV device key on the rubber keypad 2 Press and hold the SETUP key on the rubber keypad until the LED indicator light remains on and the touchscreen shows the Main Setup Screen This process takes approximately 2 3 seconds 3 Release the SETUP key 4 Press and release the SLEEP key...

Page 15: ...OLUME and MUTE keys Punch through follow these steps 1 Press and hold the SETUP key on the rubber keypad until the LED indicator light remains on and the Main Setup Screen is shown This process takes approximately 2 3 seconds 2 Release the SETUP key 3 Press and hold the device key on the rubber keypad for approximately 5 seconds TV or AUDIO AUX for volume control until the LED indicator light blin...

Page 16: ...ds from the last keypress Setting the LCD Touchscreen Display Time also changes the length of time the Backlight stays on if activated To change the LCD Touchscreen Display Time follow these steps 1 Press and hold the SETUP key on the rubber keypad until the LED indicator light remains on and the touchscreen shows the Main Setup Screen This process takes approximately 2 3 seconds 2 Release the SET...

Page 17: ...cklight turns off Master Reset A Master Reset returns all the RM24941 defaults back to the original factory settings The Master Reset clears all customer programmed codes Learned commands and resets all key labels To perform a Master Reset follow these steps 1 Press and hold the SETUP key on the rubber keypad until the LED indicator light remains on and the touchscreen shows the Main Setup Screen ...

Page 18: ...re the LCD GUIDE key brings up the on screen program list ing INPUT The LCD INPUT key selects the video inputs of your device if the device is equipped with this feature LCD The Liquid Crystal Display LCD acts as a virtual keypad on the remote The touchscreen is normally blank when not in use Pressing any of the LCD keys or the SETUP key a device key or the LIGHT key on the rubber keypad turns the...

Page 19: ...the rubber keypad is used to walk you through the steps in setting up the remote Setup is used for Library Code Entry Code Search Code Identification and other functions During a Setup function if no button is pressed for 60 seconds the unit automatically exits from the Setup rou tine SLEEP KEY The LCD SLEEP key allows you to turn your TV off automatically at a predetermined time SLEEP TIMER The S...

Page 20: ...ry the VCR code for your brand Some combination units however may require both a TV and a VCR code for full operation To do this program the TV code under the TV key and the VCR under the VCR key A As a safety feature on your remote you must press the REC key on the rubber keypad twice A If the original remote requires the ENTER key to be pressed after a channel is selected press the LCD ENTER key...

Page 21: ...ation of incidental or consequential damages so the above limitations may not apply to you This warranty gives you specific rights and you may also have other rights which vary from state to state If unit should prove defective within the warranty period return prepaid with dated proof of purchase to Jasco Products Company 311 N W 122nd Oklahoma City OK 73114 Enclosed with this remote is a sticker...

Page 22: ...Clave aprendida Pagina 29 Aprenda las Ordenes 30 Las Puntas que Aprenden 30 El Código Aprendiendo 30 Aprenda las Ordenes 31 Limpie todas Ordenes Aprendidas Almacenadas Bajo un Modo 32 Magistral Limpia 32 Duerma el Reloj 33 El Método 1 De la Operación Normal 33 El método 2 De la Rutina de Arreglo 33 La TV o el Puñetazo del Volumen de la Audiofrecuencia Por 34 El Puñeazo de VCR por 35 Registre Llave...

Page 23: ...últiples órdenes para sean ejecutadas con un solo keypress El RM24941 es fácil de utilizar fácil de programar y para darle totaliza el control en el toque de sus pun tas de los dedos La Información de la Batería Su telemando RM24941 requiere cuatro AA baterías alcalinas vendido separadamente El LCD Pantalla de cristal líquido touchscreen en su RM24941 actúa como un teclado numérico virtual Este to...

Page 24: ...salidas del proceso de Arreglo La luz del el indicador delantero destella un error en este caso y en ninguna operación no completó cuando el tiempo muerto ocurre no es programado Durante la función de Arreglo si usted aprieta clave no mostrado en el touchscreen ni una llave no esperado como parte de una rutina de Arreglo el RM24941 ignora ese keypress Apretar el LCD LIMPIA introduce por teclado un...

Page 25: ...ción previamente Aprendida para ese modo se borra El modo es repone a su poder en el estado de la rebeldía Para entrar un código directamente de la Lista de Código sigue estos pasos 1 Prenda manualmente el dispositivo para ser controlado la televisión VCR el DVD etc 2 Apriete y tenga la llave de ARREGLO en el teclado numérico de caucho hasta que la luz del indicador delantero permanezca en y el to...

Page 26: ...alquier función previamente Aprendida para ese modo son borrados El modo es repone a su poder en el estado de la rebeldía Para buscar para un código específico en la Lista de Código sigue estos pasos 1 Prenda manualmente el dispositivo para ser controlado la televisión VCR el DVD etc 2 Apriete y tenga la llave de ARREGLO en el teclado numérico de caucho hasta que la luz del indicador delantero per...

Page 27: ...tc La luz del el indicador delantero parpadea para indicar una vez la aceptación del keypress 6 Para AUX1 o AUX2 apriete y libera la llave de dispositivo de AUX Escoja la llave deseada de dispositivo para ser programada abajo AUX la tele visión VCR SENTADO CBL etc 7 El touchscreen de LCD muestra la Pantalla de Arreglo de Código Apriete y libere la llave de la BUSQUEDA de LCD 8 El touchscreen de LC...

Page 28: ...eptación del keypress 5 El touchscreen ahora muestra la Pantalla de Arreglo de Código Apriete y libere la llave de ARREGLO La luz del el indicador delantero parpadea para indicar una vez la aceptación del keypress 6 El touchscreen ahora muestra la Pantalla de Arreglo de identificación de Código inicialmente en blanco con excepción de ARREGLO de LCD llaves de INFORMACION y CODIGO El touchscreen ent...

Page 29: ...ositivo que usted ha escogido la televisión VCR SENTADO CBL etc Las etiquetas de ARREG LO y PANTALLA de LCD se muestran también 6 Apriete cualquiera de las llaves de entrepaño de LCD dentro del modo actual para escoger la etiqueta clave individual deseada Utilice la llave de PANTALLA para cambiar de aquí para allá entre las dos pantallas para ese modo La nota El SUEÑO de LCD y APRENDE que llaves s...

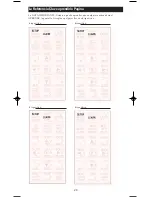
Page 30: ...cia Clave aprendida Pagina La NOTA IMPORTANTE Usted no puede aprender que cualquiera ordena bajo el APRENDE la pantalla Arreglo o cualquier llave de dispositivo dispositivo dispositivo dispositivo dispositivo 29 ...

Page 31: ...unas órdenes se pueden aprender bajo el LCD APRENDE llaves de Pantalla ni ARREGLO ni las llaves de dispositivo en el teclado numérico de caucho tal como la tele visión VCR el DVD SENTADO CBL ni llaves de AUDIOFRECUENCIA 9 Si hay un problema con el proceso que Aprende los destellos de la luz del indicador delantero por dos segundos pero tranquilo permanece en el Aprendizaje el Modo 10 Todo s clave ...

Page 32: ...indicador delantero parpadea para indicar una vez la aceptación del keypress 6 El touchscreen ahora muestra el Aprende Pantalla de Arreglo 1 que demuestra las llaves actuales de pantalla para el modo que usted ha escogi do El Macro de ARREGLO de LCD y APRENDE que llaves se muestran también 7 Apriete y libere la llave en el RM24941 para ser enseñada Recuerde Usted puede cambiar entre las pantallas ...

Page 33: ...ess 5 El touchscreen ahora muestra el Aprende Pantalla de Arreglo 1 Apriete y tenga la llave de ARREGLO hasta que la Pantalla Principal de Arreglo se demuestre Todas órdenes Aprendidas que se almacenaron previamente bajo ese modo ahora son limpiados 6 La prensa LCD Limpia en la Pantalla Principal de Arreglo para salir el Modo de Arreglo Magistral Limpia Limpiar todas órdenes Aprendidas almacenadas...

Page 34: ...todo 2 De la Rutina de Arreglo Para poner su Reloj del Sueño de la rutina de Arreglo sigue estos pasos 1 Apriete la llave de dispositivo de televisión en el teclado numérico de caucho 2 Apriete y tenga la llave de ARREGLO en el teclado numérico de caucho hasta que la luz del indicador delantero permanezca en y el touchscreen muestra la Pantalla Principal de Arreglo Este proceso toma aproximadament...

Page 35: ...s Mudas de keypress del código de la Audiofrecuencia aún cuando la televisión se programa como el Puñetazo por dispositivo Todos los otros dispositivos dan un puñetazo por al Volumen de la televisión el control de Mudo Cuándo la opción de Audiofrecuencia se escoge como el Puñetazo por dispositivo todos modos toman cualquier Volumen las órdenes Mudas de keypress del código de la Audiofrecuencia Par...

Page 36: ...ado numérico de caucho hasta que la luz del indicador delantero permanezca en y el touchscreen muestra la Pantalla Principal de Arreglo Este proceso toma aproximadamente 2 3 segundos 2 Libere la llave de ARREGLO 3 Apriete y tenga la llave MUDA en el teclado numérico de caucho por aproximadamente 5 segundos hasta que el DIRIGIDO parpadee y la Pantalla Principal de Arreglo se demues tra 4 La prensa ...

Page 37: ...de Backlight continúa para un adicionales 30 segundos después que la orden se completa Una vez que el tiempo de Backlight se ha acabado el Backlight no reactiva hasta que la llave LIGERA se apriete otra vez Si la iluminación de Backlight está en y la llave LIGERA se aprieta otra vez el Backlight apaga El maestro Repone Un Maestro Repone los regresos toda la espalda de rebeldías RM24941 a los escen...

Page 38: ...s en el Menú Principal GUIDE Si su dispositivo se equipa con esta característica la llave de la GUIA de LCD menta el en el programa de pantalla listando INPUT La llave de la ENTRADA de LCD escoge las entradas videas de su dispositivo si el dispositivo se equipa con esta característica LCD La Pantalla de cristal líquido LCD actúa como un teclado numérico virtual en el telemando El touchscreen no es...

Page 39: ...caucho se utiliza para caminarlo por los pasos a establecer el telemando Arreglo se utiliza para la Entrada de Código de Biblioteca la Búsqueda de Código Identificación de Código y otras funciones Durante una función de Arreglo si ningún botón se aprieta por 60 segundos la unidad automáticamente salidas de la rutina de Arreglo SLEEP KEY La llave del SUEÑO de LCD permite que usted apague su televis...

Page 40: ...s unidades de la combinación sin embargo puede requerir ambas una televisión y un código de VCR para la operación repleta Para hacer esto programe el código de la televisión bajo la llave de la televisión y el VCR bajo la llave de VCR A Como una característica de seguridad en su telemando usted debe apretar la llave de REC en el teclado numérico de caucho dos veces A Si el telemando original requi...

Page 41: ...que el encima de limita ciones no pueda aplicar a usted Esta garantía le da derechos específicos y usted puede tener también otros derechos que varían del estado para indicar Si la unidad debe demostrar defectuoso dentro del período de la garantía vuelve prepagado con fechó la prueba de la compra a Jasco Products Company 311 N W 122nd Oklahoma City OK 73114 Encerrado con este telemando es un letre...

Page 42: ...ilips Magnavox X X X X Pilot X X Pioneer X X X X X X Portland X X Precision X Price Club X Primestar X Prism X ProScan X X X X Protec X Proton X Pulsar X X X Pulser X Quarter X Quartz X Quasar X X Radio Shack X X X X X Radix X Randex X RCA DSS X TV VCR CABLE SATELLITE DVD AUDIO TV VCR CABLE SATELLITE DVD AUDIO RCA X X X X X Realistic X X X X X Regal X Regency X Rembrandt X Replay X Rhapsody X Rico...

Reviews: