background image

Re-connect it. 
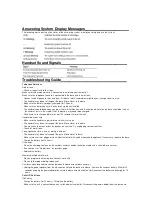
Caller ID Error Message 
• The unit displays this message if it detects anything other than valid Caller ID information during the silent period after the 
first ring. This message indicates the presence of noise on the line. 
No Caller ID 

• You must be subscribed to the standard Name/Number Caller ID service from your local telephone company to receive 

CID information. 

Battery


If you experience any of the following problems, even after recharging the battery, you may need to replace the battery 
pack: 

• Short talk time 
• Poor sound quality 
• Limited range 
• Charge indicator fails to turn on 

General Product Care__________________________________ 

To keep your unit working and looking good, follow these guidelines: 

• Avoid dropping the handset, as well as other rough treatment to the phone. 
• Clean the phone with a soft cloth. 
• Never use strong cleaning agents, paint thinner, abrasive powder, alcohol, or other chemical products to clean the unit. 

Doing so will damage the finish. 

• Retain the original packaging in case you need to ship the phone at a later date. 
• Periodically clean the charge contacts on the handset and base with a clean pencil eraser. 

Answering System Solutions__________________________ 

Can’t hear messages, beep, etc. 

• Adjust speaker volume. 
Time/Day setting stuck at 12 a.m Mon. 

• Set the time clock.   
Answers on 10th ring 

• Make sure answering system is turned on. 
• Answering system memory may be full. Erase some messages. 
Incoming messages are incomplete 

• An extension phone may have been lifted as a message is received. 
• Answering system memory is full. Erase some messages. 
• You may have accidently pressed the PLAY/STOP button during playback and stopped the message. 
Won’t respond to remote commands 

• You must use a tone-dial phone. This phone does not support pulse (rotary) dialing. 
• Make sure to enter the correct security code. 
• Did unit hang up? If you take no action for a period of time, it automatically hangs up. 

Causes of Poor Reception________________________________ 

• Aluminum siding. 
• Foil backing on insulation. 
• Heating ducts and other metal construction that can shield radio signals. 
• You are too close to appliances such as microwaves, stoves, computers, etc. 
• Atmospheric conditions, such as strong storms. 
• Base is installed in the basement or lower floor of the house. 
• Base is plugged into AC outlet with other electronic devices. 
• Baby monitor is using the same frequency. 
• Handset battery is low. 
• You’re out of range of the base. 

Service________________________________________________ 

If trouble is experienced with this equipment, for repair or warranty information, please contact customer service at 

1-800-448-0329

. If the equipment is causing harm to the telephone network, the telephone company may request that you 

disconnect the equipment until the problem is resolved. 
This product may be serviced only by the manufacturer or its authorized service agents. Changes or modifications not 
expressly approved by Thomson Inc. could void the user’s authority to operate this product. For instructions on how to 
obtain service, refer to the warranty included in this guide or call customer service at 

1-800-448-0329

Summary of Contents for 28032 Series

Page 1: ...evices you may connect to your line as determined by the REN you should contact your local telephone company A plug and jack used to connect this equipment to the premises wiring and telephone network must comply with the applicable FCC Part 68 rules and requirements adopted by the ACTA A compliant telephone cord and modular plug is provided with this product It is designed to be connected to a co...

Page 2: ...stallation Privacy of Communications may not be ensured when using this product If this equipment does cause harmful interference to radio or television reception which can be determined by turning the equipment off and on the user is encouraged to try to correct the interference by one or more of the following measures Reorient or relocate the receiving antenna that is the antenna for radio or te...

Page 3: ...nal handsets charge cradles belt clips battery packs and covers than shown above For Model 28032XX6 A there will be FIVE additional handset charge cradle belt clip battery pack and cover than shown above Telephone Jack Requirements To use this phone you need an RJ11C type modular telephone jack which might look like the one pictured here installed in your home If you don t have a modular jack call...

Page 4: ...ems Important Installation Guidelines Avoid sources of noise and heat such as motors fluorescent lighting microwave ovens heating appliances and direct sunlight Avoid areas of excessive dust moisture and low temperature Avoid other cordless telephones or personal computers Never install telephone wiring during a lightning storm Never install telephone jacks in wet locations unless the jack is spec...

Page 5: ... it on the wall 2 Plug one end of the telephone line cord into the TEL LINE jack on the bottom of the base and the other end into a modular jack 3 Plug the AC power converter into the electrical outlet and the DC connector into the jack on the bottom of the base 4 Place the handset in the base cradle The charge in use indicator turns on verifying the battery is charging 5 Allow the phone to charge...

Page 6: ...the time is automatically transmitted by your local phone company as part of Caller ID service If you subscribe to Caller ID service the current time is set automatically when you receive your first CID record Speaker Volume Use the VOLUME or buttons to adjust speaker volume on the base to a comfortable level L1 is the minimum speaker volume and L8 is the maximum Voice Instruction If you need addi...

Page 7: ... the cid vol or button to scroll to HANDSET SETUP 4 Press mute menu button to confirm and you may program the following items Set Language Handset Name Ringer Tone Ringer Volume VIP Melody Key Tone Message alert Ring to answer message length Security code Area Code Tone pulse Registration Deregistration and Default Setting During programming you may press the end button at any time to exit the men...

Page 8: ...n to select VIP melody feature and then display VIP 1 record If VIP1 does NOT contain any specific number records it will display EMPTY 3 Press cid vol or button to select the specific VIP melody memory location 10 VIP locations that does not contain any record 4 Press mute menu button to display SELECT MEMORY NOTE If the memory location does not contain any CID memory records and you are trying t...

Page 9: ...t Setup Menu 1 Press the cid vol or button to scroll to the SECURITY CODE sub menu 2 Press mute menu button to enter the menu SECURITY CODE 1 2 3 shows in the display 3 Use the touch tone pad to enter your new 3 digit security code The default setting is 123 4 Press the mute menu button to confirm You will hear a confirmation tone and the new security code shows in the display NOTE If you make a m...

Page 10: ...he page button on the base until the CHARGE IN USE indicator on the base flashes 2 Press and hold the page button on the base again until the CHARGE IN USE indicator on the base flashes rapidly 3 Press and release the page button on the base once All handsets are de registered and HANDSET NEEDS REGISTRATION shows in the display Default Setting As you become familiar with this system you may prefer...

Page 11: ...e and Caller ID information for the waiting call shows on the handset display To connect to the waiting call press the talk flash button on the handset and your original call is put on hold To switch between the two calls press the talk flash button Last Number Redial You may redial a number up to 32 digits long To quickly redial the last number you dialed 1 Press the talk flash button 2 Press the...

Page 12: ...g handset to press the delete int conf button NOTE If the receiving handset does not answer within two minutes the intercom call is automatically canceled The originating handset displays NO ANSWER 5 When finished press the end button or delete int conf button on either handset to deactivate the intercom Receiving an Intercom Call When you receive an intercom call press the delete int conf button ...

Page 13: ...ce of a Call Waiting call on the line The Call Waiting Caller ID information will be displayed and stored in the history of all handsets in the system When you hear the call waiting beep in the handset receiver press the talk flash button to put the current call on hold and answer the incoming call Press talk flash again to return to the original call Receiving CID Records When you receive a call ...

Page 14: ...vol or buttons to scroll to VIEW RECORDS 4 Press the mute menu button to confirm display will show the records 5 Press the cid vol or buttons or key in alphabet to view the records 6 Press mute menu button to confirm and the detailed information will be shown in the display Add Records 1 Make sure the phone is OFF not in talk mode 2 Press phonebook button to enter Phone Book sub menu 3 Use the cid...

Page 15: ...w messages Shows total number of old and new messages c Message counter has bars Answerer is off d Message counter has an F flashing on the display Memory is full e Message counter has a CL flashing on the display Clock is not set since power up or after power failure f Message counter has six horizontal bars flashing on the display MEMO recording g Message counter has a AN flashing on the display...

Page 16: ...RD MESSAGE 3 Release the memo button when finished Remote access You may access the answering system with the cordless handset or from any tone dial compatible telephone Cordless Handset Use the corresponding handset keys just like you would use the base buttons see Answering System Setup The button functions are located on the handset above each number key For example to play messages 1 Press the...

Page 17: ..._______ Changing the Battery CAUTION To reduce the risk of fire or personal injury use only the Thomson Inc approved model 5 2721 Nickel metal Hydride battery Ni MH which is compatible with this unit 1 Make sure the telephone is OFF not in TALK mode before you replace the battery 2 Remove the battery compartment door 3 Disconnect the cord attached to the battery pack and remove the battery pack fr...

Page 18: ...et ringer software switch is set to on The handset may be out of range of the base Move closer to the base You may have too many extension phones on your line Try unplugging some extensions Check for a dial tone You experience static noise or fading in and out The handset may be out of range of the base Move closer to base Make sure base is not plugged into an electrical outlet with another househ...

Page 19: ...lete An extension phone may have been lifted as a message is received Answering system memory is full Erase some messages You may have accidently pressed the PLAY STOP button during playback and stopped the message Won t respond to remote commands You must use a tone dial phone This phone does not support pulse rotary dialing Make sure to enter the correct security code Did unit hang up If you tak...

Page 20: ...ired Also print your name and address and a description of the defect Send via standard UPS or its equivalent to Thomson Inc 11721 B Alameda Ave Socorro Texas 79927 Pay any charges billed to you by the Exchange Center for service not covered by the warranty Insure your shipment for loss or damage Thomson Inc accepts no liability in case of damage or loss A new or refurbished unit will be shipped t...

Page 21: ...t If you have purchased an extra handset that is not of the same type as your original handset you may still use the original User s Guide to help explain the new handsets basic functions and options Parts Checklist Make sure your package includes the items shown here Installing the Handset Battery NOTE You must connect the handset battery before use CAUTION To reduce the risk of fire or personal ...

Page 22: ...NEEDS REGISTRATION shows in the display 1 Press the mute menu button HOLD BASE PAGE WAIT FOR BEEP shows in the display Your handset should be held near the base during registration process 2 Press and hold the page button on the base unit you hear a long tone at the handset HANDSET X REGISTERED shows in the handset display where X stands for the handset number You may now rename your handset ...

Reviews: