Telephone Cable Connection
To use the phone as standard telephone:
1. Plug one end of the telephone line cord into the PHONE jack on the back of the base
and the other end into a modular jack
IMPORTANT: Do not connect the telephone line until the handset is fully
charged. The base must be plugged into the AC power at all times.
Installation Note:
Your InfoLink is designed for home use and will work with most any
standard Internet system (non-commercial, non-corporate environments/
applications). This includes wired and/or wireless routers which provide
additional “hard” Firewall security functionality (HTTP Internet traffic
transmits inbound and outbound via Port 80, which is typically open on
most firewall set ups). However, this unit may not function properly behind
a firewall that does not allow http traffic inbound and outbound on Port
80.
The unit will not work with a dial-up internet connection.
Power Supply Connection
1. Connect the power adaptor provided with your unit to the base .
2. Connect the adaptor to an electrical wall outlet.
3. When power is applied to the base, the unit goes through a one minute initialization
process in the following sequence:
a) the blue DECT indicator is on (solid),
b) the green POWER indicator flashes,
c) both the blue DECT and green POWER
indicators flash; and
d) the green POWER and blue ETHERNET
indicators are on (solid).
The unit has now completed the process. The phone will not function until this process is
complete.
Handset Synchronization*
1. After base is powered up, wait 5-7 seconds until
RSS synchronization icon briefly appears on the handset display. This indicates that the
handset and base are synchronized to each other.
2. Next you will see the
RSS Service Wizard
which will guide you step through setup of
Weather and Weather Alerts. There are some useful channels pre-configured to help
get you started OR you can bypass the Wizard at this time and return later.
3. Programmed content windows will start auto scrolling and handset is ready for use.
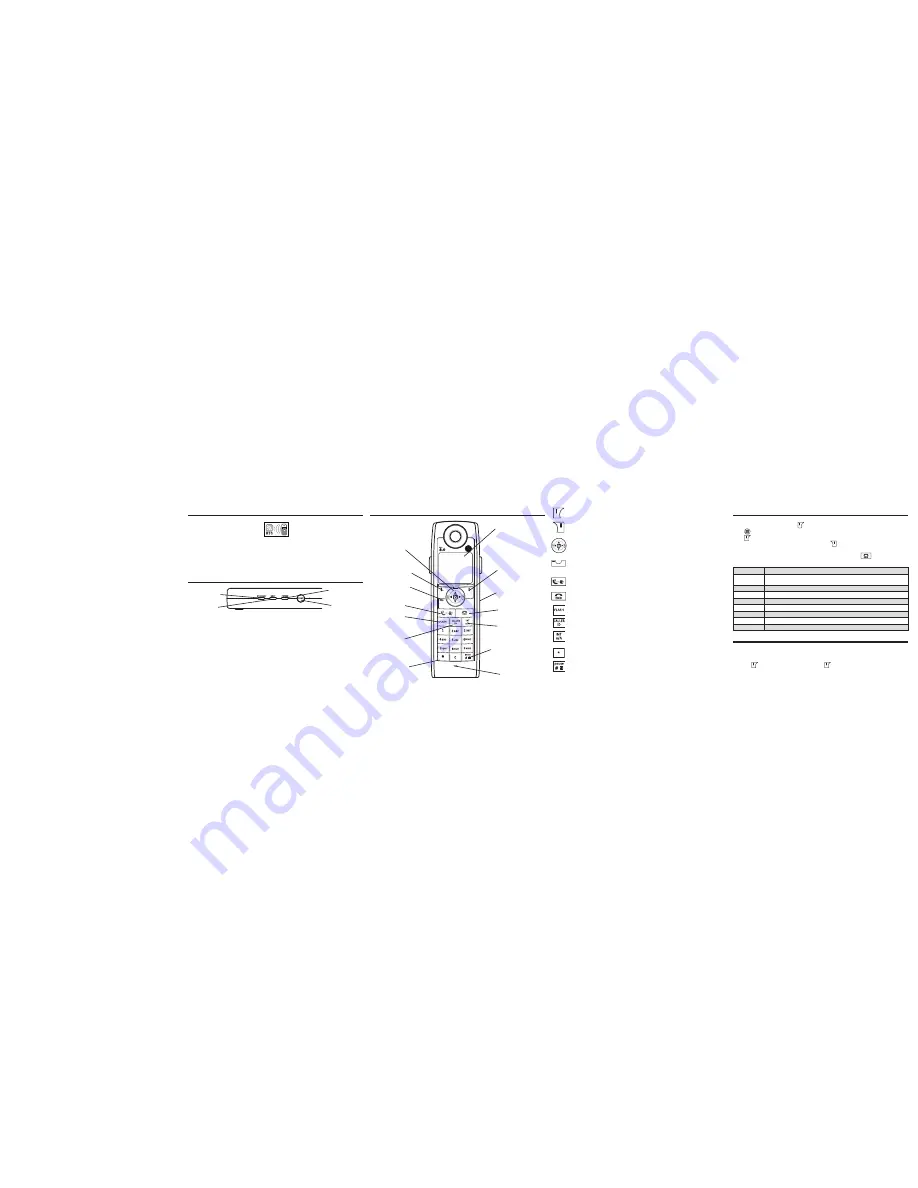
Base Layout
ETHERNET Indicator (blue)
When flashing; indicates network error with last RSS update.
When solid; indicates properly working ethernet connection.
DECT Indicator (blue)
When flashing; indicates base is in handset registration mode.
When solid; indicates an active call.
POWER Indicator (green)
When solid; indicates base is powered.
Page button
Press to locate misplaced handset(s).
ETHERNET
(indicator)
POWER
(indicator)
DECT
(indicator)
PAGE
(button)
Left soft button
Selects the current menu item or confirms a setting, depending on the current screen.
Right soft button
“Back” button returns to the previous screen.
Navigational/Volume button
Press the up, down, left, or right arrows to navigate while in a menu or the RSS content
screen. After a selection from a menu or article, press right arrow button to view.
During a call, press vol-/+ to increase or decrease the volume.
Alert Indicator
If flashing, indicates you have voice mail waiting, or a weather warning if an RSS Wealther
Alert has been selected.
Call/Speaker button
Initiates or answers a call. During a call, activates speaker.
End button
Ends a call. Also returns any RSS or menu function to idle mode.
FLASH button
Call Waiting acceptance; during a call, push to accept new incoming call.
Caller ID button
Short press to view list of received calls. Press and hold to view list of dialed calls.
Intercom/Lower/Upper case button
Allows you to make High Definition (HD) calls between the handsets registered to the base.
When in text editor, switches from lower-case to upper-case letters.
*
button
When in text editor, provides a symbol table.
Pause/#/Lock button
Allows you to input a pause while dialing or lock the keypad.
Handset Layout
Left soft
(button)
Display
pause/#/lock
(button)
*
(button)
Navigational
(button)
END
(button)
Right soft
(button)
microphone
Call/
Speakerphone
(button)
FLASH
(button)
CALLER ID
(button)
INT/a/A
(button)
Alert Indicator
Headset
jack
Navigating The Menu
Your phone has an easy to use menu system. Each menu leads to a list of options. When
the handset is in idle mode, press
to open the main menu.
Press
to navigate to the menu options you want.
Press
to select further options or confirm the setting displayed, or if a new call was
received it takes you to the Caller ID records. Press
to return to previous menu.
If no button is pressed within 60 seconds, the handset will return to idle mode
automatically. To cancel and return to idle mode at any time press
.
The following table outlines the main menu items:
Calls Lists
Access to received calls, dialed calls, and delete calls list.
Handset
Set preferences for handset name, language, menu color, wallpaper picture,
contrast, auto talk, regional and local area codes, and default settings.
Contacts
Add, edit or delete entries to your phonebook listings.
Sounds
Set preferences for volume, ringtones, ringer volume and keypad.
Base Settings
Displays IP address.
Time Settings
Set date and time, select time format, set alarm clock feature.
Registration
Register and de-register handsets to base.
RSS Setting
View and set up RSS channels, reset RSS to default channels.
Help
Detailed info. for use of Feed set up and navigation button.
Help
Assistance with your feed set up and navigation buttons.
To Access Help via the Menu
1. Make sure your phone is
OFF
(not in talk mode).
2. Press
, navigate to the
Help
menu, press
to enter.


