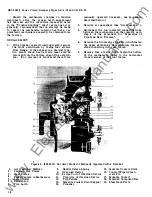
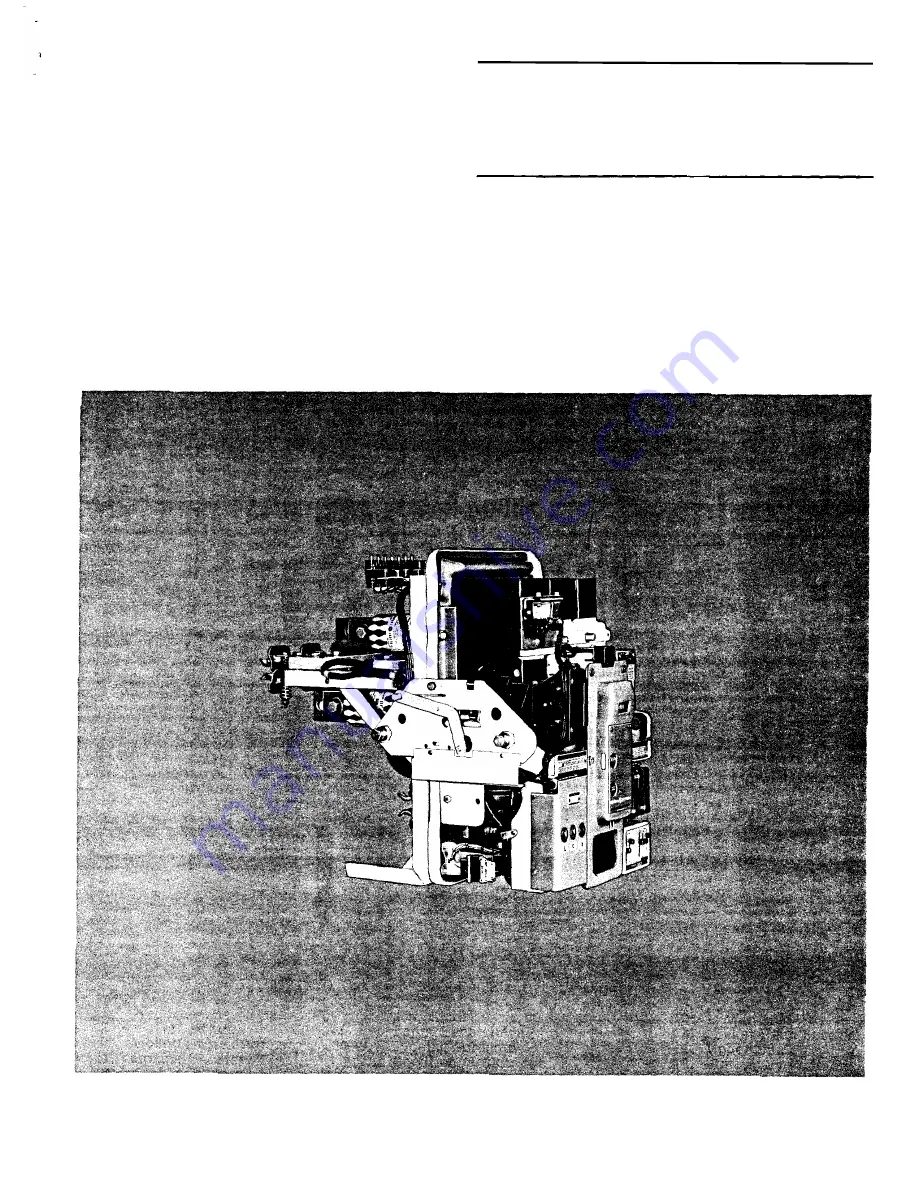
background image

� 

�aintenance 

,· 

Instructions 

•Includes Supplement GEI-86153 

GEI-50299E• 

• 

Power Circuit 

Breakers 

Types AK-2/2A-15 

AK-2/3/2A/3A-25 

AKU-2/3/2A/3A-25 

GENERAL 

fj 

ELECTRIC 

www 

. ElectricalPartManuals 

. com 

Summary of Contents for AK-2-15

Page 1: ...enance Instructions Includes Supplement GEI 86153 GEI 50299E Power Circuit Breakers Types AK 2 2A 15 AK 2 3 2A 3A 25 AKU 2 3 2A 3A 25 GENERAL fj ELECTRIC w w w E l e c t r i c a l P a r t M a n u a l s c o m ...

Page 2: ...y Cut Off t Jwitch Closing Switch Shunt Trip Device PROTECTIVE DEVICES Overcurrent Trip Device EC 2 Overcurrent Trip Device EC 1 Overcurrent Trip Device Reverse Current Trip Devices Power lensor Trip Device Selective Tripping Static Time Delay Undervoltage Tripping Vevice Instantaneous Undervoltage Device Undervoltage Lockout Device Bell Alarm Switch and or Lockout Attachment Open Fuse Lockout Dev...

Page 3: ...s forces the shorter end of the handle upwards against the bottom of the solenoid armature and closes the breaker The breaker may be tripped open by any one of a number of electrical tripping devices which will be described in detail later in these instruc tions An individual breaker may have none or any combination of these devices They are the overcurrent tripping device shunt tripping device un...

Page 4: ...e manual handle cam and mechanism connecting link The Tripping is accomplished by the manual trip button on the escutcheon or by any of the electrical tripping devices available for use on the standard breakers 4 o j TRP JA6 1 2 TC A4 A7 ELEMENTARY DIAGRAM t y y FIG LIST OF ABBREviATIONS A TERMINAL BOARD LOCATED TOP RIGHT FRONT VIEW F ANTI PUMP PERMISSIVE RELAY G oa bb CUT OFF SWITCH K Xl CLOSING ...

Page 5: ...current carrying parts of the breaker and their supporting structure The procedure for this operation is as follows 1 Remove the arc quenchers see section on Arc Quenchers 2 Disconnect the two insulated connecting links 6 between the mechanism and the crossbar 10 by removing the tie bolt 7 and slipping the ends of the links off the ends of the should ered pin 5 Figure 5 in the mechanism 3 If the b...

Page 6: ...elease of tripping latch check mechanism latch adjustment Worn or damaged trip unit parts Replace trip unit Bind in overcurrent trip device Replace overcurrent trip device False Tripping Overcurrent trip device pick up too low Check application of overcurrent trip device AK 2 Breakers Overcurrent trip device time setting too short Check application of overcurrent trip device Bind in overcurrent tr...

Page 7: ...nts and external control circuits They are used only on drawout type breakers A terminal board serves the same purpose on stationary mountedandgeneral purpose enclosure mounted breakers The second ary disconnects allow removal of the breaker with out the necessity of having to detach external con nections The movable part of the secondary disconnect consists of an insulating body which holds a con...

Page 8: ...he rear side of the stationary contacts Each of the stationary contacts pivot in a horizontal plane approximately at their mid points The end of the contact opposite to the contact tip end is formed into the shape of a small hook A tension spring engages this hook and provides the necessary contact pressure at the pivot and also at the point of contact with the movable contact arm When the breaker...

Page 9: ...contact replacement will call for re placement of all the movable and stationary con tacts at the same time This will be the case where long use of the breaker in service has resulted in extensive wear or erosion of the silver alloy contact tips A commonly used rule of thumb is that contact replacement is indicated if less than one half of the original thickness 1 8 of an inch of the contact tip m...

Page 10: ...er Base 8 Spring REPLACEMENT OF MOVAB LE C ONTACTS 18 Figure 3 1 Coat the pivot area only of the new movable contacts with a thin coat of D50H47 grease 2 Assemble the center pole movable contacts align the pivot pin holes with the bullet nosed rod and install the pivot pin and split pin 3 Move the cross bar assembly into position and insert the eccentric contact wipe adjust 20 19 14 13 12 FRONT VI...

Page 11: ...should be adjustable using eccentric numbers 1 2 or 3 These numbers are the ones visible when viewing the breaker from the front not from above The higher numbers should be reserved for tightening at future maintenance readjustments after wear Also if higher numbers are used where adequate wipe is obtainable at settings 1 2 or 3 it is possible that the stationary contacts will bottom producing exc...

Page 12: ... function properly it is best to first perform the available remedial measures listed in the Trouble Shooting chart of these instructions One of the remedies 12 listed is that of proper mechanism latch engage ment the amount of engagement be tween the latch 7 and latch roller 5 Figure 6 This is the only adjustment that is required on the breaker mech anism and proper latch engagement is obtained i...

Page 13: ... position where the contacts move before tripping occurs When this position is established note the position of the slot in the head of the adjusting screw 4 Withdraw the adjusting screw three and one half turns from the position noted in step 3 This sets the proper amount of latch engage ment Figure 5 8024457 Cut Away Model of Electrically Operated AK 2 Breaker 1 2 3 4 5 6 7 Arc Quencher Retainer...

Page 14: ...ee Arc Quencher 3 Disconnect the two insulated connecting links between the mechanism and the contacts as in step 2 of the procedure for Separation of Front and Back Frames 4 Remove the two elastic stop nuts whichfasten the upper extensions of mechanism frame to studs connecting with rear frame 5 Remove four screws which fasten the bottom of the mechanism frame to the horizontal cross member of th...

Page 15: ...mbly In replacing the escutcheon it may be necessary to use pliers to pull the operating shaft fully into the escutcheon in order to have space enough to replace the flat washers and the soft retainer The latter may be closed on its groove in the shaft by ordinary gas pliers After re placement check operation of breaker AUXILIARY SWITCH The auxiliary switch is mounted on the left side of the opera...

Page 16: ...ng axis and withdraw it Replace new contacts by reversing the pro cedure slide downward until clear of armature Coil 6 Reassemble with new coil by reversing order of procedure X C ONTACTOR The X contactor is a heavy duty relaywhich performs the function of closing the circuit of the breaker solenoid during electrical operations Three of the four sets of contact of the device are arranged in series...

Page 17: ...ns so that enough wire will remain for connection to the new relay Sufficient original wire is allowed for this purpose 2 JL_ lJ L c 3 4 5 After the old relay has been removed the wire leads to the relay should be stripped of insulation to about 1 4 of an inch from the ends A good mechanical connection should be made before soldering After all connections are completed the relay may should again b...

Page 18: ...side also holds a wiring cleat and spacer which serves to hold the wires clear of the link connecting the mechanism andthe breaker position indicator 4 Remove the front escutcheonfrom the breaker 5 Slide the cut off switch out from between the steel side plates by pulling straight forward 18 6 Mount the replacement switch by reversing the order of procedure CLOSING SWITCH Figure 8 The closing swit...

Page 19: ... Push Button 1 Nut 2 Frame 3 Spring 4 Rivet 5 Weight 5 Movable Contact 6 Spring 7 Hinge 8 Closing Solenoid _ L _ AUX SW LIC A7 M T C A M2 9 Speed Nut 10 Screw TRIP 3 1 1 Figure 9 695C161 Shunt Trip Device 6 Screws 1 1 Armature Arm 7 Magnet 8 Coil 12 Trip Paddle 13 Mechanism Frame 9 Clamp 14 Trip Shaft Clamp 10 Armature 19 w w w E l e c t r i c a l P a r t M a n u a l s c o m ...

Page 20: ...vice the movement of the armature may be delayed for a time by a timing device If a relatively long time delay seconds or minutes is desired the velocity of armature movement is governed by a piston moving through an oil dashpot If only a short time delay cycles or milli seconds is required movement is controlled by an escape ment gear and pallets arrangement An AK 2 15 25 breaker may be equipped ...

Page 21: ...ashpot Arm 8 Connecting Link 9 Instantaneous Pickup Calibration Marks counter clockwise motion decreases it The dash pot arm 7 Figure 1 1 is indexed at four points maximum 2 3 1 3 minimum from the left as viewed in Figure 1 1 When the index mark on the connecting link 8 Figure 11 lines up with a mark on the dashpot arm the approximate tripping time as shown by the charaCteristic curve is in dicate...

Page 22: ... instantaneous pick up value may have one of the following three ranges 4 to 9 times coil rating 6 to 12 times coil rating or 9 to 15 times coil rating The pick up setting may be varied by turning the instantaneous trip adjusting screw 4 Figure 11 Three standard calibration marks will appear on the operating arm at 9 Figure 11 and the value of these calibration marks will be indicated 22 by stampi...

Page 23: ... overcurrent trip devices have been replaced Positive tripping is achieved when adjustment screw 2 Figure 10 is in such a position that it will always carry the trip paddle on the trip shaft beyond the point of tripping the mechanism when the armature closes against the magnet In order to make the adjustment firstunscrew trip screw 2 Figure 10 until it will not trip the breaker even though the arm...

Page 24: ...s against trip paddle 14 tripping thebreaker open ADJUSTMENTS The only adjustment to be made on the reverse current device is to make sure that the trip rod has a minimum overtravel of 1 32 of an inch beyond the point of tripping the breaker The only occasion this adjustment should have to be made is when an old device is being replaced by a new one The new device will be factory adjusted so that ...

Page 25: ...inciple that the instantaneous value of current flowing in the three conductors or in four conductors on four wire systems must add to zero unless ground current is flowing Therefore if the electrical system is a four wire wye system with the neutral grounded at the transformer the fourth sensing coil Figure 18 must be included on the neutral conductor with its secondary combined with the secondar...

Page 26: ...e Power Sensor Successful operations in the test position should be ob tained before proceedingwith the Power Sensor trouble shooting 3 A PST 1 Power Sensor Test Kit must be available Figure 21 Check the Power Sensor Unit for correct function for each pick up setting and one point on each time delay characteristic Then check for the correct operation of each phase of the Power Supply Unit This pro...

Page 27: ... Coil Remotely Located 1 Terminal 2 External Ground Sensor Coil 3 White Polarity Dot 2 Check to be sure no continuity exists between R and A or between R and C 3 Temporarily connect jumper from shield to either terminal at remote C T and check to assure the shield is continuous from Power Sensor Plug to remote C T by checking for continuity between R and A If continuity does not now exist shield i...

Page 28: ...ingle phase testing unless the signal is shorted at the terminal board Figure 22 Jumper points 1 and 5 during overcurrent test The above considerations shouldindicate which of the four major components is faulty and in need of replacement REPLACEMENT OF POWER SENSOR COMPONENTS POWER SENSOR UNIT Figure 1 6 1 Loosen screw connecting the unit to the front frame 2 Slide unit forward 3 Remove control p...

Page 29: ...EC CONTtt ii IT R TO IEt O 1 tE tJi AL c 5RDUNO SEN SO COi l n n 75 11 Jt 50U R C E T P I C L f 0 JtJD F A JLT Co i E TiON eREAK E i 1 C t l 1 G eOuiJD SENSO OiSCO t4 IE i A NC ttlC T R NAl Gi OUNO 5SNS R COI L P R 01 Pb l l ov ER 5E I JSOR TRiP Figure 22 138B2454 Ground Fault Wiring Diagram II a II II Jl n 75 11 11 29 w w w E l e c t r i c a l P a r t M a n u a l s c o m ...

Page 30: ...ANGE AVA IL ABLE PER D E V ICE R A N G E OF 6 TO 12 T IMES IS F U RNISHED U N L E S S 1 f fi H I I I I I I O T H E RW I S E SPECIFI E D S E T T I NGIS ARE AT 12 T IM E S RATING r TOTA L cURVES ARE P L O T T E D AT 25 C AMBIENT r IQ ill CLt ARING TIME I S DURATION OF FAUL T Dlf C U R R E N T INC LUDI N G ARCING TIM E CLEA R I NG T I M E A K 1 50 Dif 30 Jill Ollr Gif r RESETTABLE I 1 tl I S DURATION...

Page 31: ... TIIP liniNG Figure 25 109HL689 Time Curve 5 Unsolder three leads at ground disconnect and pull wire through hole in back frame On stationary breakers withfourthwire ground disconnect unsolder leads at external ground coil and pull wire through hole in back frame 6 Remove primary disconnects per instructions under disconnects 7 Remove three 3 8 hexagon headed bolt con necting coils to breaker copp...

Page 32: ...to wiring diagram 0102C3698 Figure 26 The voltage 208V AC or 230V AC to be monitored is connected to terminals 1 and 2 of the time delay box The undervoltage device 32 R T t C o N NE c T tr o c T O ME R t I N ST I S N OT RE Q D Ju tv PE P UV To T B S on the breaker is always connected through either its secondary disconnects or terminal board tp terminals 4 and 5 of the time delay box The undervol...

Page 33: ...y unit is the faulty component A B Check input voltages across terminals 1 2 on static box These voltages should be as follows 1 Device 177L3 16 G 12 208 or 230volts A C 2 Device 177L316 G 14 125 volts D C 3 Device 177L316 G 15 250 volts D C Check output voltages on terminals 4 5 with the under voltage device connected The approximate voltages are as follows 1 208 Volt A C 177L31 6 G 12 l lOvolts ...

Page 34: ...ay device and its construction is similar The adjustments and replacement of t is device are the same as those described above for the static time delay undervoltage device UNDERVOLTAGE LOCKOUT DEVICE Figure 29 Figure 29 0101C7842 Undervoltage Lockout Device The undervoltage lockout device holds an open breaker trip free when the coil of the device is deenergized When the breaker is in the closed ...

Page 35: ...reaker opens lever 2 rotates counterclockwise about pin 14 The motion is transmitted through links 1 and 13 to paddle 12 which operates bell alarm switch 11 If the device has the lockout feature the movement of link 13 also causes lockout link 8 to slide in a direction that results in its striking trip paddle 5 which by displacement of the breaker mechanism trip latch makes it im possible to reset...

Page 36: ...own to engage the trip shaft paddle in the tripped position 1 Figure 31 8041865 Open Fuse Lockout Device 1 Mounting Holes 2 Lever 3 Reset Button 4 Collor 5 Armature 6 Coil 36 4 2 Check that each armature holds the breaker trip free when the armature position is limited in reset by the lower latch surface on the indicator 3 With the breaker in the closed position the top collor must clear the trip ...

Page 37: ...sembly of the existing backframe with the new front frame Addition of Shunt Trip Device Auxiliary witch Undervoltage Device Bell Alarm Lockout Device Drawout Mechanism Conversion to Elec Oper Covered By 698C900 698C901 698C902 698C904 698C922 698C904 MAINTENANCE TOOLS The following tools are recommended for proper maintenance of AK 2 15 and AK 2 3 25 breakers NOTE Obtain from local hardware firm d...

Page 38: ... w w w E l e c t r i c a l P a r t M a n u a l s c o m ...

Page 39: ... w w w E l e c t r i c a l P a r t M a n u a l s c o m ...

Page 40: ... further information call or write your local General Electric Sales Office or Distribution Equipment Division 41 Woodford Avenue Plainville CT 06062 USA GENERAL fl ELECTRIC w w w E l e c t r i c a l P a r t M a n u a l s c o m ...

Reviews: