To check the setting, arrange the breaker for "slow
close" as described in Section 7.4. Through the use of a
continuity tester, observe the position of the breaker con
tacts when the switch "A" contacts touch. At this point the
breaker's arcing contacts must be within .250" to .500 " of
closing.
Adjustment is made by disconnecting the upper end of
the adjustable link and varying its length as required.
ELECTROSWITCH TYP E 1 01
Adjustment is the same as the GE SB1 2 except that
when the switch "A" contacts touch, the breaker arcing
contacts m ust be within 0 to .250 inches of closing.
7.7 SHUNT TRIP
The shunt trip device opens the breaker when its coi l is
energ ized. An "A" auxiliary switch, which is closed only
when the breaker is closed, is in series with the device
coil. Connections are made to the external tri pping source
through secondary disconnects on drawout breakers, or to
the terminal board on stationary breakers.
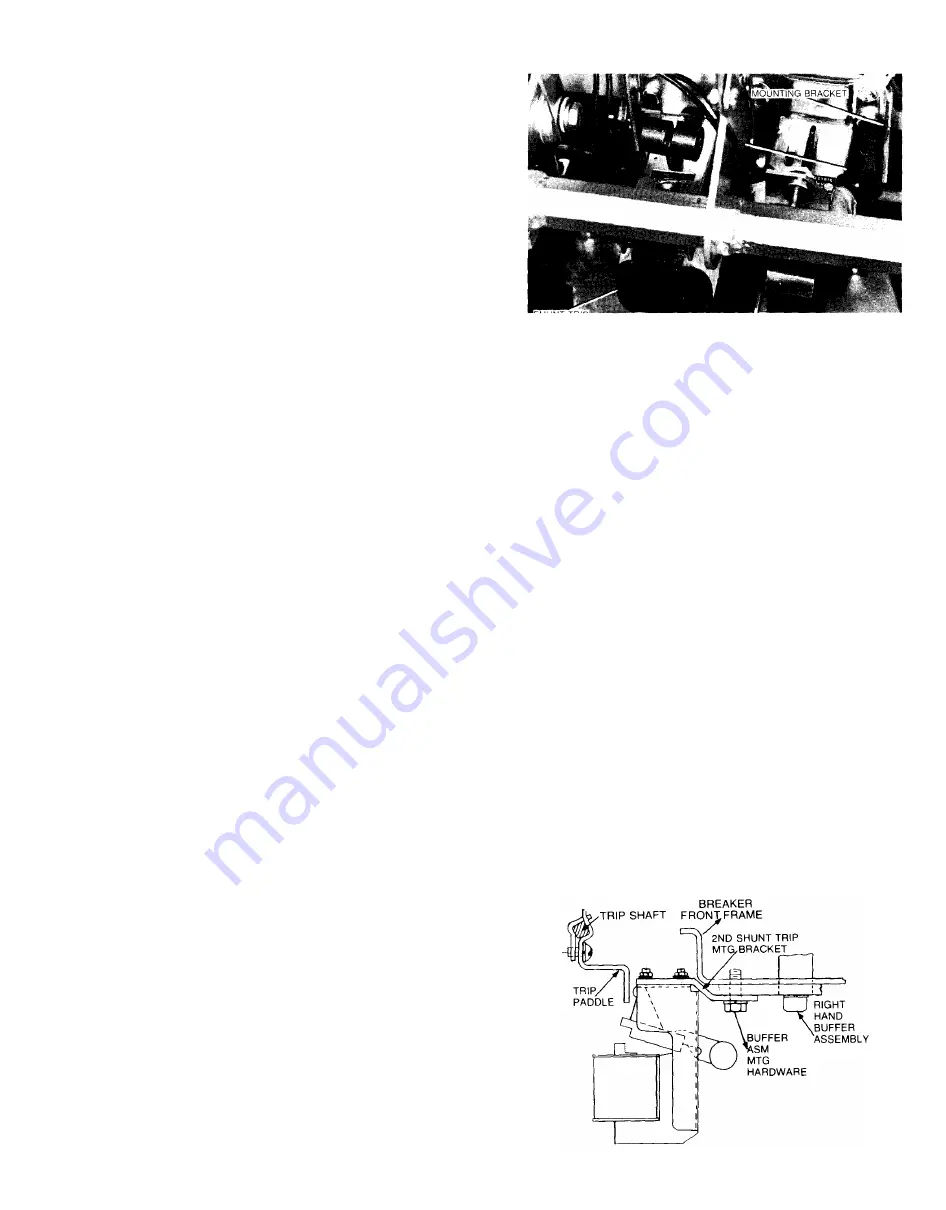
The shunt trip is mounted on the underside of the
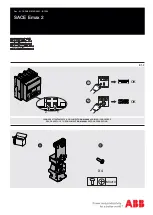
breaker front frame as shown in Fig. 29. A second shunt
trip may also be mounted to the frame (see Fig. 30) if a se
cond undervoltage device isn't already installed, see Sec
tion 7.8.
7.7.1 REPLACEM ENT
If it is necessary to replace or add one of these devices,
the easiest procedure is to remove the mounting bracket,
shown in Fig. 29, from the breaker frame and remove the
device from the bracket. If a replacement or new device is
ordered, a mounting bracket will be supplied with the
device.
If a second shunt trip is added, this is mounted by
means of an additional bracket as shown in Fig. 30. This
additional bracket is fastened by two of the hex head bolts
used to fasten the buffer assembly to the breaker frame.
7.7.2 ADJUSTMENT
When these devices are instal led or replaced, their
positive ability to trip the breaker m ust be demonstrated.
This is done by placing a 1 /32-inch shim between the ar
mature and magnet of the device and manually operating
the armature to trip the breaker.
If the shunt trip is not successful in this test, check the
mounting fasteners to make sure they are reasonably
tight. If they-are, then bend the trip paddle on the trip shaft
to slightly reduce the distance between the trip arm of the
device and the trip paddle, and recheck for positive trip. If
this bending is necessary, be careful that it is not over
done. Verify that there is a .030 "-.050 " gap between the
trip arm and the trip paddle with the breaker closed. A gap
greater than .050" is perm itted and m ay sometimes be
necessary in order to prevent n uisance tripping. Re-verify
positive trip as a final check.
7.8
UN DERVOLTAGE DEVICE
The undervoltage device trips the breaker when its coil
is de-energized . The leads of the coil are connected
directly to secondary disconnects or to a terminal board .
U nder normal conditions, the coil remains energized and
the breaker may be closed.
Dropout of the armature, with resultant breaker trip
ping, occurs when the voltage is reduced to a value
between 30% and 60% of the coil rating. An open
armature will render the breaker incapable of closing. The
FIG. 29 - SHUNT TRIP AN D
UN DERVOLTAGE MOUNTING
armature will "pick up" and allow closing if the applied
voltage is 85% or more of the coil rating. It may also pick
u p at a lower voltage. Refer to table 2 5 for pickup and
dropout ranges.
The armature of the undervoltage device may be tied
closed in order to permit breaker operation during main
tenance.
The undervoltage device is mounted to the underside of
the breaker front frame as shown in Fig . 29.
A second undervoltage may also be mounted to the
frame (see Fig . 31) if a second shunt tri p isn't already
installed, see Section 7.7.
If a second undervoltage device is added, a new buffer
assembly block will be supplied. This is required for
clearance, in this case, the buffer assembly must be taken
off, disassembled, and remounted together with the
number two undervoltage device. Before disassembling the
original buffer, carefully measure the distance between the
faces of the threaded members as shown in Fig. 31 , and set
this dimension carefully on the new assembly. Refer to the
breaker wiring diagram for the coi l lead connections.
7.8.1 REPLACEMENT
To replace an undervoltage device, remove the mount
ing bracket (shown in fig . 29) from the breaker frame and
remove the device from the bracket. Re-install in reverse
order, noting wire routing and securing means.
Set the gap between the trip paddle and device arma
ture to approximately 0.030 inch as a starting point, then
proceed with the operational check (7.8.2).
FIG. 30 - 2ND SHUNT TRIP INSTALLATION
23
www
. ElectricalPartManuals
. com


