Action
Step
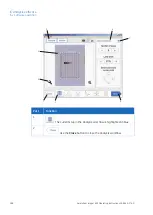
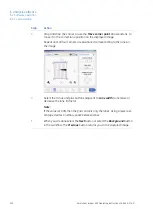
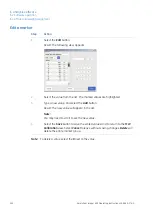
To make manual changes, select one detection channel from: Sample,
Markers, Blue, Green or Red above the image and select one or more rele-
vant options.
3
•
To create a new band, point to the position in the image.
Result: A new highlighted band appears.
•
To shift a band position, select the band and shift the band position up
or down with the Position arrow buttons.
•
To adjust a band width, select the band and adjust it with the Width plus
and minus buttons.
•
To delete a band, select the band and press Delete.
•
To delete all detected bands in the image, select Clear.
Repeat actions in step 3 for other detection channels, if relevant.
4
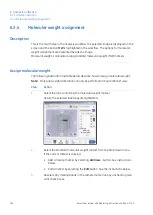
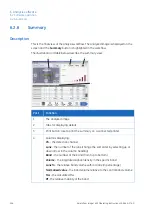
When you are done detecting bands press the Next button or select the MW
button in the workflow. The Previous button will bring you back to the previ-
ous step.
5
Amersham Imager 600 Operating Instructions 29-0645-17 AD
199
6 Analysis software
6.2 Software operation
6.2.3 Band detection

