49-7766
9
Care and Cleaning
Storage
,IWKHXQLWLVWREHVWRUHGIRUDQH[WHQGHGSHULRGRIWLPH
take the following actions before putting away the machine.
(PSW\WKHEXFNHWRIDOOZDWHU
2. Clean the water bucket and bucket filter per instructions.
3. Allow water bucket to dry and reinstall.
5HPRYHSXPSKRVHDQGVWRUHZLWKXQLW
To Release Hose: Hold the grey ring while pulling the
hose to remove.
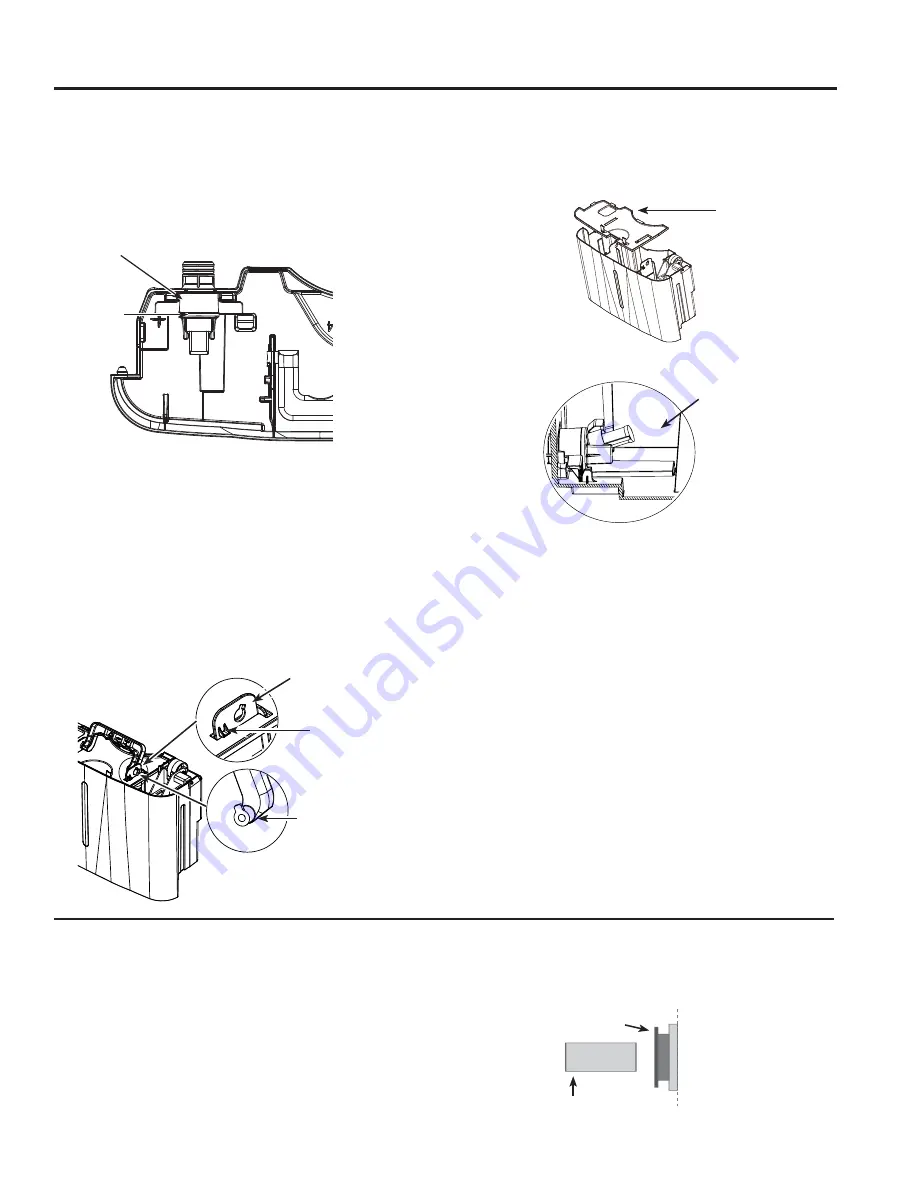
Bucket Filter
7KHEXFNHWILOWHULVORFDWHGLQVLGHWKHEXFNHWQHDUWKH
ERWWRP7KHILOWHUVKRXOGEHFKHFNHGZKHQFOHDQLQJWKH
bucket. If the filter has any debris on it, gently remove
the filter as described below and rinse with warm water.
Replace the filter in the bucket once it is clean.
IMPORTANT: Be careful not to tear or damage filter
during removal, cleaning or replacement. Do not use the
dishwasher to clean the filter.
TO REMOVE THE FILTER:
1. Lift the handle to make the ends of the handle align
with the holes in the clasps. Push the handle towards
one of the clasps keeping the handle aligned with the
clasp slots. Push the other clasp away from the handle
allowing the handle to be separated from the clasp.
Remove the handle from the other clasp.
2. Squeeze both clasp inward to disengage clasp clips from
water tank cover. Lift the cover upwards to remove.
3. Lift the end of the filter upwards to remove the filter.
TO REPLACE THE FILTER:
4. Place large end of filter above tabs, press filter down
firmly to spread tabs. Once filter is between tabs press
filter inward to engage tabs into filter.
5. Replace water tank cover and handle.
Cover
7DEV
)LOWHU
Clasp
Clip
Handle
Rotate and lift filter up
CARE AND
CLEANING
+ROGJUH\ULQJLQ
2. Pull hose out


