


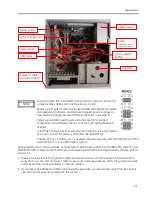

Brivo OEC 715/785/865 Mobile C-Arm X-Ray Product Service Manual
7-34
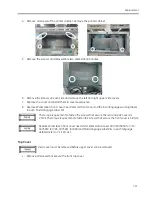
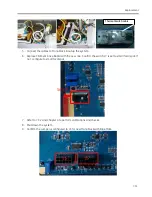
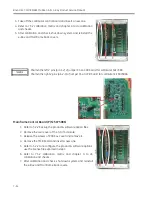
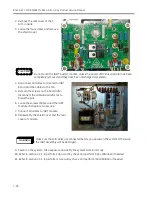
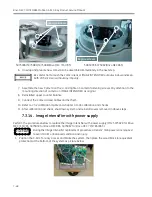
3.
Take off the collimator control board and insert a new one.
4.
Refer to 7.3.2 calibration matrix and chapter 4 to do calibration
and checks.
5.
After calibration and check, shut down system and reinstall the
e-Box and Mainframe back covers.
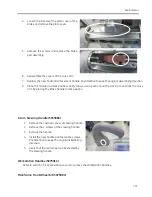
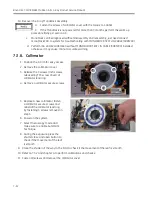
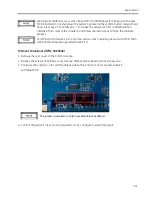
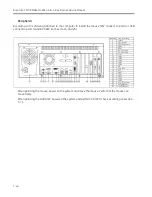
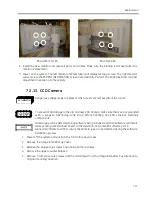
Shorten the left 2 pins (pin 1-2) of jumper S5 on CCB board for collimator 5417680.
Shorten the right 2 pins (pin 2-3) of jumper S5 on CCB board for collimator kit 5075984.
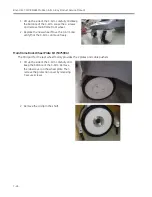
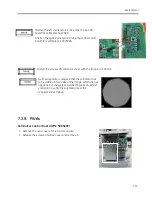
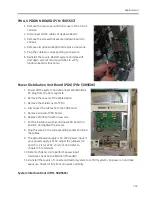
Mainframe Control Board (P/N: 5075986)
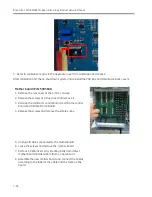
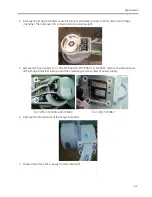
1.
Refer to 5.2.2 backup the product & software option files.
2.
Remove the rear cover of the C-Arm console.
3.
Release the screws of PCB box cover and remove it.
4.
Remove the MCB board and insert a new one.
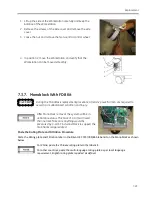
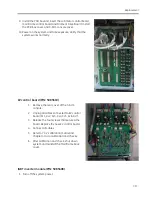
5.
Refer to 5.2.2 to reconfigure the product & software options,
use the license file exported in step1.
6.
Refer to 7.3.2 calibration matrix and chapter 4 to do
calibration and checks.
7.
After calibration and check, shut down system and reinstall
the e-Box and Mainframe back covers.
Summary of Contents for Brivo OEC 715
Page 2: ......
Page 19: ...Chapter1 Introduction and Safety...
Page 41: ...Introduction and Safety 23 46 54 20 18 26...
Page 55: ...Chapter2 System Overview...
Page 137: ...Chapter3 Installation...
Page 212: ...Chapter4 Calibration...
Page 275: ...Brivo OEC 715 785 865 Mobile C Arm X Ray Product Service Manual 4 64...
Page 284: ...Chapter5 Software...
Page 326: ...Software 5 43 2 Click on install to continue 3 Click Next to continue...
Page 335: ...Chapter6 Troubleshooting...
Page 408: ...Chapter7 Replacement...
Page 418: ...Replacement 7 11 166...
Page 488: ...Chapter8 Periodic Maintenance...
Page 502: ...Periodic Maintenance 8 15...
Page 505: ...Chapter9 Technical Reference...
Page 521: ...Technical Reference 9 17 Vertical configuration 1 5m Vertical configuration 1m...
Page 526: ...11 Appendix System Schematics...


