


Installation Instructions
13
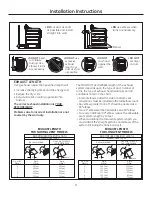
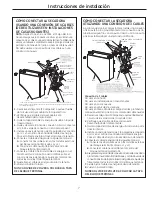
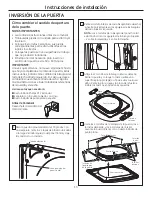
REVERSING THE DOOR
ABOUT REVERSING THE DOOR
IMPORTANT NOTES:
• Read the instructions all the way through before
starting.
• Handle parts carefully to avoid scratching paint.
• Set screws down by their related parts to avoid
using them in the wrong places.
• Provide a non-scratch work surface for the door.
• Normal completion time to reverse the door
swing is 30–60 minutes.
IMPORTANT:
Once you begin, do not move the cabinet until door
swing reversal is completed. These instructions are
for changing the hinges from the right side to the left
side - if you ever want to switch them back to the
right side, follow these same instructions and reverse
all references to the left and right.
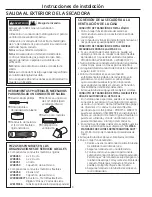
Tools needed:
Standard #2 Phillips screwdriver
Tape-tipped putty knife
Small flat blade screwdriver
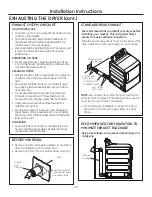
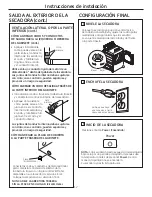
Before you start
Unplug the dryer from its
electrical outlet
1
Open the door approximately 170 degrees. With a
putty knife, remove the 4 plastic caps located along
the left side of the front panel and set them aside.
Plastic Cap (4)
Left side of
front panel
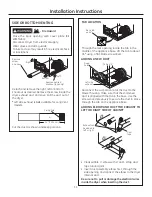
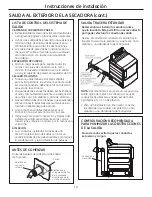
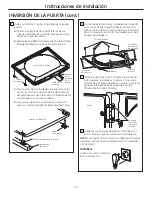
3
Loosen the bottom 2 right side hinge screws. Remove
the door and place it on a protective flat surface to
avoid any damage. Remove both the blind plate and
the strike plate and install them in opposite positions.
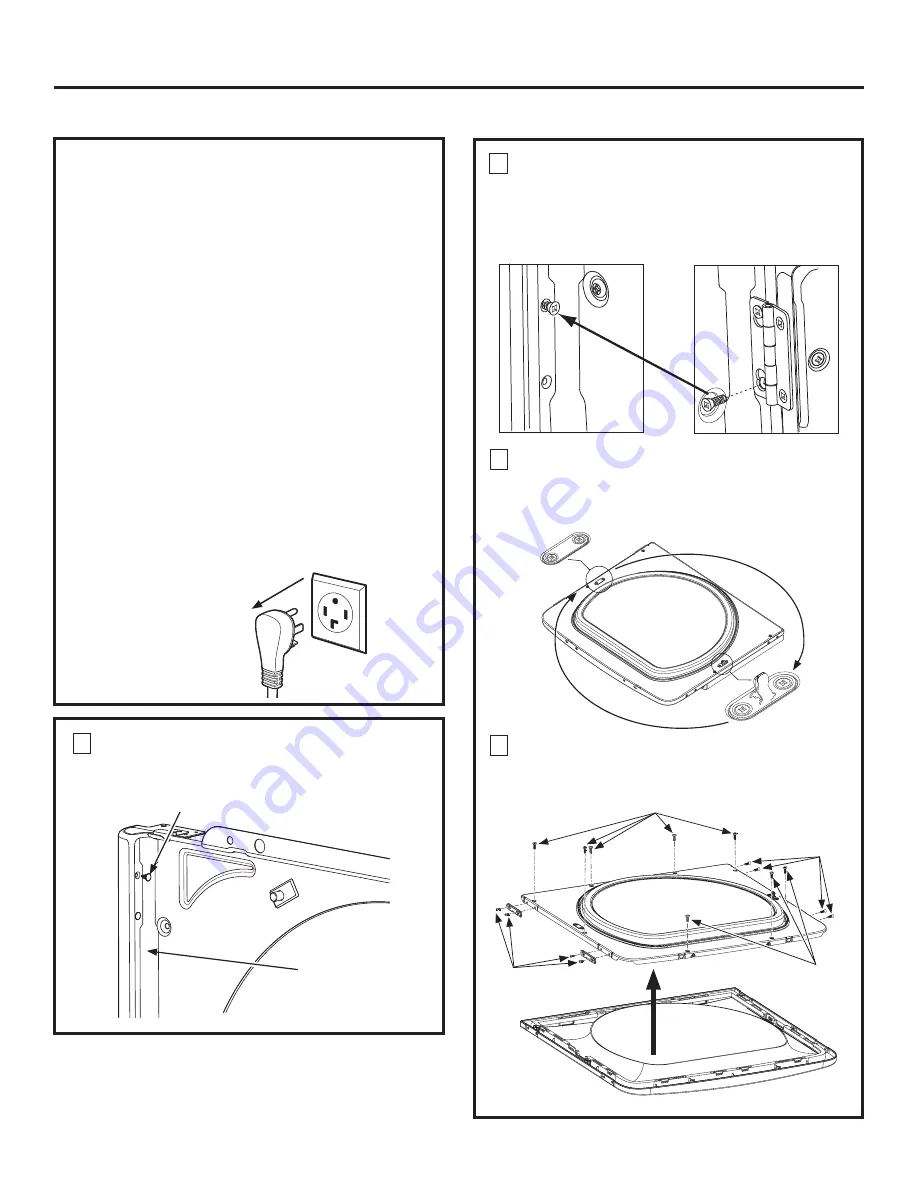
4
Remove the 4 door hinge screws, 4 edge screws, and
8 inside screws. Lift the inner door upwards using a
flat blade screwdriver.
Blind
plate
Inner door
Strike
plate
Door hinge
screws
Inner door
Outer door
Inside
screws
Inside screws
Edge
screws
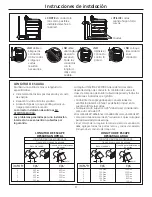
2
Remove the bottom screw from each hinge (right
side) and partially insert them into the top left side
hinge holes.
NOTE:
All 4 front panel hinge screws will now be in
the top hinge holes - 2 on the left and 2 on the right.