Displays and Controller Boards
21
Document no. M1137272-02
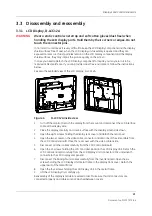
3.3 Disassembly and reassembly
3.3.1 LCD Display, D-LCC12A
WARNING
Wear a static control wrist strap and soft cotton gloves (dust free) when
handling the LCD display parts. Hold them by their corners or edges. Do not
touch the connector pins.
In normal circumstances it is very difficult to keep the LCD Display component and the display
shield surfaces free of dust, when the LCD Display unit assembly is opened and they are
exposed to room air. If dust particles remain on the LCD Display component and the display
shield surfaces, they may impair the picture quality on the screen.
In case you need to detach the LCD Display component for repair, you may return it to be
repaired at GE Healthcare. If you can provide a dust free environment, follow the instructions
below.
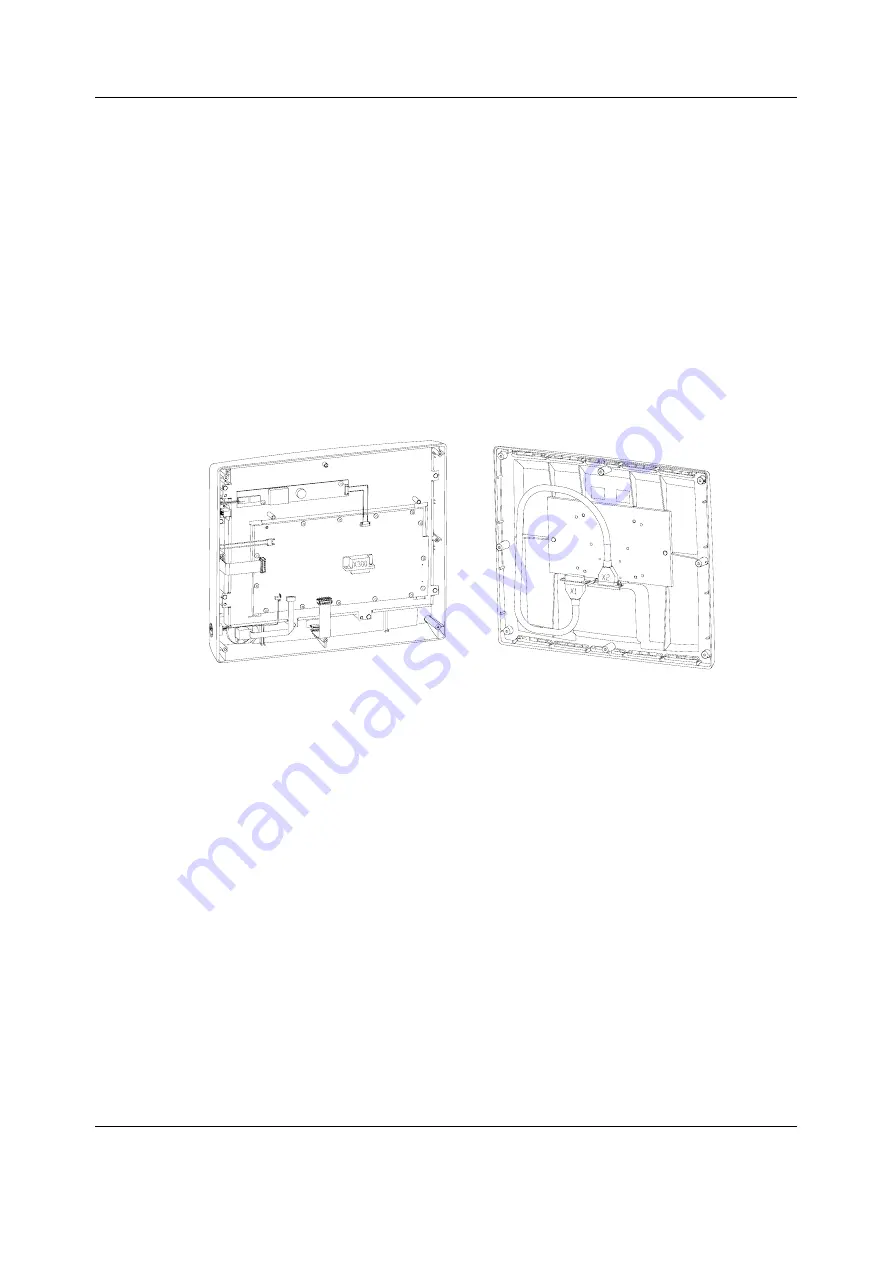
See also the Exploded view of the LCD Display, D-LCC12A.
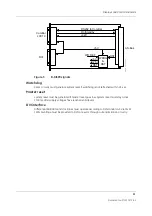
Figure 4
D-LCC12A inside view
1.
Turn off the monitor. Detach the display from the mount and disconnect the LCD interface
cable at the display side.
2.
Place the display carefully on a clean surface with the display screen side down.
3.
Open the eight screws holding the display rear cover and detach the rear cover.
4.
Open the two screws on the video cable connector and disconnect the video cable from
the LCD Controller Board. Place the rear cover with the video cable aside.
5.
Disconnect all other cables carefully from the LCD Controller Board.
6.
Open the 15 screws holding the LCD Controller Board in the LCD Display Unit. Detach the
LCD Controller Board carefully from the LCD Display Unit (connector X102 underneath
connects to the LCD Display component).
7.
Disconnect the backlight unit cables carefully from the Inverter Board. Open the six
screws holding the LCD Display Unit metal frame in the display front cover. Detach the
upper part of the metal frame.
8.
Open the four screws holding the LCD Display Unit in the metal frame.
9.
Lift the LCD Display Unit carefully up.
Reassembly of the display is made in reversed order. Make sure that all connectors are
connected properly and cables are not pinched between covers.
Summary of Contents for Datex-Ohmeda S/5
Page 4: ......
Page 6: ...Datex Ohmeda S 5 Anesthesia and Critical Care Monitors 2 Document no M1137263 04 ...
Page 12: ...Datex Ohmeda S 5 Anesthesia and Critical Care Monitors vi Document no M1137263 04 ...
Page 28: ...Datex Ohmeda S 5 Anesthesia and Critical Care Monitors 16 Document no M1137263 04 ...
Page 58: ...Datex Ohmeda S 5 Anesthesia and Critical Care Monitors 46 Document no M1137263 04 ...
Page 62: ...Datex Ohmeda S 5 Anesthesia and Critical Care Monitors 50 Document no M1137263 04 ...
Page 86: ...Datex Ohmeda S 5 Anesthesia and Critical Care Monitors 74 Document no M1137263 04 ...
Page 100: ......
Page 102: ...Datex Ohmeda S 5 Anesthesia and Critical Care Monitors ii Document no M1125633 06 ...
Page 108: ...Datex Ohmeda S 5 Anesthesia and Critical Care Monitors 6 Document no M1125633 06 ...
Page 126: ...Datex Ohmeda S 5 Anesthesia and Critical Care Monitors 24 Document no M1125633 06 ...
Page 132: ......
Page 136: ...Datex Ohmeda S 5 Anesthesia and Critical Care Monitors iv Document no M1137266 02 ...
Page 216: ...Datex Ohmeda S 5 Anesthesia and Critical Care Monitors 80 Document no M1137266 02 ...
Page 220: ......
Page 258: ......
Page 262: ...Datex Ohmeda S 5 Anesthesia and Critical Care Monitors iv Document no M1125636 05 ...
Page 302: ......
Page 326: ...Datex Ohmeda S 5 Anesthesia and Critical Care Monitors 22 Document no M1125637 04 ...
Page 330: ......
Page 332: ...Datex Ohmeda S 5 Anesthesia and Critical Care Monitors ii Document no M1137269 02 ...
Page 348: ......
Page 350: ...Datex Ohmeda S 5 Anesthesia and Critical Care Monitors ii Document no M1137272 02 ...
Page 384: ......
Page 386: ...Datex Ohmeda S 5TM Anesthesia and Critical Care Monitors ii Document no M1125639 03 ...
Page 400: ......
Page 402: ...Datex Ohmeda S 5 Anesthesia and Critical Care Monitor ii Document no M1125641 03 ...
Page 416: ...Datex Ohmeda S 5 Anesthesia and Critical Care Monitor 14 Document no M1125641 03 ...
Page 420: ......
Page 422: ...Datex Ohmeda S 5 Anesthesia and Critical Care Monitors ii Document no M1137274 01 ...
Page 428: ...Datex Ohmeda S 5 Anesthesia and Critical Care Monitors 6 Document no M1137274 01 ...
Page 431: ...Spare parts 9 Document no M1137274 01 3 2 Central Processor Unit for F CU5 F CPU 02 ...
Page 444: ...Datex Ohmeda S 5 Anesthesia and Critical Care Monitors 22 Document no M1137274 01 ...
Page 448: ...Datex Ohmeda S 5 Anesthesia and Critical Care Monitors 26 Document no M1137274 01 ...

