background image

Dryer

❑✎✎ ✎✎ ✎ ✎ 

., 

 instructions....................3-5

Operating Instructions, Tips

Automatic Drying ...........................................8

Cycle 

Drying Selections 

End Cycle 

 8

Energy-Saving Tips ........................................5

Fabric and Drying Selections . . . . . . . . . . . . . . . . . . . . 10

Knits Drying 

 14

Lint Filter 

 11

Loading . . . . . . . . . . . . . . . . . . . . . . . . . . . . . . . . . . . . . . . . . . . . . . . . . . . . . . . .   

Operating the 

Permanent Press Drying Tips 

 14, 15

Sorting Clothes ...........................................7, 9

Timed Drying 

Care and Cleaning

Dryer Exhaust . . . . . . . . . . . . . . . . . . . . . . . . . . . . . . . . . . . . . . . . . . . . . . . 11

Drum . . . . . . . . . . . . . . . . . . . . . . . . . . . . . . . . . . . . . . . . . . . . . . . . . . . . . . . . . . . . . .  11

Exterior . . . . . . . . . . . . . . . . . . . . . . . . . . . . . . . . . . . . . . . . . . . . . . . . . . . . . . . . . .   11

Lint Filter . . . . . . . . . . . . . . . . . . . . . . . . . . . . . . . . . . . . . . . . . . . . . . . . . . . . . . .   11

Storing the Dryer . . . . . . . . . . . . . . . . . . . . . . . . . . . . . . . . . . . . . . . . . 11

User Maintenance Instructions ...............11

Problem 

More questions 

GE Answer Center” 800.626.2000

Preparation

Reversing 

 12

Consumer 

Appliance Registration .................................2

Important Phone Numbers . . . . . . . . . . . . . . . . . . . . . . . 19

Model and Serial Numbers ..........................2

 Cover

Models: 


GE Appliances

Summary of Contents for DDE7200S

Page 1: ... Press Drying Tips 8 8 14 15 SortingClothes 7 9 Timed Drying 8 Care and Cleaning Dryer Exhaust 11 Drum 11 Exterior 11 LintFilter 11 Storing the Dryer 11 User Maintenance Instructions 11 Problem Solver l3 l5 More questions call GE Answer Center 800 626 2000 Preparation Reversing Door 12 Consumer Services l9 ApplianceRegistration 2 Important Phone Numbers 19 Model and Serial Numbers 2 Warranw BackCo...

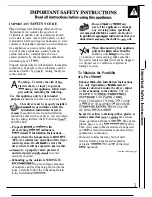
Page 2: ...imize the risk of fire or explosion or to prevent property damage personal injury or loss of life Do not store or use gasoline or other flammable vapors and liquids in the vicinity of this or any other appliance WHAT TO DO IF YOU SMELL GAS Do not try to light any appliance Do not touch any electrical switch do not use any phone in your building Clear the room building or area of dl occupanh Q Imme...

Page 3: ...t will be exposed to the weather onnect to a properly rated protected and sized power supply circuit to avoid electrical overload Exhausting to the outside is STRONGLY RECO ENDED to prevent large amounts of moisture and lint from being blown into the room Carefully follow the Exhausting Details in the Installation Insnctions Do not repair or replace any part of the appliance or attempt any servici...

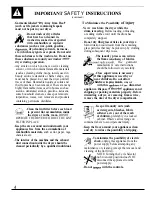
Page 4: ... the exhaust duct connection inside the dryer should be cleaned periodically by a qualified individual To Minimize the Possibility of Injury Never reach into the dryer while the drum is moving Before loading unloading or adding clothes wait until the drum has completely stopped Do not dry fiberglass articles in your dryer Skin irritation could result from the remaining glass particles that may be ...

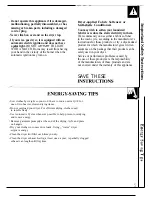
Page 5: ...y a dryer added product for which the manufacturer gives written assurance on the package that their product can be safely used in your dryer Service or performance problems caused by the use of these products are the responsibility of the manufacturers of those products and are not covered under the warranty of this appliance SAVE THESE STRUCTIONS Sort clothes by weight so you won t have to run a...

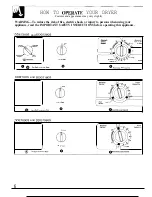
Page 6: ... and DDG7280S COnONS PERM PRESS HIGH HEAT MfDHEA1 Ul TES RUW NO HUT ART a m I Turn to Stan L Automat c COttOns J F o Utomat c Regular Pem Press Kn b COOL 0 0 OFF OFF k r E R NKLE 1 ma T med F ve Cvcle Automatic D er Q Heavv Dutv Large Capac tV DDE71OOS and DDG7180S ART m I Turn to StaH Three Cvcle Automatic O er e vvD tvL geC p tV 3DE7000S and DDG7080S START I 1 Med um Hear rum fo Ian FFrL70M N Tw...

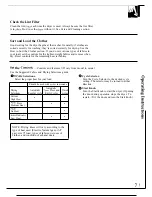
Page 7: ... will vary from model to model See the Suggested Fabric and Drying Selections guide Dryi g Selections Cycle Selector Select the proper heat for your load Turn the Cycle Selector to the desired cycle setting The selector may be turned in either Should be used with cycles indicated direction Automatic Start Knob Drying Automatic Perm Press and Timed Selections Regular cycle Knits Cycles cycles Turn ...

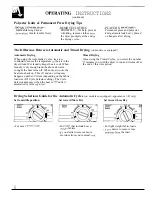
Page 8: ... in the of minutes you wish the dryer to run and it turns off at dryer drum Wet laundry keeps the air cool When the end of this time period laundry is dry enough and the drum air warm enough the heat turns off When the air cools the heat turns back on This off and on cycling may happen a number of times depending on the fabric load size and Cycle Selector setting The Cycle Selector advances when t...

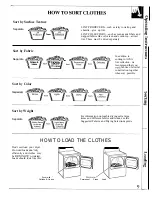
Page 9: ...Poly Knits m nm In addition to sorting to reduce Dellcates a lint collection we m recommend that you wash fabrics of similar construction together whenever possible Sort by Color Sepaatenfro flro fro m Sort by Weight Separate For information on tumble drying extra large items and different fabrics and loads see the Suggested Fabrics and Drying Selections guide HOW TO LOAD THE CLOTHES Don t overloa...

Page 10: ... and shake pillow to redistribute filling for more even drying Check pillow at end of drying time if not completely dry return pillow to dryer and reset for more drying time Feather pillows dry very slowly and must be dried completely to prevent mildew DO NOT tumble dry pillows containing kapok Put 2 or 4 dry towels into the dryer tumble dry for 5 minutes Set timer for 20 25 minutes DO NOT set con...

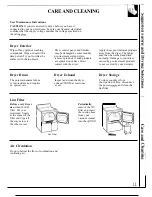
Page 11: ...s normally Damage to your dryer are sprayed on or have direct caused by pre treatment products contact with the dryer is not covered by your warranty Dryer Drum Dryer Exhaust Dryer Storage The porcelain enamel drum Inspect and clean the dryer To store your dryer for a is rust resistant and requires exhaust ducting at least once short period of time disconnect no special care a year the power suppl...

Page 12: ...e resting on the top screws II inserted in step 3 1 3 Insert these screws J i about half way into 2 the top holes for L I each hinge on the o osite side Where yb removed the filler plugs 4 Loosen the top screw from each hinge on the dryer face TT 10 II 5 With one hand holding the top of the door and the other hand holding the bottom remove the door from the dryer by lifting it up and out l 7 Remov...

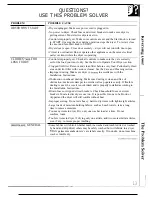
Page 13: ...ection c Improper ducting Make sure dryer is ducted in accordance with the Installation Instructions Obstruction in exhaust ducting Make sure ducting is clean and free of obstruction make sure damper in outside wall cap operates easily If flexible ducting is used be sure it is not kinked and is properly installed according to the Installation Instructions Blown fuses or tripped circuit breakers Ch...

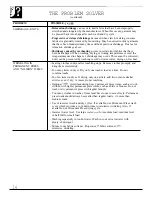
Page 14: ...r after tumbling stops Remove clothes promptly and hang them immediately Too many items in dryer Dry only one washer load at a time Do not combine loads Too few items in dryer If drying only one article add two or more similar articles even if dry to insure proper tumbling Improper loads Avoid laundering heavy permanent press items such as work clothes with lighter permanent press items such as sh...

Page 15: ...inkles may remain which cannot be removed NOTE If you fOllOW good laundry procedures and permanent press clothes still come out wrinkled the finish may not be good quality Also in permanent press synthetic cotton blends the cotton portion of the fabric can eventually wear away leaving only the synthetic Since its the cotton portion which is treated for permanent press a loss or decrease of permane...

Page 16: ...NOTES 16 ...

Page 17: ......

Page 18: ...NOTES 18 ...

Page 19: ...als qualified to service their own appliances User maintenance instructions contained in this booklet lrl ll lvt Ilt ccie l f irls or Ic t ss rit s st rl Iirect f 1 cover procedures intended to be performed by any user I tlcir tl tllt 1 tlt Ii f rls s s t lll f r vi lt s I t ss f tt 1 Other servicing generdy shodd be referred to qualified 47 p il s inci it I F i l llint I t tlt w if t llls Lrt ser...

Page 20: ... Use and Care material If you then have any questions about operating the product please contact your dealer or our Consumer Affairs office at the address below or call toll free GE Answer Cente 800 626 2000 consumer information service Improper installation I Failure of the product if it is used for other than its intended I purpose or used commercially Damage to product caused by accident fire f...

Reviews: