Installation
2-5
September 2005
General Wiring
Instructions
To wire the DewPro MMY31:
1.
Unscrew the cap on the terminal side of the unit (has a DewPro
label).
2.
Loosen the cable gland located on the side of the unit.
3.
Feed the cable through the conduit opening.
Note:
Use a standard signal cable size.
4.
Retighten the metal cable gland to meet IP 67 and to relieve any
stress on the wire.
5.
Verify that a value between 12 and 28 VDC is across the terminals
and –.
Note:
This is the voltage that appears across the DewPro terminals,
not necessarily the power supply voltage due to voltage loss in
wire length, displays, indicators, etc.
6.
In order to meet EMI/RFI immunity, a two-wire shielded cable
with a common foil shield layer is being used to power the
MMY31. Removing the insulation by 3 inches allows users to pull
back the foil, clamping it between the metal cable gland. The
ground wire must be connected to the internal grounding screw.
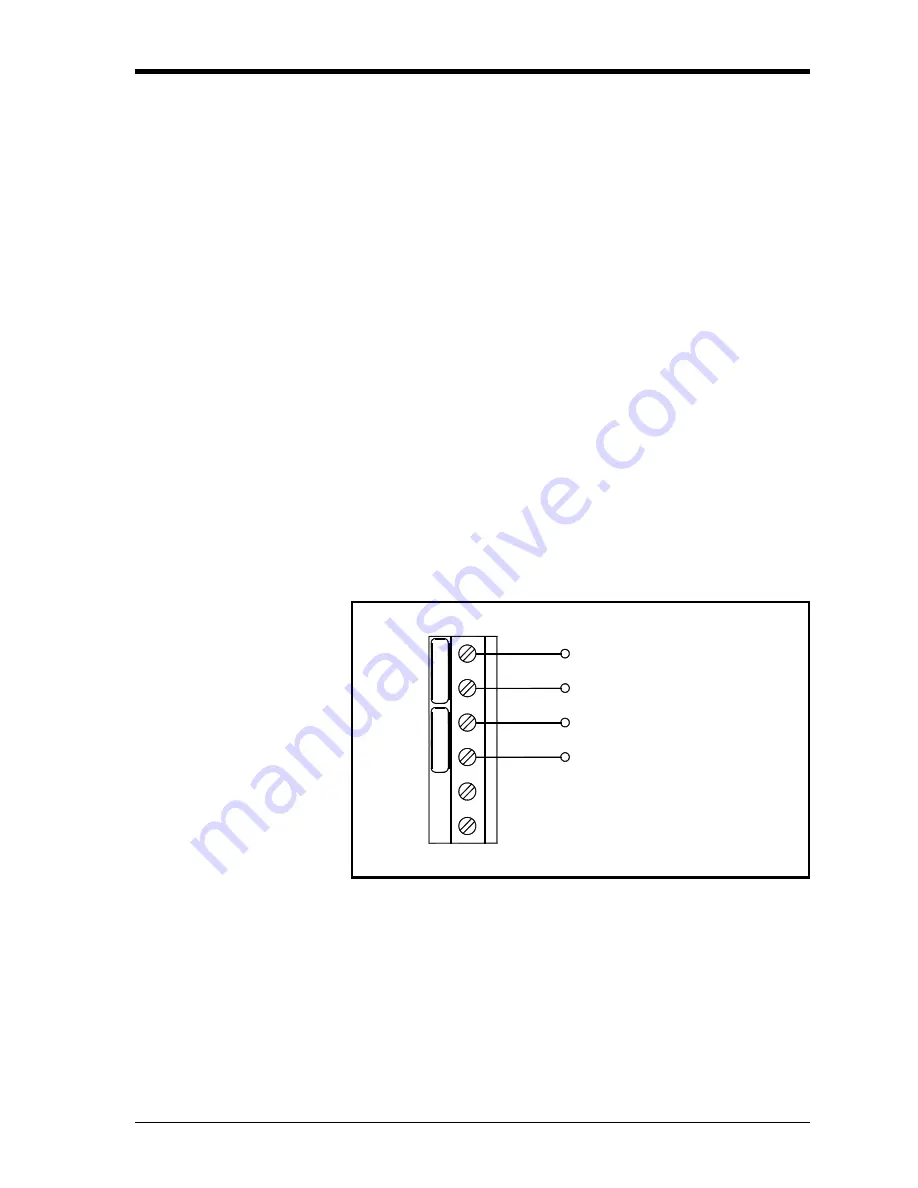
Figure 2-5: Electrical Connections
GND
LOOP 1–+
+
–
24 VDC Nominal (12-28V)
External GND/SHIELD Connection
Internal GND Connection
Summary of Contents for DewPro MMY31
Page 5: ...Chapter 1 ...
Page 6: ...General System Information Unpacking and Inspection 1 1 Theory of Operation 1 3 ...
Page 10: ...Chapter 2 ...
Page 11: ...Installation Mounting the MMY31 cont 2 2 Wiring Configurations 2 3 ...
Page 17: ...Chapter 3 ...
Page 18: ...Troubleshooting The Loop Current is Out of Range 3 1 There Is No Current 3 1 ...
Page 20: ...Chapter 4 ...
Page 29: ...Chapter 5 ...


