background image


64

6  TECHNICAL INFORMATION 

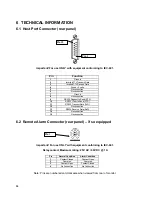
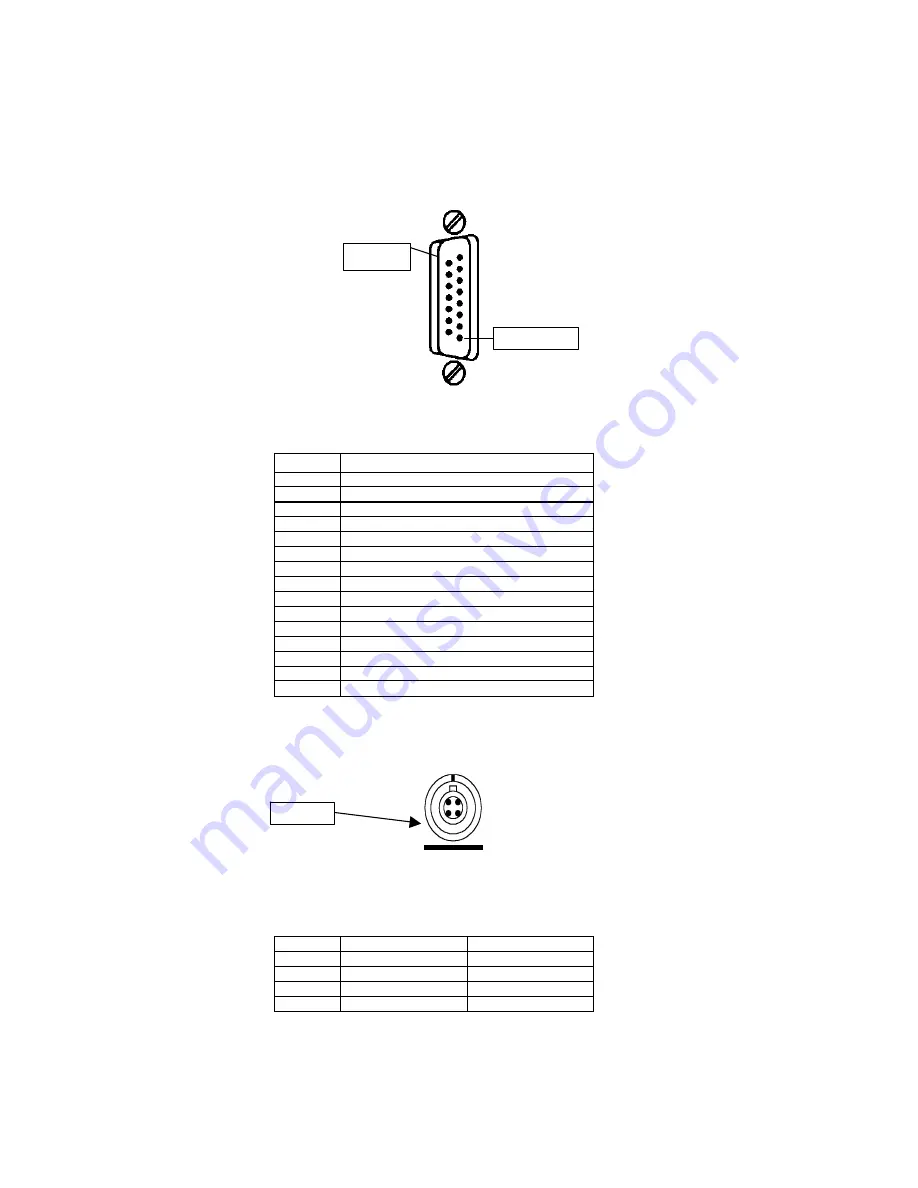
6.1  Host Port Connector (rear panel) 


Important! For use ONLY with equipment conforming to IEC-601. 


Pin 

Function 

Ground 

Inverted TTL Transmit Data 

Inverted TTL Receive Data 

Fused +5 volts 

No connection 

No connection 

Ground 

No connection 

RS232 Request to Send (RTS) 

10 

RS232 Clear to Send (CTS) 

11 

RS232 Transmit Data (TxD) 

12 

No connection 

13 

RS232 Receive Data (RxD) 

14 

No connection 

15 

No connection 


6.2  Remote Alarm Connector (rear panel) – if so equipped 


Important! For use ONLY with equipment conforming to IEC-601. 


Relay contact Maximum rating: 25V AC / 60V DC @ 1 A 


Pin 

Normal Condition


Alarm Condition 

Contact Closed 

Contact Open 

Common 

Common 

Contact Open 

Contact Closed 

No Connection 

No Connection 


Note: Pins are numbered anti-clockwise when viewed from rear of monitor. 


 Pin 1


Pin 1


Pin 15


Summary of Contents for DINAMAP Compact TS

Page 1: ...1 DINAMAP Compact Vital Signs Monitor Portable Adult Pediatric and Neonatal Monitoring Service Manual Part No 776 856 ...

Page 2: ... of operation maintenance or repair of Dinamap Compact Monitors Dissemination for other purposes or copying thereof without the prior written consent of GE Medical Systems Tampa Florida is prohibited Illustrations may show design models production units may incorporate changes GE Medical Systems Information Technologies 2001 TAMPA FL 33614 Printed in the U S A All rights reserved Reissues and Upda...

Page 3: ...3 DINAMAP Compact Vital Signs Monitor Model TS ...

Page 4: ...Environmental Specifications 11 2 PRODUCT DESCRIPTION 15 2 1 Introduction 15 2 2 Physical Description 15 2 3 Overall Principles of Operation 19 2 4 Functional Description 19 2 4 1 System Processor 19 2 4 2 Temperature System TS T models only 20 2 4 3 NIBP System 21 2 4 4 Pneumatics System 21 2 4 5 SpO2 System TS S models only 23 2 4 6 Power Supply 23 2 4 7 Audio Amplifier 24 2 4 8 Alarm and Commun...

Page 5: ...upply board from the chassis 47 3 4 5 Removal of the Pump and Pressure Transducer 48 3 4 6 Removal of the Printer 49 3 4 7 Reassembling the Monitor 50 4 MANUAL RELEASE TEST PROCEDURE 51 4 1 General 51 4 1 1 Test Equipment 51 4 1 2 Test Conditions 51 4 1 3 Service mode 51 4 2 Test Procedure 52 4 2 1 Power Up Tests 52 4 2 2 External DC Supply and Battery Indication Operation 52 4 2 3 Temperature Req...

Page 6: ...6 7 GLOSSARY OF TERMS AND ABBREVIATIONS 77 8 SERVICE DIAGRAMS 78 ...

Page 7: ...epairs on products under warranty must be performed by or approved by Technical Service personnel Unauthorized repairs will void the warranty Qualified electronic service personnel should repair products not covered by warranty Extended warranties may be purchased for most products Contact your sales representative for details and pricing If the product fails to operate correctly or if assistance ...

Page 8: ... 4 to 6 inches of padding around all sides of the monitor Use packing tape to securely close the carton Insurance is at the customer s discretion Any claims for damage must be initiated by the sender 1 2 2 Service Loan Units A loan unit is provided on request at no charge during the service life of the product while Critikon is performing the repair The loaner equipment will be shipped to your sit...

Page 9: ...oduct code available for the item you wish to order A table of accessories and replacement part numbers appears in section 6 3 1 3 Service Centers For service repairs or parts information contact either the following Critikon office or your local Critikon Sales Representative GE Medical Systems Information Technologies 4502 Woodland Blvd Tampa FL 33614 877 274 8456 North America ...

Page 10: ...ings and precautions detailed in the DINAMAP Compact Vital Signs Monitor Operation Manual This manual is intended for use by authorized personnel who are familiar with digital and analog electronic principles and who are also familiar with the operation of the DINAMAP Compact Vital Signs Monitor Disconnect all the power sources before removing covers 1 6 Symbol Definitions 1 6 1 Safety Symbols ATT...

Page 11: ...tolic mmHg Adult Pediatric 30 245 15 215 10 195 Neonate 40 140 30 115 20 100 BLOOD PRESSURE ACCURACY Meets AAMI ANSI SP 10 Electronic or Automated Sphygmomanometer Standard for Accuracy AAMI ANSI standard 5 mmHg mean error 8 mmHg standard deviation intra arterial method BLOOD PRESSURE 20 seconds to 45 seconds typical DETERMINATION TIME Adult 120 seconds maximum Neonate 85 seconds maximum PULSE RAT...

Page 12: ...sor 2 5 digits OXISENSOR II N 25 neonatal adult sensor 2 0 digits OXISENSOR II I 20 infant sensor 2 0 digits OXISENSOR II D 25L adult sensor long cable 2 0 digits Neonatal Accuracy When sensors are used on neonatal subjects as recommended the specified accuracy range is increased by 1 digit to account for the theoretical effect on oximeter measurements of fetal hemoglobin in neonatal blood e g N 2...

Page 13: ... VAC 47 63 Hz range MONITOR Protection against electrical shock Class 1 INPUT VOLTAGE 24 VDC nominal 12 30 VDC from supplied power converter EXTERNAL DC LINE FUSE T3 15A 250 VAC BATTERY 12 volt 2 3 amp hours Minimum operation time 2 hours 5 minute auto cycle with adult cuff at 25 C with power save mode enabled from full charge Time for full recharge 8 hours from full discharge Environmental OPERAT...

Page 14: ...not guaranteed to meet the Essential requirements of the Medical Device Directive The DINAMAP Compact monitor is protected against vertically falling drops of water and conforms to the IEC 529 standard at level of IPX1 No harmful effects will come of vertically falling drops of water making contact with the monitor 0086 IPX1 ...

Page 15: ...al Description Each monitor is supplied with an accessory pack The contents of the pack vary according to model and are listed below Model DINAMAP Compact BP Monitor Qty Description 1 DINAMAP Compact Monitor with integral printer 1 AC DC Power Converter 2 Mains power leads 1 Rechargeable Battery 1 Cuff Standard Adult 1 Pneumatic Hose 12 ft Standard Adult 2 Printer paper rolls 1 Operating Instructi...

Page 16: ...ket for the supplied external power converter ONLY 4 FUSE HOLDER External power source line fuse holder 5 DATA INTERFACE CONNECTOR Host communications port 15 way D type RS232 serial port for use with equipment conforming to IEC 601 only 6 REMOTE ALARM CONNECTOR Remote Alarm port with both normally open and normally closed isolated contacts for use with equipment conforming to IEC 601 only if so e...

Page 17: ...This panel displays all alarms user interface messages configuration options 22 C F DISPLAY These indicate that Temperature is being displayed in degrees Celsius or Fahrenheit 12 Press this key to begin or halt an NIBP determination The key also cancels STAT mode 23 TEMP PROBE CONNECTOR Plug the predictive temperature probe cable into this socket 13 Press this key to begin or halt operation of the...

Page 18: ...18 17 This red LED display indicates the measured mean arterial B P in mmHg It also shows instantaneous cuff pressure during an NIBP determination TS S models only ...

Page 19: ...ally to provide the DC operating power The external raw DC source is employed to charge the internal batteries The real time clock and user monitor settings are maintained by an internal rechargeable NiCd backup battery The monitor includes a pneumatics system required for NIBP operation NIBP determinations are made by pumping up the air pressure in a restrictive cuff and monitoring the oscillator...

Page 20: ...oduce a buffered data bus DB0 DB7 for the display drivers There is also a PIC micro controller IC5 on the power supply board 8620AB which has its own independent watchdog reset circuit and provides the real time clock function The PIC provides control of PSU status battery charging printer and alarm annunciator audio output Communications between the system processor and the PIC are continually mo...

Page 21: ...ystem processor Pressure transducer offset PT1_REF from the output of IC2 also enters the analog multiplexer IC20 When selected it provides an off set value to the system processor The processor then measures the offset value and subtracts the offset from PT1 measurements The control signals for the multiplexer ASEL0 ASEL2 are generated by the system processor The pulse rate component typically on...

Page 22: ...SENSE signal Once the system processor has determined which cuff type is being used it instructs latch IC3 to output an ADULT signal to TR1 In the pump pressure transducer circuit on the Main Board IC8 generates a high precision 5 volt reference which is made available to dual op amps IC10 and IC21 This reference is monitored by the system processor as PT2_REF The buffered reference from IC21 is a...

Page 23: ...hing on 06 unit or by switching TR12 off on revision 04 units and earlier 2 4 6 Power Supply The power supplies are generated and controlled on the power supply board The power supply is designed to operate from both an external DC line source and from a 12 volt rechargeable lead acid battery The supplied mains power converter provides 24 volt DC output When both supplies are present the power sup...

Page 24: ... supply VDISP which is controlled by the PIC signal ENABLE_VDISP The 12 volt line and other supplies are controlled by the 12V_ON signal from the system processor on the Main Board When this pin is at a high logic level TR9 is turned on as is p channel FET TR10 This causes the VRAW supply to enter IC8 a boost switching regulator R41 R42 set the output voltage of the flyback converter to 14 5 volts...

Page 25: ...ich are controlled by the system processor via the SPI bus The LED parameter displays are divided into functional groups on the display board IC1 drives the systolic and diastolic displays IC2 the Temperature and MAP displays IC3 the Heart Rate and SpO2 displays as well as the battery C F and Heart Rate discrete indicators A current limiting resistor attached to iSET input of each driver IC sets t...

Page 26: ...ife of the print head a thermistor constantly measures the temperature of the head As the system heats up the print head thermistor is used by the timer circuit to reduce the width of the PRINTER_OE pulse The print head voltage VP is also employed to alter the width of the PRINTER_OE pulse A typical print trigger pulse width is 6 ms An opto transistor detects the presence of printer paper and a mi...

Page 27: ...Fuse first remove the line power cord from the rear of the Monitor if connected Insert a flat bladed screwdriver or small coin into the slot in the fuse holder cap and carefully rotate anti clockwise several revolutions The fuse holder cap and fuse will be released Pull the fuse from the cap and inspect it for a burned or broken filament If the filament appears to be intact check the fuse for cont...

Page 28: ...n the battery will no longer hold a charge remove and replace with one of the same part number To charge the battery connect the supplied power converter to the monitor s rear panel then plug the converter s mains lead into an appropriate AC receptacle The battery will charge regardless of the position of any other monitor switches A battery that is completely discharged can be fully recharged by ...

Page 29: ...bration NIBP re calibration Pop Off overpressure detection calibration Changing temperature algorithm Set temperature calibration date Configuration for use with Central Station Changing language of operation Monitor Set up specifying whether SpO2 printer and temperature are fitted 3 The Super Service Mode is used to allow the calibration of the Predictive Temperature circuitry and Neonatal Overpr...

Page 30: ...30 then sequentially enter the access code for the required Service mode The code choices are 1 2 3 4 for access to the Clinician Menu 2 2 1 3 for access to the Main Service Menu ...

Page 31: ...s Fahrenheit When Celsius is selected the C indicator lights When Fahrenheit is selected the F indicator lights Click on OK to clear and save the selection Note that changing temperature units will clear the trend readings The user is requested to confirm or cancel this 3 2 1 3 Info Selection of this button causes the most recent calibration dates of the NIBP and Temperature not displayed systems ...

Page 32: ...Service mode 2 2 1 3 3 2 2 1 NIBP Selection of this button causes the NIBP service menu to appear This menu is used for calibrating and checking the calibration of both the NIBP transducers and the over pressure Pop Off circuitry Check Selection of this button allows the NIBP calibration of the monitor to be checked In this mode the monitor functions as a digital pressure gauge the systolic and di...

Page 33: ...rend information Cal Selection of this button causes the current date to be saved for the Info display This should only be done when the temperature calibration has been set as described in section 3 3 6 3 Mins Selection of this button sets the temperature mode to 3 minute predictive i e the results obtained are those which would be obtained by a mercury in glass thermometer after 3 minutes 12 Min...

Page 34: ...again Selection of OK saves the setting to the chosen language If no language was selected when OK was pressed the language will be stored as undefined The monitor will then prompt the user to select a language on every power up until a successful selection has occurred Comms Selection of this button causes the Communications menu to appear Selection of the Remote Operation check box toggles remot...

Page 35: ...option unselected Selection of OK saves changes and returns to the Service menu OK Selection of this button returns the display to the Service Menu 3 2 2 5 Silence Selection of this button will cause all patient alarms to be muted until either the monitor is powered off and on again or the Alarm Silence button is pressed A confirmation menu will appear on the display Selection of either Yes or No ...

Page 36: ...0 mBar IV If the DINAMAP Compact displays the language choice menu choose English then OK Reboot the DINAMAP Compact by turning monitor off and then back on V Select the Mode button from the main menu The Mode menu will be displayed VI Select the Service button from the mode menu VII Enter the Service Mode PIN code 2 2 1 3 The Service menu will be displayed VIII Select NIBP from the service menu T...

Page 37: ...onds to settle III Verify that the calibration pressure measurement system reads 0 mmHg 0 mBar IV If the DINAMAP Compact displays the language choice menu choose English then OK Reboot the DINAMAP Compact by turning monitor off and then back on V Select the Mode button from the main menu The Mode menu will be displayed VI Select the Service button from the mode menu VII Enter the Service Mode PIN ...

Page 38: ...ompact Overpressure detection system prevents further cuff inflation and generates an alarm Neonate Mode I Switch on the DINAMAP Compact and wait for the main menu to be displayed on the LCD II Select the Mode button from the main menu The Mode menu will be displayed III Select the Service button from the mode menu The service entry panel will be displayed IV Enter the Super Service Mode PIN code ...

Page 39: ...Compact displays the language menu choose English then OK b Reboot the DINAMAP Compact by turning monitor off then back on V Select the Mode button from the main menu The Mode menu will be displayed VI Select the Service button from the mode menu VII Enter the Service Mode PIN code 2 2 1 3 The Service menu will be displayed VIII Select NIBP from the service menu The NIBP Service menu will be displ...

Page 40: ...te The calibration plug contains an internal resistor that must be verified every time the monitor is calibrated Using a calibrated voltmeter the resistance between pins 1 and 2 of the calibration plug should be 6090 7 If the plug is not within this range replace it 3 3 6 Predictive Temperature Calibration This section describes how to enter the temperature calibration code and how to calibrate th...

Page 41: ...V3 until the number of edges reported for the 98 point is 948 1 edges IX Select 54 on the menu corresponding to the 54 F internal calibration point Confirm number of edges reported is 57 6 edges X Turn unit off then on XI Ensure that the Temperature Calibration Plug Part No 320 635 is connected to the temperature probe socket on the UUT XII If UUT is set to read temperature in C enter service mode...

Page 42: ...ppearance may differ slightly on earlier units 3 4 1 Removal of the Front Panel The front panel contains the Display board Liquid Crystal Display module and switchboard The Rotor Temperature probe socket and SpO2 socket model TS are also mounted on the inside of the panel The front panel must be removed if access to any of the boards or modules mounted on it or behind it is required To remove the ...

Page 43: ...pO2 sensor cable if fitted The switchboard ribbon cable plugs into socket PL10 on the Main Board via a ferrite which clamps the cable to the front of the chassis metalwork Detach the ferrite from the chassis front plate by separating the Dual Lock fastener With the ferrite detached the ribbon cable can be unplugged from socket PL10 ...

Page 44: ... and PCB assembly can then be lifted away Finally remove the two rubber hoses disconnect the pump hose at the pump and pressure sensor hose from the front panel noting their routing The front panel can now be lifted away 3 4 2 Removal of the Switch board Display board and Liquid Crystal Display module The switch board display board and LCD module are held in place with Pozidriv screws which in som...

Page 45: ...board 8630AB Rotor control LCD panel SpO2 connector Model TS Blanking plate Model T Hose connector Switch board ribbon cable Temperature probe connector cable LCD backlight cable Display board ribbon cable RFI earthing finger ...

Page 46: ...ide of the Main Board including all the test points and the Flash memory The remainder of the chassis can now be released from the rear enclosure by removing a single large Pozidriv screw located between the printer molding and the pump assembly Once the screw has been removed tilt the chassis forwards and remove the three plugs at the top of the power supply board From left to right these plugs c...

Page 47: ...e rear of the chassis The chassis spade terminal must also be removed This is located between the top of the chassis and the Power Supply board Unit revision 06 only Disconnect pneumatic hose from pump assembly to Main Board secondary pressure transducer on revision 06 units Disconnect pressure sensor cable on earlier revisions The boards can now be slid together up and out of the pcb guides built...

Page 48: ... of the Pump and Pressure Transducer To remove the Pump assembly take out the two Pozidriv screws holding the metal pump retaining strap The pump assembly may now be simply removed from the chassis by tilting it forward and pulling To remove the pressure transducer from the pump revision 04 and earlier units peel back the self adhesive foam covering the transducer Then use a flat bladed screwdrive...

Page 49: ...remove the printer assembly withdraw the three small Pozidriv screws Support the printer with one hand as the screws are removed When removed from the enclosure the printer s ribbon cable may be disconnected from the PCB by lifting the outer part of the plastic connector To refit the ribbon first lift the outer part of the connector insert the ribbon and then push the outer part of the connector d...

Page 50: ...ntrol from the pump to the power supply board When refitting the front panel ensure that the copper earthing fingers of the front panel engage correctly inside the rear enclosure Ensure that the hoses to the front panel are not trapped or kinked while refitting the panel Keep your work area clean It is quite easy for the plastic display panel cover to become scratched if the front panel is pressed...

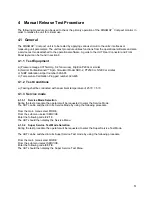
Page 51: ...calibration kit part number 320 685 d Temperature Calibration Plug part number 320 635 4 1 2 Test Conditions a Testing shall be conducted with an ambient temperature of 25 C 5 C 4 1 3 Service mode 4 1 3 1 Service Mode Selection During the test procedure the operator will be requested to enter the Service Mode The UUT can be switched into its Service Mode by using the following procedure From the m...

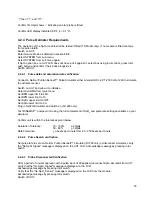
Page 52: ...ry LED is extinguished Remove Battery and confirm that External DC LED on UUT Flashes Fit Battery and switch off External DC supply Confirm the External DC LED has extinguished and the Battery LED is lit Switch on External DC supply 4 2 3 Temperature Requirements Proceed to the next section if temperature circuitry has already been calibrated and checked according to section 3 4 2 and 3 4 6 If TEM...

Page 53: ...0 Set BPM lower limit to 10 Set SpO2 upper limit to OFF Set SpO2 lower limit to 50 Plug in Nellcor Simulator and switch on N 1290 only Test DINAMAP Compact unit using the full complement of SpO2 and pulse rate settings available on your simulator Confirm unit is within the tolerances given below Saturation Tolerance 70 100 2 digits 50 69 3 digits Rate Tolerance 3 beats per minute from 20 250 beats...

Page 54: ... 3 116 155 116 3 174 232 174 3 232 309 232 3 290 387 290 3 If the Calibration Check is satisfactory continue from section 5 2 6 otherwise refer to section 3 4 2 of this Manual if calibration is required 4 2 5 2 Pressure System Leakage Test Apply a pressure of 200mmHg 267mBar to the DINAMAP COMPACT unit using the NIBP calibration kit Confirm that after 36 seconds the pressure has not dropped by mor...

Page 55: ...ck mark beside it Switch off UUT and insure a paper roll is fitted in the printer and the printer door is shut 4 2 6 1 Print Quality Confirm printer status on LCD indicates Man Select PRINT option from main menu followed by NOW Check printer output and confirm that all characters are readable and have an even contrast 4 2 6 2 Printer Error Open the printer door From the main menu select PRINT and ...

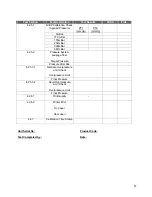
Page 56: ...LCD Display All Pixels Lit UUT Software Revision 4 2 2 1 UUT Supply Indicator Test External DC LED Operation Battery LED Operation 4 2 3 1 Predictive Temperature Accuracy Check Oral 98 6 C 4 2 4 1 Pulse data and saturation data verification SAT PULSE 4 2 4 2 Pulse Search verification 4 2 4 3 Probe Disconnected Verification ...

Page 57: ...r 4 2 5 2 Pressure System Leakage Test Target Pressure Pressure after 36s 4 2 5 3 1 Neonate Overpressure Limit Check Overpressure Limit Final Pressure 4 2 5 3 2 Adult Overpressure Limit Check Overpressure Limit Final Pressure 4 2 6 1 Print Quality 4 2 6 2 Printer Error No paper Door open 4 2 7 Calibration Time Stamp Unit Serial No Product Code Test Completed by Date ...

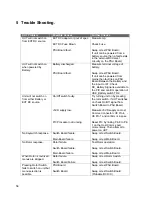
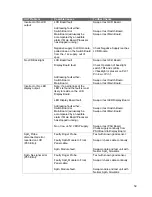
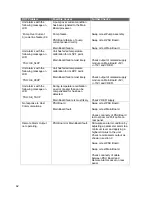
Page 58: ...EXT DC source On Off switch faulty 5VD supply low PIC Processor not running Try turning unit on by pressing the rotor switch If UUT switches on check On Off signal from Switch Board to PSU Board Measure 5VD supply on Host Comms Connector VE Pin 4 VE Pin 1 and confirm is in spec Reset PIC by linking Pin 8 to Pin 1 on the Host Comms port momentarily Then attempt to power on UUT No Keyswitch response...

Page 59: ...lay output Note If a partial loss of the LED s is found the fault is most likely to reside on the LCD Display Board LED Display Board fault Addressing fault either Switch Board or Main Board will usually be accompanied by an audible alarm if Main Board Processor has stopped running No or low 4 5V VDISP supply Swap or test LED Display Board Swap or test Switch Board Swap or test Main Board Swap or ...

Page 60: ...neumatic Assembly for blocked output Swap or test Pneumatic Assembly When the pump starts an NIBP Overpressure warning displayed on LCD when a cuff is attached Kinked hose to cuff or faulty cuff Blocked or kinked hose from Front panel to Main Board pressure sensor ML1 Main Board fault Test unit with known good cuff Examine hose for kinks or blockage Swap or test Main Board ML1 IC5 or IC7 may be de...

Page 61: ...r test PSU Board Fault could also be caused by Main Board Failure with IC3 being the most likely cause Fault could also be due to defective pump current measurement circuitry on PSU Board When an NIBP measurement is attempted unit alarms with the following message on LCD N33 NIBP Timeout Inflation Leak in pneumatic system Test unit with known good cuff If unit is leaking check integrity of interna...

Page 62: ...ibration for its 98 F point Main Board failure most likely Check output of isolated supply module on Main Board 5VI 15VI and VREFI Unit alarms with the following message on LCD TSH SE_TACF During temperature calibration an error greater than can be compensated for has been detected Main Board failure is most likely Check VREFI supply No response to Host Communications PSU Board Main Board fault Sw...

Page 63: ...d Fault could also be caused by input voltage to IC18 or IC19 on PSU board going to low and therefore causing the regulators to dropout This could be caused by excessive current drawn on the 12VV supply or interruptions to the input supply caused by erroneous operation of supply switch TR10 Unit alarms with the following message on LCD PIC Incompatible SW Version 0 code line failure 0 0 The softwa...

Page 64: ...lear to Send CTS 11 RS232 Transmit Data TxD 12 No connection 13 RS232 Receive Data RxD 14 No connection 15 No connection 6 2 Remote Alarm Connector rear panel if so equipped Important For use ONLY with equipment conforming to IEC 601 Relay contact Maximum rating 25V AC 60V DC 1 A Pin Normal Condition Alarm Condition 1 Contact Closed Contact Open 2 Common Common 3 Contact Open Contact Closed 4 No C...

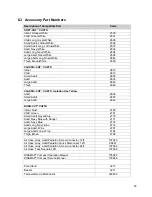
Page 65: ...CLASSIC CUF CUFFS Isolation Use Yellow Adult 2602 Small Adult 2607 Large Adult 2642 DURA CUF CUFFS Infant Rust 2783 Child Green 2781 Small Adult Royal Blue 2779 Adult Navy Blue with Hanger 2771 Adult Navy Blue 2774 Adult Long Navy Blue 2772 Large Adult Wine 2791 Large Adult Long Wine 2784 Thigh Brown 2796 Air Hose Gray Adult Pediatric Screw Connector 12ft 107365 Air Hose Gray Adult Pediatric Quick...

Page 66: ...wer Converter 300978 Printer Paper 10 rolls per box 89100 SpO2 Extension cable EC 8 Nellcor Puritan Bennett Finger Sensor DS100A Oral Temperature Probe Blue 21 Coiled 8978 Rectal Temperature Probe Red 8976 Temperature Probe Covers 5000 per case 8815 ...

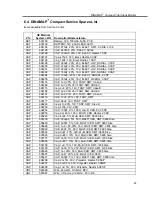
Page 67: ... SMT Case A CAP 606116 CAP 10uF 20 16V TANT SMT CAP 606117 CAP 68uF 16V TANT SMT CAP 606226 Cap 47u 20 10V TANT SMT Size D CAP 602253 Cap 470p 3kV CER CAP 602254 CAP 100pF 2 100V Low K CER PL 2 5SP CAP 602255 Cap 0ul 20 100V MULTI CER Radial 2 5SP CAP 605445 Cap 47pF 5 Multi CER SMT 0805 Size CAP 605736 CAP 330upF 5 50V MULTI CER SMT 0603 Size CAP 605446 CAP 0u001 5 50V MULTI CER SMT 0805 Size CAP...

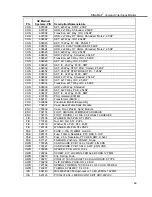
Page 68: ...eeving H S 1 4 6 3mm BK CBL 742151 SLEEVING H S 1 25 4MM BK CBL 601186 CABLE EXTENSION CHM 782243 ADH RUBBER PLASTIC LOCTITE PRISM 406 CHM 782242 ASHESIVE ETHYL CYANOACRYLATE RBR 4105 CON 608240 Pin Test Eye Terminal CON 608241 Pin Crimp Molex 4809 Anti Fishhooking CON 608242 Pin Crimp Molex 2478 Anti Fishhooking CON 608244 Pin Crimp Female Hirose AWG 26 30 CON 704734 Contact Battery CON 607978 HD...

Page 69: ...608337 SKT IC 44 Way PLCC SMT CUS 633148 PSU Isolated 633148 CUS 669141 Transformer 669141 CUS 320692 Pneumatic Manifold Assembly ENC 759331 Case Back Metal Sp02 Module ENC 759332 Case Front Plastic Sp02 Module ENC 732174 FOOT SQUARE 20MM SELF ADHESIVE ENC 732175 FOOT ROUND 12 7 DIA X 3 5H SELF ADHESIVE FIX 723136 WASHER M2 5 PLN STL ZNPL FIX 715123 Nut M3 Full STL ZnPL FIX 723133 Washer M3 PLN ST...

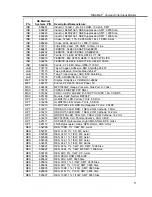
Page 70: ...S 691110 TL082CD OPAMP JFET Dual SO8 ICS 691128 CMP04FS Comparator PRECN Quad SO14 ICS 691129 AD620AR OPAMP Instrumentation LO PWR SO8 ICS 691139 AD822AR OPAMP FET SINGL Dual SUPP Dual SO8 ICS 691147 LM392M OPAMP FET SNGL Dual SUPP Dual SO8 ICS 691109 LM358D OPAMP HI GAIN Dual SO8 ICS 691117 IC LM386 AUDIO POWER AMP SUR MOUNT ICS 693111 4051BD Multiplexer 8 CHAN Analog SO16 ICS 691148 4066BM Switc...

Page 71: ... Pressure Side Port 0 7 3psi MSC 770130 PAPER PRINTER PTP ROLL MSC 621262 CONV AC DC 90 240V 47 63HZ TO 24VDC 1 5A CON B5 MSC 645189 Module Sp02 Nellcor MP204P OPT 614215 HLMP4719 LED Yellow TI 3 4 5 0 DIA OPT 614208 HLMP4740 LED Green TI 3 4 5 0 DIA OPT 614210 HLMP T200 LED RED Rectangular 5 7x3 2 2 54SP OPT 614211 HDSP A153 LED RED 7 SEG COM Cathode 7 6mm OPT 614212 HDSP H153 LED RED 7 SEG COM C...

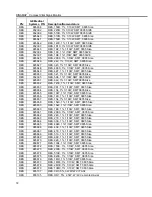
Page 72: ... 1 1 10W SMT 0805 Size RES 685655 RES 10k7 1 1 10W SMT 0805 Size RES 685656 RES 12K 1 1 10W SMT 0805 Size RES 685657 RES 13k 1 1 10W SMT 0805 Size RES 685658 RES 15k0 1 1 10W SMT 0805 Size RES 685659 RES 16k9 1 1 10W SMT 0805 Size RES 685660 RES 18K 1 1 10W SMT 0805 Size RES 685661 RES 20K0 1 1 10W SMT 0805 Size RES 685662 RES 24K 1 1 10W SMT 0805 Size RES 685663 RES 27K 1 1 10W SMT 0805 Size RES ...

Page 73: ...02 POTR 20k 10 1 2W CER Top ADJ 20t 3 8 SQ RES 630303 POTR 2k2 20 0 15W Top ADJ 1t 10x5 SP SCD 610145 30VF20F Diode Fast RECVRY 4 7A 200V TO252 SCD 610146 DE3L20U Diode Fast RECVRY 3A 200V E Pack SCD 611149 EC10DS2 Diode RECTR 1A 200V SMT 5 0x2 5 SCD 611150 DIF20 Diode RECTR 1A 200V SMT 5 0x2 5 SCD 611151 D2F20 Diode RECTR 1 4A 200V SMT 57 6x4 0 SCD 611152 NSD03A20 Diode RECTR 3A 200V SMT 8 0x4 0 ...

Page 74: ... 10MM PAN SDRV STL ZNPL SCR 721123 Screw M3x8mm CHS SLTD NYLN SCR 719326 SCREW M4X6 PAN SDRV STL ZNPL SCR 719327 SCREW M4X10 PAN SDRV STL ZNPL SCR 719328 SCREW M3X12MM INSERT PSM SDR 600121 Speaker M C 8 OHM 0 2W 1 5 DIA 38 1mm SDR 600122 Sounder Piezoelectric 4kHz 20 00DIA SWS 665127 Switch SPST Key RF15 Non ILLUM 15 0SQ SWS 665128 Switch SPST Key RF19 Non ILLUM 19 0SQ SWS 665129 Switch SPST Key ...

Page 75: ...or 15mmHg above ambient for 30 seconds for a neonate or an adult cuff respectively N13 Systolic Display N13 No Display Steady tone maximum volume No effect No effect Pump on off status determined by measurement of pump current does not concur with Main board software expected status Unit will power down within 30 seconds of detected failure P55 P00 No change P55 SpO2 NO SIGNAL P00 SpO2 NO SpO2 SEN...

Page 76: ...ady tone maximum volume High priority alarm Volume adjustable High priority alarm Volume adjustable 2 minutes silence No effect 2 minute silence 2 minute silence No effect No effect Clear Clear Replace or recharge battery From onset of alarm 5 NIBP measurements available Beep linearly increases rate as battery discharges Replace or recharge battery NIBP measurement disabled Paper expired or printe...

Page 77: ...de Modulation BPM Beats Per Minute DC Direct Current DMM Digital Multi Meter FET Field Effect Transistor FPT Filtered Pressure Transducer GAL Gate Array Logic Hz Hertz ITU Intensive Therapy Unit LCD Liquid Crystal Display LED Light Emitting Diode MAP Mean Arterial Pressure NIBP Non Invasive Blood Pressure NiCd Nickel Cadmium PSU Power Supply Unit SPI Serial Peripheral Interface TTL Transistor to T...

Page 78: ...rt lists assembly drawings and circuit diagrams for the following boards for unit revision levels 02 04 06 I Compact NIBP Monitor Block Diagram 8600EB II Main Board 8610 8760 on unit revision 06 III Power Supply Board 8620 IV Display Board 8630 V Switch Board 8640 VI Printer Board 8650 ...

Reviews: