background image

6

7

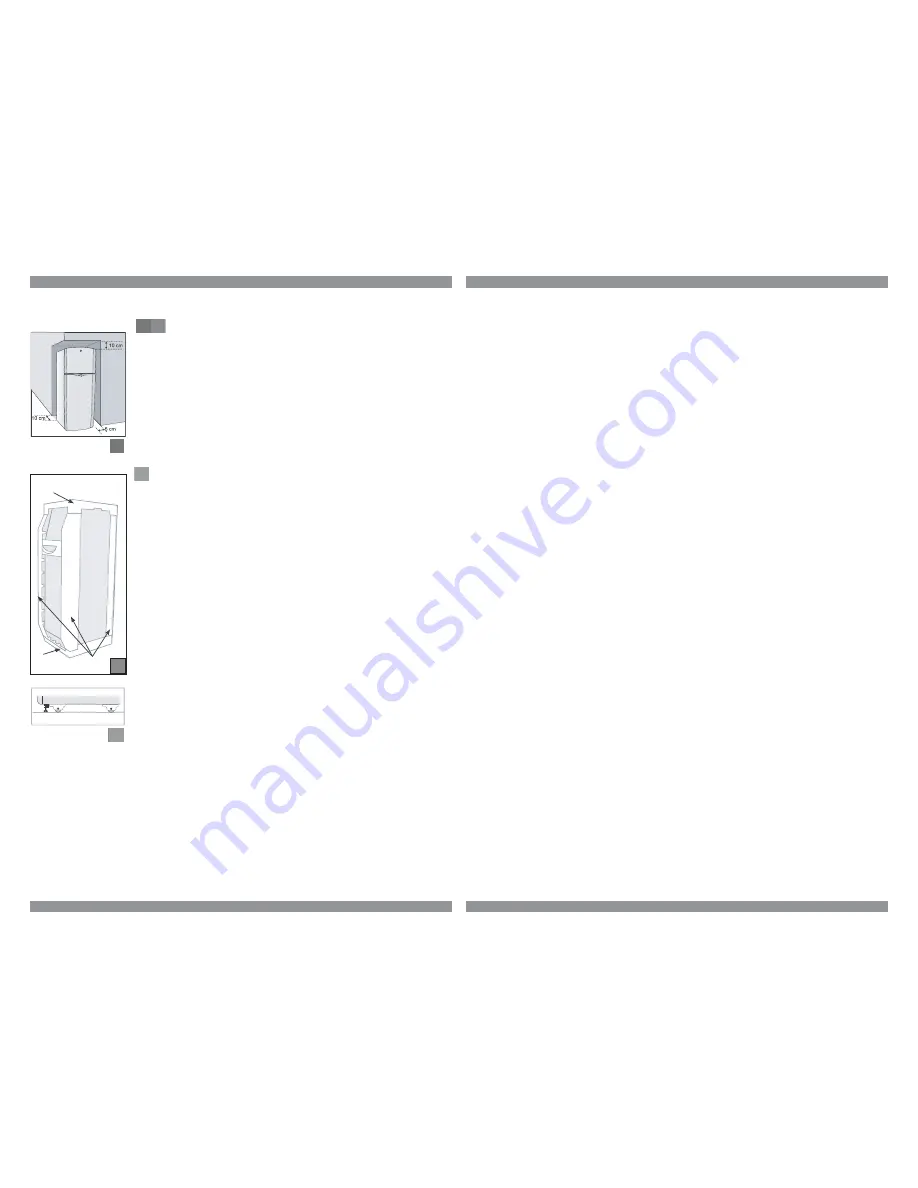
LOCATION

Allow the following minimum space to ensure adequate air
circulation, especially if the appliance is going to be next to a
wall: 5 cm on each side, 10 cm at the back, and 5 to 10 cm on
top. Allowing sufficient space will also avoid any noise caused
by the refrigerator coming into contact with a wall.

Do not install the refrigerator near heat sources like stoves,
radiators, or in direct sunlight, as this will cause it to overwork
and be less efficient, thereby increasing its consumption of
electrical energy.

LEVELING

Use the two leveling screws to level the refrigerator. Insert and
adjust them so that they rest firmly on the floor.

The front of the refrigerator should rest a little higher than the
rear (leaned slightly backwards), thereby facilitating the
automatic closing of the doors and preventing temperature
loss.
Some models have covers over the leveling legs, which can be
removed.

FIRST CONNECTION

• Once your refrigerator is in place, wait 4 to 6 hours before

connecting it so that the gas and the compressor oil settle.

• Before connecting the refrigerator, turn the refrigerator

temperature control or adjust the temperature level of the
display to mid-position (between 4 and 6).

• Connect the plug to the wall AC outlet.

• Allow it to operate empty and with the doors closed for 4

hours before loading with food.

• Avoid opening the door so that it can reach the desired

temperature.

• If you want to place your refrigerator in another location,

disconnect it before moving.

• Once it is in its new location, repeat the aforementioned steps.

Skids

Bottom
base

Top

Leveling
screws

Front
wheels

back
wheels

Front

3

1

2

3

1

2

2

. INSTALLING YOUR REFRIGERATOR

3. FUNCTIONS

How to operate temperature controls

The temperatures in the freezer and fresh food compartments can be individually
regulated by temperature controls in each area.

The freezer control has maximum, medium and minimum levels, which adjust the
flow of cool air. The fresh food section control allows the regulation of the
temperature between levels 1 (less cold) and 9 (coldest).

Temperature control

To obtain the desired temperature in the fresh food and freezer sections, follow
these instructions:

1.

Start with the original settings from factory (medium position on both controls).
Leave your refrigerator functioning for 6 hours to get the temperature stabilized.
If you need to change the temperature, readjust controls.

2

.

The fresh food section control has different levels from 1 (less cold) to 9 (coldest).
If necessary, adjust this control and observe foods over a few hours. You can
continue to make adjustments until reaching the right cooling level.

For some models:

3.

The freezer control has maximum, medium and minimum levels. It refers to the
amount of air that will flow to the refrigerator compartment. The lower the airflow
into the freezer, the faster the fresh food section will reach the selected
temperature.

Applies to all models:

Note:

1.

Product performance is affected by room temperature and the number of times
you open the door.

2

.

No food must be placed at the outlets of cool air coming from the fresh food
section. Allowing an adequate airflow to the inside will avoid freezing of certain
products.

3.

Your external control is able to detect a failure in the electronic system, which will
be indicated by the letter “F”. When the above happens, please call your
Authorized Service Center.

4.

Refrigerator temperature varies depending on the room temperature.

Summary of Contents for Estilo

Page 1: ...Use and Care Manual Read this manual before installing your refrigerator 200D9102P001 ...

Page 2: ... compartment S Can rack T Sliding bin U Wide bin V Bottle bin and snugger 2 3 Table of Contents 1 Important Safety Information Safety Precautions How to Connect Electricity Use of Extension Cord 2 Installing Your Refrigerator Location Leveling First Connection 3 Functions Temperature controls Additional functions Accessories Humidity Control Recommendations Smart Fresh Ice Factory 4 Care and Clean...

Page 3: ...in place so that children may not easily climb inside WARNING HOW TO CONNECT ELECTRICITY Do not under any circumstances cut or remove the third ground prong from the power cord For personal safety this appliance must be properly grounded The power cord of this appliance is equipped with a 3 prong grounding plug which mates with a standard 3 prong grounding wall outlet to minimize the possibility o...

Page 4: ...ont 3 1 2 3 1 2 2 INSTALLING YOUR REFRIGERATOR 3 FUNCTIONS How to operate temperature controls The temperatures in the freezer and fresh food compartments can be individually regulated by temperature controls in each area The freezer control has maximum medium and minimum levels which adjust the flow of cool air The fresh food section control allows the regulation of the temperature between levels...

Page 5: ...ng Temperature Level Pressing the button increases the cooling level of the refrigerator from 1 less cold to 9 coldest Refer to How to operate temperature controls to determine the correct setting for your refrigerator Note The display screen will indicate if your refrigerator is experiencing a malfunction This will be indicated by the letter F If this happens please call your technical service ce...

Page 6: ... door To move the can rack 1 Remove cans 2 Release the bottom part by pulling it upward and towards you 3 Pull the upper part of the rack to completely remove it 4 To put it back place the upper part on the right track and then snap the bottom part in place Make sure it is positioned in the track properly and able to slide from side to side Dairy Bin The dairy bin has a revolving lid Make sure to ...

Page 7: ...door again after having opened and closed it to introduce or remove foods This is normal due to the vacuum that forms in the interior of the refrigerator caused by the exchange of air at different temperatures If this happens wait 10 to 15 seconds before trying again and the doors should open easily Store foods in small quantities in the freezer as this facilitates quicker and more effective freez...

Page 8: ...XCESS OF WATER 4 CARE AND CLEANING Never use toxic abrasive products or fibers that can damage the surface of the product Use a soft sponge or damp cloth with a neutral soap Rinse and dry with a clean and dry cloth For cleaning the inside you can also use a solution of one spoon of sodium bicarbonate with two liters of warm water Do not use sharp or pointed objects that can scratch the refrigerato...

Page 9: ...t with the floor so wheels can slide Note After moving your refrigerator follow the installation instructions so compressor refrigerant gas settles Moving Some noises are common to the operation of the refrigerator Crackling This noise can be heard when ice breaks This same noise occurs when ice trays are removed from the freezer and exposed to room temperature Compressor noise Characteristic of t...

Page 10: ... family domestic use in Canada when the Refrigerator has been properly installed according to the instructions supplied by Mabe and is connected to an adequate and proper utility service Damage due to abuse accident commercial use and alteration or defacing of the serial plate cancels all obligations of this warranty Service during this warranty period must be performed by an Authorized Mabe Servi...

Page 11: ...earn about special discounts that are available while your warranty is still in effect You can purchase it on line anytime or call 1 888 261 2133 during normal business hours GE Consumer Home Services will still be there after your warranty expires Parts and Accessories 1 800 661 1616 or GEAppliances ca Individuals qualified to service their own appliances can have parts or accessories sent direct...

Reviews: