background image

Summary of Contents for G

Page 1: ...GE DigitalCamera G Series IG2 A Series I A735 A835 AI030 AI230 E Series I E840s EI035 E1235...

Page 2: ......

Page 3: ...arkcameras areintended for salesin Europe This symbol crossed out wheeled bin WEEEAnnex IV indicates separate collection of waste electrical and electronic equipment in the EU countries Please do not...

Page 4: ...recordingmedia etc makes the playbackof recordingsnot possible Battery notes U Incorrect use of the batteries may cause them to leak become hot ignite or burst Always observe the precautions given be...

Page 5: ...on purposesonly and may beprop erties of their respectiveowners Pleasereadthe following important information carefully before usingthe product Donot take apart or attempt to servicethe camerayourself...

Page 6: ...Donot use abrasive cleansers alcohol based orsolvent based cleaners toclean the camera Wipe the camera withaslightly damp softcloth This manual provides you withinstructions on how touse your GE digi...

Page 7: ...235 16 Charging the battery 18 Inserting the battery 19 Inserting an optional SDISDHCcard 22 Turning on and off 23 Using the Mode Dial 24 Setting date time and language 25 Setting the Date and Time 25...

Page 8: ...f 42 Snow 43 Sunset 43 Fireworks 43 Glass 43 Museum 43 Landscape 43 Night landscape 43 Night portrait 43 Return to the scene mode palette 44 Panorama mode 45 Image stabilization mode 46 Facedetection...

Page 9: ...enu 63 Expo Metering Exposure Metering 64 Stabilization 64 Playback menu 65 Protect 65 Delete 66 DPOF Digital Print Order Format 68 Info Box Information Box 68 Trim 69 Resize 69 Rotate 70 Slide show 7...

Page 10: ...80 Connecting to a PictBridge compatible printer 83 Setting the USBmode 83 Connecting the camera and priter 84 Using the PictBridge menu 85 Print with date 85 Print without date 86 Print index 87 Prin...

Page 11: ...d please contact your vendor The accessories will vary based on model purchased and are noted below Rechargeable Lithium ion battery exceptA735 A835 A1030 A1230 USBcable AA sizealkaline batteries 2 A7...

Page 12: ...F rontView OackView 0 l_x optical zoom 67S 27ram 1 3 S 5 IS Ri lht View o o_ o...

Page 13: ...ial Facedetection AFbutton Menubutton Erasebutton Exposure compensation Up button Macromode Right button 13 14 15 16 17 18 19 20 21 22 23 Self timer Down button Flashmode Left button Func okbutton Spe...

Page 14: ...Front View f Back View_ t Right View...

Page 15: ...Facedetection AFbutton T Wbutton Menubutton Erasebutton Exposurecompensation Up button Macromode Right button 13 14 15 16 17 18 19 20 21 22 23 Self timer Down button Func okbutton Flashmode Left butto...

Page 16: ...Front View _ _ Right View _ _...

Page 17: ...scroll wheel Menu button Erasebutton Func okbutton Exposurecompensation Upbutton Macromode Right button Bottom View 13 14 15 16 17 18 19 2O 21 22 23 Self timer Down button Flashmode Left button USB AV...

Page 18: ...Front View Back View Right View __ _...

Page 19: ...ion AFbutton Status LED Modedial Menubutton Erasebutton 13 14 15 16 17 18 19 2O 21 22 23 Exposure compensation Upbutton Macromode Right button Self timer Down button Flashmode Left button Func okbutto...

Page 20: ...Front View Back View r Right View...

Page 21: ...on AFbutton Status LED Hade dial Henu button Erasebutton Exposurecompensation Upbutton Macromode Right button 13 14 15 16 17 18 19 20 21 22 23 Self timer Down button Func okbutton Flashmode Left butto...

Page 22: ...the connecting ceble into e well outlet _ Throughout the rest of the menuel the following illustretions show theE1035 model es en exemple G2 A735 A835 A1030 A1230 E840s end E1235operete similerly _ L...

Page 23: ...1 Open the bettery compertment 2 Insert the bettery while observing the correct polerity Use the side of bettery to press down the stopper es shown ellowing the bettery to be inserted properly...

Page 24: ...3 Closethe battery compartment 1 Open the battery compartment _ Battery capacity decreases with usage...

Page 25: ...2 Insertthebatterywhileobserving thecorrect polarity Use thesideof batteryto press downthestopper asshown allowingthebatteryto beinserted properly 3 Close thebattery compartment...

Page 26: ...optional SD SDHCcard into the memory card slot as shown _ Optional SD SDHC cards are not included The use of 64HB to 4GB memory cards from recognized manufacturers such as SanDisk Panasonic and Toshib...

Page 27: ...buttonagain Power button To remove the SD SDHCcard open the battery compartment and gently push the card to release it Pull the card carefully When turned on the camera will enter the mode according t...

Page 28: ...ictures videos stored in the memory card and D internal memory Switch to record videos cc_ l Switch to use Image Stabilization when taking still pictures Switch to use a preset scene mode for taking s...

Page 29: ...u Date Time Display language To access the Setup menu do the following 1 Press Power to turn the camera on 2 Pressthe Q button and use UplDownlLeftl Right to select the Setup menu Setting the Date and...

Page 30: ...setting Setting the Language 1 Use the Up Down to select Language Then press the Right to enter the setting 2 Usethe nevigotion buttons to select the desired lenguege 3 Pressthe Q button to confirm t...

Page 31: ...rmal in the manufacturing pro cess and the recording is not affected in any way _ If the LCDmonitor is damaged take particular care with the liquid crystal in the monitor If any of the following situa...

Page 32: ...4 When thesubject isinfocus thegreen colored focus frame appears onthecenter oftheLCD screen 5 Press Shutterfullytocapture theimage Your camera isequipped withtwotypes ofzoom optical zoom anddigitalzo...

Page 33: ...our subjects and the night time backdrop _ Red EyeReduction Slow Synchro Usethis mode for slow synchro shots with red eye reduction To enable the self timer function press the Down Self timer to selec...

Page 34: ...m the lens The exposure compensation allows you to adjust the background brightness to produce the best result of photos To change the expo sure values do the following 1 When taking a picture press t...

Page 35: ...owing 1 Pressthe Q button to enter the Function menu Make sure the WB function is selected 2 Use Up Down navigation buttons to select the setting you want The following options are available _4b_ _ Au...

Page 36: ...set the ISOvalue do the following 1 Pressthe Q button to enter the Function menu 2 Usethe Left Right navigation buttons to highlight the ISO function Higher ISOpictures will naturally have more noise...

Page 37: ...tons to highlight the Quality function 3 Usethe Up Down navigation buttons to select a desired setting Three options are available _ _ Best quality Standard compression Fine quality High compression N...

Page 38: ...ble shots is displayed on the screen To set the image size do the following 1 Pressthe Q button to enter the Function menu 2 Usethe Left Right navigation buttons to highlight the Size function _The bi...

Page 39: ...ng is only available when the camera is in the oP1 Manual mode To set the image color do the following 1 Pressthe Q button to enter the Function menu 2 Usethe LefflRight navigation buttons to highligh...

Page 40: ...Size settings in shooting mode available 0 3M 640x480 IM i024x768 2 1600x1200 3M 2048x1536 5M 2560x1920 5M 16 9 3072x1728 6M 2816x2112 6M 3 2 _ 3072x2048 6M 16 91 3264x1836...

Page 41: ...7M 3072x2304 7M 3 21 3264x2176 7M116 91 3648x2052 _ 8M 3264x2448 9M 3 2 3648x2432 9M 16 9 4032x2268 IOM 36L18x2736 10M 3 2 4032x2688 _ 12M 4032x3024...

Page 42: ...ilization 2 Sceneicon onlyavailable for Scene mode Sport _ Fireworks Children _ Glass Indoor _ Museum Leaf _ Landscape Snow _ Night landscape Sunset _ Night portrait 3 Light metering method _o_ SpotAE...

Page 43: ...tatus 9 Facedetection on indicator 10 Remainingnumberof photosthat can be taken 11 Focusframe 12Zoomindicator 13White balance onlyavailable for Manual model 14 ISO only availablefor OM Manual model 15...

Page 44: ...us 7 Movierecording on indicator 8 Remaining time for videosthat can betaken 9 Focusframe 10 Zoomindicator 11 Videoresolution 12 Videoquality 13 Memorycardlbuilt in memory indicator Forbestmovie resul...

Page 45: ...morycard internal memoryindicator 7 PictureID 8 Battery status 9 Photoaudiostatus Pressthe shutter button to record sound Pressthe shutter button to play sound 10 Recordingdate andtime 11Histogram 12A...

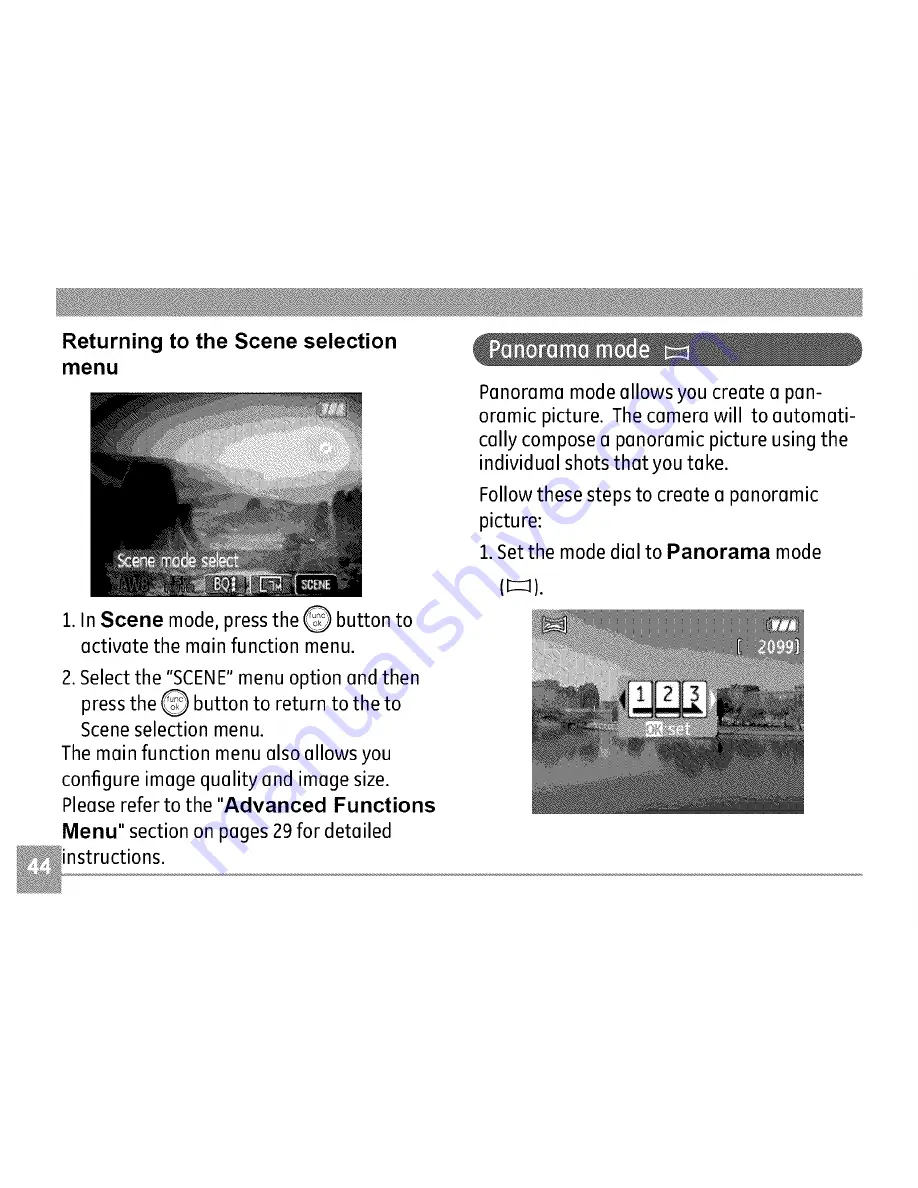
Page 46: ...al to Scene mode The scene mode palette appears Use Up Down Left Right to select a scene and press the Q button Sport For shooting fast moving objects Bring lively pictures to life Children Suitable f...

Page 47: ...hutter speed is slower than normal Use of tripod is recommended Glass Suitable for photographing objects behind glass or window Museum For shooting in museums or places where flash is not allowed Land...

Page 48: ...menu The main function menu also allows you configure image quality and image size Please refer to the Advanced Functions Menu section on pages 29for detailed Panorama mode allows you create a pan ora...

Page 49: ...ing the same steps for the first shot take the second and the third shots Compose your shots so that the edges of the pictures overlap The numeric indicators on the LCD inform you which shot is being...

Page 50: ...mode Stabilization during Movie mode is only available when the Frame Rate is set to 15 fps 1 Switch the mode dial to _ mode 2 Press the Q button to enter the Function menu 3 Use the LeftlRight naviga...

Page 51: ...shutter speed _This function may nothelp totakeaclear picture ofafastmoving target such as acarpassing by etc This function may not help to stabilize photos if you are in a moving vehicle car boat etc...

Page 52: ...pointthe camera towards thesubject tostarttheface detection process When thecamera detects aface awhite rectangular framewill be drawnaroundthe face Note Forbest results thefaceofthe subjectshouldbe r...

Page 53: ...s face is detected and brocketect by o square box Press the shutter button oil the way clown onct release the shutter button The camera will now wait for the subject to smile 3 When the subject smile...

Page 54: ...ect Blinkdetection setting 3 Use the Right navigation buttons to enter the submenu andselect On option 4 Pressthe button _ to confirm the setting and exit the menu 5 The Blink detection indicator appe...

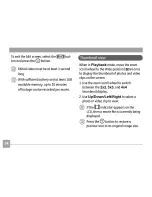
Page 55: ...e photos or video clips stored in the internal memory or memory card 3 To play a selected video clip press the Q button to enter the movie playback mode 4 Usethe Left Right navigation buttons to selec...

Page 56: ...rform the functions ac cordingly During the slow motion playback you can use the Left Right navigation buttons to adjust the speed of playback During the video playback you can use the Up Down navigat...

Page 57: ...button 4 Usethe Up Down nevigetion buttons to select en option 1 Select the _ button end use the Left Right nevigetion buttons to specify the new beginning of the pleybeck 2 Select the _ button end u...

Page 58: ...mode move the zoom scroll wheel to the Wide position w once to display the thumbnail of photos and video clips on the screen 1 Usethe zoom scroll wheel to switch between the 2x2 3x3 and 4x4 thumbnail...

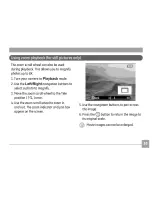
Page 59: ...t navigation buttons to select a photo to magnify 3 Move the zoom scroll wheel to the Tele position TO once 4 Usethe zoom scroll wheel to zoom in and out The zoom indicator and pan box appear on the s...

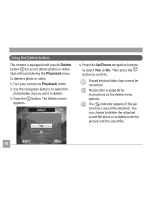
Page 60: ...clip you want to delete 3 Pressthe Q button The Delete screen appears 4 Press the Up Down navigation buttons to select Yes or No Then press the button to confirm Erased photos video clips cannot be re...

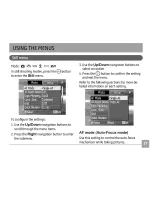
Page 61: ...to confirm the setting and exit the menu Refer to the following sections for more de tailed information on each setting To configure the settings 1 Usethe UplDown navigation buttons to scroll through...

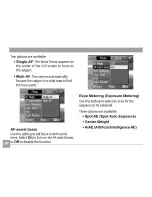
Page 62: ...wide area to find the focus point AF assist beam Usethis setting to aid focus in dark condi tions Select On to turn on the AF assist beam or Off to disable the function Expo Metering Exposure Metering...

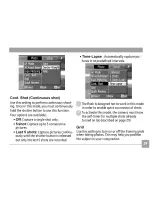
Page 63: ...pture up to Sconsecutive pictures Last 5 shots Capture pictures continu ously until the shutter button is released but only the last S shots are recorded The flash is designed not to work in this mode...

Page 64: ...etting refers to the quick photo review immediately after taking a picture The picture stays on the LCDscreen for an adjustable period of time Digital Zoom Usethis setting to enable or disable the dig...

Page 65: ...togram display onthe LCD screen Slow Shutter In Slow shutter mode the shutter will remain open as long as the shutter button is pressed This gives you complete control over the duration of exposure Th...

Page 66: ...k Detection feature is on by default and after taking each photo a warning message will pop up if a blink had been detected in the photo Off On Date Imprint Include a date time stamp in the photo imag...

Page 67: ...uttons to select an option 4 Pressthe Q button to confirm the setting and exit the menu Refer to the following sections for more de tailed information on each setting To configure the settings 1 Useth...

Page 68: ...tion Please refer to page 46 for instructions on image stabilization While in Movie mode image stabilization can be activated and de activated via the record ing menu Three options are available Spot...

Page 69: ...telly you con use this setting to lock one or ell files Pleese refer to the following sections for deteiled instructions on the verious menu options To protect unprotect e picture or video 1 Switch to...

Page 70: ...Down navigation buttons to select Back to return to the Playback menu 5 A key Co_ _ icon will appear on the top of the screen to indicate that the picture video is protected 6 Select reset to cancel...

Page 71: ...ht button 2 Usethe UplDownlLeftlRight buttons to locate each file to be deleted and then press the Q button to mark the file for deletion An indicator will appear for each file that is marked for dele...

Page 72: ...photo kiosk without having to tell them in person which photos you would like to print Info Box Information Box Usethis setting to enable or disable the text display for taking pictures The following...

Page 73: ...on buttons to adjust the trimming box to fit the location and size of the new picture 4 Pressthe Shutter button to save what you see on the LCDscreen as a new picture or the G button to cancel and ret...

Page 74: ...ate setting from the Playback menu as described previously 2 Usethe Left Right navigation buttons to select a picture to rotate 3 Use the Up Down navigation buttons to select the direction for rotatio...

Page 75: ...w or CanceltoreturntothePlaybackmenu 4 Press theQ button toconfirm thesetting Red eyeremoval Use thissettingto remove red eye effectin yourphotos 1 Select theRed eyeremovalsetting from thePlaybackmenu...

Page 76: ...information on each setting Format Memory Please note formatting enables you to delete all contents in the memory card and built in memory including protected photo and movie files To configure the se...

Page 77: ...sethis setting to adjust the volume of beep when buttons are pressed and change the tones for shutter buttons self timer and power onlpower off To change this setting 1 Select the Beep setting from th...

Page 78: ...r election Power Saver This setting allows you to save power and get the maximum possible running time foryour battery Follow the steps below to turn offthe LCDscreen and camera automatically after a...

Page 79: ...ction on pege 25 World time The world time setting is e useful function on your oversees trips This feeture enebles you to displey the Iocel time on the LCDscreen while you ere oversees 1 Select the W...

Page 80: ...e lost photo you hove token reset the counter to 1ond sore files in o new folder in the memory cord Video system Usethis setting to determine your video system in the current oreo 1 Select the Video s...

Page 81: ...t video system is selected Copy to Card Copy internal memory to memory card Usethis setting to copy the files stored in the internal memory to the memory card 1 Select the Copy to memory card setting...

Page 82: ...iously 2 Usethe Up Down navigation buttons to select Yes or No Then press the Q button to confirm FW Ver Firmware version Use this setting to view the current camera firmware version 1 Select the FW V...

Page 83: ...your TV video standard see page 77 and then turn offthe camera 2 Connect one end of the AV cable to the USB AVOUTport on your camera 3 Connect the plugs on the other end of the cable to the audio and...

Page 84: ...PC 1 Pressthe Q button and use the Up Down navigation buttons to select USB Connect and then press the Right navigation button 2 Use the Up Down navigation buttons to select PC 3 Pressthe Q button to...

Page 85: ...the other end of the cable to an available USBport on your PC 5 Disconnect the camera once transfer is completed If the USB option is set to PC Turn the camera off and disconnect the USB cable If the...

Page 86: ...Window 2000 Professional Click the Unplugor Eject Hardware icon _ in the taskbar and select Stop USBMass Storage Device from the menu displayed Macintosh Drag the untitled icon to the Trash Untitled...

Page 87: ...a PictBridge compatible printer using the supplied USBcable without the need for a PC i Pressthe Q button and use UplDown to select USB Connect and then press the Right navigation button 2 UseUp Down...

Page 88: ...ceble to the USBport on the printer If the cemere is not connected to e PictBridge competible printer the following error messege eppeers on the LCDscreen The ebove error messege would elso eppeer if...

Page 89: ...saved with the photos you take Youcon print the photos with date by following the steps below 1 Select Print with date from the PictBridge menu The following screen appears Usethe Up Down navigation b...

Page 90: ...hoto 4 Press theQ button andthefollowing screen appears Print without date Usethis setting to print the photos without dates on them 1 Select Print without date from the PictBridge menu The following...

Page 91: ...en appears Print index Youcan use this setting to print all indexes to show all the photos currently in your camera 1 Select Print index from the PictBridge menu The following screen appears S Select...

Page 92: ...ings before hand See DPOF section on page 68 1 Select Print DPOF from the PictBridge menu The following screen appears Toexit the PictBridge menu select Exit The Remove USBcable message will be displa...

Page 93: ...equivalent 38mm Wide 152mm Tele F number F3 5 Wide F5 15 Tele Lens Lens Construction 14 elements in 11 groups Optical Zoom 4 Focusing Range Normal 60cm oo Tele 80cm oo Macro Wide 6cm oo Anti Handshake...

Page 94: ...Stabilization Movie Scene Sport Shooting Modes Children Indoor Leaf Snow Sunset Fireworks Glass Museum Landscape Night Landscape Night Portrait Panorama Portrait Smile Detection Yes Blink Detection Y...

Page 95: ...Spot Fixed to center of freme ProgremAE AE Iock eveileble _ 2EVin 1 3 steps 4 1 2000 second Henuel 30 seconds Approx 1 8 fps Lerge Fine mode Single Photo Index 4 9 16 thumbneils Slide Show Movie Slow...

Page 96: ...40 C Humidity 0 90 Dimensions W x H x D 91mmx6Omm x 18 mm Moss Approx 120g Body only Internal Hemory 26HB SD Card SDHC Card Up to 4GBsupport PictBridge Exif Print Support Multi language Support 23 lan...

Page 97: ...xels 1 2 5 CGD Focal Length F 6 1ram Wide 18 3ram Tele 35mm film equivalent 36mm Wide 108mm Tele Fnumber F2 8 Wide F4 8 Tele Lens Lens Construction 7 elements in 6 groups Optical Zoom 3 Normal 60cm oo...

Page 98: ...640 480pi els 30fps 15fps 320 240pi els 30fps 15fps Best Fine Normal Yes E if2 21 JPEG Quick Time Motion PEG Audio G 711 Monaural WAVE Monaural Max 60 seconds Auto Manual Image Stabilization Scene Sp...

Page 99: ...verage Light Metering Method Spot Fixed tocenter offrame Exposure Control Method ProgramAE AE Iock available Exposure Compensation 2 EVin 1 3 Step increments Shutter Speed 4 1 2000 second Manual 30s C...

Page 100: ...00 ShootingRange Wide Approx 0 3m 4 6m Tale Approx 0 3m 2 Tm ISO400 Internal Hemory 32HB SDCard SDHC Card Upto 4GBsupport PictBridge ExifPrintSupport Hulti language Support 23 languages USB2 0 AV OUT...

Page 101: ...or 12 40 Megapixels 1 1 72 CCD Focal Length F 7 Smm Wide 22 5mm Tele 35mm filmequivalent 35mm Wide 105mm Tele Fnumber F2 8 Wide F4 9 Tele Lens Lens Construction 7elements in7groups Optical Zoom 3 Norm...

Page 102: ...s Exif 2 2 JPEG Quick Time Hotion JPEG Audio G 711 Honeurel Imege Compression DCF DPOF Verl 1 Support Still Imege File Hovie Formet Audio WAVE Honeurel Hex 60 seconds Auto Menuel Imege Stebilizetion S...

Page 103: ...ted Average Light Metering Method Spot Fixed tocenter offrame Exposure Control Method ProgramAE AE Iock available Exposure Compensation 2 EVin 1 3 Step increments Shutter Speed 4 1 2000 second Manual...

Page 104: ...hro Gno 5 7_ 0 5EV ISO100 Shooting Range Wide Approx 0 3m 3 2m Tale Approx 0 3m 2 0m ISO400 Internal Hemory 24HB SDCard SDHC Card Up to 8GBsupport PictBridge ExifPrint Support Multi language Support 2...

Page 105: ...els Image Sensor 1 2 5 CCD 1 1 7 CCD 1 1 72 CCD Lens 6 15mm Wide 7 5mm Wide 7 5mm Wide Focal Length F 24 6mm Tele 22 5mm Tele 22 5mm Tele 35mm film 37mm Wide 35mm Wide 35mm Wide equivalent 148mm Tele...

Page 106: ...Number of 8MP 7MP 3 2 IOMP 9MP 3 2 12MP 4 3 10MP 3 2 6MP 16 9 5MP 7MP 16 9 5MP 9MP 16 9 6MP Recording Pi els 3MP 2MP 3MP 2MP 3MP 2MP Still Image IMP 0 3MP IMP 0 3MP IMP 0 3MP Numberof Re 640 480pi els...

Page 107: ...en Indoor Leaf Shooting Modes Snow Sunset Fireworks Glass Museum Landscape Night Landscape Night Portrait Panorama Portrait Smile Detection Yes Blink Detection Yes Face Detection Yes Red eye Removal Y...

Page 108: ...point Face Detection AF Assist Light On Off Artificial Intelligence AE Ai AE Center weighted Average Spot Fixed to center of frame ProgramAE AE Iockavailable _ 2EV in 1 3 steps 4 1 2000 second Manual3...

Page 109: ...7_ 0 5EV ISO100 ShootingRange Wide Approx 0 3m 3 2m Tele Approx 0 3m 2 0m ISO400 Recording Hedia SDCard SDHC Card Upto 4GB support Other Features PictBridge Exif Print Support Hulti language Support...

Page 110: ...A basedonCIPA basedon CIPA Performance standards standards standards Operation Temperature 0 40 C Humidity 0 90 Environment Dimensions 95 7x 56x 19 5mm 103x 56x 24mm 103x 56x 24 mm WxHxD Approx 95g Ap...

Page 111: ...s not coptured correctly The picture is domoged No picture There re no imoges in the memory cord or in the internol memory Lens error The lens is probobly stuck end the comero will power off outomotic...

Page 112: ...h in the memory card is set to the LOCK position Warning Camera recording No other actions allowed to perform during video audio please wait recording Warning Battery exhausted The battery is out of c...

Page 113: ...Charge the battery or replace with a fully charged battery Re insert the battery observing the correct polarity Charge the battery or replace with a fully charged battery Use a soft cloth to clean the...

Page 114: ...The printer is not Pict Bridge compotible The printer is out of peper or out of ink The peper isjommed Reploce the memory cord with o new one or cleon off current memory cord Delete unwonted imoges Th...

Page 115: ...Printedin China...

Reviews: