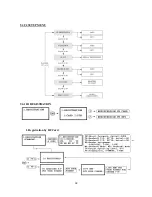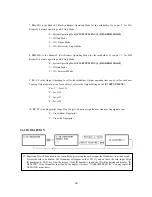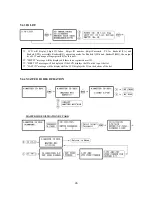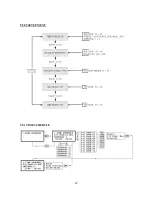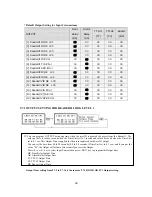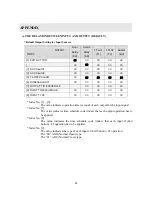
* Default Output Setting for Input Circumstance
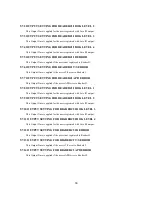
9.7.1 OUTPUT SETTING FOR READER#1 ID OK LEVEL 1
Output Time setting from 9.7.2 to 9.7.14 is the same as 9.7.1 RD1 ID OK LV1 Output setting.
OUTPUT
Door
Relay
(DR)
Alarm
Relay
(AR)
TTL#1
(T1)
TTL#2
(T2)
Buzzer
(BZ)
[1] Reader#1 ID OK LV1
03
00
00
00
00
[2] Reader#1 ID OK LV2
05
00
00
00
00
[3] Reader#1 ID OK LV3
05
00
00
00
00
[4] Reader#1 ID OK LV4
05
00
00
00
00
[5] Reader#1 ID Error
00
03
00
00
00
[6] Reader#1 T/S Error
00
03
00
00
00
[7] Reader#1 APB Error
00
03
00
00
00
[8] Reader#2 ID OK LV1
03
00
00
00
00
[9] Reader#2 ID OK LV2
05
00
00
00
00
[10] Reader#2 ID OK LV3
05
00
00
00
00
[11] Reader#2 ID OK LV4
05
00
00
00
00
[12] Reader#2 ID Error
00
03
00
00
00
[13] Reader#2 T/S Error
00
03
00
00
00
[14] Reader#2 APB Error
00
03
00
00
00
. You can program
☞
OUTPUT activating time when the user ID is granted the access from the Reader#1. The
value put here is value x second when the Time Unit set to 1 second and value/10 second when the Time Unit
set to 0.1 sec. This Output Time is applied for the users registered with Level#1 output.
You can set the time from 00 to 98 seconds (0.0 to 9.8 seconds if Time Unit set to 0.1 sec.) and if you put the
value “99”, the Output will activate forever until you reset the Output.
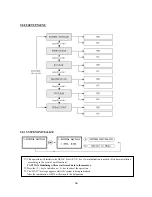
Press <4> or <6> key to select Input Sources then press <ENT> key to program the Output time.
DR: Door Relay Output Time
AR: Alarm Relay Output Time
T1: TTL#1 Output Time
T2: TTL#2 Output Time
BZ: Buzzer Output Time
54
Summary of Contents for GE314
Page 1: ...OPERATING MANUAL FINGERPRINT ACCESS CONTROLLER MODEL GE314 ...
Page 33: ...9 2 F2 SETUP MENU 33 ...
Page 37: ...9 3 F3 SETUP MENU 37 ...
Page 42: ...9 4 F4 SETUP MENU 9 4 1 ID REGISTRATION 1 Registration by RF Card 42 ...
Page 47: ...9 5 F5 SETUP MENU 9 5 1 TIME SCHEDULE 47 ...
Page 50: ...9 6 F6 SETUP MENU 50 ...
Page 53: ...9 7 F7 SETUP MENU 53 ...
Page 71: ...A S REQUEST FORM ORIGINAL 71 ...
Page 72: ...A S REQUEST FORM SAMPLE 72 ...
Page 73: ...MEMO 73 ...


