


4
49-3000255 Rev 1
SAFETY
INFORMA
T
ION
READ AND SAVE THESE INSTRUCTIONS
IMPORTANT SAFETY INFORMATION
READ ALL INSTRUCTIONS BEFORE USING THE APPLIANCE
PROPER INSTALLATION
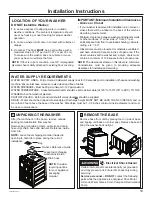
This washer must be properly installed and located in accordance with the Installation Instructions before it is used.
Ŷ
Ensure that the hot water hose is connected to the “H” valve and the cold water hose is connected to the “C”
valve.
Ŷ
Install or store where it will not be exposed to temperatures below freezing or exposed to the weather, which
could cause permanent damage and invalidate the warranty.
Ŷ
Properly ground washer to conform with all governing codes and ordinances. Follow details in the Installation
Instructions.
Ŷ
Ensure washer is properly leveled and washer legs are adjusted such that unit is stable.
Ŷ
Optional drain hose extension recommended for discharging heights from 60” - 96”.
Ŷ
GE Appliances strongly recommends the use of factory specified parts. A list of factory hoses available for
purchase are listed. These hoses are manufactured and tested to meet GE Appliances specifications.
Ŷ
GE Appliances strongly recommends the use of new water supply hoses. Hoses degrade over time and need
to be replaced every 5 years to reduce the risk of hose failures and water damage.
Ŷ
Consider recycling options for your appliance packaging material.
PARTS AND ACCESSORIES
Order on-line at
GEApplianceparts.com
today,
24 hours a day or by phone at 800.626.2002 during
normal business hours. In Canada, visit your local
GE Appliances parts distributor or call 800.661.1616.
Part Number Accessory
PM14X10002 4 ft rubber water supply hoses
Or
PM14X10005 4 ft braided water supply hoses
WH49X301
Drain hose extension
PM7X1
Washer Floor Tray
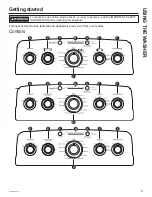
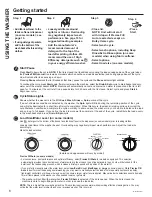
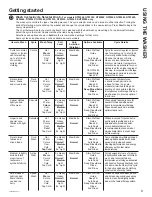
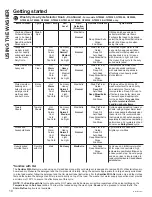
START-UP SEQUENCE
Ŷ
Any time the washer is being started or restarts after the washer lid has been opened and closed, the washer
will turn on the cold water valve for two short periods followed by a 10 second pause before continuing. If the
lid is opened during this period, the washer will pause. You will have to push the
Start
button again to restart
the cycle.
WHEN NOT IN USE
Ŷ
Turn off water faucets to minimize leakage if a break or rupture should occur. Check the condition of the fill
hoses; GE Appliances recommends changing the hoses every 5 years.
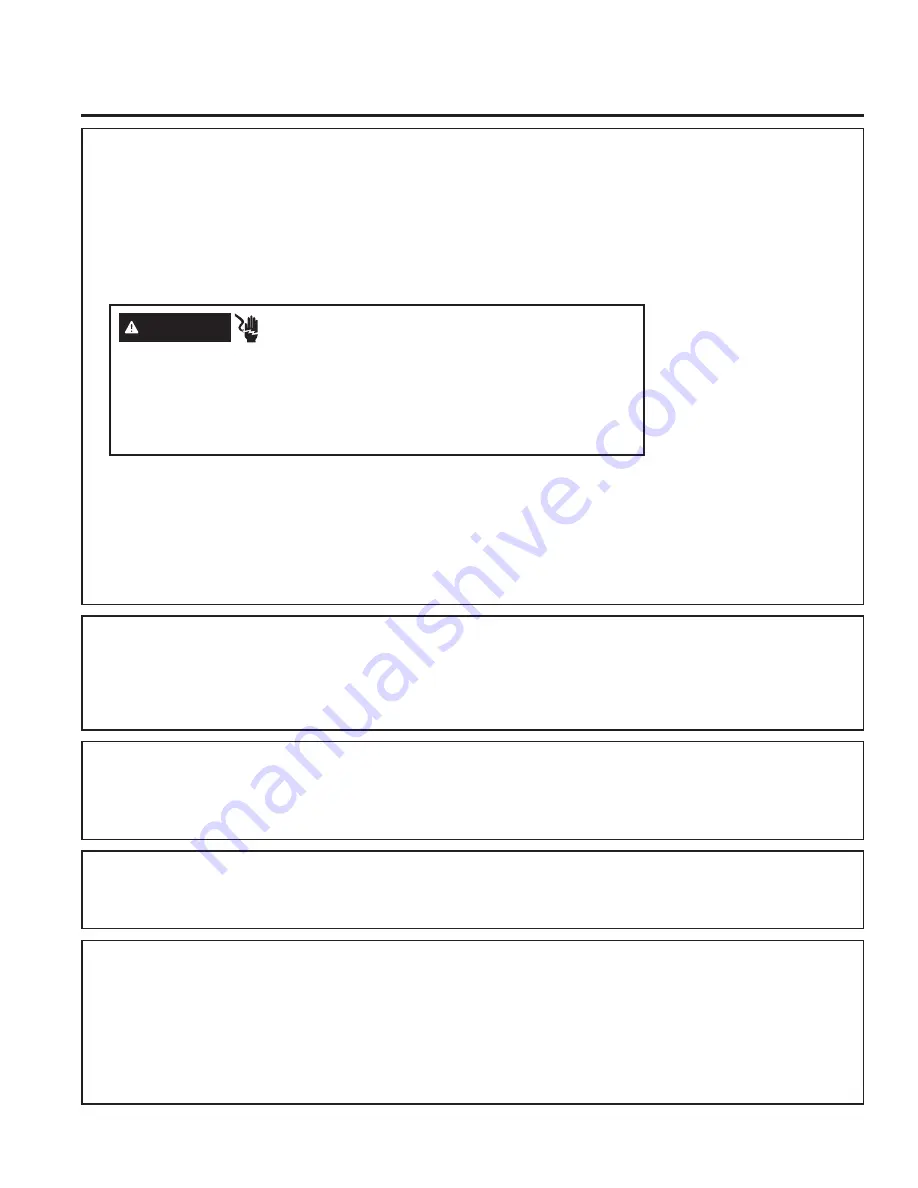
Plug into a grounded 3 prong outlet.
DO NOT
remove ground prong.
DO NOT
use an adapter.
DO NOT
use an extension cord.
Failure to follow these instructions can result in death, fire or electrical shock.
- Electrical Shock Hazard
WARNING
AUTOMATIC DRAIN SEQUENCE
Ŷ
Machine will automatically drain any time the lid is left open for more than 15 minutes and water is present.
Ŷ
Machine will automatically drain if left in a paused state with the lid closed for more than 24 hours and water is
present.


