– 54 –
7. Remove the left hand thread 1-5/16-inch hub
nut. If an impact gun is used, ensure to use
the torque limiter (
Part #
: WX05X10028).
8. Disconnect the drain hose from the tub.
9. Remove the front rod and spring assembly
(one at a time) by lifting the tub assembly,
WDNLQJWKHZHLJKWRႇRIWKHVXVSHQVLRQVSULQJ
at the lower portion of the rod. Pull the spring
assembly out from the tub leg and repeat the
same for the rear.
NOTE:
The rod and spring
assemblies are color coded according to
spring color and should not be switched.
(Continued Next Page)
Spin Basket Removal
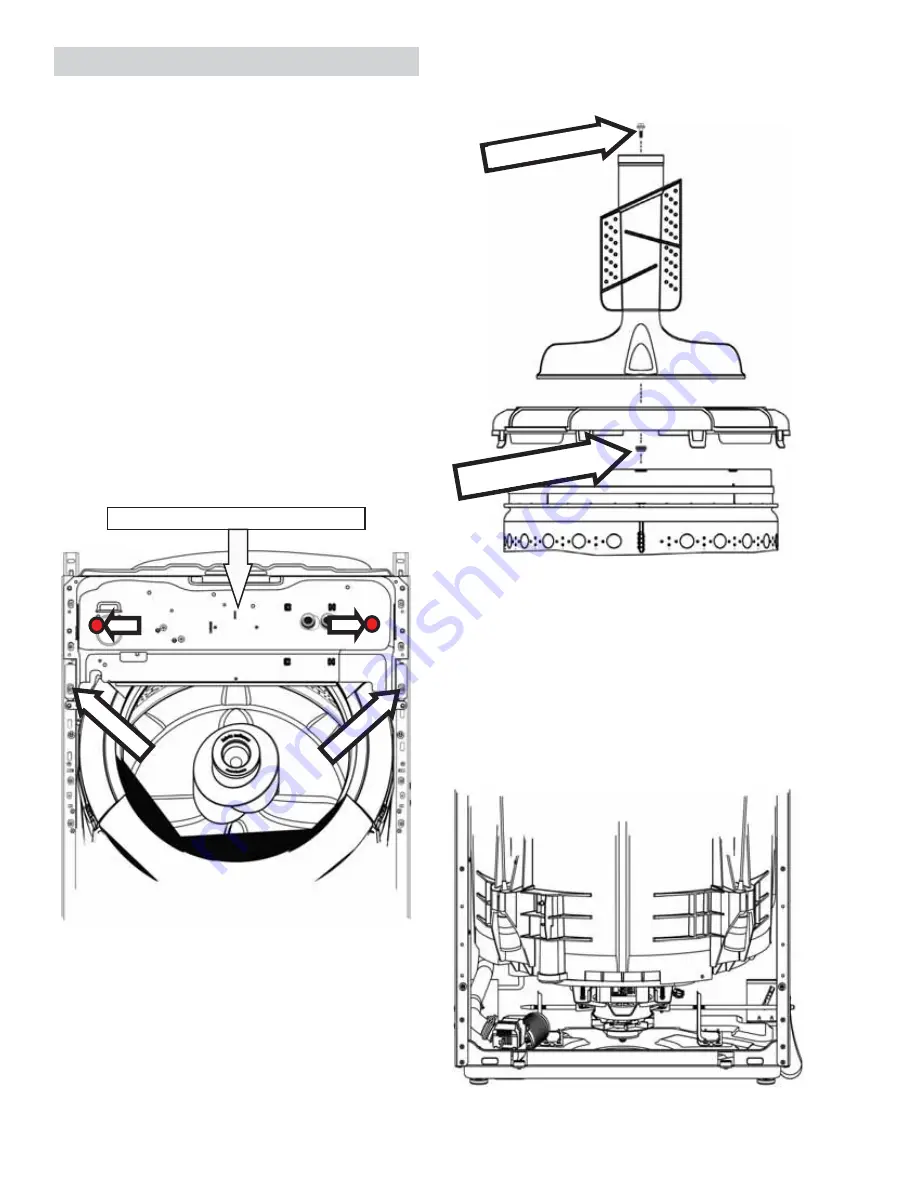
1. Drain all water from the tub by using the drain
and spin cycle.
2. Remove the front panel and top cover/lid
assembly.
3. Disengage the main board housing assembly
from the water valve mounting plate.
4. On the 27-inch models, disengage the water
valve mounting plate from the cabinet by
removing two 1/4-inch hex-head screws.
The rear of the plate has no screws. It has
tabs. The location of the plate mounting
VFUHZVZLOOEHGLႇHUHQWRQWKHLQFKPRGHO
(Approximate location indicated by two circles
in picture below.) The water hoses do not
need to be disconnected from the water valve
to disengage the water vale mounting plate.
5. Remove the tub cover by lifting the tabs on
WKHWXEFRYHUDQGSXOORႇ
6. Remove the 7/16 hex-head bolt attaching the
agitator to the spline shaft of the transmission.
/LIWDJLWDWRUVWUDLJKWXSDQGRႇRIWKHVKDIW
7/16" Hex Bolt
1-5/16" Hub Nut
Water Vale Mounting Plate
Spin Basket
Summary of Contents for GUD24ESSMWW
Page 16: ... 16 LUÀRZ ...
Page 75: ... 75 Fault Code Binary Display ...
Page 77: ... 77 LULQJ LDJUDPV To Washer Electric Dryer ...
Page 78: ... 78 OHFWULF U HU RQJ 9HQW ORZHU 0RWRU LUFXLW ...
Page 79: ... 79 To Washer Gas Dryer ...
Page 80: ... 80 Power Supply To Washer Personality Jumper Plugs Washer ...


