background image

GE M

EDICAL

 S

YSTEMS


D

IRECTION

 2392751-100, R

EVISION


3

V

IVID

™ 4 S

ERVICE

 M

ANUAL

4-30

Section 4-5 - System Turnover Checklist

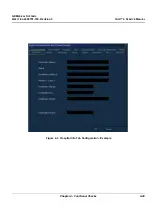
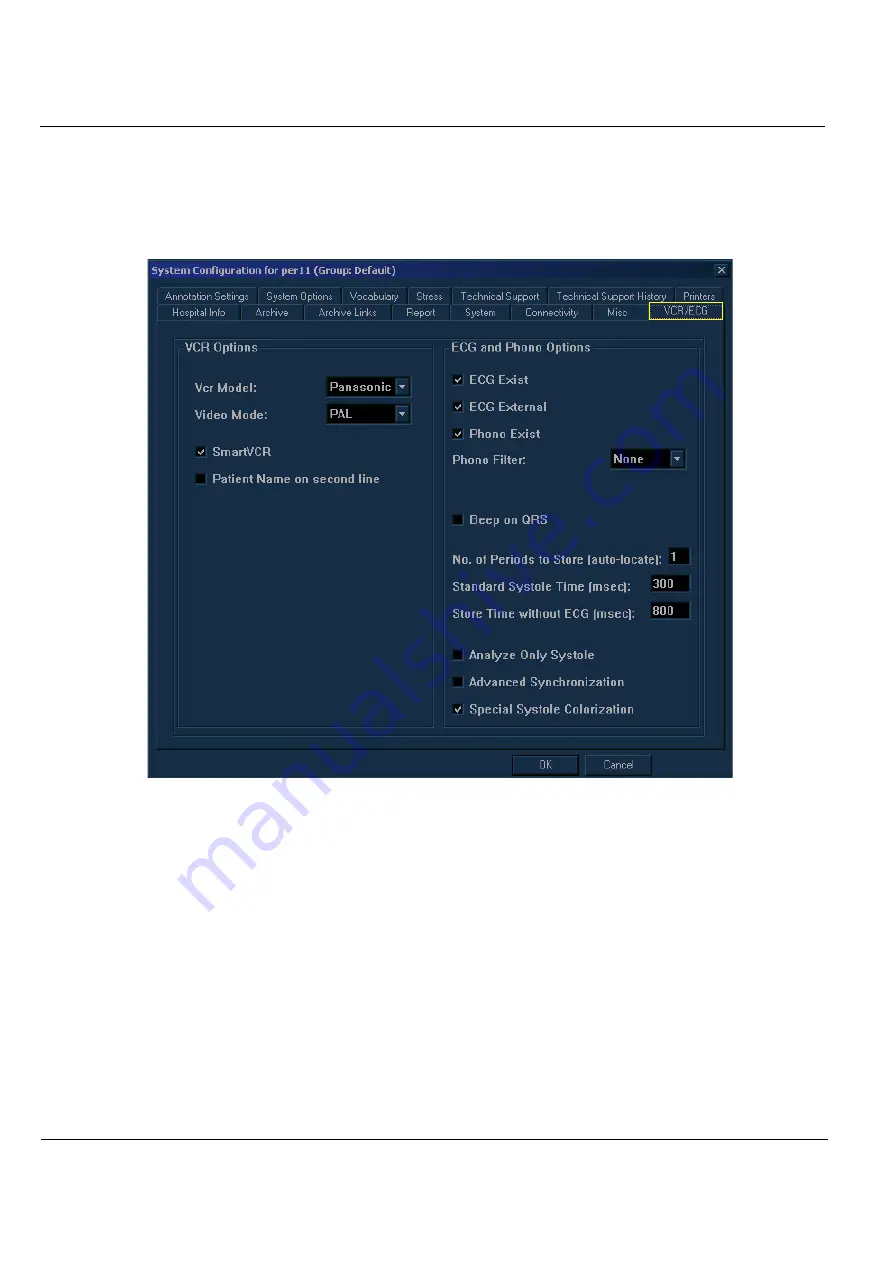
Figure 4-4   VCR/ECG Tab Configuration - Example

Summary of Contents for H45011DT

Page 1: ...Technical Publication Part Number 2392751 100 Revision 3 GE Medical Systems Vivid 4 Service Manual Copyright 2006 by GE Medical Systems ...

Page 2: ...L ANGLAIS C EST AU CLIENT QU IL INCOMBE DE LE FAIRE TRADUIRE NE PAS TENTER D INTERVENTION SUR LES ÉQUIPEMENTS TANT QUE LE MANUEL SERVICE N A PAS ÉTÉ CONSULTÉ ET COMPRIS LE NON RESPECT DE CET AVERTISSEMENT PEUT ENTRAÎNER CHEZ LE TECHNICIEN L OPÉRATEUR OU LE PATIENT DES BLESSURES DUES À DES DANGERS ÉLECTRIQUES MÉCANIQUES OU AUTRES DIESES KUNDENDIENST HANDBUCH EXISTIERT NUR IN ENGLISCHER SPRACHE FALL...

Page 3: ...AIS NOUTRO IDIOMA É DA RESPONSABILIDADE DO CLIENTE FORNECER OS SERVIÇOS DE TRADUÇÃO NÃO TENTE REPARAR O EQUIPAMENTO SEM TER CONSULTADO E COMPREENDIDO ESTE MANUAL DE ASSISTÊNCIA TÉCNICA O NÃO CUMPRIMENTO DESTE AVISO PODE POR EM PERIGO A SEGURANÇA DO TÉCNICO OPERADOR OU PACIENTE DEVIDO A CHOQUES ELÉTRICOS MECÂNICOS OU OUTROS IL PRESENTE MANUALE DI MANUTENZIONE È DISPONIBILE SOLTANTO IN INGLESE SE UN...

Page 4: ...GE MEDICAL SYSTEMS DIRECTION 2392751 100 REVISION 3 VIVID 4 SERVICE MANUAL iii ...

Page 5: ...ctors Other connections between pieces of electrical equipment calibrations and testing shall be performed by qualified GE Medical Systems personnel In performing all electrical work on these products GE will use its own specially trained field engineers All of GE s electrical work on these products will comply with the requirements of the applicable electrical codes The purchaser of GE equipment ...

Page 6: ...ated in any form in whole or in part without prior written permission of GE Medical Systems GE Medical Systems may revise this publication from time to time without written notice TRADEMARKS All products and their name brands are trademarks of their respective holders COPYRIGHTS All Material Copyright 2006 by General Electric Inc All Rights Reserved ...

Page 7: ...age N A Chapter 2 Pre Installation pages 2 1 to 2 12 3 Chapter 7 Diagnostics Troubleshooting pages 7 1 to 7 132 3 Important Precautions pages i to iv 3 Chapter 3 Installation pages 3 1 to 3 80 3 Chapter 8 Replacement Procedures pages 8 1 to 8 150 3 Legal Rev History LOEP pages v to vi 3 Chapter 4 Functional Checks pages 4 1 to 4 34 3 Chapter 9 Replacement Parts pages 9 1 to 9 28 3 Table of Content...

Page 8: ... s 1 4 Important Conventions 1 5 Conventions Used in this Manual 1 5 Model Designations 1 5 Icons 1 5 Safety Precaution Messages 1 5 Standard Hazard Icons 1 6 Safety Considerations 1 7 Introduction 1 7 Human Safety 1 7 Mechanical Safety 1 7 Electrical Safety 1 8 Probes 1 8 Dangerous Procedure Warnings 1 9 Product Labels and Icons 1 10 Product Label Locations 1 10 Label Descriptions 1 12 Vivid 4 Ex...

Page 9: ...DIRECTION 2392751 100 REVISION 3 VIVID 4 SERVICE MANUAL viii Electrostatic Discharge ESD Prevention 1 24 Standards Used 1 25 Lockout Tagout Requirements For USA Only 1 25 Customer Assistance 1 26 Contact Information 1 26 ...

Page 10: ...Site Circuit Breaker 2 3 Site Power Outlets 2 4 Mains Power Plug 2 4 Power Stability Requirements 2 4 EMI Limitations 2 5 Probe Environmental Requirements 2 6 Facility Needs 2 7 Purchaser Responsibilities 2 7 Mandatory Site Requirements 2 8 Site Recommendations 2 8 Recommended Ultrasound Room Layout 2 9 Networking Pre Installation Requirements 2 9 Stand alone Unit without Network Connection 2 9 Un...

Page 11: ...eparing for Installation 3 13 Confirming Customer Order 3 13 Verifying the Shipping Crate Contents 3 13 External Cables 3 13 Accessories 3 14 Component Inspection 3 14 Damage Inspection Checklist 3 14 Front and Side View of the Vivid 4 Ultrasound Unit 3 16 Rear View of the Vivid 4 Ultrasound Unit 3 18 System Voltage Confirmation 3 19 System Voltage Settings 3 19 Confirming System Voltage Configura...

Page 12: ...gs Tab 3 40 System Options Tab 3 42 Printers Tab 3 44 VCR ECG Tab 3 45 Technical Support Tab 3 47 Technical Support Tab RFI Configuration 3 47 Technical Support Tab RFT Configuration 3 49 Technical Support History Tab 3 51 Connectivity Setup 3 52 Introduction 3 52 Physical Connection 3 52 Ethernet Switch Connections 3 52 Local Network Connection to EchoPAC PC Workstation 3 53 Hospital Network Conn...

Page 13: ...ipping Crate and Packaging Materials 3 71 Cardboard Shipping Carton and Packaging Materials 3 72 Packing the Unit into the Wooden Shipping Crate 3 73 Assembling the Wooden Shipping Crate 3 74 Packing the Unit in the Cardboard Shipping Carton 3 76 Assembling the Cardboard Shipping Carton 3 77 Completing the Installation Paperwork 3 78 System Installation Details 3 78 Product Locator Installation 3 ...

Page 14: ...Printer Tests 4 5 Mechanical Functions 4 6 Console Movement Test 4 6 Brakes Function Test 4 6 Back End Processor Tests 4 7 Internal ECG Test 4 7 Phono Test optional 4 7 Magneto Optical Drive MOD Test 4 8 CD Writer Test 4 9 Plug and Scan Test 4 10 Image Testing 2D M CFM Doppler 4 11 3S Probe Image Quality Tests 4 11 2D Noise Uniformity Test 4 11 2D Performance Test 4 11 2D Penetration Test 4 12 CFM...

Page 15: ... 739L Probe Image Quality Tests 4 21 2D Noise Uniformity Test 4 21 2D Performance Test 4 21 CFM Stationary Noise Test 4 22 Probe Operation Check Alignment Sensitivity 4 22 CFM Operation Tests 4 23 PW Operation Tests 4 24 Probe 10S Image Quality Tests 4 25 2D Center Noise Test 4 25 Doppler Artifacts Test 4 25 2D Pencil Probe Image Quality Test 4 25 Image Quality Test 4 25 System Turnover Checklist ...

Page 16: ...FI configuration only 5 12 Transmit Signal Path 5 12 Received Signal Path 5 12 Front Board Assembly FB 5 16 General Description 5 16 TR4 Board Description 5 17 MUX Board 5 18 General Description 5 18 Beamformer Board BF 5 19 General Description 5 19 Description of Operation 5 20 Radio Frequency Interface RFI Board 5 21 General Description 5 21 Signal Flow 5 21 RF Processing 5 21 Data Buffer 5 22 T...

Page 17: ... 5 38 Floppy Drive 5 39 Hard Disk 5 39 Magneto Optical Drive MOD 5 40 CD Read Write CDRW 5 40 ECG Module 5 40 Modem 5 41 PC VIC Assembly 5 42 General Description 5 42 PAL 5 43 NTSC 5 43 External Peripherals 5 44 Introduction 5 44 VCR 5 44 Black White Video Printer 5 44 Color Video Printer 5 44 Color Inkjet Printer 5 44 Vivid 4 Power Distribution 5 45 Electrical Power 5 45 AC System 5 46 AC Distrib...

Page 18: ...rvice Platform 5 52 Introduction 5 52 iLinq Interactive Platform Features 5 52 Web Server Browser 5 52 Connectivity 5 52 Configuration 5 52 Contact GE 5 52 Interactive Application 5 52 Global Service User Interface GSUI 5 53 Internationalization 5 53 Service Login 5 53 Access Security 5 54 ...

Page 19: ...ort IMP LEDs 6 5 Front End Controller FEC LEDs 6 6 RF and Tissue Processor RFT 6 6 Beamformer BF 6 6 Channels Multiplexer MUX 6 7 Front Board Assembly FB 6 7 Back End Power Supply Voltages 6 8 VIC Video Signal Setting 6 8 Video Format Confirmation 6 8 Vivid 4 17 Monitor Operation Image Quality Calibration 6 9 Monitor Operation 6 9 Image Quality Calibration 6 10 Calibration 6 11 Accessing the Calib...

Page 20: ...ic Tests for RFT Configuration 7 15 RFT Diagnostic Tests for RFT Configuration 7 17 Front End Controller FEC Diagnostic Tests for RFT Configuration 7 19 Beamformer BF Diagnostic Tests 7 21 Front Board Assembly FB Diagnostic Tests 7 26 Accessing the Front Board Assembly Options 7 26 Transmit Test 7 29 FLA Jumper Switch 7 31 Receive Test 7 35 TR Switch Test 7 39 Pencil Probe Test 7 41 Port Test 7 45...

Page 21: ...ory 7 76 General Configuration 7 76 Keyboard Diagnostic Test 7 77 Media Driver Diagnostic Test 7 78 MOD Diagnostic Test 7 78 CD Writer Diagnostic Test 7 79 Computer Diagnostic Test 7 80 Benchmark Testing 7 80 Check Disk Bus 7 81 UPS Test 7 83 Checking the Network Adaptors from Windows Device Manager 7 84 Common Service Interface 7 86 iLinq Interactive Platform Features 7 86 Global Service User Int...

Page 22: ...t 7 106 Monitor Test 7 106 Front End Diagnostics 7 107 Image Quality Page 7 111 Calibration Page 7 111 Configuration Page 7 112 Utilities Page 7 113 Windows 2000 Utility 7 113 Scanner Utilities 7 115 ProDiags Configuration 7 117 ProDiags Browser 7 117 File Transfer Configuration 7 121 iLinq Configuration Utility 7 122 Replacement Page 7 127 PM Page 7 127 Automatic Error Log 7 128 Adding Comments t...

Page 23: ...ure 8 6 Rear Cover Replacement Procedures 8 7 Tools 8 7 Preparations 8 7 Rear Cover Removal Procedure 8 7 Rear Cover Installation Procedure 8 7 Connector Panels Cover Replacement Procedures 8 8 Tools 8 8 Preparations 8 8 Connector Panels Cover Removal Procedure 8 8 Connector Panels Cover Installation Procedure 8 8 Top Cover Lower Section Replacement Procedures 8 9 Tools 8 9 Preparations 8 9 Top Co...

Page 24: ...er Removal Procedure 8 19 Control Console Lower Rear Cover Installation Procedure 8 19 Front Handle Replacement Procedure 8 20 Tools 8 20 Preparation 8 20 Front Handle Removal Procedure 8 20 Front Handle Installation Procedure 8 20 Rear Handle Replacement Procedure 8 21 Tools 8 21 Preparation 8 21 Rear Handle Removal Procedure 8 21 Rear Handle Installation Procedure 8 21 Control Console Components...

Page 25: ...peaker Replacement Procedure 8 34 Tools 8 34 Preparation 8 34 Speaker Removal Procedure 8 34 Speaker Installation Procedure 8 34 Front End Parts Replacement 8 35 Front End Boards Replacement Procedure 8 35 Tools 8 35 Preparation 8 35 Front End Boards Removal Procedure 8 35 Front End Boards Installation Procedure 8 36 TR4 Boards Replacement Procedure 8 37 Tools 8 37 Preparation 8 37 TR4 Boards Remo...

Page 26: ...dure 8 54 BEP2 Side Cover Installation Procedure 8 54 BEP2 Front Cover Removal Procedure 8 54 BEP2 Front Cover Installation Procedure 8 56 BEP2 Octopus Card Holder Removal Procedure 8 56 BEP2 Octopus Card Holder Installation Procedure 8 56 Plug Scan Board Replacement Procedure 8 57 Tools 8 57 Preparation 8 57 Plug Scan Board Removal Procedure 8 57 Plug Scan Board Installation Procedure 8 57 Plug S...

Page 27: ...ools 8 66 Preparation 8 66 CDRW Drive Removal Procedure 8 66 CDRW Drive Installation Procedure 8 67 MO Drive Replacement Procedure 8 68 Tools 8 68 Preparation 8 68 MO Drive Removal Procedure 8 68 MO Drive Installation Procedure 8 69 ECG Module Replacement Procedure 8 70 Tools 8 70 Preparation 8 70 BEP2 ECG Module Removal Procedure 8 70 BEP2 ECG Module Installation Procedure 8 72 PC VIC Replacement...

Page 28: ...ocedure 8 88 AC BEP or FE Cable Installation Procedure 8 88 Gas Spring Cable Replacement Procedure 8 89 Preparation 8 89 Gas Spring Cable Removal Procedure 8 89 Gas Spring Cable Installation Procedure 8 92 Swivel Release Cable Replacement Procedure 8 94 Preparation 8 94 Swivel Release Cable Removal Procedure 8 94 Swivel Release Cable Installation Procedure 8 97 Up Down Swivel Handle Replacement Pr...

Page 29: ...eparations 8 118 Mitsubishi VCR Installation Procedure 8 119 Mitsubishi VCR Setup Procedure 8 122 Mitsubishi VCR Removal Procedure 8 125 Sony VCR Replacement Procedure 8 126 Tools 8 126 Manpower 8 126 Preparations 8 126 Sony VCR Installation Procedure 8 127 Sony VCR Removal Procedure 8 129 Panasonic VCR Replacement Procedure 8 130 Tools 8 130 Manpower 8 130 Preparations 8 130 Panasonic VCR Install...

Page 30: ...E MEDICAL SYSTEMS DIRECTION 2392751 100 REVISION 3 VIVID 4 SERVICE MANUAL xxix HP 6540 3 USB Deskjet Color Printer Installation Procedure 8 140 HP 6540 3 USB Deskjet Color Printer Removal Procedure 8 150 ...

Page 31: ...9 Renewal Parts Overview 9 1 Purpose of Chapter 9 9 1 List of Abbreviations 9 2 Renewal Parts Lists and Diagrams 9 3 Mechanical Hardware Parts 9 3 AC System Parts 9 9 Front End Parts 9 11 Back End Parts 9 14 Cables 9 19 Software 9 24 Probes 9 25 Peripherals 9 26 System Block Diagrams 9 27 ...

Page 32: ...nance 10 6 System Periodic Maintenance 10 7 Preliminary Checks 10 7 Functional Checks 10 8 System Checks 10 8 Peripheral Option Checks 10 9 Input Power Checks 10 9 Mains Cable Inspection 10 9 Cleaning 10 10 General Cleaning 10 10 Air Filter Cleaning 10 10 Physical Inspection 10 12 Diagnostic Checks Optional 10 13 Probe Maintenance 10 14 Probe Checks 10 14 Probe Handling 10 14 Basic Probe Care 10 1...

Page 33: ...t Lead Source Leakage Lead to Ground 10 24 Definition 10 24 Generic Procedure 10 24 Isolated Patient Lead Source Leakage Lead to Lead 10 25 Isolated Patient Lead Sink Leakage Isolation Test 10 25 Data Sheet for ECG Current Leakage 10 26 Probe Current Leakage Test 10 27 Definition 10 27 Generic Procedure 10 27 No Meter Probe Adapter Procedure 10 28 Data Sheet for Transducer Source Current Leakage 1...

Page 34: ...t Chapter 3 Installation Contains installation procedures and an installation checklist Chapter 4 Functional Checks Contains functional checks that are recommended as part of the installation procedure or as required during servicing and periodic maintenance Chapter 5 Components and Function Theory Contains block diagrams and functional explanations of the electronic circuits Chapter 6 Service Adj...

Page 35: ... Parts Contains a complete list of field replaceable parts for the Vivid 4 ultrasound unit Chapter 10 Periodic Maintenance Provides periodic maintenance procedures for the Vivid 4 ultrasound unit 1 1 3 Typical Users of the Basic Service Manual This manual is intended for the following categories of users GE service personnel installation maintenance etc Hospital service personnel Contractors some ...

Page 36: ... and below are configured with RFT hardware Table 1 2 Vivid 4 BT03 RFI Models Model Cat No Description BASE Vivid 4 Console Vivid 4 BT03 console 220 240V AC RFI H45011FT An advanced version of the Ultrasound Scanning Systems based on the Vivid product line Enables a larger variety of probes and larger application use Vivid 4 BT03 console 100V AC RFI H45011FW Vivid 4 BT03 console 110 120V AC RFI H4...

Page 37: ...ound unit and therefore shares much of the same hardware However even though much of the hardware is the same the Vivid 3 cannot be upgraded to Vivid 4 or vice versa The Vivid 4 ultrasound unit provides advanced features in a compact and user friendly tool 1 1 6 Purpose of Operator Manual s The Vivid 4 User Guide and Operator Manual s should be fully read and understood before operating the Vivid ...

Page 38: ...els of safety precautions are found on the equipment and throughout this service manual Different levels of severity are identified by one of the following icons which precede precautionary statements in the text DANGER Indicates the presence of a hazard that will cause severe personal injury or death if the instructions are ignored WARNING Indicates the presence of a hazard that can cause severe ...

Page 39: ...veral different graphical icons symbols may be used to make you aware of specific types of hazards that could cause harm Other hazard icons make you aware of specific procedures that should be followed Table 1 4 Standard Hazard Icons ELECTRICAL MECHANICAL RADIATION LASER HEAT PINCH Table 1 5 Standard Icons Indicating a Special Procedure Be Used AVOID STATIC ELECTRICITY TAG AND LOCK OUT WEAR EYE PR...

Page 40: ...THAT CAN EASILY BE DAMAGED BY IMPROPER HANDLING USE CARE WHEN HANDLING AND PROTECT FROM DAMAGE WHEN NOT IN USE DO NOT USE A DAMAGED OR DEFECTIVE PROBE FAILURE TO FOLLOW THESE PRECAUTIONS CAN RESULT IN SERIOUS INJURY AND EQUIPMENT DAMAGE DANGER NEVER USE A PROBE THAT HAS BEEN SUBJECTED TO MECHANICAL SHOCK OR IMPACT EVEN IF THE PROBE APPEARS TO BE UNBROKEN IT MAY IN FACT BE DAMAGED CAUTION Always lo...

Page 41: ...be shared with other types of equipment Both the system power cable and the power connector must meet international electrical standards Note When replacing UPS batteries ensure that defective batteries are disposed of in accordance with local regulations Alternatively forward them to GE Medical Systems for proper disposal 1 3 4 1 Probes All the probes for the Vivid 4 ultrasound unit are designed ...

Page 42: ...d DANGEROUS VOLTAGES CAPABLE OF CAUSING DEATH ARE PRESENT IN THIS EQUIPMENT USE EXTREME CAUTION WHEN HANDLING TESTING AND ADJUSTING EXPLOSION WARNING DO NOT OPERATE THE EQUIPMENT IN AN EXPLOSIVE ATMOSPHERE OPERATION OF ANY ELECTRICAL EQUIPMENT IN SUCH AN ENVIRONMENT CONSTITUTES A DEFINITE SAFETY HAZARD DO NOT SUBSTITUTE PARTS OR MODIFY EQUIPMENT BECAUSE OF THE DANGER OF INTRODUCING ADDITIONAL HAZA...

Page 43: ...ertinent information regarding the operation of the ultrasound unit 1 4 1 Product Label Locations The following two diagrams indicate the location of some of the labels and icons found on the Vivid 4 ultrasound unit All the labels and icons are described in Table 1 6 on page 1 12 Figure 1 1 Product Label and Icon Locations Front 1 Product Logo 2 Equipment Type CF 3 Parking Label on Brake Pedal 4 C...

Page 44: ...MEDICAL SYSTEMS DIRECTION 2392751 100 REVISION 3 VIVID 4 SERVICE MANUAL Chapter 1 Introduction 1 11 Figure 1 2 Product Label and Icon Locations Rear 1 Main Label 2 AC Voltage Rating Label 3 GND Label 1 2 3 ...

Page 45: ... cannot become live in the event of a failure of the basic insulation Rear of the unit and probe connectors Device Listing Certification Labels Laboratory logos or labels that denote conformity with industry safety standards such as UL or IEC Rear of the unit CE certification mark Rear of the unit on the main label Equipment Type BF man in the box symbol IEC 878 02 03 indicates B Type equipment ha...

Page 46: ... the lightning flash with arrowhead in equilateral triangle is used to indicate electric shock hazards Rear of the unit Protective Earth Indicates the protective earth grounding terminal Rear of the unit Equipotentiality Indicates the terminal to be used for connecting equipotential conductors when interconnecting grounding with other equipment Peripherals Waste Electrical and Electronic Equipment...

Page 47: ... Label section on page 1 23 Swivel Brake Label section on page 1 23 1 4 3 1 Main Label The main label may be printed in any of the following languages English German French Spanish Portuguese Italian Chinese Danish Dutch Finnish Greek Japanese Norwegian Russian or Swedish as shown in the examples below Each main label includes a serial number a voltage rating caution warnings danger warnings and c...

Page 48: ...TION 2392751 100 REVISION 3 VIVID 4 SERVICE MANUAL Chapter 1 Introduction 1 15 German Used in all German language countries Figure 1 5 Main Label German French Used in all French language countries Figure 1 6 Main Label French ...

Page 49: ...0 REVISION 3 VIVID 4 SERVICE MANUAL 1 16 Section 1 4 Product Labels and Icons Spanish Used in all Spanish language countries Figure 1 7 Main Label Spanish Portuguese Used in all Portuguese language countries Figure 1 8 Main Label Portuguese ...

Page 50: ... SYSTEMS DIRECTION 2392751 100 REVISION 3 VIVID 4 SERVICE MANUAL Chapter 1 Introduction 1 17 Figure 1 9 Main Label Portuguese 220 240V Italian Used in all Italian language countries Figure 1 10 Main Label Italian ...

Page 51: ...51 100 REVISION 3 VIVID 4 SERVICE MANUAL 1 18 Section 1 4 Product Labels and Icons Chinese Used in all Chinese language countries Figure 1 11 Main Label Chinese Danish Used in all Danish language countries Figure 1 12 Main Label Danish ...

Page 52: ...ION 2392751 100 REVISION 3 VIVID 4 SERVICE MANUAL Chapter 1 Introduction 1 19 Dutch Used in all Dutch language countries Figure 1 13 Main Label Dutch Finnish Used in all Finnish language countries Figure 1 14 Main Label Finnish ...

Page 53: ...51 100 REVISION 3 VIVID 4 SERVICE MANUAL 1 20 Section 1 4 Product Labels and Icons Greek Used in all Greek language countries Figure 1 15 Main Label Greek Japanese Used in all Japanese language countries Figure 1 16 Main Label Japanese ...

Page 54: ...92751 100 REVISION 3 VIVID 4 SERVICE MANUAL Chapter 1 Introduction 1 21 Norwegian Used in all Norwegian language countries Figure 1 17 Main Label Norwegian Russian Used in all Russian language countries Figure 1 18 Main Label Russian ...

Page 55: ...ed in all Swedish language countries Figure 1 19 Main Label Swedish 1 4 3 2 Rating Labels Indicates the ultrasound unit s factory preset input AC voltage as follows AC 100V AC 120V AC 220 240V AC 220 230V One of the rating labels shown in Figure 1 20 below is located on the rear of the ultrasound unit Figure 1 20 Rating Labels ...

Page 56: ...tes the locked pedal position which locks the front castors and prevents the ultrasound unit from moving The parking label shown below is located on the brake pedal at the front of the unit as shown in Figure 1 1 on page 1 10 Figure 1 22 Parking Label 1 4 3 5 Swivel Brake Label Indicates the locked swivel position which prevents the front castors from swiveling The swivel brake label shown below i...

Page 57: ... produces unacceptable levels of emission This interference is often referred to as radio frequency or electromagnetic interference RFI EMI and can be radiated through space or conducted over interconnecting power or signal cables In addition to electromagnetic energy EMC also includes possible effects from electrical fields magnetic fields electrostatic discharge and disturbances in the electrica...

Page 58: ...al is required in order to achieve full EMC performance 1 5 4 Lockout Tagout Requirements For USA Only Follow OSHA Lockout Tagout requirements by ensuring you are in total control of the electrical Mains plug Table 1 7 Standards Used Standard Directive Scope 89 336 EEC EMC Directive 93 42 EEC Medical Device Directive IEC 801 2 Electrostatic Discharge IEC 801 3 Radiated Electromagnetic Field IEC 80...

Page 59: ...Ultrasound Service Engineering 4855 W Electric Avenue Milwaukee WI 53219 Customer Answer Center Phone 1 800 437 1171 Phone 1 800 321 7937 Phone 1 800 682 5327 Phone 1 262 524 5698 Fax 1 414 647 4125 Latin America GE Medical Systems Ultrasound Service Engineering 4855 W Electric Avenue Milwaukee WI 53219 Customer Answer Center Phone 1 262 524 5300 Phone 1 262 524 5698 Fax 1 414 647 4125 Europe GE U...

Page 60: ...the installation of a Vivid 4 ultrasound unit Included are descriptions of the electrical and facility requirements that must be met by the purchaser A worksheet is provided at the end of this chapter see Figure 2 2 on page 2 11 to help ensure that all the required network information is available prior to installation Table 2 1 Contents in Chapter 2 Section Description Page Number 2 1 Overview 2 ...

Page 61: ...d if the room lighting is subdued and indirect when a scan is being performed Therefore a combination lighting system dim bright is recommended Keep in mind that lighting controls and dimmers can be a source of EMI which could degrade image quality These controls should be selected to minimize possible interference 2 2 4 Time and Manpower Requirements Site preparation takes time Begin pre installa...

Page 62: ...lease note that image artifacts can occur if at any time within the facility the Ground from the main facility s incoming power source to the Ultrasound unit is only a conduit 2 2 5 1 Vivid 4 Power Requirements Electrical specifications for the Vivid 4 monitor and onboard peripherals are as follows 2 2 5 2 Inrush Current Inrush current is not a factor for consideration due to the inrush current li...

Page 63: ...et all current local state and national electrical codes 2 2 5 5 Mains Power Plug If the unit arrives without a power plug or with the wrong plug contact your GE dealer When necessary the installation engineer will supply the locally required power plug 2 2 5 6 Power Stability Requirements Voltage drop out Max 10 ms NOTE The Vivid 4 ultrasound unit can be provided with an external UPS system Conta...

Page 64: ...owever there is no guarantee that interference will not occur in a particular installation Note Possible EMI sources should be identified before the unit is installed and should not be on the same line as the ultrasound system A dedicated line should be used for the ultrasound system Electrical and electronic equipment may produce EMI unintentionally as the result of a defect Sources of EMI includ...

Page 65: ...Loose or missing covers or RF gaskets allow radio frequencies to interfere with the ultrasound signals Replace broken RF gaskets If more than 20 or a pair of the fingers on an RF gasket are broken replace the gasket Do not turn ON the unit until any loose metallic part is removed and replaced if required Do not place labels where RF gaskets touch metal Never place a label where RF gaskets meet the...

Page 66: ...calibration and testing must also be performed by qualified personnel The products involved and the accompanying electrical installations are highly sophisticated and special engineering competence is required All electrical work on these products must comply with the requirements of applicable electrical codes The purchaser of GE equipment must utilize only qualified personnel to perform electric...

Page 67: ... the case of a network option An active network outlet in the vicinity of the ultrasound unit A network cable of appropriate length regular Pin to Pin network cable An IT administrator who will assist in configuring the unit to work with your local network A fixed IP address is required Refer to the form provided in Figure 2 2 on page 2 11 for network details that are required Note All relevant pr...

Page 68: ...erator with clinically useful features for moving images and patient information over a hospital network Examples of DICOM services include the transfer of images to workstations for viewing or transferring images to remote printers As an added benefit transferring images in this manner frees up the on board monitor and peripherals enabling viewing to be done while scanning continues With DICOM im...

Page 69: ...work administrator must provide the required information which should include the following Vivid 4 Details DICOM network details for the Vivid 4 unit including the host name local port IP address AE title and net mask Routing Information IP addresses for the default gateway and other routers in use at the site DICOM Application Information Details of the DICOM devices in use at the site including...

Page 70: ... Destination Devices TCP IP Settings Device Type Manufacturer Name IP Address Port AE Title 1 2 3 4 5 6 7 8 9 10 11 12 Dept Vivid 4 SN Type Floor Room REV Comments CONTACT INFORMATION Name Title Phone E Mail Address Site Scanner IP Settings IP Address Subnet Mask Default Gateway Echo Server GEMNet Server EchoPac PC Server Name Remote DB User Name Name AE Title Remote Archive Setup IP Address Subne...

Page 71: ... from the basic installation Make sure system and probes have been subject to acclimation period Environmental cooling is sufficient Lighting is adjustable to adapt to varying operational conditions of the scanner Electrical facilities meet system requirements EMI precautions have been taken and all possible sources of interference have been removed Mandatory site requirements have been met If a n...

Page 72: ...repared as described in Chapter 2 Pre Installation Once the site has been prepared installation can proceed as described in this chapter Table 3 1 Contents in Chapter 3 Section Description Page Number 3 1 Overview 3 1 3 2 Installation Reminders 3 2 3 3 Receiving and Unpacking the Equipment 3 4 3 4 Preparing for Installation 3 13 3 5 Completing the Hardware Installation 3 23 3 6 System Configuratio...

Page 73: ... troubleshooting 3 2 2 1 System Acclimation Time Following transport the Vivid 4 system may be very cold or hot Allow time for the system to acclimate before being switched ON Acclimation requires 1 hour for each 2 5oC increment when the temperature of the system is below 10o C or above 35o C Table 3 2 Average Installation Time Description Average Installation Time Comments Unpacking the scanner 0...

Page 74: ... connect the unit to a properly grounded power outlet Do NOT use a three prong to two prong adapter as this defeats safety grounding CAUTION Do NOT wear the ESD wrist strap when you work on live circuits where more than 30 V peak is present CAUTION Do NOT operate the unit unless all board covers and frame panels are securely in place to ensure optimal system performance and cooling When covers are...

Page 75: ...age 3 9 3 3 1 Unpacking the Wooden Shipping Crate The Vivid 4 ultrasound unit is packed in a wooden crate that has four walls left right front and rear the crate base and the top cover Each section has rebated joints that are joined together with Clip lokTM clips 3 3 1 1 Removing the Clip lokTM Clips When unpacking the Vivid 4 ultrasound unit always remove the Clip lokTM clips as follows 1 Locate ...

Page 76: ... either the Drop or Tilt indicators have turned red showing failure please inform the GE Medical Systems sales representative immediately In addition mark on the shipping consignment note or packing slip post delivery checklist in the Package column that the Tilt and or Drop indicators show failure It is recommended to keep and store the crate and all other packing materials including the Clip lok...

Page 77: ...g the probes and peripheral options items D and E in Figure 3 3 below from the wooden crate 5 Remove the console control support back foam item 11 in Figure 3 3 above 6 Remove the keyboard support foam located in front of the keyboard item 10 in Figure 3 3 above 7 Remove the back support foam located in front of the rear wheels item 9 in Figure 3 3 above 8 Remove the top cover by opening the six c...

Page 78: ...ontrol console monitor by pressing the release grip located under the unit s front handle 15 Remove the two cartons containing the external cables and accessories located under the control console and then lower the control console 16 Lay the top cover removed from the crate in step 8 on page 3 6 on the floor and push it over the narrow side of the base in front of the unit to act as a ramp item 3...

Page 79: ... wheels from swiveling as described in the Swivel Brake Label section page 1 23 18 Pull the unit backwards from the platform base onto the ramp and roll it down to the floor 19 Press the brake pedal located near the bottom of the front of the unit to the left to lock the wheels as described in the Parking Label section page 1 23 20 Verify the contents of the case as described in Verifying the Ship...

Page 80: ...s on the Shock watch and Tilt watch labels respectively for evidence of accidental shock or tilting of the crate during transit refer to Figure 3 2 on page 3 5 NOTE If the crate is damaged or if either the Drop or Tilt indicators have turned red showing failure please inform the GE Medical Systems sales representative immediately In addition mark on the shipping consignment note or packing slip po...

Page 81: ...rews item 16 so that the cardboard carton item 12 is free of the wooden platform item 4 and the narrow flap is free 4 Open the narrow side flap of the carton remove the ramp item 5 and attach it to the narrow side of the wooden platform item 4 in Figure 3 7 below 5 Remove the small boxes containing the accessories probes and peripherals from the shipping carton 6 Clear away the carton cover item 1...

Page 82: ... SERVICE MANUAL Chapter 3 Installation 3 11 8 Pull out and remove the monitor support item 10 in Figure 3 9 below from under the base of the monitor Figure 3 8 Front and Side View of the Unit in the Shipping Carton Figure 3 9 Unit in Shipping Carton Right View ...

Page 83: ...ese cartons contain the external cables and accessories 12 Lower the control console to its lowest position 13 Remove the manuals item 4 in Figure 3 8 on page 3 11 from the compartment on the left side of the ultrasound unit 14 Press the brake pedal located near the bottom of the front of the unit to the right to prevent the wheels from swiveling as described in the Swivel Brake Label section page...

Page 84: ...stallation 3 4 2 1 External Cables The ECG cable item number 10 or 11 is supplied according to installation location Table 3 4 Vivid 4 External Cables Item Number P N Description Quantity 1 2269430 PWR CORD MALE FEMALE 10A V 0 60M PERIPHERALS 1 2 2266746 AUDIO IN EXT CABLE 1 3 2266745 AUDIO OUT EXT CABLE 1 4 2266744 VIDEO OUT EXT CABLE 1 5 2266743 VIDEO IN EXT CBL 1 6 2266742 RS232 D25 TO D9 CBL 1...

Page 85: ...serial number printed on the main label into the system installation details card as described in System Installation Details on page 3 78 3 4 3 1 Damage Inspection Checklist Visually inspect the contents of the shipping crate shipping carton for damage If any parts are damaged or missing contact an authorized GE Service Representative A Damage Inspection Checklist is provided in Table 3 6 on page...

Page 86: ... and peripheral fans are operating and clean 7 BE Rear Panel Check the BE rear panel connectors for bent pins loose connections and loose or missing hardware Screw all the cable connectors tightly to the connector sockets on the panel Verify that the labeling is in good condition 8 Covers Check that all screws are in place all chassis and internal covers are installed and that the air filters are ...

Page 87: ...ide of the front panel 4 Control Panel Contains the alphanumeric keyboard and the buttons used to operate the ultrasound unit 5 Front Handle 6 Raise Lower the Control Console Up Down Swivel Handle Located midway underneath the front handle Used to swivel left or right and raise or lower the control console control panel and monitor Press the handle halfway for the swivel action and all the way for...

Page 88: ...t I O module that enables keyboard commands to be operated by foot 11 Gel Holders Situated on either side of the control console and on the top surface on either side of the monitor 12 Color Printer or optional storage area 13 On Off Switch 14 Alphanumeric Keyboard and Operation Buttons 15 Cable Hook 16 Peripherals The VCR recorder and or black and white printer and or color printer are positioned...

Page 89: ... Unit The following figure shows the Vivid 4 ultrasound unit components that are visible from the rear of the ultrasound unit 1 Monitor 2 Gel Wells 3 Monitor Connection Panel 4 Left Rear Panel 5 Right Rear Panel 6 Power Cable Storage Hook 7 Circuit Breaker On Off Switch 8 Ground Screw 9 Power Cable Socket Figure 3 12 Rear View of the Vivid 4 1 3 4 6 7 8 9 5 2 2 ...

Page 90: ...ystem WARNING CONNECTING A Vivid 4 SCANNER TO THE WRONG VOLTAGE LEVEL WILL MOST LIKELY DESTROY THE SCANNER 3 4 4 2 Confirming System Voltage Configuration 1 Turn ON the system 2 In regular 2D Scanning Mode press Config 3 From the System Configuration dialog box click the Technical Support tab 4 Make sure the frequency and voltage ranges are set up correctly and that the appropriate settings are di...

Page 91: ... 100 REVISION 3 VIVID 4 SERVICE MANUAL 3 20 Section 3 4 Preparing for Installation 5 Click OK Note If the voltage is not set correctly contact an authorized GE Service Representative Figure 3 14 System Configuration Technical Support Tab ...

Page 92: ...red 3 4 5 1 Video Format Confirmation 1 Turn ON the system and the check video transmission signal is set correctly 2 Press Config 3 From the System Configuration dialog box select the VCR ECG tab and make sure Either PAL or NTSC is selected 4 Click the Technical Support tab and make sure Frequency is set to either 60Hz for NTSC or 50Hz for PAL 5 Click OK Note If the video format is not set correc...

Page 93: ...sy images Check the grounding of the power cord and power outlet Be aware of RF sources Keep the unit at least 5m 16 4 ft away from other EMI sources Special shielding may be required to eliminate interference problems caused by high frequency high powered radio or video broadcast signals Replace and or reassemble all screws RF gaskets covers and cores After you finish repairing or updating the sy...

Page 94: ...m CAUTION The Vivid 4 weighs 170 kg 375 lbs or more depending on installed peripherals when ready for use Care must be used when moving it or replacing its parts Failure to follow the precautions listed could result in injury uncontrolled motion and costly damage ALWAYS Be sure the pathway is clear Use slow careful motions Use two people when moving the system on inclines or lifting more than 16 k...

Page 95: ...nformation for each peripheral device refer to the manufacturer s manual On board peripherals must be connected to one of the two available auxiliary power supplies on the right rear panel The total load on both auxiliary AC outlets should not exceed 500 VA This means 8 Amp 100 120V AC or 4 Amp 220 240V AC Voltages are set according to local country voltage as described in the Voltage Level Checks...

Page 96: ...untry voltage 2 AUXILIARY AC OUTLET For use with external peripherals Voltages are set according to local country voltage If additional auxiliary outlets are required use the special cable provided by GE DO NOT attempt to connect additional peripherals using an external wall outlet 3 THERMAL CIRCUIT BREAKERS Three 4A thermal circuit breakers for fuse protection 4 NETWORK For the network connection...

Page 97: ...T Y C Video Out 4 pin connector for output to an S VHS VCR 3 S VIDEO IN Y C Video In 4 pin connector for input from an S VHS VCR 4 VIDEO OUT B W BNC connector for composite B W video output to a hard copy printer 5 VIDEO OUT 1 BNC connector for composite color video output PAL or NTSC 6 VIDEO OUT 2 BNC connector for composite color video output PAL or NTSC 7 AUDIO IN RIGHT RCA jack 8 AUDIO IN LEFT...

Page 98: ...ure 8 101 on page 115 3 After connecting the remaining peripherals and switching the system on configure the printer settings as described in the Printers Tab section on page 3 44 For more details about peripherals installation refer to Chapter 8 Replacement Procedures see the Peripherals section on page 114 3 5 2 4 Connecting the Color Printer 1 Place the color printer in the printer compartment ...

Page 99: ...d 4 unit WARNING Whenever moving the Vivid 4 scanner the DeskJet Color Printer must be disconnected from the scanner DO NOT attempt to move the two units simultaneously without first disconnecting them After relocation re connect the printer to the scanner 1 Place the DeskJet color printer on the shelf below the control console or alternatively on the designated stand or table adjacent to the unit...

Page 100: ... Gently push the connector in as far as possible 5 Rotate the locking latch 90 degrees clockwise to lock the connector into place vertical NOTE It is not necessary to turn OFF power to connect or disconnect a probe 3 5 3 1 Available Probes The following probes are available for use with the Vivid 4 ultrasound unit Table 3 15 Available Probes P N Description 2256686 Heart Sound Microphone 2259153 P...

Page 101: ...ferent cable parts The main part trunk is a single cable connecting to the unit at one end and providing a cable splitter device at the other end The splitter contains five receptacles only three of which are used with the Vivid 4 ultrasound unit Three color coded electrode cables are inserted into the splitter in the appropriate color coded receptacles Each electrode cable hooks up to the appropr...

Page 102: ...ards see Table 3 16 Figure 3 19 ECG Cable and Electrode Placement Table 3 16 ECG Cable Types Description Part No Full ECG Cable Kit AHA Americas Japan 2256477 Black wire LA 2269982 3 White wire RA 2269982 Green wire RL 2269982 2 Full ECG Cable Kit IEC Europe Asia ROW 2256478 Yellow wire L 2269983 Red wire R 2269983 3 Black wire N 2269983 2 AHA Americas Japan IEC Europe Asia ROW ...

Page 103: ...ce wall outlet plug should be connected to the fixed power socket that has a protective grounding conductor Never use an adapter or converter to connect with a power source plug for example a three prong to two prong converter 3 5 5 1 Voltage Level Checks The following voltage level checks are required 1 Check the rating label at the rear of the ultrasound unit as described in Chapter 1 Introducti...

Page 104: ...ug the power cord connector into the AC input socket and secure it in place using the attached clip see Figure 3 20 4 Plug the other end of the power cord to the AC wall outlet Allow sufficient slack so that the plug will not be pulled out if the unit is slightly moved The remaining length of the cord should be looped and hung on the hook provided DANGER To avoid the risk of fire power to the syst...

Page 105: ...robe and application that were last used before the system was shut down If the probe has been removed since the system was last used the currently connected probes and their available applications are displayed and selected by default 3 5 6 2 Switching the System OFF NOTE After turning OFF the system wait at least 10 seconds before turning it on again The system may not be able to boot up if powe...

Page 106: ...GE MEDICAL SYSTEMS DIRECTION 2392751 100 REVISION 3 VIVID 4 SERVICE MANUAL Chapter 3 Installation 3 35 Figure 3 21 Shut Down Options Screen ...

Page 107: ...ight They can be adjusted using the Contrast and Brightness buttons on the front part of the display monitor All display monitor controls other than the contrast and brightness controls are factory adjusted for optimum settings and usually do not require further adjustment For details on adjusting the display monitor settings refer to the Vivid 4 17 Monitor Operation Image Quality Calibration sect...

Page 108: ... area set the date and time as follows Trackball to the Set button and press Select Use the alphanumeric keyboard to select the current date Select the format of the date and time display for example DD MM YYYY Select the hour mode for example 24 hour or 12 hour In the Default PC Cursor Position area specify the default location of the PC cursor on the screen by entering the X and Y coordinates in...

Page 109: ...igure 3 24 Archive Tab Note The Archive tab will display even if the Archive Package option is not installed 3 Select Display patients gender on screen to display the patient s gender in the patient information area of the scanning screen not applicable to OB applications 4 Select Delete Confirmation to prompt the user to confirm delete commands 5 Select the type of weight measurement to be used d...

Page 110: ... to which data is stored during backup from the Backup Device Is dropdown list 10 Select Eject MO Disk on Shutdown to have the system automatically eject the backup media when the unit is shut down 11 Enter the location of ASCII files in the user U path partition of the internal hard disk in the Export To Excel Path field 12 Select Enter From Halves to Quad to enable the user to toggle between vie...

Page 111: ...t name is highlighted Trackball to the Change button and press Select The Font dialog box is displayed Trackball to the required font color style and size and press Select for each choice Trackball to OK and press Select The font is defined In the Home position for text area set the home position for the text cursor by entering the X and Y coordinates into the X and Y fields as required Note After...

Page 112: ...played it will appear in the newly selected position until such time as this setting is changed 5 Activate the Duplicate Bodymark on Switch Window and or the Bodymark Menu on Freeze checkboxes as required Note For more details on using the Bodymark features refer to the Vivid 3 User Manual 6 Trackball to the OK button and press Select ...

Page 113: ...ext to the name of the option being installed and use the alphanumeric keyboard to enter the password supplied by GE Note If an incorrect password is entered if the option has already been correctly installed in the system it will be removed Note Please note that all passwords should be visible underneath the control console or and on the green password option certificate If a new password option ...

Page 114: ...3 43 Note If an option was not initially purchased or installed it may be acquired and or installed later During option installation type the relevant password in the appropriate Option window see Figure 3 26 and click Apply The Installed status to the right of the Apply button will then be visible ...

Page 115: ... with the Vivid 4 system Other generic printers are not approved and GE Medical Systems will not guarantee their correct operation on this system 3 In the Currently Installed Printers area trackball to the required printer and press Select The printer is highlighted 4 Trackball to the Set as default button and press Select The selected printer is set as the default printer and is shown in the text...

Page 116: ...tions area complete the following as required Select the video system from the Video Mode dropdown list for example PAL or NTSC Select the SmartVCR option to enable Measurement and Analysis measurements and calculations on recorded VCR images Select the Patient Name on second line option to display the patient s name on the second line For use when an external monitor omits picture borders 4 If do...

Page 117: ...ld define the default length of a cineloop when there is no ECG trace Select the Analyze only Systole checkbox to place markers only on the systole portion for synchronization and analysis purposes Select the Advanced Synchronization checkbox to enable the use of a special synchronization algorithm This algorithm allows non linear stretching of the time base to compensate for non linearity of the ...

Page 118: ...t Tab RFI Configuration Monitoring should always be enabled this provides constant monitoring of critical parameters to ensure safe operation of the system Watchdog normally should not be enabled When enabled if there is a system lock up caused by the Back End this will turn OFF power at the Front End MOD Fan should be enabled only on BEPs based on Pentium 4 this provides faster operation of the M...

Page 119: ...Configuration Table 3 17 Recommended Vivid 4 Hardware Configurations RFI Models Item Vivid 4 BT03 ECG Second Re Image Port No board Front Board V7 3 TR V4 Ex Keyboard Revision 4 MUX Board V2 Sound Board Ver 3 RFI Board V1 Network Board Intel EtherExpr UPS PowerCard 450 VIC V1 PC VIC Number of Fans 5 ...

Page 120: ...chdog normally should not be enabled When enabled if there is a system lock up caused by the Back End this will turn OFF power at the Front End MOD Fan should be enabled only on BEPs based on Pentium IV this provides faster operation of the MOD Enabling this option in the wrong type of BEP may cause damage to the MOD or MO media Use Front End normally should be enabled ILinq should be enabled only...

Page 121: ...uration Table 3 18 Recommended Vivid 4 Hardware Configurations RFT Models Item Vivid 4 BT03 ECG Second Re Image Port Revision E8 F8 Front Board V7 3 TR V4 Ex Keyboard Revision 4 MUX Board V2 Sound Board Ver 3 RFI Board No board Network Board Intel EtherExpr UPS PowerCard 450 VIC V1 PC VIC Number of Fans 5 ...

Page 122: ...er 3 Installation 3 51 3 6 11 Technical Support History Tab The Technical Support History is where you would record any historical technical support information that may be relevant to a problem or any other maintenance operations performed Figure 3 31 Technical Support History Tab ...

Page 123: ... station or a DICOM service using a TCP IP connection 3 7 2 Physical Connection 3 7 2 1 Ethernet Switch Connections An Ethernet Switch P N 066E0741 is used to connect the Vivid 4 system to an EchoPAC PC and a network printer Figure 3 32 Ethernet Switch Identifications Table 3 19 MDI Button Position Descriptions Position Label Function X To PC To connect an end station or a Server to the Port To HU...

Page 124: ...C Workstation Figure 3 34 Hospital Network Connections See the EchoPAC PC Service Manual Part Number EP091298 for details about the EchoPAC PC and the required set up procedures EchoPAC PC Vivid7 Do not use the fifth connector and the switch can be in any position Use only Standard non crossed Ethernet cabling Vivid3 Using standard non crossed cables and MDI switch set to position HUB connect like...

Page 125: ...ts to the Hospital Information System HIS through HL7 protocol Users requiring this option should contact the GE representative 1 Press Config on the alphanumeric keyboard The System Configuration window is displayed 2 Trackball to the System Options tab and press Select The System Options tab is displayed as shown below Figure 3 35 System Options Tab 3 Verify that the following options are instal...

Page 126: ...AL Chapter 3 Installation 3 55 4 Enable the DICOM printer option as required under the Services sub tab see Figure 3 36 Figure 3 36 Setting up DICOM Print 5 Enable any other remote server as required for example Services My Computer select MPEGvueCDR as shown in Figure 3 37 ...

Page 127: ...CAL SYSTEMS DIRECTION 2392751 100 REVISION 3 VIVID 4 SERVICE MANUAL 3 56 Section 3 7 Connectivity Setup Figure 3 37 Setting up Remote Server for MPEGvue 6 When done trackball to the OK button and press Select ...

Page 128: ...ed 2 Trackball to the Connectivity tab and press Select The Connectivity tab is displayed with the Views subsidiary tab selected by default as shown below Figure 3 38 Connectivity Tab 3 Trackball to the SERVICE button at the bottom of the Views tab and press Select The following dialog box is displayed Figure 3 39 Password Request Dialog Box 4 Enter the password geulsservice and then trackball to ...

Page 129: ...Computer Name field shows the serial number of your Vivid 4 system 6 Enter the network information in the appropriate fields Leave the User Name as vivid3 Note The Default Gateway option is not always required If this address is not supplied by the system administrator leave it blank 7 Trackball to the OK button and press Select The following warning is displayed 8 Trackball to the OK button and p...

Page 130: ... window is displayed 3 Trackball to the Connectivity tab and press Select The Connectivity tab is displayed with the Views subsidiary tab selected by default as shown in Figure 3 38 on page 3 57 4 Trackball to the SERVICE button at the bottom of the Views tab and press Select The password request dialog box shown in Figure 3 39 on page 3 57 is displayed 5 Enter the password geulsservice and then t...

Page 131: ...orage Server line in the Services table The Services tab is expanded as shown below Figure 3 43 Connectivity Tab Services for DICOM Server Expanded 10 Enter the AE Title and the Port No of the DICOM server in the appropriate fields Note Ensure that the Allow Raw Data checkbox is deselected 11 Trackball to the Dicom Print line in the Services table The Services tab is expanded as shown in Figure 3 ...

Page 132: ...ter 3 Installation 3 61 Figure 3 44 Connectivity Tab Settings for DICOM Print Expanded 12 Under Settings select the required Format Film Orientation etc see Figure 3 44 above 13 Proceed to the next section to perform the procedure for validating communication with the DICOM server ...

Page 133: ...ataflow configuration such as Int HD MOD 525 DICOM images are stored both on the internal hard drive and on media MOD The name DICOM is shown in parenthesis signifying that on the MOD the images are in DICOM format No Archive is a dataflow that has no output source for use in emergencies CAUTION DO NOT change the name of an existing dataflow or attempt to add new services to a dataflow In the even...

Page 134: ...ished a red cross is displayed The properties of the DICOM storage server configuration are displayed on the right side of the tab for reference 6 If the connection was successfully established trackball to the Dicom Print line and press Select then trackball to the Check button and press Select If the connection is established a green checkmark is displayed If the connection cannot be established...

Page 135: ...al Archive Int HD DICOM Server option from the drop down list at the bottom of the window If the system will not accept the dataflow or displays an error message there is an error in dataflow communication 3 Begin an exam for a new patient and store some images The storage process will take longer as each loop is now stored in both raw data and DICOM format 4 Begin an exam for a new patient Once t...

Page 136: ...l reject any images that have a future date Ensure that the clock on the Vivid 4 ultrasound unit lags behind that of the EchoPAC system by a minute or two 1 Press Config on the alphanumeric keyboard The System Configuration window is displayed 2 Trackball to the Connectivity tab and press Select The Connectivity tab is displayed with the Views subsidiary tab selected by default as shown in Figure ...

Page 137: ...rver from the Name dropdown list The Services tab is updated as shown below Figure 3 48 Services Tab EchoPAC 8 Enter the IP address of the EchoPAC server in the IP address field 9 Select the Remote Archive Remote Storage line from the Services table The Services tab is expanded as shown below Figure 3 49 Services Tab EchoPAC Expanded ...

Page 138: ...chive in the Placement of Report Files field OR If Image Vault Server is required make sure that the Image Vault Server checkbox is selected as shown in Figure 3 50 below then proceed as follows a Enter ECHOPAC7 OOOXXX DB in the Database Name field b Under Store Info make sure that the Hard Drive checkbox is selected c Enter ECHOPAC7 000XXX Archive in the Placement of Image Files field d Select th...

Page 139: ...emote Storage is displayed 5 Trackball to Remote Servers and press Select then trackball to the Check button and press Select If the connection is established a green checkmark is displayed If the connection cannot be established a red cross is displayed 6 If the connection was successfully established trackball to the Remote Archive Remote Storage line and press Select then trackball to the Check...

Page 140: ...new services to a dataflow In the event that any changes or additions are required contact the On line Center 3 7 6 2 Validating EchoPAC or Image Vault Operation 1 Press the Archive button on the control console The Patient List window is displayed as shown in Figure 3 46 on page 3 64 2 Select the Remote Archive Remote Storage option from the dropdown list at the bottom of the window If the system...

Page 141: ...em is completely shut down Power disconnection before full system shutdown may cause system boot up failure This may require system recovery by booting up the system using the software CD Before storing the unit or moving it to another site disconnect the unit as follows 1 Press the On Off button on the control panel for 5 seconds A menu is displayed 2 Select Full Shutdown from the displayed menu ...

Page 142: ...han ten degrees to prevent the unit from tipping over Once the destination is reached lock the front wheel brakes 3 8 4 Wooden Shipping Crate and Packaging Materials Verify that the following packing materials are available All these materials are required to safely package the Vivid 4 ultrasound unit in the wooden shipping crate for shipment by vehicle or any other means Table 3 20 Packaging Mate...

Page 143: ... other means Table 3 21 Packaging Materials for the Cardboard Shipping Crate Item Description Qty 1 Press on envelope 2 2 Product Label 1 3 Input Pwr Cable 1 4 Platform wooden base 1 5 Ramp 1 6 Antistatic nylon 6 6m 7 Silica gel bag 3 8 Cardboard Package Carton 1 9 Gel Support 2 10 Monitor Support 1 11 Antistatic bag 1 12 Carton cover 1 13 Steel strip 15m 14 Cellotape 20m 15 Staple 22 16 Wood scre...

Page 144: ...ual and any other manuals in an antistatic bag item 4 11 Lay the case base on the floor with the two wood strips facing upwards 12 Cover the top side of the base with the antistatic sheet 2 2 m x 3m 7 2 ft x 10 ft item 2 13 Lay the top cover ramp item 3 on the floor and push it over the narrow side of the case base in front of the unit Note The top cover serves first as a ramp on which to roll the...

Page 145: ...ld appear next to each other in one corner The top cover has also a red mark that should be facing downwards in the corner where the other three marks meet Note Always insert the short leg of a clip in the appropriate slot first and then using the heel of your hand insert the long leg of the clip into the slot located on the part being joined 1 Place the right wall item 6 vertically along the righ...

Page 146: ...t in place using eight clips item 15 11 Secure the hand lever clip remover tool item 23 to the outside of the wooden crate using a screw 12 Secure the box with two steel strip loops item 16 around the right and left side walls and one strip loop around the front and back walls 13 Place two shock watch labels item 17 and all other labels items 20 to 25 on the outer sides of the wooden box ...

Page 147: ...s in an antistatic bag 11 Lay the wooden platform item 4 on the floor Leave sufficient free space around the platform 12 Lay the ramp item 5 on the floor and attach it to the narrow side of the wooden platform item 4 that has the front stopper next to it 13 Cover the wooden platform and the ramp with the antistatic sheet item 6 14 Release the front stopper pin by sliding the metal sleeve at the pi...

Page 148: ... included 1 Ensure that the ultrasound unit was properly packed that the brake pedal is in the parking position and that the front stopper is locked and prevents the unit from moving on the wooden platform 2 Place the carton cover item 12 around the wooden platform item 4 so that the front flap is positioned on the narrow side of the wooden platform 3 Fasten the carton to the wooden platform along...

Page 149: ...nuals Installation Manuals for the peripheral units must be kept as part of the original system documentation This will ensure that all relevant safety and user information is available during the operation and service of the complete system 1 Verify that all details have been entered in the System Installation Details form as described in the System Installation Details section above If this form...

Page 150: ...the installation Specific language versions of the Vivid 4 User Manual may also be available Check with your GE Sales Representative for availability During and after installation supplementary documentation such as User Manuals and Installation Manuals for the peripherals must be kept as part of the original system documentation This will ensure that all relevant safety and user information is av...

Page 151: ...installation procedure or as required during servicing and periodic maintenance of the Vivid 4 ultrasound scanner Note Refer to Chapter 7 Diagnostics Troubleshooting for detailed descriptions of some of the functional checks described in this chapter Table 4 1 Contents in Chapter 4 Section Description Page Number 4 1 Overview 4 1 4 2 General Procedures 4 2 4 3 Functional Check 4 3 4 4 Image Testin...

Page 152: ...n Listen to fan spinning sound check filter go to monitoring and verify that all fans are working 2 Connect each of the probes available for the system Verify that the system properly recognizes each of the probes and displays the correct probe ID 3 Turn OFF the unit by holding down the On Off button for no longer than 3 seconds Verify that system enters Standby mode indicated by a the blinking On...

Page 153: ...slider is moving on the Diagnostic panel 8 Perform an automatic lights test as described in the Automatic Lights Test on page 7 75 Verify that all the key LEDs are illuminated one by one 9 Select the Select option All the backlights are turned on one by one Check that the backlights on the extended and alphanumeric keyboards are illuminated 10 Return to the Test Manager tab and select Lights Manua...

Page 154: ...table and has similar grey levels to that of the reference image Table 4 7 VCR Test Step Task Expected Result s 1 Connect a Sony 9600 VCR to the system restart the system and load an SVHS cassette Verify that all the following cables are connected SVHS In Out Audio In Out and RS232 2 Connect a 3S probe Reset the VCR counter and press the VCR Record button using the indicated soft keys as displayed...

Page 155: ... image See B W Printer Tests below The image is displayed correctly 5 Connect the monitor to the Color Printer RGB connectors and check the image See Color Printer Tests below The image is displayed correctly Table 4 9 B W Printer Test Step Task Expected Result s 1 Scan a phantom or suitable interface in 2D Mode 2 Press the Freeze button 3 Press the Print B button Evaluate the print quality Adjust...

Page 156: ...at you do not apply too much force to move the console and that the console movement is smooth 4 With the front handle still in the fully pressed position push the console to its minimum height Ensure that you do not apply too much force to move the console and that the console movement is smooth Table 4 12 Brakes Function Test Step Task Expected Result s 1 Push the brake pedal to its center posit...

Page 157: ...and electrode pads 2 Perform the ECG diagnostic test as described in the ECG Phono Diagnostic Test on page 7 72 Verify that a single clear QRS signal is displayed Table 4 14 Phono Test Step Task Expected Result s 1 Connect the microphone to the microphone input on the ECG Board Note that the special Medical Microphone is required 2 Perform the Phono diagnostic test as described in the ECG Phono Di...

Page 158: ...ly is displayed 8 Select the GetVolInfo button The message Media in drive G has following properties Media Label MY_LABEL Media File System Name FAT is displayed 9 Select the Get BTPsector button The message The Bytes Per Sector value of media in drive G is 512 is displayed 10 Select the SetVolLabel1 button The message Media Label set to TEST_LABEL1 is displayed 11 Select the GetVolInfo button The...

Page 159: ...Label Media File System Name CDUDF is displayed 8 Press the Get BTPsector button and respond OK to the message The message The Bytes Per Sector value of Media in Drive H is 2048 is displayed 9 Press the SetVolLabel2 button and respond OK to the message The message Media Label set to TEST_LABEL2 is displayed 10 Press the GetVolInfo button and respond OK to the message The message Media in drive H h...

Page 160: ...The system remains in Standby mode indicated by the blinking On Off button LED 3 Turn ON the system s circuit breaker Press the On Off Button The system returns quickly to the Power ON state less than 30 seconds 4 Turn OFF the system s circuit breaker Turn ON the system s circuit breaker after entering to Standby mode The system enters Standby mode and stays in this mode The On Off button LED is b...

Page 161: ...e effects 4 4 1 3S Probe Image Quality Tests 4 4 1 1 2D Noise Uniformity Test 4 4 1 2 2D Performance Test Table 4 18 2D Noise Uniformity Test 3S Step Task Expected Result s 1 With a 3S probe in the air select a Cardiac preset 2 Set the following parameters 2D Gain 50 Depth 7cm Dynamic Range 80dB Ensure that there are no white circular lines or other patterns in the noise Table 4 19 2D Performance ...

Page 162: ... the phantom at position 3 Gain 37 Power 0 dB Depth 20cm Focus Max depth Dynamic Range 65dB 4 Record the maximum depth at which tissue can be differentiated from the noise The depth should be greater than 18cm Table 4 21 CFM Noise Floor Test 3S Step Task Expected Result s 1 With the 3S probe in the air select a Cardiac preset and activate CFM 2 Set the CFM ROI to its maximum size 3 Set the followi...

Page 163: ...the Electronic Flow Phantom RMI1425A 2 Place the 3S probe above the vertical nails line position 1 3 Select a Cardiac preset and activate CFM 4 Set the following CFM parameters Gain Max possible without color noise Tissue Priority 0 Flash 0 Ensure that the color does not appear constantly on the white nail Table 4 23 Probe Operation Check Alignment and Sensitivity Test 3S Step Task Expected Result...

Page 164: ...et and set the 2D Gain to 40 2 Activate CFM and set the following CFM parameters Gain Max possible without color noise Frame Rate 2 LVR MIN setting CFM Artifacts Test 3 Place the 3S probe on the RMI1425A Phantom top view A Ensure there are no flash strikes or other color artifacts CFM Alignment Test 4 Rotate the probe 90 degrees top view B to see a circular cross section of the vessel Ensure that ...

Page 165: ... the following 2D parameters 2D Gain 50 2D Dynamic Range 60 2D Reject 10 2 Activate CFM and set the CFM Gain to the maximum possible without color noise 3 Activate M Mode Color M Mode CMM is activated 4 Place the 3S probe on the RMI1425A Phantom top view A and position the M Marker across the vessel Ensure that you see a continuous orange line Note that the line does not need to look smooth Ensure...

Page 166: ...e area is dark and that there are no flash strikes or other artifacts 5 Move the sample volume to different locations along the vessel Ensure that the flow looks clear the noise area is dark and that there are no flash strikes or other artifacts PW HPRF Artifacts Test 6 Increase the velocity range to MAX 7 Place the 3S probe on the RMI1425A Phantom top view A 8 Place the sample volume in the cente...

Page 167: ...noise area is dark and that there are no flash strikes or other artifacts 5 Move the CW cursor to different locations along the vessel Ensure that the flow looks clear the noise area is dark and that there are no flash strikes or other artifacts CW High Velocity Artifacts Test 6 Increase the Velocity Scale to 8 6m s max 7 Place the 3S probe on the Phantom top view A 8 Place the CW cursor in the ce...

Page 168: ...that the Doppler audio and display noise are homogenous and constant 3 Move the cursor angle multiple times from one half of the screen to the other Check that the noise level does not increase after the cursor angle is changed Table 4 29 2D Noise Center Test 7S Step Task Expected Result s 1 With a 7S probe in the air select a Pediatrics preset 2 Reduce the 2D Gain until the background noise disap...

Page 169: ...g parameters Depth 22cm Frame Rate 2 single focus Focus Location 12cm 3 Look for artifacts in the image Table 4 31 CFM Artifacts Test C358 Step Task Expected Result s 1 Use the Electronic Flow Phantom RMI1425A Select the Abdomen preset from the Abdomen preset options and set the 2D Gain to 45 2 Select CFM and set the following CFM parameters Gain Maximum possible without color noise Frame Rate 2 L...

Page 170: ...ow looks clear the noise area is dark and that there are no flash strikes or other artifacts 5 Move the sample volume to different locations along the vessel Ensure that the flow looks clear the noise area is dark and that there are no flash strikes or other artifacts PW HPRF Artifacts Test 6 Increase the velocity range to MAX 7 Place the C358 probe on the Phantom top view A 8 Place the sample vol...

Page 171: ... options 2 Set the following parameters 2D Gain Max Depth 2cm Gain Sliders Max Up to 5mm of white carpet noise should be displayed as shown in the left figure above Ensure that there are no white lines along the image down to 2cm or other artifacts like those shown in the figure on the right above Table 4 34 2D Performance Test 739L Step Task Expected Result s 1 Use the Standard Superficial Phanto...

Page 172: ...n the Electronic Flow Phantom RMI1425A 2 Place the 739L probe above the vertical nails line position 1 3 Select a Cardiac preset and activate CFM 4 Set the following CFM parameters Gain Max possible without color noise Tissue Priority 0 Flash 0 Ensure that the color does not appear constantly on the white nail Table 4 36 Probe Operation Check Alignment and Sensitivity Test 739L Step Task Expected ...

Page 173: ...peration Tests 739L Step Task Expected Result s 1 Select a Cardiac preset and set the 2D Gain to 40 2 Activate CFM and set the following CFM parameters Gain Max possible without color noise Frame Rate 2 LVR MIN setting CFM Artifacts Test 3 Place the 739L probe on the RMI1425A Phantom top view A Ensure there are no flash strikes or other color artifacts ...

Page 174: ...ow looks clear the noise area is dark and that there are no flash strikes or other artifacts 5 Move the sample volume to different locations along the vessel Ensure that the flow looks clear the noise area is dark and that there are no flash strikes or other artifacts PW HPRF Artifacts Test 6 Increase the velocity range to MAX 7 Place the 739L probe on the Phantom top view A 8 Place the sample vol...

Page 175: ...enter of the screen as shown opposite and write down the Gain value 4 Increase the Gain until background noise is displayed and write down the Gain value Ensure that the Gain difference is not higher than 4 Table 4 40 Doppler Artifacts Test 10S Step Task Expected Result s 1 Perform this test in PW and CW Modes 2 Find a suitable surface that can simulate a signal on the neck for example RMI1425A an...

Page 176: ...e 4 6 show example configurations and should be used for reference only as each site has its own specific settings 4 5 1 Software Configuration Checks Table 4 42 Software Configuration Checklist Step Task Check 1 Check the date and time settings 2 Check the language settings 3 Ensure that all of the options are configured correctly 4 Ensure that the hospital details are configured correctly 5 Ensu...

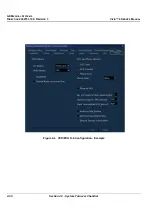
Page 177: ...GE MEDICAL SYSTEMS DIRECTION 2392751 100 REVISION 3 VIVID 4 SERVICE MANUAL Chapter 4 Functional Checks 4 27 Figure 4 1 System Tab Configuration Example ...

Page 178: ...GE MEDICAL SYSTEMS DIRECTION 2392751 100 REVISION 3 VIVID 4 SERVICE MANUAL 4 28 Section 4 5 System Turnover Checklist Figure 4 2 System Options Tab Configuration Example ...

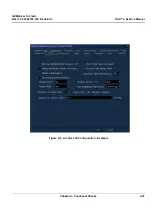
Page 179: ...GE MEDICAL SYSTEMS DIRECTION 2392751 100 REVISION 3 VIVID 4 SERVICE MANUAL Chapter 4 Functional Checks 4 29 Figure 4 3 Hospital Info Tab Configuration Example ...

Page 180: ...GE MEDICAL SYSTEMS DIRECTION 2392751 100 REVISION 3 VIVID 4 SERVICE MANUAL 4 30 Section 4 5 System Turnover Checklist Figure 4 4 VCR ECG Tab Configuration Example ...

Page 181: ...GE MEDICAL SYSTEMS DIRECTION 2392751 100 REVISION 3 VIVID 4 SERVICE MANUAL Chapter 4 Functional Checks 4 31 Figure 4 5 Archive Tab Configuration Example ...

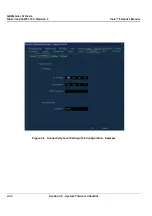
Page 182: ...GE MEDICAL SYSTEMS DIRECTION 2392751 100 REVISION 3 VIVID 4 SERVICE MANUAL 4 32 Section 4 5 System Turnover Checklist Figure 4 6 Connectivity Local Settings Tab Configuration Example ...

Page 183: ...GE MEDICAL SYSTEMS DIRECTION 2392751 100 REVISION 3 VIVID 4 SERVICE MANUAL Chapter 4 Functional Checks 4 33 Section 4 6 Site Log Table 4 1 Vivid 4 Site Log Date Service Person Problem Comments ...

Page 184: ...GE MEDICAL SYSTEMS DIRECTION 2392751 100 REVISION 3 VIVID 4 SERVICE MANUAL 4 34 Section 4 6 Site Log Table 4 1 Vivid 4 Site Log Continued Date Service Person Problem Comments ...

Page 185: ...This chapter contains block diagrams and functional explanations of the Vivid 4 electronic circuits Table 5 1 Contents in Chapter 5 Section Description Page Number 5 1 Overview 5 1 5 2 General Information 5 2 5 3 Block Diagrams 5 3 5 4 Front End 5 7 5 5 Back End Processor 5 29 5 6 External Peripherals 5 44 5 7 Vivid 4 Power Distribution 5 45 5 8 Front End Cooling System 5 51 5 9 Common Service Pla...

Page 186: ... beam forming system which can handle up to 192 element linear probes by use of multiplexing Signal flow travels from the Probe Connector Panel to the Front End FE Electronics to the BEP and finally is displayed on the monitor and peripherals System configuration is stored on a hard disk Hasp plug and all necessary software is loaded from the hard disk on power up The user initiates system operati...

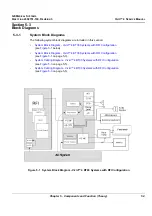
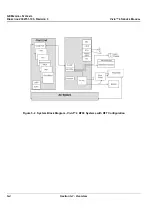
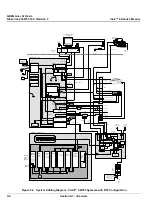
Page 187: ...System Block Diagram Vivid 4 BT03 Systems with RFI Configuration see Figure 5 1 below System Block Diagram Vivid 4 BT03 Systems with RFI Configuration see Figure 5 1 on page 5 3 System Cabling Diagram Vivid 4 BT03 Systems with RFI Configuration see Figure 5 3 on page 5 5 System Cabling Diagram Vivid 4 BT03 Systems with RFI Configuration see Figure 5 3 on page 5 5 Figure 5 1 System Block Diagram Vi...

Page 188: ...GE MEDICAL SYSTEMS DIRECTION 2392751 100 REVISION 3 VIVID 4 SERVICE MANUAL 5 4 Section 5 1 Overview Figure 5 2 System Block Diagram Vivid 4 BT03 Systems with RFT Configuration PCVIC ...

Page 189: ...75 2252982 2258801 2252964 2253011 2252976 2252981 2253009 2253015 2292972 2276874 2300847 2253014 2276875 2269429 2253080 2253079 RS232 1 2266742 2269430 C B L F AC INPUT BOX 2252994 On off 2269430 AC DIST BOX ISOL TRAN Temp Ctrl Temp Sens LAMBDA PS 12VDC contactors 2253001 2252998 2252999 2253002 2253004 2253000 2252966 USB1 TR4 1 TR4 16 I2C COM1 Rear panel left Rear panel right Composite Video ...

Page 190: ...977 2252975 2252982 2258801 2252964 2253011 2252976 2252981 2253009 2253015 2292972 2276874 2300847 2253014 2276875 2253080 2253079 RS232 1 2266742 2269430 C B L F AC INPUT BOX 2252994 On off 2269430 AC DIST BOX ISOL TRAN Temp Ctrl Temp Sens LAMBDA PS 12VDC contactors 2253001 2252998 2252999 2253002 2253004 2253000 2252966 USB1 TR4 1 TR4 16 I2C COM1 Rear panel left Rear panel right Composite Video...

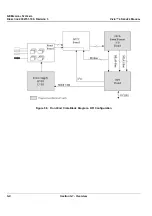
Page 191: ...nents as described in the following sections Front Board Assembly FB on page 5 16 MUX Board on page 5 18 Beamformer Board BF on page 5 19 Radio Frequency Interface RFI Board on page 5 21 OR Front End Controller Board FEC on page 5 26 RF and Tissue Processor Board RFT on page 5 27 Image Port Board IMP on page 5 28 Back Plane Board Motherboard on page 5 28 A block diagram of the Front End Crate is s...

Page 192: ...GE MEDICAL SYSTEMS DIRECTION 2392751 100 REVISION 3 VIVID 4 SERVICE MANUAL 5 8 Section 5 1 Overview Figure 5 5 Front End Crate Block Diagram RFI Configuration ...

Page 193: ...FI Radio Frequency Interface Board OR FEC Front End Controller Board RFT Radio Frequency Tissue Board IMP Image Port Front Board TR4 Boards MUX Board 64Ch Beam Former A D Board RFT Board Image Port Board FEC Front End Controller Board Power Supply Tx P S L V P S Vingmed manufactured boards I C bus 2 PCI2IP I2C bus FE bus Pipeline link VME bus Front Board TR4 Boards MUX Board 64Ch Beam Former A D B...

Page 194: ...mit bursts are generated on the Front board FB initiated by the transmit trigger pulse TXTRIG_L The transmit trigger starts the Transmit Pulse Generators TPG on the FB each generating 16 transmit pulses with different delays The transmit pulses are then routed to separate transmit amplifiers fed with voltage HV1 and HV2 witch are controlled by the Acoustic Power control software The transmit pulse...

Page 195: ...0 to 80 V HV1 another providing a voltage ranging from 0 to 40 V HV2 and the third outputting 80 V for the multiplexers in the linear probes HV1 and HV2 are programmable through a serial interface from the FEC board or Radio Frequency Interface RFI board 5 4 1 4 Mid Processors The Vivid 4 Front End and visualization system are interconnected through digital signal processing modules called the Mid...

Page 196: ...FEC or RFI and the FEC or RFI sends a signal to the high voltage power supply HVPS to program one of the supplies HVPS1 or HVPS2 Once the signal is transmitted it is received by the transmit pulsor TP which is a switching device that will propagate the signal between different elements of the probe The propagation of that signal depends on the way in which the FEC or RFI programs the Front board R...

Page 197: ...bed delay between the elements and immediately after this are received all the time aiming at one point at a specific depth In this way echo signals are collected from all points along a certain line from which a vector is created The vector is transmitted to the MUX board and from there to the Beamformer where it is amplified and undergoes analog to digital conversion From here RF signals are tra...

Page 198: ...GE MEDICAL SYSTEMS DIRECTION 2392751 100 REVISION 3 VIVID 4 SERVICE MANUAL 5 14 Section 5 1 Overview Figure 5 8 Received Signal Path Block Diagram Systems with RFI Configuration ...

Page 199: ...GE MEDICAL SYSTEMS DIRECTION 2392751 100 REVISION 3 VIVID 4 SERVICE MANUAL Chapter 5 Components and Function Theory 5 15 Figure 5 9 Received Signal Path Block Diagram Systems with RFT Configuration ...

Page 200: ...eneral Description The FB Board has 64 identical receive channels The signal in each channel is fed via a Transmit Receive T R switch to a preamplifier The next step is a Time Controlled Gain TGC amplifier used to equalize the signal strength from the near field the mid field and the far field Figure 5 10 Front Board Assembly Block Diagram ...

Page 201: ...nnels Each channel has two pulsars for different transmitted Tx voltages and a low signal receiver amplifier Both are connected to the same input output line The receiver is buffered from the transmitted voltage up to 80V by an electronic switch to avoid high voltage on the receiver input Figure 5 11 TR4 Board Block Diagram TR4 Transmit Receive X4 Board Rx BF Channel Probe CTRL 0 40V 0 80V Tx Tx V...

Page 202: ...hem to the BF Boards Expanding the low high channels in CW mode TEE motion control Monitoring temperature and voltage measurements via the I C FE Bus switch To reduce the noise in the FE cards the MUX switches OFF the FE Bus to the FB during the data acquisition in CW mode Min max AC input monitoring every ten seconds Figure 5 12 MUX Board Diagram Input Channels Multiplex TEE Control Monitor Temp ...

Page 203: ...utput from the other BA Level 2 as shown in Figure 5 13 on page 5 20 These ASICs will add all the input and output channels with appropriate delay to give optimal receive focusing and beam steering as a function of time All focusing and steering parameters for a scan are stored in VRAM on the BF Board The output of the BF Board is a high frequency digital Word update This output can be added to an...

Page 204: ...5 1 Overview 5 4 4 2 Description of Operation Figure 5 13 Beamformer Board 64 Channel Block Diagram ADC ADC ADC ADC From prev board To next board BA2 FE bus 21 21 12 Bus Ifc RX N RX N 1 RX N 2 RX N 3 4 of 64 FOC 2 0 1 BA2 BA2 BA2 1 of 16 SRAM Control MLA0 To next board 21 MLA1 MLA0 MLA1 21 ...

Page 205: ...by the RFI board System Master Clock generator Transmitter Control ATGC Control Receive Focusing Control Analog Test Signal Generator High Voltage Control and supervision Probe Sensing Control of MUX board Front Board and Beam Former Temperature Sensing for TEE probes Step Motor Control for TEE probes 5 4 5 2 Signal Flow The digitized signals from the Beam Formers are connected to the RFI module T...

Page 206: ...d clipping is performed 5 4 5 6 Color Flow Processing No Color Flow processing is performed here except for the RF demodulation previously mentioned The data used for Color Flow is tagged with the appropriate headers and tails and sent to the Back End Processor BEP 5 4 5 7 Doppler Data On the RFI board Doppler Data is high pass filtered to remove strong low frequencies returned from wall motion va...

Page 207: ...follows TX Power Supply 1 TX1 generates voltage levels for pulsed TX operations TX Power Supply 2 TX2 generates voltage levels for both pulsed and CW operations The RFI sets the voltage level for the two TX Power Supply outputs TX1 and TX2 and also measures the voltage levels and current drain from the two TX outputs If any of the values exceed the limit for a given mode the RFI will turn OFF powe...

Page 208: ...N A N A 9 2 5 V voltage Locally generated from 3 3 V 10 DSP CLOCK 50 MHz 11 15 V MONITOR voltage 12 EMIFA CLOCK 133 MHz 13 DSP_BSOE3_L signal 14 1 4 V voltage Locally generated from 3 3 V 15 OPTIONAL EMIFB CLOCK 16 N A 17 N A 18 N A 19 DSP CLOCK EMIFB OUT 20 1 5 V voltage Locally generated from 3 3 V 21 PCI P_LOCK_L signal 22 15 V voltage 23 15 V voltage 24 6 V voltage 25 3 3 V 26 10 V 27 1 4 V vo...

Page 209: ...V voltage 35 5 V voltage 36 5 V voltage 37 N A 38 N A 39 2 0 V voltage 40 FAN VENT 1 voltage 41 FAN VENT 2 voltage 42 10V_Ref_voltage 43 5V_ref voltage 44 5V_ref voltage 45 AUDIO RIGHT CHANNEL OUT 1 V 46 AUDIO LEFT CHANNEL OUT 1 V 47 N A 48 N A 49 N A 50 CLK20 20 MHz 500 507 GND Table 5 3 RFI Test Points Continued Test Point Description Comments ...

Page 210: ...tter control ATCG control Receive focusing control Analog test signal control Probe sensing Transmit voltage control Control of Front Board switching Temperature sensing for the TEE probes Memory refresh control for the BF Board Provide 40 MHz clock to IP Figure 5 1 Front End Controller Block Diagram FE Bus P2 FB TX RFT Trig Ps A25 FB P B35 FB Probe CTRL P3 FB ATGC P2 B37 P2 D37 All Boards P3 D25 ...

Page 211: ... Bus 5 4 7 1 Control The RFT Board has a local DSP with an external EPROM The DSP performs the following control tasks Handles communication with the BE over the VME Bus and the PCI Bus Updates filter coefficients and other parameters in the data path When output events are received from the FEC the RFT Board sets up the pipe link to output control for data tagging and transfer During transfer of ...

Page 212: ...below The IMP is used as a connection to the BEP All the instructions to the Front End Crate are sent via the IMP and all the outgoing data is transferred to the BEP via the IMP through the PCI Bus 5 4 9 Back Plane Board Motherboard The Back Plane Board serves as a mother board which connects all the boards signals It also distributes the low voltages for the FE Crate boards and the TX voltages It...

Page 213: ...8 PC2IP on page 5 38 Plug and Scan Card and Battery on page 5 38 Network Card Onboard on page 5 38 SCSI Card on page 5 38 Floppy Drive on page 5 39 Hard Disk on page 5 39 Magneto Optical Drive MOD on page 5 40 CD Read Write CDRW on page 5 40 ECG Module on page 5 40 Modem on page 5 41 PC VIC Assembly on page 5 42 Figure 5 16 on page 5 30 shows the location of the various components within the BEP f...

Page 214: ...GE MEDICAL SYSTEMS DIRECTION 2392751 100 REVISION 3 VIVID 4 SERVICE MANUAL 5 30 Section 5 1 Overview Figure 5 16 Back End Component Locations Vivid 4 BT03 Systems with RFI Configuration ...

Page 215: ...udio Bracket PCI2IP Card Multifunction I O Card Key Board Control Card MO Driver ECG Module CD R Driver Floppy Driver HD Driver Mother Board P S Battery Slot 1 Slot 2 Slot 3 Slot 4 Slot 5 Slot 6 AGP Slot VIC VGA Card Plug Scan Card SCSI Card Audio Bracket PCI2IP Card Multifunction I O Card Key Board Control Card MO Driver ECG Module CD R Driver Floppy Driver HD Driver Mother Board P S Battery Slot...

Page 216: ...GE MEDICAL SYSTEMS DIRECTION 2392751 100 REVISION 3 VIVID 4 SERVICE MANUAL 5 32 Section 5 1 Overview Figure 5 18 Back End Block Diagram Vivid 4 BT03 Systems with RFI Configuration ...

Page 217: ...lug Scan Card SCSI Card Network Card PCI2IP Card Empty slot Key Board Control Card MO Driver ECG Module CD R Driver Floppy Driver HD Driver P S Battery Video Out Mother Board S VGA To Front End To LAN VIC Monitor Extended Keyboard A N Keyboard Audio Doppler Audio Bracket Plug Scan Card SCSI Card Network Card PCI2IP Card Empty slot Key Board Control Card MO Driver ECG Module CD R Driver Floppy Driv...

Page 218: ... 5 2 Central Processing Unit CPU The CPU controls and processes the internal Back End Processor operations In addition the CPU supports the Front End Crate via the IP card The CPU used in the Vivid 4 ultrasound unit is a Pentium 4 2GHz Intel Processor or newer On older units Pentium III the CPU is I GHz ...

Page 219: ...GE MEDICAL SYSTEMS DIRECTION 2392751 100 REVISION 3 VIVID 4 SERVICE MANUAL Chapter 5 Components and Function Theory 5 35 Figure 5 20 BEP Motherboard Layout Vivid 4 BT03 Note Not drawn to scale ...

Page 220: ...ial Port Connector Header CPU Fan CPU Fan Header DIMM1 2 Memory DIMM Slots Ethernet LAN Ethernet Port Game Port Game Port J1a a P4SGA only 4xAGP J5 Floppy Disk Drive Connector J6 J7 IDE 1 2 Hard Disk Drive Connectors J15 Parallel Printer Port J17 PS 2 Keyboard Mouse J21 ATX 12V Power Connector 20 pin J24b b The 4 pin connector at J24 must be connected to meet the safety requirements of the ATX 12V...

Page 221: ... 10 seconds This is for emergencies only and should not be used under regular circumstances Standby Mode which enables system boot up in 30 seconds this option is enabled if the Plug Scan option is installed allowing you to move the unit from one location to another Full Shutdown which then requires more than 2 minutes to boot up There are three main keyboard components External Keyboard All the s...

Page 222: ...CPU The PCI2IP is sometimes referred to as the PCI Bridge 5 5 7 Plug and Scan Card and Battery The Plug Scan enables the Standby Mode during Plug and Scan operations and performs a legal shutdown of the operating system when the power lines go below preset values The P S does not support the operation of the unit during a power failure but rather enables the shutdown of the Back End Processor to S...

Page 223: ... the Vivid 4 ultrasound unit The Hard Disk is controlled by the CPU via signals from the IDE Bus The Hard Disk is partitioned into four drives each of which is designated for different operations as follows C Drive Execution of the operating system and the software application and factory presets The partition size must be 2Gbyte D Drive User presets and data The partition size must be at least 2 ...

Page 224: ...ed to back up images and reports in the similar way as the MOD In addition the CD is used as the main source of software upgrades and other service utility operations The CDRW can write to 24X speed CDs or above and can read all types of CDs The CDRW is controlled by the CPU via the IDE Bus 5 5 14 ECG Module The ECG Patient I O module is used to track and convert the ECG signal either via Internal...

Page 225: ... 5 5 15 Modem The Modem is a universal modem controlled by the CPU via the USB port The modem is used for iLinq InSite remote servicing This is a standard MultiTech modem that connects to an analog phone line Figure 5 24 Modem Block Diagram External I O Modem To hospital s analog phone line Analog phone line USB COM3 BEP ...

Page 226: ...d image is captured and transmitted in RGB format to the S Video C Video Converter circuit and to the RGB to Color Printer Converter circuit The PC2IP board controls the PC VIC Power on and also controls the operation of PC VIC via an I2 C signal generated from the PCI bus of the BEP The I2 C signal determines the operation of the Video Input and Capturing circuit and gives the command whether to ...

Page 227: ...l Timing Interlaced Vertical Start VS 53 Lines field Active Lines VA Lines frame PAL standard Total Lines VT 625 Lines frame PAL standard Frame Rate 25Hz PAL standard Table 5 6 NTSC Video Specifications Horizontal Timing Horizontal Total HT us 780 pixels Horizontal Start HS us 118 pixels Horizontal Active HA us 640 pixels Pixel Clock Freq 12 272725 MHz NTSC Vertical Timing Interlaced Vertical Star...

Page 228: ...ich receives and transmits Y C video signals is used for recording and re playing exams The appropriate type of VCR should be used for the local video signal PAL or NTSC 5 6 1 2 Black White Video Printer The B W Video Printer receives a Black and White video signal and a trigger signal and is controlled via the Control Console 5 6 1 3 Color Video Printer The Color Video Printer receives an RGB vid...

Page 229: ... components and converted into DC voltages in the BEP and the Front End to support their operation Table 5 7 below shows which voltages are used in the various system components both in the BEP and the Front End Table 5 7 Vivid 4 DC Voltage Distribution End F Front B Back Board Unit 3 3V Dig 5 V Dig 5V Ana 12V TEE 5 V Vee 10 V 15V 15V Pmx85 n Pmx85 p 80 V 40 V 5 V BE 12 V BE Local 42V LVPS 230V AC...

Page 230: ...he AC System see Figure 5 26 comprises the following components AC Isolation Transformer AC Distribution Box as described in AC Distribution Box on page 5 47 AC Input Box see AC Input Box on page 5 47 Thermal Fuses see Thermal Fuses on page 5 47 Figure 5 26 AC System Block Diagram Monitor Monitor 230 230 110AC Local voltage 230 AC ...

Page 231: ...ayback video signal from the VCR to the Image Port 5 7 3 1 AC Input Box The AC Voltage Input cord is connected to the AC Input Box It contains the Dual Rating Circuit Breaker 6A 200 240V or 12A 100 120V 5 7 3 2 Thermal Fuses The system has three internal AC thermal fuses One is connected to the secondary coil of the transformer and supplies 230V to the system The other two fuses are connected to t...

Page 232: ...e with specific requirements as indicated on the label near the AC input connector The AC transformer s primary and secondary voltages are set up by using the appropriate plugs connected in Jumper1 and Jumper2 on the AC Distribution Box according to the following table NOTE The AC input voltage power cord and its plug must meet the local standard requirements Table 5 8 Primary and Secondary AC Vol...

Page 233: ...IRECTION 2392751 100 REVISION 3 VIVID 4 SERVICE MANUAL Chapter 5 Components and Function Theory 5 49 5 7 4 Front End DC Power Distribution Figure 5 28 DC Distribution Front End Crate Vivid 4 Systems with RFI Configuration ...

Page 234: ... PMX85N 80 80 40 40 5 10 PMX85P PMX85N DOLPHIN Front Bd MUX Bd BF2 BF1 FEC RFT Image Port J11 J21 J22 J14 J24 J25 J15 J16 J26 J33 J32 J31 J41 J42 J43 J53 J63 J73 J62 J52 J51 J61 J71 J72 125 125 125 125 110 110 185 185 96 J82 J83 DC PWR J12 110 HVS FEC BF1 RFT Front Bd Image Port BF2 125 125 110 185 185 185 185 185 185 185 185 185 185 96 48 96 96 DC PWR J81 48 MUX Bd J23 125 MEASURMENTS AVCC AVCC A...

Page 235: ...ont End itself Air is sucked from the inside of the system through the Filter Cover and the Filter It passes the Fan Assembly directly into the upper part of the Front End where it forms a cooling air current between the Boards before being blown out against the floor See Figure 5 30 5 8 2 Location in the Unit The Fan Assembly is located on top of the Front End Crate Figure 5 30 Airflow through th...

Page 236: ...ith iLinq The following sections contain a brief introduction of iLinq s features 5 9 2 1 Web Server Browser The Service platform and other Service software use the iLinq web server and browser 5 9 2 2 Connectivity This feature provides basic connectivity between the scanner and the OnLine Center OLC 5 9 2 3 Configuration This feature provides the interfaces to configure various iLinq parameters 5...

Page 237: ...r service software across all GEMS products 5 9 3 1 Internationalization The user interfaces provided by the service platform are designed for GE personnel and as such are in English only At this time there is no multi lingual capability built into the Common Service Interface 5 9 3 2 Service Login Press the switch with the wrench icon in the status bar at the bottom of the video screen This switc...

Page 238: ...nSite use Every access request whether successful or not will be logged into a service access log that is viewable to authorized users See Chapter 7 Diagnostics Troubleshooting for more info about InSite and the Global Service User Interface Table 5 9 Access Authorization User Level Access Authorization Operator These service tools are normally used in house and are protected with a password Admin...

Page 239: ...view 6 1 1 Purpose of Chapter 6 Table 6 1 Contents in Chapter 6 Section Description Page Number 6 1 Overview 6 1 6 2 Input AC Voltage Configuration 6 2 6 3 Front End Voltages and Signal Indicators 6 3 6 4 Back End Power Supply Voltages 6 8 6 5 VIC Video Signal Setting 6 8 6 6 Vivid 4 17 Monitor Operation Image Quality Calibration 6 9 6 7 Calibration 6 11 ...

Page 240: ...according to specific requirements as indicated on the label near the AC input connector The AC transformer s primary and secondary voltages are set up by using the appropriate plugs connected in Jumper1 and Jumper2 on the AC Distribution Box in accordance with the information in Table 6 2 below 6 2 2 AC Input Cord The input voltage power cord and plug must meet the local standards and requirement...

Page 241: ...te have red green and yellow LEDs which indicate the board s status as follows Red LED Lit An error has occurred on the board unless otherwise specified Yellow LED Lit Software defined Green LED Lit The board is functioning properly For RFI configured systems see Figure 6 1 below Refer to Figure 6 2 on page 6 4 for systems with the RFT hardware configuration Figure 6 1 Front End Crate LEDs RFI Con...

Page 242: ...2 Front End Crate LEDs RFT Configuration The LEDs for each of the boards in the Front End Crate are summarized in the following subsections The LEDs are listed as viewed from the top of the board when positioned in the Front End Crate Note The front end voltages can be measured at the front of the Front Board FB using the voltage test points ...

Page 243: ...w Transmit data to BEP During Processing LD502 Red Not Used LD501 Yellow Not Used LD500 Green Not Used LD12 Green 5 0 V status LD22 Green 2 0 V status LD11 Green 1 4 V status LD10 Green 1 5 V status LD9 Green 3 3 V status LD8 Green 5 0 V status LD7 Green 2 5 V status Table 6 4 Image Port LEDs LED Indicates When Lit Comments Red Board Failure Normally ON Yellow Yellow VME Master Lit during scanning...

Page 244: ... No Probe Lit if no probe is selected Yellow HV Over Range Lit if excessive HV is output possibly due to HV surveillance Table 6 6 RF and Tissue Processor LEDs LED Indicates When Lit Comments Red Board Failure Normally OFF Green Board OK Normally lit Yellow DSP Runs Normally blinking Yellow Data Out on Pipeline Lit during data transfer to pipelink Red Clock Problems Normally OFF Red Clock Problems...

Page 245: ... Normally lit Green 5V PS is OK Normally lit Table 6 9 Front Board Assembly LEDs LED Indicates When Lit Comments Green 15V LVPS is OK Normally lit Green 15V LVPS is OK Normally lit Green AVee LVPS is OK Normally lit Green AVcc LVPS is OK Normally lit Green 5V Dig LVPS is OK Normally lit Green 10V LVPS is OK Normally lit T1 Probe Connector 1 Normally lit T2 Probe Connector 2 Normally lit T3 N A Nor...

Page 246: ... Figure 6 3 Back End Power Supply Voltages Section 6 5 VIC Video Signal Setting The Vivid 4 ultrasound scanner and VIC may be configured to operate with either PAL or NTSC video systems as required 6 5 1 Video Format Confirmation 1 Turn ON the system and the check video transmission signal is set correctly 2 Press Config 3 From the System Configuration dialog box select the VCR ECG tab and make su...

Page 247: ... may be accessed directly from the three adjustment buttons located on the front of the monitor as shown in Figure 6 4 below NOTE All display monitor controls other than the contrast and brightness controls are factory adjusted for optimum settings and usually do not require further adjustment The service representative adjusts the display monitor to the user s preference To make adjustments to th...

Page 248: ...fer to the recommended settings in Table 6 10 below 3 When the Contrast setting is correct press the center button again to make adjustments to the Brightness The Brightness adjustment bar is displayed 4 Repeat Step 2 using the left and right buttons to select the correct Brightness adjustment Refer to the recommended settings in Table 6 10 below Note While performing these adjustments it is usefu...

Page 249: ...lar scanning mode enables you to perform three types of calibration as described in the following sections Monitor Calibration section page 6 13 Beamformer Calibration section page 6 14 Video Grabbing Calibration section page 6 14 6 7 1 Accessing the Calibration Options 1 Press Ctrl F11 or Alt D on the alphanumeric keyboard The Diagnostic dialog box is displayed as shown below Figure 6 5 Diagnosti...

Page 250: ... DIRECTION 2392751 100 REVISION 3 VIVID 4 SERVICE MANUAL 6 12 Section 6 7 Calibration 2 Trackball to the Calibration button and press Select The following calibration options are displayed Figure 6 6 Calibration Options ...

Page 251: ...l to the Display option and press Select The Calibration Display window is displayed as shown below Figure 6 7 Calibration Display Window 3 Adjust the brightness of the monitor so that the black square in the upper left corner of the window is as dark as possible while a faint border remains visible between that square and the square to its right 4 Rotate the soft key rotaries to offset the red gr...

Page 252: ...isk perform the BF calibration procedure 1 Access the calibration options as described in the Calibration section page 6 11 2 Trackball to the Calibration button and press Select The bias voltages for each channel are validated and stored in the back end Note If necessary Trackball to the Validation button and press Select to validate the currently saved bias voltages for each channel without perf...

Page 253: ...almost the same quality as the left side Note The video signal path is from the Back End SVGA board output to the VIC via the rear panel connector IP and then back to the Back End via the PC2IP cable 5 Select the PatternColor bmp from the Test with one of bitmaps area You will observe the duplication of the selected pattern This selected pattern is generated by the system and grabbed by the IP car...

Page 254: ...and run diagnostic tools to locate system problems and failures The Vivid 4 ultrasound unit includes built in diagnostic tools that can be accessed from the scanner application Table 7 1 Contents in Chapter 7 Section Description Page Number 7 1 Overview 7 1 7 2 Diagnostics 7 2 7 3 Performing Front End FE Diagnostics 7 5 7 4 Performing Back End Diagnostics on the System 7 69 7 5 Common Service Inte...

Page 255: ...temperatures in the Front End motherboard and in the AC Distribution Box To check the Front End parts the tests must follow a logical sequence in order to identify the faulty component For example testing communication between the Front End and the Back End begins by testing the RFI board IMP board and the PC2IP before testing all the other boards in the following sequence as applicable For system...

Page 256: ... tools are accessed from 2D Mode by simultaneously pressing Ctrl F11 on the alphanumeric keyboard The Diagnostic menu is displayed as shown below Figure 7 1 Diagnostic Menu Note Once the test has been completed a log can be viewed as described in the Common Service Interface section on page 7 86 Software Version Option Buttons Description Area Report and Exit Buttons ...

Page 257: ...ming Front End FE Diagnostics section on page 7 5 Tests various back end hardware components as described in the Performing Back End Diagnostics on the System section on page 7 69 Monitors all low voltages Tx voltages temperatures and AC power input Performs a full sequence of Front End tests that do not require user intervention Auto Sequence is particularly recommended for detecting problems tha...

Page 258: ...F Diagnostic Test as described in the Beamformer BF Diagnostic Tests section on page 7 21 At this stage to continue to the Front End diagnostic tests it is necessary to re boot the system 3 Front Board Assembly FB Diagnostic Test as described in the Front Board Assembly FB Diagnostic Tests section on page 7 26 4 MUX Diagnostic Test as described in the MUX Diagnostic Tests section on page 7 48 5 H ...

Page 259: ...e manual options see Manual Options on page 7 8 7 3 1 1 Auto Sequence 1 In the Diagnostic menu trackball to the Auto Sequence button and press Select The Automatic FE Testing dialog box is displayed as shown below Figure 7 2 Automatic FE Testing 2 Select the required number of Loops and activate the Enable checkbox 3 Under On Failure activate either the Stop or Continue checkbox as required Stoppi...

Page 260: ... under Execute Sequence and press Select if required 6 To resume testing from the point where you paused trackball to the Start button and press Select 7 At any stage during the testing sequence trackball to the View Report button and press Select to review the current Auto Sequence Test Report 8 When Auto Sequence is complete trackball to the View Report button and press Select to review the fina...

Page 261: ... Diagnostics 7 3 1 2 Manual Options 1 In the Diagnostic menu trackball to the Front End button and press Select The FE Diagnostics dialog box is displayed as shown in Figure 7 3 or Figure 7 4 below Figure 7 3 FE Diagnostics Dialog Box RFI Configuration Data Flow Map Test Description Area Test Area Comment Area Tabs ...

Page 262: ...S DIRECTION 2392751 100 REVISION 3 VIVID 4 SERVICE MANUAL Chapter 7 Diagnostics Troubleshooting 7 9 Figure 7 4 FE Diagnostics Dialog Box RFT Configuration Data Flow Map Test Description Area Test Area Comment Area Tabs ...

Page 263: ...isplays a description of the selected diagnostic test Test Area Displays the buttons that enable you to perform diagnostic tests Each button has an LED that indicates the following by its color Green The test has been completed and no problems were identified Red Problems were identified during the performance of the test Yellow The test is in progress Comment Area Displays instructions during the...

Page 264: ... may be tested by performing either of the two tests Self Test or Full Test as required While the Full Test is in progress it may be necessary to wait a while since this requires longer than the Self Test for completion 3 Verify that the Comment area indicates that the system is ready to perform the test as shown in Figure 7 5 above 4 Trackball to the Full Test tab and press Select OR Trackball to...

Page 265: ...ts contact your local GE Medical Systems field engineer for assistance If errors were identified but the results were marginal perform calibration as described in the Calibration section on page 6 11 and then repeat the RFI test If errors were identified and the results were not marginal verify that the RFI cables are connected and functioning properly as described in Chapter 5 Components and Func...

Page 266: ...agnostics dialog box as described in the Accessing the Front End Diagnostic Options section on page 7 6 2 In the FE Diagnostics dialog box trackball to the IMP tab and press Select OR Trackball to the IMP button in the Data Flow Map and press Select The IMP tab is displayed as shown below Figure 7 7 IMP Tab FE Diagnostics Dialog Box Data Flow Map Test Description Area Test Area Comment Area Tabs ...

Page 267: ... Comment area and proceed as follows If no problems were identified proceed to the VME test as described in the VME Bus VME Diagnostic Tests for RFT Configuration section on page 7 15 If no problems were identified but the problem persists contact your local GE Medical Systems field engineer for assistance If errors were identified but the results were marginal perform calibration as described in ...

Page 268: ... section on page 7 13 If the VME Bus test is performed without first performing this test and errors are identified you must perform the IMP test to ensure that the VME board is the source of the error 1 Access the FE Diagnostics dialog box as described in the Accessing the Front End Diagnostic Options section on page 7 6 2 In the FE Diagnostics dialog box trackball to the VME tab and press Select...

Page 269: ... area and proceed as follows If no problems were identified proceed to the RFT test as described in the RFT Diagnostic Tests for RFT Configuration section on page 7 17 If no problems were identified but the problem persists contact your local GE Medical Systems field engineer for assistance If errors were identified but the results were marginal perform calibration as described in Calibration on p...

Page 270: ...ribed in the Image Port IMP Diagnostic Tests for RFT Configuration section on page 7 13 and in the VME Bus VME Diagnostic Tests for RFT Configuration section on page 7 15 If the RFT test is performed without first performing these tests and errors are identified you must perform the VME Bus test and then the IMP test to ensure that the RFT board is the source of the error 1 Access the FE Diagnosti...

Page 271: ...were identified during the performance of the test 5 Review the test results in the Comment area and proceed as follows If no problems were identified proceed to the FEC test as described in the Front End Controller FEC Diagnostic Tests for RFT Configuration section on page 7 19 If no problems were identified but the problem persists contact your local GE Medical Systems field engineer for assista...

Page 272: ... Temp Test Diagnoses the temperature threshold for TEE probes Pencil ID Test Checks the pencil ID circuit in the FEC Note Before performing any of the FEC tests perform the IMP VME Bus and RFT tests as described beginning on page 7 13 If an FEC test is performed without first performing these tests and errors are identified you must perform the RFT test and then the VME Bus test and the IMP test t...

Page 273: ...ndently The relevant LED changes color as follows Yellow The test is in progress Green The test has been completed and no problems were identified Red Problems were identified during the performance of the test 5 Review the test results in the Comment area and proceed as follows If no problems were identified proceed to the BF test as described in the Beamformer BF Diagnostic Tests section on page...

Page 274: ...t the VME Bus test and the IMP test to ensure that the BF board is the source of the error NOTE When replacing the BF perform calibration as described in the Calibration section on page 6 11 NOTE IMPORTANT Do not perform BF Calibration after operating in CW or PW scanning modes since validation will fail Perform the BF Calibration procedure only after 2D scanning mode 1 Access the FE Diagnostics d...

Page 275: ...ON 2392751 100 REVISION 3 VIVID 4 SERVICE MANUAL 7 22 Section 7 3 Performing Front End FE Diagnostics Figure 7 11 BF Tab FE Diagnostics Dialog Box RFI Configuration Data Flow Map Test Description Area Test Area Comment Area Tabs ...

Page 276: ...gital Test 1 independently as follows Trackball to the Digital Test 0 button and press Select When complete trackball to the Digital Test 1 button and press Select 4 In the BF tab verify that the Comment area indicates that the system is ready to perform the test 5 Trackball to the ADC button and press Select The beamformer digital test and ADC bit tests are activated sequentially The test results...

Page 277: ...Alternatively review the information manually using the scroll arrows on the right of the Ultrasound Scope window to select a vector between 0 and 63 The selected vector is displayed in the Vector field and its test results are displayed in the Spectrum area Check the test results for each vector as follows Verify that the RMS level displayed in the RMS field is above 84 in absolute value Verify t...

Page 278: ...ineer for assistance If errors were identified but the results were marginal perform calibration as described in the Calibration section on page 6 11 and then repeat the test If errors were identified and the results were not marginal verify that all image port and PCI bridge cables are connected and functioning properly as described in Chapter 5 Components and Function Theory If the problem persi...

Page 279: ...7 11 If the FB tests are performed without first performing these tests and errors are identified you must perform the following tests in the order listed to ensure that the FB is in fact the source of the error 7 3 8 1 Accessing the Front Board Assembly Options 1 Access the FE Diagnostics dialog box as described in the Accessing the Front End Diagnostic Options section on page 7 6 2 In the FE Dia...

Page 280: ...ECTION 2392751 100 REVISION 3 VIVID 4 SERVICE MANUAL Chapter 7 Diagnostics Troubleshooting 7 27 Figure 7 14 F B Tab FE Diagnostics Dialog Box RFI Configuration Data Flow Map Test Description Area Test Area Comment Area Tabs ...

Page 281: ...h Test Checks the transmit switches as described in the TR Switch Test section on page 7 39 d FLA Jumper Test Checks the jumpers that connect the side elements to the center elements as described in the FLA Jumper Switch section on page 7 31 e Pencil Probe Test Checks the transmitting channels associated relays to the pencil probe port as described in the Pencil Probe Test section on page 7 41 f P...

Page 282: ... test is in good condition 1 Connect either a 7S or 3S probe and lock it in place 2 Access the F B tab of the FE Diagnostics dialog box as described in the Accessing the Front Board Assembly Options section on page 7 26 3 In the Select Socket area of the F B tab trackball to the socket to which the 7S or 3S probe is connected Trackball to Left Right or Center and press Select 4 Trackball to Pulser...

Page 283: ...the test result message in the Report dialog box If one or more channels were identified as bad trackball to the Save Report button and press Select then contact a GE Medical Systems service representative If no channels were identified as bad mark the channels suspected as being bad as follows Trackball to each of the channels in the Display area and press select Trackball to the Mark bad channel...

Page 284: ...results it is imperative that only this probe is used and that it be in good condition 2 Access the F B tab of the FE Diagnostics dialog box as described in the Accessing the Front Board Assembly Options section on page 7 26 3 In the Select Socket area of the F B tab trackball to the socket to which the 10L probe is connected Trackball to Left Right or Center and press Select 4 Trackball to Pulser...

Page 285: ...heckbox to display only bad channels in the Display area Mark bad channel Select this checkbox to manually mark the currently selected channel as bad 6 Check the test result message and proceed as follows If one or more channels were identified as bad trackball to the Save Report button and press Select then contact a GE Medical Systems Service Representative If no channels were identified as bad ...

Page 286: ...oard elements as follows Each element is represented by a button highlighted in green that displays the element and the channel number that is associated with that element Each button is highlighted yellow when selected Each button is highlighted red if errors were detected for one or more elements Checkboxes Enable you to manipulate bad channels Show Only Bad Channels Select this checkbox to disp...

Page 287: ...ss Select and contact a GE Medical Systems service representative If no errors were identified proceed with the next test If no errors were identified but the problem persists contact your local GE Medical Systems field engineer for assistance If errors were identified but the results were marginal perform calibration as described in the Calibration section on page 6 11 and then repeat the test If...

Page 288: ...ot is required if the tests are not being performed in the sequence described in the Performing Front End FE Diagnostics section on page 7 5 1 Disconnect all the probes 2 Access the F B tab of the FE Diagnostics dialog box as described in the Accessing the Front Board Assembly Options section on page 7 26 3 Trackball to Pulser 1 High Voltage Power Supply HVPS 80V or Pulser 2 Low Voltage Power Supp...

Page 289: ...s Show Only Bad Channels Select this checkbox to display only bad channels in the Display area Mark bad channel Select this checkbox to manually mark the currently selected channel as bad 5 Check the test result message and proceed as follows If one or more channels were identified as bad trackball to the Save Report button and press Select then contact a GE Medical Systems Service Representative ...

Page 290: ...up consists of four TR4 sockets each socket containing four vectors channels as follows Each vector is represented by a button highlighted in green that displays the number of the socket to which the TR4 is connected Each button is highlighted yellow when selected Each button is highlighted red if errors were detected for one or more channels Checkboxes Enable you to manipulate bad channels Show O...

Page 291: ...ss Select and contact a GE Medical Systems service representative If no errors were identified proceed with the next test If no errors were identified but the problem persists contact your local GE Medical Systems field engineer for assistance If errors were identified but the results were marginal perform calibration as described in the Calibration section on page 6 11 and then repeat the test If...

Page 292: ... B tab of the FE Diagnostics dialog box as described in the Accessing the Front Board Assembly Options section on page 7 26 3 In the Select Socket area of the F B tab trackball to the socket to which the 3S probe is connected Trackball to Left Right or Center and press Select 4 Trackball to Pulser 1 High Voltage Power Supply HVPS 80V or Pulser 2 Low Voltage Power Supply LVPS 40V and press Select 5...

Page 293: ...nels were identified as bad trackball to the Save Report button and press Select then contact a GE Medical Systems Service Representative If no channels were identified as bad mark the channels suspected as being bad as follows Trackball to each of the channels in the Display area and press select Trackball to the Mark bad channel checkbox and press Select Trackball to Save Report and press Select...

Page 294: ...t has two phases namely the open pencil probe test and the close pencil probe test 1 Connect a 2D pencil probe 2 Access the F B tab of the FE Diagnostics dialog box as described in the Accessing the Front Board Assembly Options section on page 7 26 3 Trackball to Pulser 1 High Voltage Power Supply HVPS 80V or Pulser 2 Low Voltage Power Supply LVPS 40V and press Select 4 Trackball to the Pencil Pro...

Page 295: ...d channels in the Display area Mark bad Channel Select this checkbox to manually mark the currently selected channel as bad 5 Check the test result message and proceed as follows If one or more relays were identified as bad trackball to Save Report and press Select and contact a GE Medical Systems service representative If no relays were identified as bad mark the channels suspected as being bad a...

Page 296: ... of the eight front board pencil probe relays as follows Each relay is represented by a button highlighted in green that displays the relay number Each button is highlighted in yellow when selected Each button is highlighted in red if errors were detected for one or more relays Checkboxes Enable you to manipulate bad channels Show Only Bad Channels Select this checkbox to display only the bad chan...

Page 297: ...ort and press Select and contact a GE Medical Systems service representative If no errors were identified proceed with the next test If no errors were identified but the problem persists contact your local GE Medical Systems field engineer for assistance If errors were identified but the results were marginal perform calibration as described in the Calibration section on page 6 11 and then repeat ...

Page 298: ...s are displayed in the Comments area 4 Check the test results and proceed as follows If no errors were identified proceed with the next test If no errors were identified but the problem persists contact your local GE Medical Systems field engineer for assistance If errors were identified but the results were marginal perform calibration as described in the Calibration section on page 6 11 and then...

Page 299: ...rm focal beam Note You must reboot the system after performing the RAM test 1 Access the F B tab of the FE Diagnostics dialog box as described in the Accessing the Front Board Assembly Options section on page 7 26 2 Trackball to the RAM Test button and press Select The RAM test is performed and the results are displayed in the Comments area as shown in Figure 7 24 or Figure 7 25 below Figure 7 24 ...

Page 300: ...sists contact your local GE Medical Systems field engineer for assistance If errors were identified but the results were marginal perform calibration as described in the Calibration section on page 6 11 and then repeat the test If errors were identified and the results were not marginal verify that all image port and PCI bridge cables are connected and functioning properly as described in Chapter ...

Page 301: ...t Options 1 Access the FE Diagnostics dialog box as described in the Accessing the Front End Diagnostic Options section on page 7 6 2 In the FE Diagnostics dialog box trackball to the MUX tab and press Select OR Trackball to the MUX button in the Data Flow Maps and press Select The MUX tab is displayed as shown in Figure 7 26 or Figure 7 27 below Figure 7 26 MUX Tab FE Diagnostics Dialog Box RFI C...

Page 302: ...ECTION 2392751 100 REVISION 3 VIVID 4 SERVICE MANUAL Chapter 7 Diagnostics Troubleshooting 7 49 Figure 7 27 MUX Tab FE Diagnostics Dialog Box RFT Configuration Data Flow Map Test Description Area Test Area Comment Area Tabs ...

Page 303: ...ol on page 7 59 AC Power Input Test on page 7 61 LVPS Voltage Test on page 7 63 HVPS Voltage Test on page 7 64 Temp Test on page 7 65 Show History on page 7 66 7 3 9 2 Normal Channels Diagnostic Tests Tests the output channels from the input channels This test setting is used for all modes except CW Mode The Normal Channels Diagnostic Tests check each amplifier output against the predefined output...

Page 304: ...GE MEDICAL SYSTEMS DIRECTION 2392751 100 REVISION 3 VIVID 4 SERVICE MANUAL Chapter 7 Diagnostics Troubleshooting 7 51 Figure 7 28 Normal Channels Diagnostic Test ...

Page 305: ...y Bad Channels Select this checkbox to display only bad channels in the Display area Mark bad channel Select this checkbox to manually mark the currently selected channel as bad 4 Check the test result message and proceed as follows If one or more channels were identified as bad trackball to the Save Report button and press Select then contact a GE Medical Systems Service Representative If no chan...

Page 306: ... group consists of four TR4 sockets each socket containing four vectors channels as follows Each vector is represented by a button highlighted in green that displays the number of the socket to which the TR4 is connected Each button is highlighted yellow when selected Each button is highlighted red if errors were detected for one or more channels Checkboxes Enable you to manipulate bad channels Sh...

Page 307: ...ss Select and contact a GE Medical Systems service representative If no errors were identified proceed with the next test If no errors were identified but the problem persists contact your local GE Medical Systems field engineer for assistance If errors were identified but the results were marginal perform calibration as described in the Calibration section on page 6 11 and then repeat the test If...

Page 308: ...oting 7 55 7 3 9 3 Expanded Low Channels Diagnostic Tests Tests output signals in CW Mode only when the input channels are connected to the output channels If one channel is missing the output will be 6db The input signals come from either a 3S or a 7S probe Figure 7 30 Expanded Low Channels Diagnostic Tests ...

Page 309: ...forming Front End FE Diagnostics 7 3 9 4 Expanded High Channels Diagnostic Tests Tests the output signals from the input of the high channels If one channel is missing the output will be 6db The input signals come from either a 3S or a 7S probe Figure 7 31 Expanded High Channels Diagnostic Tests ...

Page 310: ... SYSTEMS DIRECTION 2392751 100 REVISION 3 VIVID 4 SERVICE MANUAL Chapter 7 Diagnostics Troubleshooting 7 57 7 3 9 5 Port Test The Port test is a general logic control test Figure 7 32 Port Test RFI Configuration ...

Page 311: ...GE MEDICAL SYSTEMS DIRECTION 2392751 100 REVISION 3 VIVID 4 SERVICE MANUAL 7 58 Section 7 3 Performing Front End FE Diagnostics Figure 7 33 Port Test RFT Configuration ...

Page 312: ...ell as temperatures 7 3 9 6 1 TEE Probe Control The TEE probe control test checks the position setting of the probe as well as its normal operation 1 Access the MUX tab of the FB Diagnostics dialog box as described in the Accessing the MUX Diagnostic Test Options section on page 7 48 2 Trackball to the Advanced board tests button and press Select The Advanced System Tests options are displayed as ...

Page 313: ...RECTION 2392751 100 REVISION 3 VIVID 4 SERVICE MANUAL 7 60 Section 7 3 Performing Front End FE Diagnostics Figure 7 35 TEE Probe Test Dialog Box 5 Verify the test results and then trackball to the OK button and press Select ...

Page 314: ... accuracy by percentage 1 Access the MUX tab of the FB Diagnostics dialog box as described in the Accessing the MUX Diagnostic Test Options section on page 7 48 2 Trackball to the Advanced board tests button and press Select The Advanced System Tests options are displayed as shown in Figure 7 34 on page 7 59 3 Trackball to the Monitor button and press Select The View Power options are displayed as...

Page 315: ...ont End FE Diagnostics 4 Trackball to the AC Power Input button and press Select The AC Power Input dialog box is displayed Figure 7 37 AC Power Input Dialog Box 5 Trackball to the Show button and press Select to display the voltage Note For repeat readings select Loop every and set the reading time cycle ...

Page 316: ...UX Diagnostic Test Options section on page 7 48 2 Trackball to the Advanced board tests button and press Select The Advanced System Tests options are displayed as shown in Figure 7 34 on page 7 59 3 Trackball to the Monitor button and press Select The View Power options are displayed as shown in Figure 7 36 on page 7 61 4 Trackball to the LV PS Voltage button and press Select The LVPS voltage rang...

Page 317: ...box as described in the Accessing the MUX Diagnostic Test Options section on page 7 48 2 Trackball to the Advanced board tests button and press Select The Advanced System Tests options are displayed as shown in Figure 7 34 on page 7 59 3 Trackball to the Monitor button and press Select The View Power options are displayed as shown in Figure 7 36 on page 7 61 4 Trackball to the HV PS Voltage button...

Page 318: ... section on page 7 48 2 Trackball to the Advanced board tests button and press Select The Advanced System Tests options are displayed as shown in Figure 7 34 on page 7 59 3 Trackball to the Monitor button and press Select The View Power options are displayed as shown in Figure 7 36 on page 7 61 4 Trackball to the Temperature button and press Select The temperatures are displayed as shown below Fig...

Page 319: ... Advanced board tests button and press Select The Advanced System Tests options are displayed as shown in Figure 7 34 on page 7 59 3 Trackball to the Monitor button and press Select The View Power options are displayed as shown in Figure 7 36 on page 7 61 4 Trackball to the View History button and press Select The following options are displayed Figure 7 41 View History Options 5 Select the test a...

Page 320: ...g the Front End boards software versions and hardware revisions 1 Access the FE Diagnostics dialog box as described in the Accessing the Front End Diagnostic Options section on page 7 6 2 Trackball to the H W Report button and press Select The System Report window is displayed as shown in Figure 7 42 or Figure 7 43 below Figure 7 42 System Report Window RFI configured Systems Figure 7 43 System Re...

Page 321: ...in the FE Diagnostics dialog box enables you to generate a report of the current test and failure results 1 Access the FE Diagnostics dialog box as described in the Accessing the Front End Diagnostic Options section on page 7 6 2 Trackball to the Current Report button and press Select The Current Report window is displayed as shown below Figure 7 44 Current Report Window ...

Page 322: ... End hardware components Note The Back End Diagnostic Tests may be performed independently regardless of sequence 7 4 1 Accessing the Back End Diagnostic Options 1 In 2D Mode press Ctrl F11 on the alphanumeric keyboard The Diagnostic menu is displayed as shown in Figure 7 1 on page 7 3 2 In the Diagnostic menu trackball to the Back End button and press Select The HW Diagnostics menu is displayed a...

Page 323: ...ptions as described in the ECG Phono Diagnostic Test section on page 7 72 External Keyboard Enables you to test the keyboard options and lights in different modes as described in the External Keyboard Diagnostic Test section on page 7 74 Keyboard Enables you to test the alphanumeric keyboard keys as described in the Keyboard Diagnostic Test section on page 7 77 Media Driver Enables you to test the...

Page 324: ...ormed for each of the speakers at various PRFs and frequencies Left and right are as seen when standing behind the unit 3 In the User controls area trackball to the Right radio button and press Select to test the right speaker Ensure that the left speaker is deselected 4 In the Actions area trackball to the Play button and press Select Verify that a clear tone is emitted 5 In the User controls are...

Page 325: ...or to an appropriate ECG simulator In this case select the External ECG radio button in the TestECGDevice dialog box 2 Access the HW Diagnostics menu as described in the Accessing the Back End Diagnostic Options section on page 7 69 3 Trackball to the ECG Phono button and press Select The TestECGDevice dialog box is displayed as shown below Figure 7 47 Test ECG Device Dialog Box 4 In the Select tr...

Page 326: ...on page 7 69 3 Trackball to the ECG Phono button and press Select The TestECGDevice dialog box is displayed as shown in Figure 7 47 on page 7 72 4 In the Select trace area trackball to the Phono radio button and press Select 5 Trackball to the Open Device button and press Select 6 Use your finger to click the microphone The Phono signal is displayed in the data area Verify that the waveform on the...

Page 327: ...Diagnostic Test section on page 7 77 7 4 4 1 Manual External Keyboard Test 1 Access the HW Diagnostics menu as described in the Accessing the Back End Diagnostic Options section on page 7 69 2 Trackball to the External Keyboard button and press Select The Extended Keyboard Test window is displayed as shown below Figure 7 48 Test Manager Tab Extended Keyboard Test Window 3 In the Test Manager tab t...

Page 328: ...nector on the front panel of the unit and press the right middle and left of the switch Verify that the numbers 68 69 and 70 accordingly are displayed on the info bar 11 When you are finished trackball to the Exit button and press Select 7 4 4 2 Automatic Lights Test 1 Access the HW Diagnostics menu as described in the Accessing the Back End Diagnostic Options section on page 7 69 2 Trackball to t...

Page 329: ...ual radio button and press Select 4 In the KB Panel tab deselect the Select checkbox Verify that after the Select LED is off the alphanumeric keyboards LEDs are dimmed 5 When you are finished trackball to the Exit button and press Select 7 4 4 4 Commands History Select the Commands History tab in the Extended Keyboard Test window to view a report of the activity of the extended control panel durin...

Page 330: ...onality of the alphanumeric keyboard keys 1 Access the HW Diagnostics menu as described in the Accessing the Back End Diagnostic Options section on page 7 69 2 Trackball to the Keyboard button and press Select The Keyboard Test dialog box is displayed as shown below Figure 7 51 Keyboard Test Dialog Box 3 Follow the on screen instructions 4 When you are finished trackball to the Close button and pr...

Page 331: ...isplayed as shown below Figure 7 52 Util_MO_CDR_App Dialog Box 3 Trackball to the MO radio button and press Select 4 Trackball to the IsMediaAccess button an press Select The message Media in drive G is accessible is displayed 5 Trackball to the Eject button and press Select The message Media is outside is displayed Verify that the media has actually been ejected 6 Trackball to the Load button and...

Page 332: ...ed 7 Select No The message Media is outside is displayed Verify that the media has actually been ejected 8 Trackball to the Load button and press Select The message Media is inside is displayed Verify that the media is actually inside 9 Trackball to the Format button and press Select The message Media in drive H was formatted successfully is displayed 10 Trackball to the GetVolInfo button and pres...

Page 333: ...as check the memory usage 7 4 7 1 Benchmark Testing 1 Access the HW Diagnostics menu as described in the Accessing the Back End Diagnostic Options section on page 7 69 2 Trackball to the Computer Testing button and press Select The following options are displayed Figure 7 53 Benchmark Testing Options 3 Trackball to the required option from the Select one of the cines drop down list and press Selec...

Page 334: ...ch indicates current computer results are higher or equal to those indicated in the lower line 7 4 7 2 Check Disk Bus 1 Access the HW Diagnostics menu as described in the Accessing the Back End Diagnostic Options section on page 7 69 2 Trackball to the Computer Testing button and press Select The options shown in Figure 7 53 on page 7 80 are displayed 3 Trackball to the Check Disc Bus button and p...

Page 335: ... Bench In the information displayed make sure that the speed values displayed are greater than 23MB sec This test checks the speed of information transfer between the hard disk and IDE BUS Bus Bench In the information displayed make sure that the speed values displayed are greater than 86MB sec This test checks the speed of information transfer between the memory and the BUS ...

Page 336: ...ct The system enters Standby mode The light on the ON OFF button on the control console blinks repeatedly 3 Disconnect the AC power cable from the mains wall power outlet 4 Check that the ON OFF button on the control console blinks repeatedly the system is now powered by the UPS 5 Leave the system in this state for a period of 20 minutes checking that the ON OFF button continues to blink during th...

Page 337: ...rallel or USB port on the Vivid 4 rear connectors panel 1 Turn ON the system by pressing the ON OFF button on the control console and re boot into Technical Support Mode using the T plug While re booting the system be prepared to select Technical Support Mode when prompted then press Enter 2 From the Windows desktop select Start Programs Computer Management Device Manager Network Adaptors as shown...

Page 338: ...e Connectivity Provides basic connectivity between the scanner and the OnLine Center OLC or the field engineer in the field Configuration Provides the interface to configure the various iLinq parameters Contact GE Enables the user to contact the OnLine Center and describe the problems with their scanner in an easy and convenient way using a one touch switch Interactive Application Displayed in the...

Page 339: ...cal Support tab as shown in Figure 7 58 below Figure 7 58 Technical Support System Configuration 2 Trackball to OK and press Select The System Configuration window closes Note If iLinq was not found to be enabled in step 1 it is necessary to re boot the system before proceeding 3 Trackball to the wrench icon in the status bar at the bottom of the scanning screen and press Select The Profile Manage...

Page 340: ... location select Remote from the Profile Name drop down list 5 Trackball to the Start Communicator button and press Select Wait a while until the Service Login dialog box is displayed as shown below Figure 7 60 Service Login Dialog Box 6 Select Operator from the Select User Level drop down list and in the Enter Password field enter the password supplied by the OLC this is updated on a frequent bas...

Page 341: ...ect the required tool or application as described in the following sections Error Logs Page section on page 7 90 Diagnostics Page section on page 7 98 Image Quality Page section on page 7 111 Calibration Page section on page 7 111 Configuration Page section on page 7 112 Utilities Page section on page 7 113 Replacement Page section on page 7 127 PM Page section on page 7 127 Note When using the Co...

Page 342: ...r Logs Page When the Error Logs page is selected as shown in Figure 7 62 below the log viewing options described in the following sections are available Log Viewer section on page 7 91 Log Browser section on page 7 95 Figure 7 62 Error Logs Page Table 7 1 Access and Security User Level Access Authorization Operator Normally used in house and protected with a special scanner configuration that is n...

Page 343: ...he following high level requirements Simple filtering of the scanner log s with filtering capabilities as a function of login access permissions Log visibility by all services modes Multiple instances of the log viewer Color coded log entries for severity levels as follows Severity 1 Green Severity 2 Yellow Severity 3 Red Support the transfer of logs to local or remote destinations 7 5 3 1 1 Logs ...

Page 344: ...the power logs including errors monitoring dates and values as shown below Figure 7 65 Power Logs Temperature Displays all the temperature logs including errors monitoring dates and values as shown below Figure 7 66 Temperature Logs NOTE Upper FEC Sensor sensor inside the Front End Lower FEC Sensor sensor inside the AC Distribution Box ...

Page 345: ...r Power logs in graphical format Select Power or Temperature from the Log option on the Logs Viewer menu and then select Plot Log to display the results as shown below Figure 7 67 Plot Log Window Plot Page Enables you to view the results of the System log in graphical format showing the distribution of the log information according to packages Select System from the Log option on the Logs Viewer m...

Page 346: ...nsitive text that you want to filter from the logs or pages that you are currently viewing as shown below Figure 7 69 Search for Text in Log or Page 7 5 3 1 4 Filter The Filter option on the Logs Viewer menu is available to users with the GE Service access level Select the System Logs option to select default options that you want to filter from the System Logs as shown below Figure 7 70 Filter Op...

Page 347: ... Viewer Select the Exit Log Viewer option to return to the Common Service Desktop Figure 7 71 Exit Option 7 5 3 2 Log Browser When Log Browser is selected in the left pane of the Error Logs page you can browse through the different log categories All the logs that were generated during the past 3 months are listed under Logs Available on System as shown in Figure 7 72 below Figure 7 72 Log Browser...

Page 348: ...ommon Service Interface Each system re boot will generate a new log file each log file can be viewed by selecting the appropriate link as shown in the example in Figure 7 73 below Figure 7 73 Viewing a Log File Click here System Log File Displayed Note _2 signifies the second reboot of that day ...

Page 349: ...om this screen Figure 7 73 i e when you are connected to the system remotely or you may save the file to a floppy disk on the system itself Only three log files may be reviewed in the field DiagErr SystemInfo errorlog For all others the information contained within the log file would be meaningless since it needs to be reviewed on an actual system and cannot be analyzed remotely ...

Page 350: ...nteractive The user is required to perform an operation on the ultrasound unit in order for the test to be completed successfully This option is not applicable when used remotely Non Interactive The tests are performed without the user s intervention When the Diagnostics page is selected as shown below the options described in the following sections are available Utilities section on page 7 99 PC ...

Page 351: ...Grey abort Execute Button Enables you to start a selected diagnostic test Once the diagnostic is running the Execute button becomes the Abort button enabling you to stop the diagnostic Loop Count Field Enables you to enter the number of times that the diagnostic test should be performed Any numeric value between one and four digits can be entered This field is queried after you press Execute to st...

Page 352: ...CAL SYSTEMS DIRECTION 2392751 100 REVISION 3 VIVID 4 SERVICE MANUAL 7 100 Section 7 5 Common Service Interface Reset Power Supply Enables you to reset the Front End power supply Figure 7 76 Reset Power Supply ...

Page 353: ...ION 2392751 100 REVISION 3 VIVID 4 SERVICE MANUAL Chapter 7 Diagnostics Troubleshooting 7 101 Restart Scanner Software System Shutdown Enables you to remotely shutdown or restart the system Figure 7 77 Restart Scanner Software ...

Page 354: ...751 100 REVISION 3 VIVID 4 SERVICE MANUAL 7 102 Section 7 5 Common Service Interface Save System State to Log This performs the same system operation as that initiated when pressing Ctrl F or Alt D Figure 7 78 Save System State to Log ...

Page 355: ...ed CPU String Operations Tests the proper operation of the string commands LODS MOVS SCAS and STOS with 8 16 and 32 bit operands If errors are detected the failed commands and operands are listed CPU Logical Operations Tests the proper operation of the logical operations AND NOT OR and XOR with 16 and 32 bit operands If errors are detected the failed operands are listed CPU Math Registers Tests th...

Page 356: ...ting these diagnostics will also look for parity errors and other exceptions If encountered these are added to the test log as errors Memory Pattern Test Uses several test patterns to test as much memory as possible Memory Parity Test Checks for parity errors on the memory bus during intensive string transfer operation If an error is detected the address of the failed block is displayed 7 5 4 3 4 ...

Page 357: ...and video controller 7 5 4 3 6 Frame Grabber Test Testing for proper operation of the Frame Grabber Board is achieved by performing the Video Grabbing Test For details refer to the Video Grabbing Test on page 4 4 For information regarding the video grabbing calibration procedure refer to Video Grabbing Calibration on page 6 14 7 5 4 3 7 PCI Board Configuration Test A Peripheral Component Interconn...

Page 358: ...80 Monitor Test Combination Test Checks the monitor alignment color depth and monitor resolution Four cross hairs are placed in each corner of the screen as well as RGB spectrum arrays and horizontal and vertical alignment bars Solid Color Test Tests the panel display on laptops and LCD screens This test display a solid color on the screen to ensure that all the color pixels are operating correctl...

Page 359: ...ts as those performed by pressing Ctrl F11 during regular operation can be conducted Both Non interactive see Figure 7 81 or Figure 7 82 and Interactive see Figure 7 83 tests may be performed However the Interactive tests require the use of specific probes NOTE To avoid failure alarms during the Front End diagnostics tests disconnect all probes that are not required to perform the test Figure 7 81...

Page 360: ...s for RFI Configuration on page 7 11 OR for systems with RFT Configuration Image Port Image Port IMP Diagnostic Tests for RFT Configuration on page 7 13 VME Bus VME Bus VME Diagnostic Tests for RFT Configuration on page 7 15 RFT Board RFT Diagnostic Tests for RFT Configuration on page 7 17 FEC Front End Controller FEC Diagnostic Tests for RFT Configuration on page 7 19 Beam Former see Beamformer B...

Page 361: ...EDICAL SYSTEMS DIRECTION 2392751 100 REVISION 3 VIVID 4 SERVICE MANUAL Chapter 7 Diagnostics Troubleshooting 7 109 Figure 7 83 Interactive Tests NOTE Interactive tests are performed on the Front Board only ...

Page 362: ...test refer to the appropriate section as follows Transmit Test see Transmit Test on page 7 29 FLA Jumper Test see FLA Jumper Switch on page 7 31 TR Switch Test see TR Switch Test on page 7 39 Note On the TR Switch Test Socket 1 and Socket 2 relate to which socket the probe is plugged into Select the appropriate Pulser Pencil Probe Test see Pencil Probe Test on page 7 41 ...

Page 363: ... as shown below you can verify and calibrate image quality Figure 7 84 Image Quality Page Note This page is not populated in this version 7 5 6 Calibration Page When the Calibration page is selected as shown below you can perform different calibration procedures as described in Chapter 6 Service Adjustments Figure 7 85 Calibration Page Note This page is not populated in this version ...

Page 364: ...age When the Configuration page is selected you can configure the GSUI InSite No changes should be made in this page without the help of GE Medical Systems Service Personnel as any modifications made by untrained personnel can cause damage to the ultrasound unit Figure 7 86 Configuration Page Note This page is not populated in this version ...

Page 365: ...e size already utilized IP Configuration shows the IP configuration of the different remote devices such as the network or the modem Network Status shows the communication status of active connections on the network Windows 2000 Services shows which services applications are currently active on Windows 2000 User Accounts shows the internal account information that was provided and set up on the sy...

Page 366: ...GE MEDICAL SYSTEMS DIRECTION 2392751 100 REVISION 3 VIVID 4 SERVICE MANUAL 7 114 Section 7 5 Common Service Interface Figure 7 88 System Shutdown ...

Page 367: ...stem Shutdown There are three options provided described on previous page also see Figure 7 88 Reset Database used to empty the database and reset a new one see Figure 7 89 below Figure 7 89 Reset Database WARNING THIS PROCESS IS IRREVERSIBLE Before proceeding make sure you have a complete backup of the existing database When selecting Reset Database the following warning message is displayed Clic...

Page 368: ...ngs CAUTION THIS PROCESS IS IRREVERSIBLE Before proceeding make sure you have a complete backup of the current settings if they will be required in the future When selecting Clean Userdefs the following warning message is displayed After making a back up copy of the current settings click OK to proceed NOTE This function performs the same procedure as that of Restore Factory Presets accessed under...

Page 369: ...1 Select the Prodiags Browser under the Configuration Utility option The following message is displayed Wait a few minutes until the following screen is displayed Figure 7 91 ProDiags Browser Schedule The Schedule tab indicates the tasks that are scheduled and on which date they are scheduled and their frequency It also indicates the type of operation Background or Foreground ...

Page 370: ...REVISION 3 VIVID 4 SERVICE MANUAL 7 118 Section 7 5 Common Service Interface Figure 7 92 ProDiags Browser Task The Task tab indicates all the tasks that are available for activation This also indicates which tasks are scheduled and their type ...

Page 371: ...STEMS DIRECTION 2392751 100 REVISION 3 VIVID 4 SERVICE MANUAL Chapter 7 Diagnostics Troubleshooting 7 119 Figure 7 93 ProDiags Browser Time Slot The Time Slot tab indicates the time slots available for setting tasks ...

Page 372: ...AL 7 120 Section 7 5 Common Service Interface Figure 7 94 ProDiags Browser Log and Result The Log Result tab indicates the logs and results of any tasks that have been performed At any of the above mentioned tabs you can Add or Delete a task from the list of displayed tasks ...

Page 373: ...ANUAL Chapter 7 Diagnostics Troubleshooting 7 121 7 5 8 3 2 File Transfer Configuration The File Transfer Configuration utility can be used to transfer files to the GE Service center Follow the on screen instructions as shown below Figure 7 95 File Transfer Configuration ...

Page 374: ...nterface 7 5 8 3 3 iLinq Configuration Utility When the iLinq Configuration Utility option is selected in the left pane of the Configuration page see Figure 7 96 below the InSite Interactive Platform Configuration window is displayed as shown in Figure 7 97 on page 7 123 Figure 7 96 iLinq Configuration Utility ...

Page 375: ...N 3 VIVID 4 SERVICE MANUAL Chapter 7 Diagnostics Troubleshooting 7 123 Click Accept and select the modem device as the communication device to the OLC in the Device Connection tab also shown below Figure 7 97 InSite Interactive Platform Configuration ...

Page 376: ...up information required for the InSite Checkout tab as shown below When all the settings have been entered click the CHECKOUT NOW button twice The OLC will attempt to communicate with your ultrasound unit via the modem The unit should be connected to a direct telephone line so that the OLC can dial in directly to the scanner Figure 7 98 InSite Checkout Tab ...

Page 377: ...w under the Technical Support Tab will allow you to save the iLinq IP settings to the hard disk as described below iLinq IP Save Procedure 1 In the System Configuration window click on the Technical Support tab see Figure 7 99 below 2 Trackball to iLing Settings Save and press Select The system saves the presets to the disk 3 TRACKBALL to OK and press Select The scanning screen is re displayed Fig...

Page 378: ...on window under the Technical Support Tab refer to Figure 7 99 above trackball to iLinq Settings Restore and press Select A blank screen appears wait for a while until the phone and modem options message is displayed then TRACKBALL to OK and press Select 2 Wait while the restore process is running this may take a while When complete a message is displayed prompting for system shutdown 3 Perform a ...

Page 379: ...etails and ordering information is displayed as described in Chapter 9 Renewal Parts Figure 7 100 Replacement Page Note This page is not populated in this version 7 5 10 PM Page When the PM page is selected as shown below information about planned proactive and preventive maintenance is displayed as described in Chapter 10 Periodic Maintenance Figure 7 101 PM Page Note This page is not populated i...

Page 380: ...vity logging you can also enter your own comments as well as screen captures pertaining to system functionality These comments are saved as part of the daily logger report 1 When an error occurs press Ctrl F or Alt D on the alphanumeric keyboard The Failure Report window is displayed as shown below Figure 7 102 Failure Report Window 2 In the Problem Description area enter a description of the prob...

Page 381: ...you expand the dropdown list in the Store Daily History area as shown below By default the current date is displayed Figure 7 103 Failure Report Calendar 3 Insert an empty PC formatted diskette Note An individual empty diskette is required for each report 4 Trackball to the Save To Diskette button and press Select The report is copied to the diskette as a single zipped file If the file is too larg...

Page 382: ...2252982 2258801 2252964 2253011 2252976 2252981 2253009 2253015 2292972 2276874 2300847 2253014 2276875 2269429 2253080 2253079 RS232 1 2266742 2269430 C B L F AC INPUT BOX 2252994 On off 2269430 AC DIST BOX ISOL TRAN Temp Ctrl Temp Sens LAMBDA PS 12VDC contactors 2253001 2252998 2252999 2253002 2253004 2253000 2252966 USB1 TR4 1 TR4 16 I2C COM1 Rear panel left Rear panel right Composite Video Out...

Page 383: ...253016 2252977 2252975 2252982 2258801 2252964 2253011 2252976 2252981 2253009 2253015 2292972 2276874 2300847 2253014 2276875 2253080 2253079 RS232 1 2266742 2269430 C B L F AC INPUT BOX 2252994 On off 2269430 AC DIST BOX ISOL TRAN Temp Ctrl Temp Sens LAMBDA PS 12VDC contactors 2253001 2252998 2252999 2253002 2253004 2253000 2252966 USB1 TR4 1 TR4 16 I2C COM1 Rear panel left Rear panel right Comp...

Page 384: ...This chapter provides replacement procedures for system parts Table 8 1 Contents in Chapter 8 Section Description Page Number 8 1 Overview 8 1 8 2 Cover Replacement Procedures 8 2 8 3 Control Console Components Replacement 8 22 8 4 Front End Parts Replacement 8 35 8 5 Back End Parts Replacement 8 45 8 6 Lower Section Components Replacement 8 84 8 7 Software Loading 8 113 8 8 Peripherals 8 114 ...

Page 385: ...8 2 Vivid 4 Ultrasound Unit Covers Legend to Figure 8 1 Label Item Label Item 1 Right Side Cover 7 Control Console Lower Cover 2 Left Side Cover 8 Control Console Upper Cover Front 3 Front Cover 9 Control Console Upper Cover Rear 4 Rear Cover not shown 10 Control Console Rear Lower Cover 5 Connector Panels Cover 11 Color Printer Compartment 6 Top Cover Lower Section 12 Air Filter 13 Service Cover ...

Page 386: ... power unit turn the power OFF and disconnect the power cord CAUTION Before removing circuit boards turn the power OFF and wear the ESD wrist band strap 8 2 1 2 Order of Cover Removal Remove the side covers in the following order Side Covers as described on page 8 4 Front Cover as described on page 8 5 Rear Cover as described on page 8 7 Connector Panels as described on page 8 8 Top Cover lower se...

Page 387: ...ers four in total an example of which is shown below To easily access the screws turn the wheels inwards by 90 degrees Figure 8 2 Wheel Arch Screw 2 Slide the right side cover down and outwards until it is free from its holders 3 Slide the left side cover down and outwards until it is free from its holders 8 2 2 4 Side Covers Installation Procedure 1 Slide the right side cover up and inwards until...

Page 388: ...he Vivid 4 ultrasound unit as described in Chapter 3 Installation 8 2 3 3 Front Cover Removal Procedure 1 Pull out and remove the air filter as shown below Figure 8 3 Air Filter 2 Remove the side covers as described Side Covers Replacement Procedures on page 8 4 3 The front cover is secured to the base of the main metal frame by a metal bracket on each side Remove the upper screw from each bracket...

Page 389: ...unit taking care to first insert its upper edge under the top cover 2 Fasten the front cover with the three screws at the edge of the top cover as shown in Figure 8 5 above 3 Fasten the left and right brackets at the lower end of the front cover one each side by tightening each bracket with its two screws to the main metal frame as shown in Figure 8 4 on page 8 5 4 Install the side covers as descr...

Page 390: ...s that secure the rear cover in position Two screws are located on the sides of the rear cover as shown below The other two screws are located in the AC Input Box Unit as shown in Figure 8 7 below Figure 8 6 Rear Cover Screws Figure 8 7 Rear Cover Screws in AC Input Box Unit 3 Remove the rear cover 8 2 4 4 Rear Cover Installation Procedure 1 Return the rear cover in its original position 2 Insert ...

Page 391: ...cedures 8 2 5 2 Preparations Shut down the Vivid 4 ultrasound unit as described in Chapter 3 Installation 8 2 5 3 Connector Panels Cover Removal Procedure 1 Remove the two screws located one on either side of the cover 2 Lift and remove the cover Figure 8 8 Connector Panels Cover 8 2 5 4 Connector Panels Cover Installation Procedure 1 Return the cover to its original position above the connector p...

Page 392: ...bed in the Side Covers Replacement Procedures on page 8 4 2 Remove the rear cover as described in the Rear Cover Replacement Procedures on page 8 7 3 Raise the control console to its maximum height 4 Remove the two screws located in the brackets underneath the lower section of the top cover one on either side of the unit as shown below Figure 8 9 Top Cover Lower Section Screws 5 Remove the connect...

Page 393: ...plug any cables from below the rear panels except for those indicated in this procedure 8 Viewing the unit from behind there are two small metal plates at the back of the top cover each with two screws Remove only the outer screw from each plate releasing the small section of the collar with its two metal plates attached as shown below Figure 8 11 Top Cover Collar 9 Remove the section of the colla...

Page 394: ...of the gas spring cover shown below and lower it into the collar of the top cover Figure 8 14 Gas Spring Cover Screws CAUTION The remaining section of the gas spring cover cannot be removed at this stage Do not attempt to remove it 14 Remove the three screws located at the front edge of the top cover and allow it to sink down into the top cover collar 15 Slightly lift the top cover together with t...

Page 395: ...asten it with the two screws shown in Figure 8 14 on page 8 11 7 Gently fit the left and right connector panels back to their original position on the top cover and fasten each with its four screws 8 Mount the small section of the top cover collar closing the open gap at the rear of the top cover and fasten it to the top cover with the two screws shown in Figure 8 11 on page 8 10 9 Plug in the AC ...

Page 396: ...as described in Chapter 3 Installation 8 2 7 3 Gas Spring Cover Removal Procedure The procedure for removing the gas spring cover is identical to the procedure for removing the lower section of the top cover as described in the Top Cover Lower Section Removal Procedure on page 8 9 8 2 7 4 Gas Spring Cover Installation Procedure The procedure for installing the gas spring cover is identical to the ...

Page 397: ...l console lower rear cover as described in the Control Console Lower Rear Cover Removal Procedure on page 8 19 2 Loosen the screws fastening the control console lower cover in position and lower the front and rear sections downwards without completely removing the cover For details refer to the Control Console Lower Cover Removal Procedure on page 8 18 3 Raise the control console monitor to its ma...

Page 398: ... rear of the upper front cover refer to Figure 8 15 to fasten the front cover to the upper rear cover and tighten the 2 screws 4 Return and fasten the 12 screws 6 on each side and 2 in the front as shown in Figure 8 15 to secure the upper front cover in place 5 Raise the front and rear sections of the control console lower cover up into position and tighten the screws to fasten the lower cover sec...

Page 399: ...ibed in the Vivid 4 17 Monitor Removal on page 8 24 CAUTION The Vivid 4 17 monitor is heavy At least two people must be available to lift the monitor Attempts to move this unit by one person alone could result in personal injury and or damage to the system 3 Working from the left side of the Vivid 4 unit remove the 4 screws securing the rectangular cover in the roof of the side compartment in posi...

Page 400: ...turn the control console lower cover as described in the Control Console Lower Cover Installation Procedure on page 8 18 5 Remove the control console lower rear cover as described in the Control Console Lower Rear Cover Installation Procedure on page 8 19 6 Working from the left side of the Vivid 4 unit return the rectangular cover to the roof of the side compartment and fasten in position with th...

Page 401: ... the Control Console Lower Rear Cover Removal Procedure on page 8 19 4 Remove the 16 screws 7 from each side and 2 from the front that fasten the lower cover in place as shown in Figure 8 17 below Figure 8 17 Location of Screws on the Control Console Lower Cover 5 Lower the control console lower cover downwards 6 Completely remove the cover from the machine 8 2 10 4 Control Console Lower Cover Ins...

Page 402: ...d unit as described in Chapter 3 Installation 8 2 11 3 Control Console Lower Rear Cover Removal Procedure 1 Raise the control console to its maximum height 2 Remove the 4 screws that fasten the rear cover in position two at the rear and two below see Figure 8 18 below Figure 8 18 Location of Screws on Lower Rear Cover 3 Remove the bottom rear cover 8 2 11 4 Control Console Lower Rear Cover Install...

Page 403: ...scribed in the Control Console Upper Cover Front Removal Procedure on page 8 14 3 Remove the two 8mm securing nuts two on each side and one nut located below the keyboard parallel to the hand rest location 4 Remove the Front Handle 8 2 12 4 Front Handle Installation Procedure 1 Return the Front Handle to its original position on the front of the machine 2 Fasten each side of the Front Handle benea...

Page 404: ... as described in the Control Console Upper Cover Rear Removal Procedure on page 8 16 3 Remove the eight Allen 8mm securing screws four on each side from the rear of the upper console 4 Remove the Rear Handle 8 2 13 4 Rear Handle Installation Procedure 1 Return the Rear Handle to its original position on the rear of the machine 2 Fasten each side of the Rear Handle to the rear of the upper console ...

Page 405: ...eaker Replacement Procedure on page 8 34 8 3 1 Vivid 4 17 Monitor Rear Cover Replacement Procedure NOTE The procedures below describe replacement of the Vivid 4 Monitor Rear Cover only P N 2303931 8 3 1 1 Tools NOTE Use a 2 Phillips screw driver as indicated in the Vivid 4 monitor rear cover replacement procedure 8 3 1 2 Preparation Shut down the Vivid 4 ultrasound unit as described in Chapter 3 I...

Page 406: ...re the Vivid 4 control console is lowered to its minimum height 2 Carefully lift the replacement Monitor Rear Cover into position on the monitor 3 Return and fasten each of the 4 screws previously removed to secure the Monitor Rear Cover firmly two each side one upper and one lower as shown in Figure 8 21 on page 8 22 4 Return the two screw covers previously removed to the top of the Monitor Rear ...

Page 407: ...dures 8 3 2 2 Preparation Shut down the Vivid 4 ultrasound unit as described in Chapter 3 Installation 8 3 2 3 Vivid 4 17 Monitor Removal 1 Turn OFF the Vivid 4 main circuit breaker located at the rear of the machine lower end 2 Disconnect the main AC power cable from the wall outlet 3 Remove any Color printer if present from the side compartment 4 Remove the six screws from the metal cover on the...

Page 408: ...in place before you return the monitor to the control console 1 Using two people lift the monitor into position on the control console 2 Fasten the monitor securing bracket in position using the four screws previously removed 3 Reconnect the VGA cable and AC power cable to the receptacle cable inside the service compartment refer to Figure 8 22 4 Return the six screws and fasten the service cover ...

Page 409: ...Procedure on page 8 19 2 Remove the control console lower cover as described in the Control Console Lower Cover Removal Procedure on page 8 18 3 Remove the control console upper cover front as described in the Control Console Upper Cover Front Removal Procedure on page 8 14 4 Unplug the four keyboard cables located at the bottom of the keyboard 5 Loosen and remove the two M4 screws securing the ke...

Page 410: ...er refer to Figure 8 25 on page 8 26 3 Return and fasten the two M4 screws to secure the keyboard matrix to the metal frame one on each of the left and right corners refer to Figure 8 84 on page 8 99 4 Re connect in the four keyboard cables located at the bottom of the keyboard see Figure 8 24 on page 8 26 5 Return the control console upper cover front as described in the Control Console Upper Cov...

Page 411: ... its neighboring keypad see Figure 8 26 below 2 Use the screw driver to gently lever off the defective keypad until it is completely loosened from its base 3 Lift off and remove the defective keypad NOTE For Key Pad Part Numbers refer to Table 9 6 on page 9 8 8 3 4 4 Keypad Installation Procedure 1 Carefully place a new keypad into position on the keyboard taking care to align the two notches on t...

Page 412: ...tallation 8 3 5 3 Keycaps Removal Procedure 1 Carefully place a small flat screw driver between the ATGC slider keycap you wish to remove and the surface of the keyboard 2 Use the screw driver to gently lever off the defective keycap until it is completely loosened from its base 3 Lift off and remove the defective keycap see Figure 8 26 below 8 3 5 4 Keycap Installation Procedure 1 Carefully place...

Page 413: ...knob replacement procedure 8 3 6 2 Preparation Shut down the Vivid 4 ultrasound unit as described in Chapter 3 Installation 8 3 6 3 Rotary Knob Removal Procedure 1 Carefully place a small flat screw driver between the rotary knob you wish to remove and the surface of the keyboard see Figure 8 26 below 2 Use the screw driver to gently lever off the defective rotary knob until it is completely loose...

Page 414: ...h the curved surface facing towards the center of the hole as shown in Figure 8 29 below Figure 8 29 Tension Plate Fitted in Centre of Knob 2 Carefully place the new rotary knob into position on the securing pin taking care that the tension plate remains in position inside the knob while aligning the core of the knob base with the flat sided notch on the securing pin see Figure 8 29 above NOTE The...

Page 415: ...in the Control Console Upper Cover Front Removal Procedure on page 8 14 4 Unplug the four keyboard cables located at the bottom of the keyboard see Figure 8 24 on page 8 26 5 Loosen and remove the two M4 screws securing the keyboard matrix to the metal frame one on each of the left and right corners see Figure 8 25 on page 8 26 6 Loosen the M5 nut from the forked metal aligning plate located in th...

Page 416: ...he left and right corners see Figure 8 25 on page 8 26 5 Reconnect the four keyboard cables to the keyboard previously disconnected see Figure 8 24 on page 8 26 6 Return the control console upper cover front as described in the Control Console Upper Cover Front Installation Procedure on page 8 15 7 Return the control console lower cover as described in the Control Console Lower Cover Installation ...

Page 417: ... Console Upper Cover Front Removal Procedure on page 8 14 3 Remove the four speaker screws one from each corner of both of the speakers 4 Gently pull the speakers towards you 5 Disconnect the wires at the back of the speakers 8 3 8 4 Speaker Installation Procedure 1 Reconnect the wires to the back of the new speakers 2 Return the speakers to their original position ensuring that the two connection...

Page 418: ...NECTION POINT LOCATED ON THE REAR OF THE SCANNER TO THE RIGHT OF THE POWER CONNECTOR 2 FOLLOW GENERAL GUIDELINES FOR HANDLING OF ELECTROSTATIC SENSITIVE EQUIPMENT 8 4 1 2 Preparation Shut down the Vivid 4 ultrasound unit as described in Chapter 3 Installation 8 4 1 3 Front End Boards Removal Procedure CAUTION FRONT END BOARDS ARE HEAVY FAILURE TO TAKE PRECAUTIONS WHEN LIFTING COULD RESULT IN PERSO...

Page 419: ...l frame guiding tracks 2 Use the plastic latches to firmly lock in the card in position so that the connectors are firmly placed in their sockets 3 Return the front door of the crate to its original position and tighten the two screws that secure the door in place 4 Return the left side cover to its original position as described in the Side Covers Installation Procedure on page 8 4 Note When you ...

Page 420: ...OCATED ON THE REAR OF THE SCANNER TO THE RIGHT OF THE POWER CONNECTOR 2 FOLLOW GENERAL GUIDELINES FOR HANDLING OF ELECTROSTATIC SENSITIVE EQUIPMENT 8 4 2 2 Preparation Shut down the Vivid 4 ultrasound unit as described in Chapter 3 Installation 8 4 2 3 TR4 Boards Removal Procedure 1 Remove the FE Board as described in the Front End Boards Removal Procedure on page 8 35 CAUTION FRONT END BOARDS ARE...

Page 421: ...ket previously removed that secures the TR4 boards to its original location above the TR4 boards 3 Return and tighten the four screws two on each side to fasten the bracket in position and secure the TR4 boards to the Front board main plate refer to Figure 8 32 on page 8 37 4 Carefully return the FE Board to its original position in the FE crate as described in the Front End Boards Installation Pr...

Page 422: ...ip and disconnect the AC power supply cable from the bottom of the DC power supply 3 Disconnect the AC power supply cable that is connected to the Tx P S HV P S 4 Remove the four small screws located one at each corner of the front panel of the power supply 5 Remove the DC power supply by pulling it out using its handle on the front panel 8 4 3 4 DC Power Supply Installation Procedure 1 Return the...

Page 423: ...move the DC power supply refer to the DC Power Supply Removal Procedure on page 8 39 3 Remove the two screws located at the top of the Tx power supply unit 4 Remove the Tx power supply unit by pulling it out by the handle on the front panel 8 4 4 4 TX Power Supply Installation Procedure 1 Return the Tx power supply unit to its original position 2 Fasten the Tx power supply unit with the two screws...

Page 424: ... probe sockets 3 Remove the right side cover as described in the Side Covers Removal Procedure on page 8 4 4 Remove the front door of the crate by unscrewing the two large screws at the top of the door and gently pulling the door down and lifting it off its hinges 5 Disconnect the AC power cable from the DC power supply 6 Loosen the two wing nuts of the PCI flat cable spring clamp located on the r...

Page 425: ...the front end crate back to its original position 5 Fasten the front end crate to the frame with the eight screws 6 Reconnect the PCI cable to the Image Port Board or RFI Board and slide it back to its original slot in the crate 7 Mount the PCI flat cable under the spring clamp and then tighten the two winding nuts to secure the cable to the right wall of the crate 8 Reconnect the AC power cable t...

Page 426: ...al Procedure 1 Remove the front end crate as described in the Front End Crate Removal Procedure on page 8 41 2 Unscrew and remove the four screws that secure the fans to the top of the front end crate Figure 8 37 Fan Screws Note Mark the position at which the fan is attached to the connector to ensure that the new fan is reconnected correctly 3 Gently lift up the fan and disconnect its wires from ...

Page 427: ...igure 8 38 on page 8 43 CAUTION Ensure that you position the fan in the correct airflow direction pushing air inwards into the crate and that you connect the fan to the connector that was marked during the removal process 4 Apply Loctite 24L on each of the screw tips then insert them with their appropriate spring washers and flat washers in the fan holes 5 Tighten the screws to the point where the...

Page 428: ...eparation Furnished Materials Confirm that the Back End Processor Kit P N 2315842 7 contains the following items Important The BEP arrives inside packing box P N 2328455 Make sure the returned BEP is shipped for return in the same packing box P N Description Quantity 2406742 Backend BEP Assembly 1 2330026 BEP Front Panel for MOD 1 2344553 BEP Front Panel Basic 1 2344630 BEP Upper bracket 1 2343032...

Page 429: ... only the following components ready installed CD R driver Floppy driver HD driver Cables and Brackets Memory 512 MB Therefore the FE will need to remove some components from the removed BEP and install them in the new BEP as part of the BEP Installation procedure described below CAUTION Failure to follow this exact instruction will cause irreversible damage Figure 8 39 Back End Component Location...

Page 430: ...GE MEDICAL SYSTEMS DIRECTION 2392751 100 REVISION 3 VIVID 4 SERVICE MANUAL Chapter 8 Replacement Procedures 8 47 Figure 8 40 Back End Component Locations Systems with RFT Configuration ...

Page 431: ...Archive 2 Press Utility and select Backup 3 Start full incremental backup onto the removable media 4 When the backup procedure is completed the yellow portion of the pie chart will be 0 8 5 2 3 Back End Processor Removal Procedure 1 Shut down the Vivid 4 ultrasound unit as described in Chapter 3 Installation 2 Remove the Vivid 4 left and right side covers as described in the Side Covers Removal Pr...

Page 432: ...AKING THE NECESSARY ESD PRECAUTIONS 1 ALWAYS CONNECT YOURSELF VIA AN ARM WRIST STRAP TO THE ADVISED ESD CONNECTION POINT LOCATED ON THE REAR OF THE SCANNER TO THE RIGHT OF THE POWER CONNECTOR 2 FOLLOW GENERAL GUIDELINES FOR HANDLING OF ELECTROSTATIC SENSITIVE EQUIPMENT For BEP2 RFT and RFI systems PC VIC Assembly see PC VIC Removal Procedure on page 8 73 ECG Box Assembly Patient I O Module see BEP...

Page 433: ...d in the MO Drive Installation Procedure on page 8 69 if applicable 2 Remove the Octopus Card Holder as described in the BEP2 Octopus Card Holder Removal Procedure on page 8 56 3 Install the SCSI Board as described in the SCSI Board Installation Procedure on page 8 61 if applicable 4 Install the ECG Module as described in the BEP2 ECG Module Installation Procedure on page 8 72 5 Install the PC VIC...

Page 434: ...2 on page 8 51 13 Connect the VIC VGA OUT Left cable Part No 2252964 to the VGA OUT socket 1 on the BEP rear panel 14 Connect the VIC VGA IN Right cable Part No 2252965 to the VIC VGA IN socket 2 15 Connect the other end of this cable Part No 2252965 i e the end labelled Back End to the VIC VGA OUT socket 2a 16 Connect the trackball cable Part No 2252978 to the trackball socket 4 17 Connect the ke...

Page 435: ... cable Part No 2307289 to the Plug and Scan socket 16b and then connect the BEP Modem power cable Part No 2300847 to the power input socket 16a 31 Facing the side cover push the BEP as far to the right as possible and tighten first the left lower bracket then the right lower bracket and finally the bracket on its upper left side Use two screws to fasten each bracket 32 Turn ON the system and boot ...

Page 436: ...D Fan Set to ON checkbox activated UPS Change the UPS setting to Used or Not Used as appropriate If the Plug Scan option was purchased the UPS setting can be selected as Used If this option not purchased select Not Used VIC Set to PC VIC Nominal Voltage Set to the appropriate local voltage setting 38 Perform a complete functional check of the system as described in Chapter 4 Functional Checks 39 I...

Page 437: ...ocedure 1 Remove the two screws that secure the side cover in position from the rear of the BEP see Figure 8 44 below 2 Slide the cover backwards and remove it 8 5 3 4 BEP2 Side Cover Installation Procedure 1 Return the cover to the side of the BEP and slide it forwards into position 2 Replace and tighten the two screws to hold the cover firmly in position Figure 8 44 on page 8 54 8 5 3 5 BEP2 Fro...

Page 438: ...GE MEDICAL SYSTEMS DIRECTION 2392751 100 REVISION 3 VIVID 4 SERVICE MANUAL Chapter 8 Replacement Procedures 8 55 Figure 8 45 Front Cover BEP2 Figure 8 46 Front Cover Removal BEP2 ...

Page 439: ... cover in position see Figure 8 45 on page 8 55 8 5 3 7 BEP2 Octopus Card Holder Removal Procedure 1 Remove the three screws that secure the Octopus Card Holder in position as shown in Figure 8 47 below 2 Remove the Octopus Card Holder 8 5 3 8 BEP2 Octopus Card Holder Installation Procedure 1 Place the Octopus Card Holder in position on the BEP part holding it firmly in place 2 Return the three sc...

Page 440: ...val Procedure on page 8 56 5 Disconnect all cables connected to the Plug Scan board from the keyboard control card the battery and the power supply Note Counting from the top the board is positioned in the first PCI slot 6 Release the securing screw located on the left of the board bracket 7 Gently remove the Plug Scan board from the BEP 8 5 4 4 Plug Scan Board Installation Procedure 1 Gently inse...

Page 441: ...nd unit as described in Chapter 3 Installation Voltage may exist in the system when a Plug Scan is present Ensure that a full shutdown of the system is performed otherwise voltage might be present that can cause injury and or damage 8 5 5 3 Plug Scan Battery Removal Procedure 1 Remove the left cover as described in the Side Covers Removal Procedure on page 8 4 2 Disconnect the power cable from the...

Page 442: ... the BEP Figure 8 50 Removing Plug Scan Velcro Strips 1 Place the battery inside the battery bracket Ensure that the cable is positioned at the lower end and that the rear of the battery with the two velcro strips faces the inner wall of the BEP 2 Mount the battery and bracket in its original location in the BEP tightening the screws two or three as shown in Figure 8 48 on page 8 58 to secure it f...

Page 443: ... BEP 3 Remove the BEP side cover as described in the BEP2 Side Cover Removal Procedure on page 8 54 4 Remove the octopus card holder as described in the BEP2 Octopus Card Holder Removal Procedure on page 8 56 5 Disconnect the cable Part No 2252965 connected to the AGP board Note Counting from the top the AGP board is positioned in the first slot AGP 6 Release the securing screw located on the left...

Page 444: ... Procedure on page 8 4 2 Disconnect the power cable from the rear of the BEP 3 Remove the BEP side covers as described in the BEP2 Side Cover Removal Procedure on page 8 54 4 If applicable remove the octopus card holder as described in the BEP2 Octopus Card Holder Removal Procedure on page 8 56 5 Disconnect the cable connecting the SCSI board to the MO Note Counting from the top the SCSI board is ...

Page 445: ... 5 Back End Parts Replacement 7 Return the Vivid 4 rear and left and right side covers see the Rear Cover Installation Procedure on page 8 7 and the Side Covers Installation Procedure on page 8 4 Note Perform a complete functional check of the MO as described in Chapter 4 Functional Checks ...

Page 446: ... 5 Disconnect the PCI cable that is connected to the BEP Note Counting from the top the PC2IP board is positioned in the fourth slot 6 Release the securing screw located on the left of the board bracket 7 Gently remove the PC2IP board from the BEP 8 5 8 4 PC2IP Board Installation Procedure 1 Gently insert the PC2IP board into its slot Note Counting from the top the PC2IP board is positioned in the...

Page 447: ...oval Procedure on page 8 56 5 Disconnect the frame grabber cable from the rear of the frame grabber board Note Counting from the top the frame grabber board is positioned in the fifth PCI slot 6 Release the securing screw located on the left of the board bracket 7 Gently remove the frame grabber board from the BEP 8 5 9 4 Frame Grabber Board Installation Procedure 1 Gently insert the frame grabber...

Page 448: ...cables connected to the keyboard control board Note Counting from the top the keyboard control board is positioned in the sixth PCI slot 6 Release the securing screw located on the left of the board bracket 7 Gently remove the keyboard control board from the BEP 8 5 10 4 Keyboard Control Board Installation Procedure 1 Gently insert the keyboard control board into its slot Note Counting from the to...

Page 449: ...Installation 8 5 11 3 CDRW Drive Removal Procedure 1 Remove the Vivid 4 left and right side covers and rear cover see the Rear Cover Removal Procedure on page 8 7 and the Side Covers Installation Procedure on page 8 4 2 Disconnect the power cable from the rear of the BEP 3 Remove the BEP left and right side covers as described in the BEP2 Side Cover Removal Procedure on page 8 54 4 Remove the BEP ...

Page 450: ... from the drive previously removed 2 Carefully slide the CDRW Drive into the front of the BEP refer to Figure 8 51 on page 8 66 3 Reconnect the cables data and power to the rear of the CDRW Drive 4 Install the BEP left and right side covers as described in the BEP2 Side Cover Installation Procedure on page 8 54 5 Reconnect the power cable to the rear of the BEP 6 Return the Vivid 4 rear left and r...

Page 451: ...t 2 Remove the Vivid 4 left and right side covers refer to the Side Covers Removal Procedure on page 8 4 3 Remove the Vivid 4 rear cover refer to the Rear Cover Removal Procedure on page 8 7 4 Remove the BEP left and right side covers as described in the BEP2 Side Cover Removal Procedure on page 8 54 5 Remove the BEP front cover as described in the BEP2 Front Cover Removal Procedure on page 8 54 6...

Page 452: ...SCSI card see SCSI Board Installation Procedure on page 8 61 4 Connect the data cable between the SCSI card and the rear of the MO Drive 5 Connect the power cable to the rear of the MO Drive Make sure that Pin 1 is aligned with the red line on the flat cable 6 If applicable install the octopus card holder as described in the BEP2 Octopus Card Holder Installation Procedure on page 8 56 7 Install th...

Page 453: ...vid 4 left and right side covers refer to the Side Covers Removal Procedure on page 8 4 3 Remove the Vivid 4 rear cover refer to the Rear Cover Removal Procedure on page 8 7 4 Disconnect all cables from the rear of the BEP 5 Remove the BEP from the machine as described Back End Processor Replacement Procedure on page 8 48 6 Remove both BEP side covers as described in the BEP2 Side Cover Removal Pr...

Page 454: ...ule in position two from each side of the exposed BEP as shown in Figure 8 54 on page 8 71 9 Disconnect the footswitch cable from the KB Controller card 10 Disconnect the COM2 cable from the rear of the ECG Module 11 Carefully slide out the ECG Module from the front of the BEP Figure 8 53 ECG Module BEP2 Figure 8 54 ECG Module Removal BEP2 ECG Module Two screws ...

Page 455: ... COM 2 cable to the rear of the new ECG Module 5 Install the BEP left and right side covers as described in the BEP2 Side Cover Installation Procedure on page 8 54 6 Carefully return the BEP to its original location and secure all brackets by tightening the screws 7 Reconnect all cables at the rear of the BEP 8 Return the Vivid 4 rear cover to its original position see Rear Cover Replacement Proce...

Page 456: ...ound unit as described in Chapter 3 Installation 8 5 14 3 PC VIC Removal Procedure 1 Remove the left cover as described Side Covers Removal Procedure section page 8 4 2 Remove the BEP side cover as described in the BEP2 Side Cover Removal Procedure on page 8 54 3 Remove the screw that holds the Ground cable and PC VIC in position as shown in Figure 8 56 below 4 Carefully slide the PC VIC out from ...

Page 457: ...igure 8 57 above 3 Reconnect all the cables at the rear of the PC VIC module and the hard disk 4 Carefully slide the PC VIC into position in the same location as that of the removed PC VIC 5 Return and tighten the screw that holds the PC VIC in position as shown in Figure 8 56 on page 8 73 6 Return the BEP side cover as described in the BEP2 Side Cover Installation Procedure on page 8 54 7 Return ...

Page 458: ...edure 1 Disconnect the mains AC power cable for the mains power wall outlet 2 Remove the Vivid 4 left and right side covers refer to the Side Covers Removal Procedure on page 8 4 3 Remove the Vivid 4 rear cover refer to the Rear Cover Removal Procedure on page 8 7 4 Remove the BEP2 from the Vivid 4 ultrasound unit as follows a Remove the two screws of upper BEP bracket see Figure 8 41 on page 8 49...

Page 459: ...the power supply in position on the BEP as shown in Figure 8 59 Note For the next steps it is recommended to carefully lie the BEP2 on its side to provide easier access 9 Cut any cable ties holding the power supply cable in place as shown in Figure 8 60 below Figure 8 59 BEP2 Rear View Figure 8 60 BEP2 Power Supply and Cable Ties Power Supply Cut Cable Ties Here Cut Cable Ties Here ...

Page 460: ...r cables from the media drives MOD 2 and CD RW 3 13 Remove the screw that fastens the Ground cable and PC VIC in position as shown in Figure 8 62 below 14 Disconnect the power cable from the Hard Disk labelled 4 in Figure 8 61 refer also to Figure 8 62 15 Disconnect the data cable from the PC VIC refer to Figure 8 62 above 16 Slide the PC VIC hard disk out sufficiently to be able to cut any cable ...

Page 461: ... BEP cutting any cable ties as necessary 19 Disconnect the mains power cable 8 from the motherboard beside the ECG location 20 Gently slide the power supply further downwards and then out of the BEP casing sufficiently to be able to cut any remaining cable ties 21 Remove the power supply from the BEP together with the attached cable loom as shown in Figure 8 63 below 22 Disconnect the 4 pin extern...

Page 462: ...loom and arrange each of the cables in the approximate position Carefully feed the cable connectors underneath the data cables 2 Holding the new BEP2 power supply in one hand connect the 4 pin external connector A to the motherboard beside the CPU 3 Slide the power supply into the BEP power supply location see Figure 8 65 below and push the metal stabilizing bracket located on the side of the powe...

Page 463: ...mory boards etc are securely in position and that nothing has erroneously become disconnected during the power supply removal procedure 15 Stand the BEP2 upright 16 At the rear of the BEP2 return and loosely tighten the four screws that fasten the power supply in position on the BEP as shown in Figure 8 59 on page 8 76 17 Return the BEP front cover as described in the BEP2 Front Cover Installation...

Page 464: ...id 4 ultrasound unit as described in Chapter 3 Installation 8 5 16 3 Hard Disk Removal Procedure 1 Remove the left cover as described Side Covers Removal Procedure section page 8 4 2 Remove the BEP side cover as described in the BEP2 Side Cover Removal Procedure on page 8 54 3 Remove the screw that holds the hard disk module in position as shown in Figure 8 56 below 4 Carefully slide the module ou...

Page 465: ...rd disk make sure the jumper settings are as shown below 1 Place the new hard disk in position in the hard disk module holder 2 Reconnect all the cables at the rear of the hard disk 3 Fasten each of the four screws two on each side as shown in Figure 8 67 on page 8 82 4 Carefully slide the module holder into position in the unit 5 Return and fasten the screw that holds the hard disk module in posi...

Page 466: ... in the BEP2 Side Cover Installation Procedure on page 8 54 7 Return the Vivid 4 left cover as described in the Side Covers Installation Procedure on page 8 4 Note When a new hard disk arrives from the manufacturer usually it is partitioned and ready for software installation Refer to Software Loading on page 8 113 for software installation instructions ...

Page 467: ... 6 1 3 AC Distribution Box Removal Procedure 1 Remove the Vivid 4 left right and rear covers as described in the Side Covers Removal Procedure on page 8 4 and Rear Cover Removal Procedure on page 8 7 2 Unplug all the internal cables from the AC Distribution Box and the voltage setting plugs at Jumper1 and Jumper2 3 Unscrew the Ground cable located at the top right corner of the AC Distribution Box...

Page 468: ...on 2 Fasten the AC Distribution Box using the two screws located in the lower bracket of the AC Distribution Box 3 Tighten the screw that connects the Ground cable to the AC Distribution Box 4 Plug in all the internal cables to the AC Distribution Box including the voltage setting plugs at Jumper1 and Jumper2 5 Install the rear left and right covers as described in the Rear Cover Installation Proc...

Page 469: ...al Procedure on page 8 7 3 Unplug the internal power cable from the AC Distribution Box 4 Unscrew the Ground cable from the AC Distribution Box 5 Remove the two screws on both the left and the right sides that secure the AC Input Box to the chassis Figure 8 69 AC Input Box Screws 6 Remove the AC Input Box 8 6 2 4 AC Input Box Installation Procedure 1 Return the AC Input Box to its original positio...

Page 470: ...ing all the cables at the back of the unit 4 Open the track by hooking a thumb or finger under the right side of one of the tracks and pulling the side of the track The track clicks open enabling you to select the required cable Figure 8 70 Opening the Track 5 Disconnect both ends of the cable that is to be replaced 6 Replace the cable adding new ties to bind the cables together where necessary an...

Page 471: ...e Allen keys as indicated in the cable replacement procedure 8 6 4 1 Preparation Shut down the Vivid 4 ultrasound unit as described in Chapter 3 Installation 8 6 4 2 AC BEP or FE Cable Removal Procedure 1 Disconnect both ends of the required cable 2 Open the plastic ties that hold the cables together 3 Remove the required cable 8 6 4 3 AC BEP or FE Cable Installation Procedure 1 Route the required...

Page 472: ...side covers and the rear cover as described in the Side Covers Removal Procedure on page 8 4 and in the Rear Cover Removal Procedure on page 8 7 3 Remove the front end crate as described in the Front End Crate Removal Procedure on page 8 41 4 Raise the control console to its maximum height 5 Remove the control console lower rear cover as described in the Control Console Lower Rear Cover Removal Pr...

Page 473: ...g from the front of the unit and using an M4 Allen key loosen the two cap screws on the gas spring cable retaining bracket and slide the bracket forwards towards you sufficiently to release tension on the cable as shown in Figure 8 85 CAUTION When releasing tension do not pull the gas spring cable excessively as this may cause damage to the cable mechanism Figure 8 72 Gas Spring Rod and Cable Hold...

Page 474: ...g cable from the up down swivel handle by carefully sliding the cable end stopper out through the grooved slot on the handle assembly refer to the detail shown in Figure 8 88 on page 8 101 NOTE IMPORTANT Before finally removing the gas spring cable pay attention to its path inside the machine and the position of each of its parts 15 Remove the gas spring cable Figure 8 74 Releasing Gas Spring Cabl...

Page 475: ...ssembly carefully aligning the groove on the cable with that of the groove in the slot refer to the detail shown in Figure 8 88 on page 8 101 7 Feed the gas spring cable down into the slot in the cable retaining bracket refer to Figure 8 90 on page 8 102 and tighten the securing nut against the bracket to hold the cable firmly in position refer also to Figure 8 87 on page 8 100 8 Slide the cable r...

Page 476: ... 16 Return the front end crate as described in the Front End Crate Installation Procedure on page 8 42 17 Return the Vivid 4 side covers and the rear cover as described in the Side Covers Installation Procedure on page 8 4 and in the Rear Cover Installation Procedure on page 8 7 18 Insert the air filter in its original location as shown in Figure 8 3 on page 8 5 Note It is recommended to clean the...

Page 477: ...s maximum height 2 Remove the control console lower rear cover as described in the Control Console Lower Rear Cover Removal Procedure on page 8 19 3 Remove the control console lower cover as described in the Control Console Lower Cover Removal Procedure on page 8 18 4 Loosen the three screws securing the gas spring cover central sleeve in position see Figure 8 76 below and lower it downwards until...

Page 478: ...e cable Then slide the cable end stopper E and cable sleeve F out of the slot in the retaining bracket 9 Working from the front of the unit and using an M4 Allen key loosen the two cap screws on the swivel release cable retaining bracket and slide the bracket forwards sufficiently to allow removal of the cable from the up down swivel handle as shown in Figure 8 85 below Figure 8 77 Swivel Release ...

Page 479: ...he cable end stopper out through the grooved slot on the handle assembly refer to the detail shown in Figure 8 88 on page 8 101 NOTE IMPORTANT Before finally removing the swivel release cable pay attention to its path inside the machine and the position of each of its parts 12 Remove the swivel release cable Figure 8 79 Swivel Release Cable and Retaining Bracket Figure 8 80 Releasing the Swivel Re...

Page 480: ...8 79 on page 8 96 NOTE For clarification the letters appearing in square brackets in the following step correspond to the letters shown in Figure 8 77 on page 8 95 and Figure 8 78 on page 8 95 6 Working from the left side of the machine press the tensioning plate D downwards then slide the other cable end stopper E and the cable sleeve F into the slot in the cable retaining bracket B 7 Using the U...

Page 481: ...cribed in Chapter 3 Installation 8 6 7 3 Up Down Swivel Handle Removal Procedure 1 Remove the control console lower cover rear as described in the Control Console Lower Rear Cover Removal Procedure on page 8 19 2 Remove the control console lower cover as described in the Control Console Lower Cover Removal Procedure on page 8 18 3 Remove the control console upper cover front section as described i...

Page 482: ... swivel release cable are now fully exposed providing easy access to complete the handle removal procedure 6 Using an M4 Allen key loosen the two cap screws on the cable retaining bracket and slide the bracket forwards sufficiently to release tension on the cables as shown in Figure 8 85 CAUTION When releasing tension do not pull the cables excessively as this may cause damage to the cable mechani...

Page 483: ...lease the swivel release cable from the up down swivel handle by carefully sliding the cable end stopper out through the grooved slot on the handle assembly refer to the detail shown in Figure 8 88 on page 8 101 9 Repeat step 7 to release the gas spring cable from the cable retaining bracket 10 Repeat step 8 to release the gas spring cable from the up down swivel handle refer to the detail shown i...

Page 484: ...nd of the swivel release cable from the vertical axis welding refer to the Swivel Release Cable Removal Procedure on page 8 94 11 Loosen and remove the M6 nut from the handle assembly axis screw see Figure 8 89 below 12 Holding the Up Down Swivel handle in one hand extract the axis screw from the handle assembly pull in the direction shown in Figure 8 89 above and remove the defective Up Down Swiv...

Page 485: ...curing nut against the bracket to hold the cable firmly in position refer also to Figure 8 87 on page 8 100 6 Repeat step 4 to insert the swivel release cable end stopper into the grooved slot on the handle assembly 7 Repeat step 5 to secure the swivel release cable to the cable retaining bracket Figure 8 90 below 8 Slide the cable retaining bracket backwards previously moved forwards along the ch...

Page 486: ...e as described in the Front End Crate Removal Procedure on page 8 41 4 Lower the control console to its minimum height NOTE For clarification the letters appearing in square brackets in the following steps correspond to the letters shown in Figure 8 91 and Figure 8 92 below 5 Remove the securing screw A from the cable holder located on the gas spring rod 6 Turn the cable holder B to free the cable...

Page 487: ...e and then tighten the screw until the pin L at the lower end of the gas spring is loose enough to be removed and remove the pin NOTE For clarification the letters appearing in square brackets in the following step correspond to the letters shown in Figure 8 92 below 11 Remove the retaining washer M from the pin N at the upper end of the gas spring and then remove the pin 12 Carefully remove the g...

Page 488: ...Fit the groove of the cable end sleeve C on the hinge F of the gas spring head 6 Turn the cable holder B over the cable end sleeve C and then fasten it with the securing screw A 7 Remove the Hex M8 screw from the compartment 8 Using the up down swivel handle lower and raise the control console several times to verify its proper operation 9 Return the front end crate back to its original position a...

Page 489: ...oved type Part No 2392789 with the same type of wheels refer to the following instructions Front Wheel Removal Procedure 2 on page 8 108 Front Wheel Installation Procedure 2 on page 8 110 8 6 9 1 Tools Use the appropriate flat and Phillips type screw drivers a wire cutter the appropriate Hex wrenches and the appropriate Allen keys as indicated in the front wheel replacement procedure 8 6 9 2 Prepa...

Page 490: ...es 8 107 Figure 8 94 Releasing the Spring Washer from the Center of the Transverse Arm 3 Remove the four bolts three wrench bolts and one Allen bolt that secure the front wheel to the chassis see Figure 8 94 below and remove the wheel Figure 8 95 Front Wheel Part No 2269437 Bolted to Chassis Securing Bolts ...

Page 491: ...cing the front and the brake in the left locked position preventing movement 1 Remove the Vivid 4 front cover as described in the Front Cover Removal Procedure on page 8 5 2 Remove the locking washer located on the black wheel position bar and lift the wheel position bar 3 Using a flat screwdriver push up and release the locking spring washer located in the center of the transverse arm wheel posit...

Page 492: ...eel 7 Proceed to step 1 of the Front Wheel Installation Procedure 2 on page 8 110 to install a new front wheel in place of the one removed 8 Repeat step 6 above to remove the other front wheel from the chassis 9 Proceed to step 2 of the Front Wheel Installation Procedure 2 on page 8 110 to install the second new front wheel then complete the remaining steps of the front wheel installation procedur...

Page 493: ...Always remove and replace one wheel at a time before attempting to remove the second wheel 1 Having removed one wheel from the machine chassis as described in Front Wheel Removal Procedure 2 on page 8 108 install one of the new wheels Part No 2392789 in its place ensuring that the wheel is correctly positioned Install the four bolts three wrench bolts and one Allen bolt removed in step 6 on page 8...

Page 494: ...NING When BOTH rear wheels are being removed the machine must be safely supported on two wooden blocks or on a jack capable of supporting the weight of the machine Always remove and replace one wheel at a time before attempting to remove the second wheel 1 Remove the Vivid 4 side covers and the rear cover as described in the Side Covers Removal Procedure on page 8 4 and the Rear Cover Removal Proc...

Page 495: ...s remove and replace one wheel at a time before attempting to remove the second wheel 1 Having removed one rear wheel position the new wheel on the chassis in the same position as that of the wheel removed 2 Tighten the shaft screw see Figure 8 99 below making sure the wheel is firmly secured 3 If replacing both wheels when the second rear wheel has been removed repeat step 1 and step 2 above to i...

Page 496: ...d the software CD 3 Hold down the ON OFF button for 5 seconds to shutdown the system The shutdown options are displayed on screen 4 Select Full Shutdown The system powers down 5 Hold down the ON OFF button for three seconds The system powers ON and when system boot up from the CD is complete the following message is displayed prompting you to select the required option Select option A Install Vivi...

Page 497: ...opriate flat and Phillips type screw drivers 8 8 1 2 Manpower One person 30 mins 8 8 1 3 Preparations 1 Shut down the Vivid 4 ultrasound unit as described in Chapter 3 Installation 2 Remove the Connectors Panel cover as shown in the Connector Panels Cover Removal Procedure on page 8 8 3 Unpack the B W Video Printer 4 Check that the B W Video Printer AC voltage corresponds to that of your local vol...

Page 498: ...er on the right side of the Vivid 4 ultrasound unit s top surface below the control console as shown in Figure 8 102 and next to the VCR if present allowing sufficient room to access the cables at the rear of the printer Figure 8 101 B W Video Printer DIP Switches on the Rear Panel Figure 8 102 B W Video Printer Installed in the Vivid 4 All switches in DOWN position B W Video Printer ...

Page 499: ...cribed in the Connector Panels Cover Installation Procedure on page 8 8 7 Reconnect the mains AC power cable from the wall outlet 8 Turn ON the main circuit breaker located on rear of the Vivid 4 9 Turn ON the Vivid 4 by pressing the ON OFF button on the Control Console 10 Select the activation key under System Configuration VCR ECG Tab A B Swap By default Print B key will be B W Video printer and...

Page 500: ...er as described in the Connector Panels Cover Removal Procedure on page 8 8 2 Release the B W printer by undoing the fastening belt secured around it and around the VCR if present 3 Disconnect the Remote cable the B W Video IN cable and Power cable from rear of the printer refer to Figure 8 103 on page 8 116 4 Remove the B W Video Printer from the right side of the Vivid 4 ultrasound unit taking i...

Page 501: ...4 The VCR will not operate without initial setup and adjustments as described below Figure 8 105 Mitsubishi Video Cassette Recorder VCR 8 8 2 1 Tools No special tools needed 8 8 2 2 Manpower One person 30 mins 8 8 2 3 Preparations 1 Shut down the Vivid 4 ultrasound unit as described in Chapter 3 Installation 2 Remove the Connectors Panels Cover as described in the Connector Panels Cover Removal Pr...

Page 502: ...r cable P N 2269430 to the power outlet on the Vivid 4 rear panel and the other end to the AC power socket on the VCR rear panel see Figure 8 107 on page 8 119 3 Using the S video cable P N 2266743 connect one end to the Video OUT socket on the VCR rear panel refer to Figure 8 107 and the other to the Video IN socket on the Vivid 3 rear panel 4 Boot up the Vivid 4 ultrasound unit by pressing the O...

Page 503: ...ing the power switch on VCR front panel 6 Press Config then from the System Configuration window activate the VCR ECG tab 7 Under the VCR Options list choose Mitsubishi from the VCR model drop down list Figure 8 109 Figure 8 108 Mitsubishi VCR Front Panel Power Switch Figure 8 109 Selecting VCR Model Mitsubishi Power ON OFF Switch ...

Page 504: ...N 3 VIVID 4 SERVICE MANUAL Chapter 8 Replacement Procedures 8 121 8 From the Video Mode drop down list choose PAL or NTSC according to video system in your region then press OK to apply the changes 9 Proceed to the VCR Setup procedure described below ...

Page 505: ... the Enter button to apply your selection To configure the Mitsubishi VCR 1 Press the VCR Play B button on the Vivid 3 control console to display the VCR menus on the Vivid 3 monitor 2 Using the Jog button on the VCR front panel Figure 8 110 select the required VCR menu language Figure 8 111 then press the Enter button to continue to the next menu 3 Select the Menu1 settings according to the confi...

Page 506: ...Figure 8 113 below then press the Enter button to continue to the next menu 5 Skip Menu3 Figure 8 114 by pressing the Enter button to continue to the next menu 6 Select the RS 232C settings according to the configuration shown in Figure 8 115 below then press the Enter button to continue to the next menu Figure 8 112 Menu 1 Settings Figure 8 113 Menu 2 Settings Figure 8 114 Menu 3 ...

Page 507: ...tor and Audio switches are in the positions shown in Figure 8 117 below if necessary adjust accordingly then move the Key Lock switch to the ALL position to lock all keys 10 Perform the VCR Test as described in the VCR Test on page 4 4 Figure 8 115 RS 232C Menu Settings Figure 8 116 Elapsed Time Menu Figure 8 117 Mitsubishi VCR Switches Settings Front Panel Monitor Mix Determines what is sent to M...

Page 508: ...ge 8 8 2 If optional shelf P N H45011CN is present refer to the Sony UP 21MD Color Video Printer Removal Procedure on page 8 138 3 Disconnect the RS 232C cable the Audio and S Video IN and OUT cables and Power cord from VCR s rear as shown in Figure 8 107 on page 8 119 4 Remove the VCR from the left side of the Vivid 4 ultrasound unit taking it out from below the control console and from beside th...

Page 509: ...parations 1 Shut down the Vivid 4 ultrasound unit as described in Chapter 3 Installation 2 Remove the Connectors Panels Cover as described in the Connector Panels Cover Removal Procedure on page 8 8 3 Unpack the VCR 4 Check that the VCR AC voltage corresponds to that of your local voltage 5 Verify that the switches on the VCR front panel are as shown in Figure 8 119 below If necessary adjust accor...

Page 510: ...nd next to the B W Printer if present allowing sufficient room to access the cables at the rear of the VCR Figure 8 121 Video Cassette Recorder VCR Installed in the Vivid 4 Ultrasound Unit Figure 8 120 Sony VCR Switches Setting Rear Panel Switch Position VCR AUDIO SWITCHES on Rear 1 OFF Audio Video Mute during search 2 OFF Search at high speed using FF REW 3 OFF Reset control counter when cassette...

Page 511: ...alled Figure 8 122 Sony VCR Connection Cables AUDIO IN cable From Left Connectors Panel To VCR Audio Input Out R Connector Red Out L Connector Black BLACK CH1 RED CH2 RED BLACK RED BLACK AUDIO OUT cable From Left Connectors Panel To VCR Audio Output IN R Connector Red IN L Connector Black BLACK CH1 RED CH2 S VIDEO OUT cable From Left Connectors Panel S Video OUT To VCR S Video IN To S Video Output...

Page 512: ...on page 3 45 Note Sony VCR Reset Counter If the Reset Counter button is activated while the VCR is in the Stop Pause or Record state the counter display is reset to zero 0 00 00 8 8 3 5 Sony VCR Removal Procedure 1 Remove the Connectors Panels Cover as described in the Connector Panels Cover Removal Procedure on page 8 8 2 Release the B W printer by undoing the fastening belt around it together wi...

Page 513: ...is necessary to order the Panasonic VCR RS 232 Adaptor Part No 066E8200 Figure 8 123 Panasonic Video Cassette Recorder VCR 8 8 4 1 Tools No special tools needed 8 8 4 2 Manpower One person 30 mins 8 8 4 3 Preparations 1 Shut down the Vivid 4 ultrasound unit as described in Chapter 3 Installation 2 Remove the Connectors Panels Cover as described in the Connector Panels Cover Removal Procedure on pa...

Page 514: ...imum height 2 Place the VCR on the Vivid 4 ultrasound unit s top surface left side below the control console as shown in Figure 8 125 below allowing sufficient room to access the cables at the rear of the VCR Figure 8 125 Panasonic Video Cassette Recorder VCR Installed in the Vivid 4 Ultrasound Unit Figure 8 124 Panasonic VCR Switches Setting Pull Front Switch Lock Video Cassette Recorder VCR ...

Page 515: ...sonic VCR Connection Cables S VIDEO IN cable From Internal IO Module Connector A11 To S Video Input S VIDEO OUT cable From Internal IO Module Connector A10 To S Video Output Power cable From Distribution box To AC IN AUDIO IN cable From Internal IO Module To S Video Input RED Connector A9 BLACK Connector A8 RED CH1 BLACK CH2 AUDIO OUT cable From Internal IO Module To S Video Output RED Connector A...

Page 516: ...nector Panels Cover Installation Procedure on page 8 8 9 Reconnect the mains AC power cable from the wall outlet 10 Turn ON the main circuit breaker located on rear of the Vivid 4 11 Turn ON the Vivid 4 by pressing the ON OFF button on the Control Console 12 Under System Configuration VCR ECG Tab select the Panasonic VCR option as shown in Figure 8 127 below For more information see Note Panasonic...

Page 517: ...2 Release the B W printer by undoing the fastening belt around it together with the VCR if present 3 Disconnect the RS 232C cable with adaptor the Audio and S Video IN and OUT cables and the Power cable from the rear of the VCR as shown in Figure 8 122 on page 8 128 4 Remove the VCR from the left side of theVivid 4 ultrasound unit taking it out from below the control console and from beside the B ...

Page 518: ...or on the rear panel Figure 8 128 SONY UP 21MD Color Video Printer 8 8 5 1 Tools Use the appropriate flat and Phillips type screw drivers 8 8 5 2 Manpower One person 30 mins 8 8 5 3 Sony UP 21MD Color Video Printer Installation 1 Shut down the Vivid 4 ultrasound unit as described in Chapter 3 Installation 2 Unpack the Color Video Printer 3 Set the NTSC PAL selector switch to PAL or NTSC as shown i...

Page 519: ... side compartment as shown in Figure 8 129 below 6 Connect the Ground cable hanging out of the Bottom Metal Cover to the Ground screw at the rear of the UP 21MD Color Video Printer as shown in Figure 1 17 below Figure 8 130 UP 21MD Color Video Printer Ground Cable Connection Figure 8 129 Color Printer Cables in Side Compartment Ground Cable Ground Screw ...

Page 520: ...m Metal Cover slot see Figure 8 129 on page 8 136 to the UP 21MD Color Video Printer as shown in the diagram in Figure 8 131 below Figure 8 131 Sony UP 21MD Color Video Printer Connection Cables R G B and SYNC cables To UP 21MD Color Video Printer INPUT R G G SYNC B and SYNC BNC Connectors REMOTE cable To UP 21MD Color Video Printer REMOTE 2 Connector NTSC PAL selector Power cord To UP 21MD Color ...

Page 521: ...D Color Video Printer Installed on the Vivid 4 8 8 5 4 Sony UP 21MD Color Video Printer Removal Procedure 1 Shut down the Vivid 4 ultrasound unit as described in Chapter 3 Installation 2 Slide the UP 21MD Color Video Printer out of the side compartment 3 Disconnect all the cables and remove the printer from the Vivid 4 4 Make sure that all the loose cables are placed safely in the side compartment...

Page 522: ...40 3 Printer Kit P N 2415435 contains the following items 8 8 6 1 Tools Use the appropriate flat and Phillips type screw drivers 8 8 6 2 Manpower One person 15 mins 8 8 6 3 Preparations 1 Shut down the Vivid 4 ultrasound unit as described in Chapter 3 Installation 2 Remove the Connectors Panels Cover as described in the Connector Panels Cover Removal Procedure on page 8 8 3 Carefully unpack the HP...

Page 523: ...tage Power IN socket on the rear of the printer as shown in Figure 8 134 below WARNING To avoid electrical hazards the HP 6540 3 USB Deskjet Color Printer must be connected to the AC Supply of the Vivid 4 Ultrasound Unit and never directly to the local AC wall outlet 3 Use the USB cable shipped with the printer to connect the Vivid 4 system to the USB socket on the HP6540 3 rear panel see Figure 8...

Page 524: ...s click Cancel see Figure 8 135 below Figure 8 135 Found New Hardware Wizard 7 Insert the HP6540 3 driver installation CD P N 2415381 provided with the printer into the CD ROM drive 8 Browse the CD Drive H and double click on the InstallPrinter bat file Figure 8 136 Figure 8 136 Install Printer The printer installation process will begin see Figure 8 137 ...

Page 525: ...8 8 Peripherals 9 When the Add Printer Wizard opens click Next see Figure 8 138 10 When prompted verify that Local Printer is selected If not activate the Local printer radio button as shown in Figure 8 139 Figure 8 137 Printer Installation Process Commences Figure 8 138 Add Printer Wizard ...

Page 526: ...RVICE MANUAL Chapter 8 Replacement Procedures 8 143 11 Click Next 12 From the displayed list of available ports choose one of the available USB ports as shown in Figure 8 140 13 Click Next Figure 8 139 Verify Local Printer Figure 8 140 Choosing Available USB Port ...

Page 527: ...ipherals 14 From the list of Printers highlight the HP Deskjet 6500 Series see Figure 8 141 15 Click Next 16 When prompted choose Yes if you want this printer to be the default printer see Figure 8 142 17 Click Next Figure 8 141 Printer Manufacturer and Model Figure 8 142 Choosing Default Printer ...

Page 528: ...res 8 145 18 When the following message appears verify that Do not share this printer is selected as shown in Figure 8 143 19 Click Next 20 In response to the Print a test page message choose No and then click Next see Figure 8 144 Figure 8 143 Printer Sharing Message Figure 8 144 Print Test Page Message ...

Page 529: ...erals The Add Printer Wizard displays the following message 21 Click Finish to close the Wizard The Printer Properties Dialog opens with the General Tab activated as shown in Figure 8 146 22 Click on Print Test Page Figure 8 145 New Printer Added Figure 8 146 Printer Properties Dialog Box General Tab ...

Page 530: ...g message is displayed 23 Confirm that test page was printed properly then click OK The Printer Properties Dialog opens with the Ports Tab activated as shown in Figure 8 148 24 Confirm that a USB port is selected for the printer then click OK Figure 8 147 Test Page Printing Figure 8 148 Printer Properties Dialog Box Ports Tab ...

Page 531: ...eripherals The Printer Properties Dialog opens with the Advanced Tab activated as shown in Figure 8 149 25 Click on Printing Defaults The Printing Defaults dialog box opens with the Printing Shortcuts tab activated as shown in Figure 8 150 Figure 8 149 Printer Properties Dialog Box Advanced Tab ...

Page 532: ... etc to your liking then click OK The following message is displayed 27 Press any key to reboot the system and then eject the CD from the CD tray 28 Press the Config button on control console and from the System Configuration window activate the Printers tab see Figure 8 152 Figure 8 150 Printing Defaults Dialog Box Figure 8 151 Printer Installed and Checked Message ...

Page 533: ...ntly Installed Printers list then click OK 8 8 6 5 HP 6540 3 USB Deskjet Color Printer Removal Procedure 1 Turn OFF power to the USB printer 2 Unplug the AC power cable from the Power IN socket at the rear of the printer 3 Unplug the USB cable from the USB socket at the rear of the printer 4 Remove the USB printer Figure 8 152 System Configuration Window Printers Tab ...

Page 534: ...on 9 1 Overview 9 1 1 Purpose of Chapter 9 This chapter gives you an overview of replacement parts for the Vivid 4 ultrasound unit Table 9 1 Contents in Chapter 9 Section Description Page Number 9 1 Overview 9 1 9 2 List of Abbreviations 9 2 9 3 Renewal Parts Lists and Diagrams 9 3 9 4 Peripherals 9 26 9 5 System Block Diagrams 9 27 ...

Page 535: ...ist of Abbreviations Assy Assembly BEP Back End Processor Ctrl Control FEP Front End Processor FRU 1 Replacement part available in parts hub FRU 2 Replacement part available from the manufacturer lead time involved LCD Liquid Crystal Display Int Internal I O Input Output PWA Printed Wire Assembly Recv Receive XFRMR Transformer ...

Page 536: ... 1 Mechanical Hardware Parts Figure 9 1 Mechanical Hardware Parts Diagram 1 Table 9 2 Mechanical Hardware Parts Diagram 1 Item Part Name Part Number Description Qty FRU 101 Cover Rear 2258594 1 2 102 Cover Connector Panels 2258596 1 2 103 Cover Front 2258597 1 2 104 Cover Left 2258599 1 1 105 Up Down Swivel Handle V4 2370002 2 1 1 101 103 102 105 104 ...

Page 537: ...GE MEDICAL SYSTEMS DIRECTION 2392751 100 REVISION 3 VIVID 4 SERVICE MANUAL 9 4 Section 9 3 Renewal Parts Lists and Diagrams Figure 9 2 Mechanical Hardware Parts Diagram 2 201 202 203 204 205 206 207 ...

Page 538: ...m Part Name Part Number Description Qty FRU 201 Cover Right 2258600 1 1 202 Cover Top Lower Section 2258602 1 2 203 Control Console Upper Cover Front V4 2405642 1 1 204 Control Console Upper Cover Rear V4 2405643 1 1 205 Control Console Lower Cover V4 2261573 2 1 2 206 Control Console Rear Lower Cover V4 2261574 2 1 2 207 Front Handle V4 2261578 2 1 2 ...

Page 539: ...m 3 Table 9 4 Mechanical Hardware Parts Diagram 3 Item Part Name Part Number Description Qty FRU 301 Filter Air 2301690 1 2 302 Cover Gas Spring Sleeve V4 2261575 2 1 2 303 Probe Cable Holder V4 2263841 2 2 2 304 Gas Spring Cable 2268877 1 2 305 Gas Spring Assembly V4 2276027 2 1 1 306 Rear Handle 2253925 2 1 2 307 Cable Clip 264C0001 1 1 301 302 303 304 305 306 307 ...

Page 540: ...s Diagram 4 Table 9 5 Mechanical Hardware Parts Diagram 4 Item Part Name Part Number Description Qty FRU 501 Wheel Castor Rear 2389102 Rear 2 1 502 Wheel Castor Front 2392789 Front with brake and transverse arm 2 1 503 Rear Connector Panel Right with cables 2253013 1 2 504 Rear Connector Panel Left with cables 2253008 1 2 501 502 503 504 ...

Page 541: ...t Illustrated Item Part Name Part Number Description Qty FRU 601 Swivel Release Cable 2392103 1 2 602 Monitor Service Cover 2392137 1 2 603 Screw Kit 2253052 1 1 604 Keycaps Kit V4 2394000 2 1 1 605 Vertical Support Assembly 2393437 1 2 606 Vertical Axis Welding 2393543 1 2 607 Axis Bushing 2393441 1 2 608 Friction Washer 2393443 1 2 609 Tenon Washer 2393444 1 2 ...

Page 542: ...GE MEDICAL SYSTEMS DIRECTION 2392751 100 REVISION 3 VIVID 4 SERVICE MANUAL Chapter 9 Renewal Parts 9 9 9 3 2 AC System Parts Figure 9 5 AC System Parts 701 702 703 704 705 706 707 708 ...

Page 543: ...Breaker 2252994 1 1 702 AC Voltage Distribution Box 2399304 2 1 1 703 Connector AC Voltage Primary 100 120V 2253054 100 120V 1 2 704 Connector AC Voltage Primary 200 240V 2253056 200 240V 1 2 705 Connector AC Voltage Secondary 100V 2253057 100V 1 2 706 Connector AC Voltage Secondary 120V 2253058 120V 1 2 707 Connector AC Voltage Secondary 220V 2253059 220V 1 2 708 Connector AC Voltage Secondary 22...

Page 544: ... Front End Parts Diagram 1 Table 9 8 Front End Parts Diagram 1 Item Part Name Part Number Description Qty FRU 801 Front End Crate 2253030 2 including back plan MB 1 2 802 Front End Crate 2253030 3 systems with RFI configuration 1 2 803 FAN 92x92 Crate Fan 12V 2295971 12V 5 1 804 Low Voltage Power Supply LVPS 2270068 1 1 801 802 803 804 ...

Page 545: ...nd Parts Diagram 2 Item Part Name Part Number Description Qty FRU 1001 PCB Front Board and TR4 Assembly 2253033 3 FB 3Con V7 1 1 1002 PCB TR4 Board 2418129 16 1 1003 PCB Multiplexer MUX 2253038 3 1 1 1004 TX Voltage Power Supply TXPS HV Power Supply FA200114 1 1 1005 PCB Front End Controller FEC FA200764 Applies to systems with RFT configuration only 1 1 1001 1002 1003 1004 1005 ...

Page 546: ...m 3 Item Part Name Part Number Description Qty FRU 1011 PCB RF Tissue RFT MLA2 FB200992 Applies to systems with RFT configuration only 1 1 1012 PCB Beamformer BF 64ch FB200900 1 1 1013 PCB Image Port 3 IP3 FC200120 Applies to systems with RFT configuration only 1 1 1014 PCB RFI IMP RFT FEC FC200507 Applies to BTO3 systems with RFI configuration only 1 1 1011 1012 1013 1014 ...

Page 547: ...s and Diagrams 9 3 4 Back End Parts Figure 9 9 Back End Parts Diagram 1 Table 9 11 Back End Parts Diagram 1 Item Part Name Part Number Description Qty FRU 1021 Keyboard Trackball 2274623 1 1 1022 Keyboard Matrix Assembly English V4 2392754 1 1 1023 ECG Box Assembly Patient I O Module 2256476 1 1 1021 1022 1023 ...

Page 548: ...mbly Spanish 2393953 4 1 2 Keyboard Overlay Assembly Portuguese 2393953 5 1 2 Keyboard Overlay Assembly Italian 2393953 6 1 2 Keyboard Overlay Assembly Russian 2393953 8 1 2 Keyboard Overlay Assembly Danish 2393953 10 1 2 Keyboard Overlay Assembly Norwegian 2393953 11 1 2 Keyboard Overlay Assembly Swedish 2393953 12 1 2 Keyboard Overlay Assembly Finnish 2393953 13 1 2 Keyboard Overlay Assembly Dut...

Page 549: ...Battery 2300858 1 1 1052 PCB Plug Scan Card 2316279 1 1 1053 MO Drive 5 25 2277189 This hardware is an option that should be ordered P N H45011CF 1 1 1054 Footswitch 066E0007 1 2 1055 BEP Vivid 4 Assy Basic 2315842 7 Before ordering review the BEP Replacement instructions see Back End Processor Replacement Procedure on page 8 48 and check for any additional BEP components required 1 1 1057 PCB Key...

Page 550: ...GE MEDICAL SYSTEMS DIRECTION 2392751 100 REVISION 3 VIVID 4 SERVICE MANUAL Chapter 9 Renewal Parts 9 17 Figure 9 12 Back End Parts Diagram 4 1061 1062 1063 1064 1065 1066 1067 1068 1069 ...

Page 551: ...9 PC VIC 1 1 1062 Hard Disk Drive HDD 40 to 100 GB 2408479 1 1 1063 Floppy Drive 2346034 1 2 1064 CD Drive RW 2413449 1 1 1065 PCB SCSI Card 2271149 2 This hardware is an option that should be ordered P N H45011CF 1 1 1066 BEP2 Power Supply 2346011 1 1 1067 PCB PC2IP Card FB200973 1 1 1068 Frame Grabber 2399676 Applies to BTO3 systems with RFI configuration only 1 1 1069 PCB PC2IP2 Card FC200656 A...

Page 552: ... Cable VGA VIC PC 2252965 1 2 1103 Cable Input Box AC Distribution Box 2252966 1 2 1104 Cable Soft Shutdown 2252967 1 2 1105 Cable Ground VIC 2252968 1 2 1106 Cable Ground Back End 2252969 1 2 1107 Cable Ground Front End 2252970 1 2 1108 Cable Fan AC Dist Box Front End 2252972 1 2 1109 Cable Ground Keyboard 2252973 1 2 1110 Cable Keyboard Matrix Control 2252975 1 2 1111 Cable Keyboard VIC External...

Page 553: ...ck End Matrix Panel 2252978 1 2 1115 Cable ECG Back End Internal 2252979 1 2 1116 Cable Patient I O int ECG ECG Phono 2252980 1 2 1117 Cable ECG Int Footswitch Keyboard Control 2252982 1 2 1118 Cable Com1 Back End Rear Panel Left 2253009 1 2 1119 Cable Ground Rear Panel Left 2253010 1 2 1120 Cable VIC Rear Panel Left Col Pr 2253011 1 2 1121 Cable Video Rear Panel Left AC Dist Video Grabbing 225301...

Page 554: ...AC Box 2254089 1 2 1128 Cable ECG BEP Cable USA External 2256477 1 1129 Cable ECG BEP Cable Europe External 2256478 1 1 1130 Cable External ECG with Echo Stress Option 2256685 1 2 1131 Cable Internal Audio Keyboard Control Back End 2258801 1 2 1132 Cable External Audio Back End Rear Panel 2258803 1 2 Table 9 15 Cables Continued Item Part Name Part Number Description Qty FRU AC DIS BOX 2253014 A RI...

Page 555: ...RS232 Adaptor for Panasonic VCR 066E8200 1 1 1138 Cable Video IN Rear Panel 2266743 1 2 1139 Cable Video OUT Rear Panel 2266744 1 2 1140 Cable Audio OUT Rear Panel 2266745 1 2 1141 Cable Audio IN Rear Panel 2266746 1 2 1142 Cable Power Peripherals 2269430 1 N 1143 Cable Power Color Printer 2269431 1 2 1144 Cable Power Monitor Internal 2391918 1 N 1145 Cable PC2IP Data Front End to Back End 2276874...

Page 556: ...ation Box 2292972 1 N 1150 Cable USB Cable 2297905 1 2 1151 Cable ECG Internal COM 2 2298089 1 N 1152 Cable Power Peripherals and Printer 2300857 1 2 1153 Cable Cable Power Asia 2269428 2 1 1 1154 Cable Cable Power EU Plug 2269459 2 1 1 1155 Cable Cable Power AM Plug 2269460 2 1 1 1156 Cable Cable Power China Plug 2415383 6 1 1 1157 Cable PC2IP to KB Controller 2296166 1 1 1158 Cable YC to Frame G...

Page 557: ...REVISION 3 VIVID 4 SERVICE MANUAL 9 24 Section 9 3 Renewal Parts Lists and Diagrams 9 3 6 Software Table 9 16 Software Item Part Name Part Number Description Qty FRU 1301 S W Kit contains s w for systems Vivid 3 Vivid 4 and Vivid i 2415386 1 1 ...

Page 558: ...408 Probe 5S Sector H40422LA H4901RA 1 1 1409 Probe 10L 739L Linear H40412LG 1 1 1410 Probe 39A 12L Linear H40412LH 1 1 1411 Biopsy Kit for 10L 12L E83885MM 1 N 1412 Probe 10S H4901PC 1 1 1413 Probe P509 H44201TG For use in Japan 1 1 1414 Probe T739L Linear H40212LM 1 1 1415 Probe 7L 546L H40412LF 1 1 1416 Probe 6T OR H45521DX 1 1 1417 Probe 8T PED TEE H45001YE 1 1 1418 Probe 9T H45521DY For use o...

Page 559: ...S MD3000E S VHS RS232C PAL H45011PT 1 2 1502 VCR Mitsubishi HS MD3000U S VHS RS232C NTSC H45011PN 1 2 1503 VCR Cassette S VHS H45001PG 1 N 1504 Color Printer Tray V4 2393556 1 2 1505 Sony UP 21MD PAL NTSC Color Video Printer H45001PY 1 2 1506 Color Paper for Color Printer H45001PJ 1 N 1507 Sony UPD7897MD B W Video Printer H45021FZ 1 2 1508 B W Paper for B W Printer H45001PH 1 N 1509 HP Deskjet 654...

Page 560: ...977 2252975 2252982 2258801 2252964 2253011 2252976 2252981 2253009 2253015 2292972 2276874 2300847 2253014 2276875 2269429 2253080 2253079 RS232 1 2266742 2269430 C B L F AC INPUT BOX 2252994 On off 2269430 AC DIST BOX ISOL TRAN Temp Ctrl Temp Sens LAMBDA PS 12VDC contactors 2253001 2252998 2252999 2253002 2253004 2253000 2252966 USB1 TR4 1 TR4 16 I2C COM1 Rear panel left Rear panel right Composi...

Page 561: ...016 2252977 2252975 2252982 2258801 2252964 2253011 2252976 2252981 2253009 2253015 2292972 2276874 2300847 2253014 2276875 2253080 2253079 RS232 1 2266742 2269430 C B L F AC INPUT BOX 2252994 On off 2269430 AC DIST BOX ISOL TRAN Temp Ctrl Temp Sens LAMBDA PS 12VDC contactors 2253001 2252998 2252999 2253002 2253004 2253000 2252966 USB1 TR4 1 TR4 16 I2C COM1 Rear panel left Rear panel right Composi...

Page 562: ...on the backplane the AC distribution box and the DC distribution box that could be dangerous Be sure to disconnect the system power plug and to open the main circuit breaker before you remove any parts Proceed with caution whenever power is ON and covers are removed DANGER Do not pull out or insert circuit boards while mains power to the system is ON CAUTION Practice good ESD prevention Wear an an...

Page 563: ...scanner or nearby 10 2 2 Quality Assurance In order to gain accreditation from organizations such as the American College of Radiology USA it is the customer s responsibility to have a Quality Assurance program in place for each scanner The program must be directed by a medical physicist the supervising radiologist physician or appropriate designee Quality Control testing of the system must be con...

Page 564: ...anner as recommended in the Periodic Maintenance Schedule in order to retain the high levels of safety dependability and system performance Your GE Medical Systems Service Representative has an in depth knowledge of your Vivid 4 ultrasound scanning system and can best provide competent efficient service Please contact us for further information and to schedule routine maintenance servicing by our ...

Page 565: ...rrective maintenance or as required by your facility s QA program Peripheral Current Leakage Checks Also after corrective maintenance or as required by your facility s QA program Surface Probe Current Leakage Checks Also after corrective maintenance or as required by your facility s QA program Endocavity Probe vaginal or anal Current Leakage Checks As prescribed in Probe Manual Transesphongeal TEE...

Page 566: ...r abrasions Equipment for loose or missing hardware The keyboard for defects Brakes for defective operation DANGER To avoid electrical shock hazard do not remove the panels or covers from the machine This servicing must be performed by qualified service personnel only Failure to comply could result in serious injury DANGER If any defects are observed or any system malfunctions occur DO NOT operate...

Page 567: ...ble wrist strap 3M 3051 conductive Ground cord Anti Static Vacuum Cleaner 46 194427P278 46 194427P279 120V 230V Air Filter 2256176 Air intake Safety Analyzer 46 285652G1 DALE 600 KIT or equivalent for electrical tests SVHS VCR Cassette E7010GG E7010GF 60 minutes 120 minutes SVHS VCR Head Cleaner See VCR user manual for requirements 5 25 MOD MEDIA 2277190 Blank 2 3 M disk Blank 5 2 M disk 5 25 MOD ...

Page 568: ...r if they have any problems or questions about the equipment 2 Paperwork Fill in the appropriate details at the top of the Vivid 4 Preventative Maintenance Inspection Certificate see page 10 31 Note all probes and system options 3 Power up Turn the system power ON and verify that all fans and peripherals turn on Watch the displays during power up to verify that no warning or error messages are dis...

Page 569: ...M Mode operation Check the basic system controls that affect this mode of operation 5 Applicable Software Optionsa a Some software may be considered as standard depending upon system model configuration Verify the basic operation of all optional modes such as Multi Image 3D Contrast Harmonics Cine Stress Echo etc Check the basic system controls that affect each options operation 6 Probe Elements P...

Page 570: ...essary 3 Color Printer Verify hardcopy output of the Color video page printer Clean heads and covers if necessary 4 DICOM Verify that DICOM is functioning properly Send an image to a DICOM device 5 InSite iLinq Verify that InSite is functioning properly Ensure two way remote communications Warranty Contract Customers only 6 Footswitch Verify that the footswitch is functioning as programed Clean as...

Page 571: ...elps to maintain a clean working environment Prior to cleaning turn OFF the power to the system Use a fluid detergent in warm water on a soft damp cloth to carefully wipe the entire system Be careful not to get the cloth too wet so that moisture does not enter the console 4 Control Panel and Keyboard Control Panel On a weekly basis moisten a soft non abrasive folded cloth or sponge with a mild gen...

Page 572: ...r the air filter replacement part number Table 10 9 Air Filter Cleaning Step Item Description 1 Air Filter Remove the air filter located at the front of the scanner above the probe connector sockets Clean the air filter as follows shake it in an area away from the system wash with a mild soapy solution rinse and air dry 2 Air Filter Install the clean air filter Refer to Chapter 8 Replacement Proce...

Page 573: ...s MOD disks must be stored away from dust and cigarette smoke Do not use alcohol or benzene to clean the MOD cartridge 10 CD Drive Clean the drive head and media with the vendor supplied cleaning kit Advise the user to repeat this often to prevent future problems CDs must be stored away from dust and cigarette smoke Do not use alcohol or benzene to clean the CD drive 11 Rear Panel Connectors Check...

Page 574: ...10 13 10 5 6 Diagnostic Checks Optional To complete the periodic maintenance checks perform the diagnostic tests as described in Chapter 7 Diagnostics Troubleshooting Review the system error log for any problems Check the temperature log to see if there are any trends that could cause problems in the future ...

Page 575: ...check of the probe pins and system sockets before plugging in a probe Avoid pulling pinching or kinking the probe cable since a damaged cable may compromise the electrical safety of the probe To avoid the risk of a probe accidentally falling do not allow the probe cables to become entangled with or to be caught in the wheels of the system Protect the probe when moving the unit Use a soft cloth and...

Page 576: ... TEE and Interoperative probes often have special usage considerations always refer to the individual probe manufacturers handling instructions user manual 10 6 4 Probe Cleaning 10 6 4 1 Basic Probe Cleaning WARNING Always disinfect a defective probe before returning it to the manufacturer Be sure to tag the probe as being disinfected CAUTION To help protect yourself from blood borne diseases when...

Page 577: ...rogen free probe sheaths Probes used during neurological surgery must NOT be sterilized with liquid chemical sterilants because of the possibility of neurotoxic residue remaining on the probe 10 6 4 2 1 Cleaning and Sterilizing Probes Used Externally Table 10 12 Cleaning Sterilizing Procedure for Probes Used Externally Step Description 1 To protect yourself from blood borne diseases wear approved ...

Page 578: ...o will receive and or open the package NOTE The US Department of Transportation DOT has ruled that items that were saturated and or dripping with human blood that are now caked with dried blood or which were used or intended for use in patient care are regulated medical waste for transportation purposes and must be transported as a hazardous material Table 10 13 Cleaning Sterilizing Procedure for ...

Page 579: ...t under test must not be connected to other electrical equipment Remove all interconnecting cables and wires The operator and patient must not come into contact with the unit while the tests are being performed CAUTION Possible risk of infection Do not handle soiled or contaminated probes and other components that have been in patient contact Follow appropriate cleaning and disinfecting procedures...

Page 580: ...ormal Condition Open Ground Reverse Polarity Open Neutral Mains Applieda a Mains Applied is the Sink Leakage Test In this test mains supply voltage is supplied to the part or equipment to determine the amount of current that will pass sink to Ground if a patient comes into contact with the part USA 0 05 mA 0 05 mA 0 05 mA 0 05 mA N A Other 0 1 mA 0 5 mA 0 5 mA 0 5 mA 5 0 mA Table 10 16 Type CF App...

Page 581: ... the Grounding protective earth conductor have been reversed If later tests indicate high current leakages this should be suspected as a possible cause and the outlet wiring should be visually inspected 10 7 4 Grounding Continuity Measure the resistance from the third pin of the attachment plug to the exposed metal parts of the case The Ground wire resistance should be less than 0 2 Ohms Refer to ...

Page 582: ...these steps to test the Ground wire resistance 1 Turn the Vivid 4 unit OFF 2 Connect one of the Ohmmeter probes to the tested AC wall outlet Ground pin 3 Using the other Ohmmeter probe touch the exposed metal part of the Vivid 4 unit 4 Set the meter Function switch to the Resistance position 5 Measure and record the Ground wire resistance This should be less than 0 2 Ohms ...

Page 583: ... powered ON Be sure to turn the unit power OFF before switching them using the Polarity switch and or the Neutral switch 10 7 5 2 Generic Procedure The test verifies the isolation of the power line from the chassis The testing meter is connected from accessible metal parts of the case to Ground Measurements should be made with the unit ON and OFF with the power line polarity Normal and Reversed Re...

Page 584: ...ble 10 14 Record all data on the Vivid 4 Preventative Maintenance Inspection Certificate see page 10 31 Table 10 17 Typical Data Sheet for Chassis Source Current Leakage Test Unit Power Tester Polarity Switch Tester Neutral or Ground Switch Test 1 Probe Connector Test 2 Caster Wheel Test 3 CRT Test 4 Optional Test 5 Optional Enter Name of tested peripheral here ON NORM OPEN ON NORM CLOSED ON REV O...

Page 585: ...ts should be made with the Ground Open and Closed with the Vivid 4 unit ON and OFF and with the power line polarity Normal and Reversed Record the highest reading For each combination the operating controls such as the lead switch should be operated to find the worst case condition Figure 10 4 Test Circuit for Measuring Non Isolated Patient Leads POWER OUTLET H Black N White G Green Internal circu...

Page 586: ...ed Patient Lead Sink Leakage Isolation Test NOTE Refer to the procedure in the IEC 60601 1 CAUTION Line voltage is applied to the ECG leads during this test To avoid the risk of possible electric shock the system being tested must not be touched by anyone patient or operator while the ISO TEST switch is depressed NOTE It is not necessary to test each lead individually or power condition combinatio...

Page 587: ...r Source Maximum Allowance Limit GROUND OPEN GROUND CLOSED Patient Lead to Ground Current Leakage Test and Patient Lead to Lead Current Leakage Test 115V 10uA 10uA 220 240V 500uA 10uA Table 10 19 Maximum Allowance Limit for ECG Lead Isolation Sink Test AC Power Source Maximum Allowance Limit Patient Lead Isolation Current Test 115V 20uA 220 240V 5mA Table 10 20 Typical Data Sheet for ECG Lead to L...

Page 588: ...e made with the Ground OPEN and CLOSED with power line polarity Normal and Reversed and with the unit OFF and ON For each combination the probe must be active to find the worst case condition NOTE Each probe will have a certain amount of leakage current depending on its design Small variations in probe current leakages are normal from probe to probe Other variations will result from differences in...

Page 589: ...obe into the meter EXTERNAL connector 4 Set the meter s FUNCTION switch to EXTERNAL position 5 Connect the probe for test with the connector of the console 6 Add the saline probe and the imaging area of the probe into the saline bath 7 Turn unit power ON for the first part turn it OFF for the second half 8 Depress the ISO TEST rocker switch and record the highest current reading 9 Follow the test ...

Page 590: ... 10 31 CAUTION When power to the unit is ON never switch the Polarity and the status of Neutral Be sure to turn OFF power to the unit before switching them using the POLARITY switch and or the NEUTRAL switch Failure to comply with this warning may cause damage to the unit Table 10 21 Typical Data Sheet for Transducer Source Current Leakage Test Transducer Tested Unit Power Tester Power POLARITY Sw...

Page 591: ...t lies with the probe or the scanner NOTE Each probe will have some amount of leakage dependent on its design Small variations in probe current leakages are normal from probe to probe Other variations will result from differences in line voltage and test lead placement The maximum allowable leakage current for body surface contact probe differs from inter cavity probe Be sure to enter the correct ...

Page 592: ...Format Model Number Serial Number Probe 6 Frequency Scan Format Model Number Serial Number Probe 7 Frequency Scan Format Model Number Serial Number Probe 8 Frequency Scan Format Model Number Serial Number Probe 9 Frequency Scan Format Model Number Serial Number Scan Format Phased Array Linear Array Curved Array Mechanical Array or other Functional Checks if applicable OK or N A Physical Inspection...

Page 593: ...s Source Current Leakage CRT Patient Lead Source Leakage Lead to Ground Patient Lead Source Leakage Lead to Lead Patient Lead Source Leakage Isolation Peripheral 1 Current Leakage Peripheral 1 Ground Continuity Peripheral 2 Current Leakage Peripheral 2 Ground Continuity Peripheral 3 Current Leakage Peripheral 3 Ground Continuity PROBES Probe Number from page 10 31 Max Value Allowed Max Value Measu...

Page 594: ...Americas Fax 414 544 3384 P O Box 414 Milwaukee Wisconsin 53201 0414 U S A GE Medical Systems Europe Fax 33 1 40 93 33 33 Paris France GE Medical Systems Asia Fax 65 291 7006 Singapore GE Vingmed Ultrasound Fax 47 3302 1350 Horten Norway 34 ...

Reviews: