GE M
EDICAL
S
YSTEMS
D
IRECTION
2392751-100, R
EVISION
3
V
IVID
™ 4 S
ERVICE
M
ANUAL
Chapter 8 - Replacement Procedures
8-79
8-5-15-4
BEP2 Power Supply Installation Procedure
Note:
When performing this procedure, it is recommended to work with the BEP2 lying on its side
(as shown in
on page 8-76), to provide easier access.
NOTE:
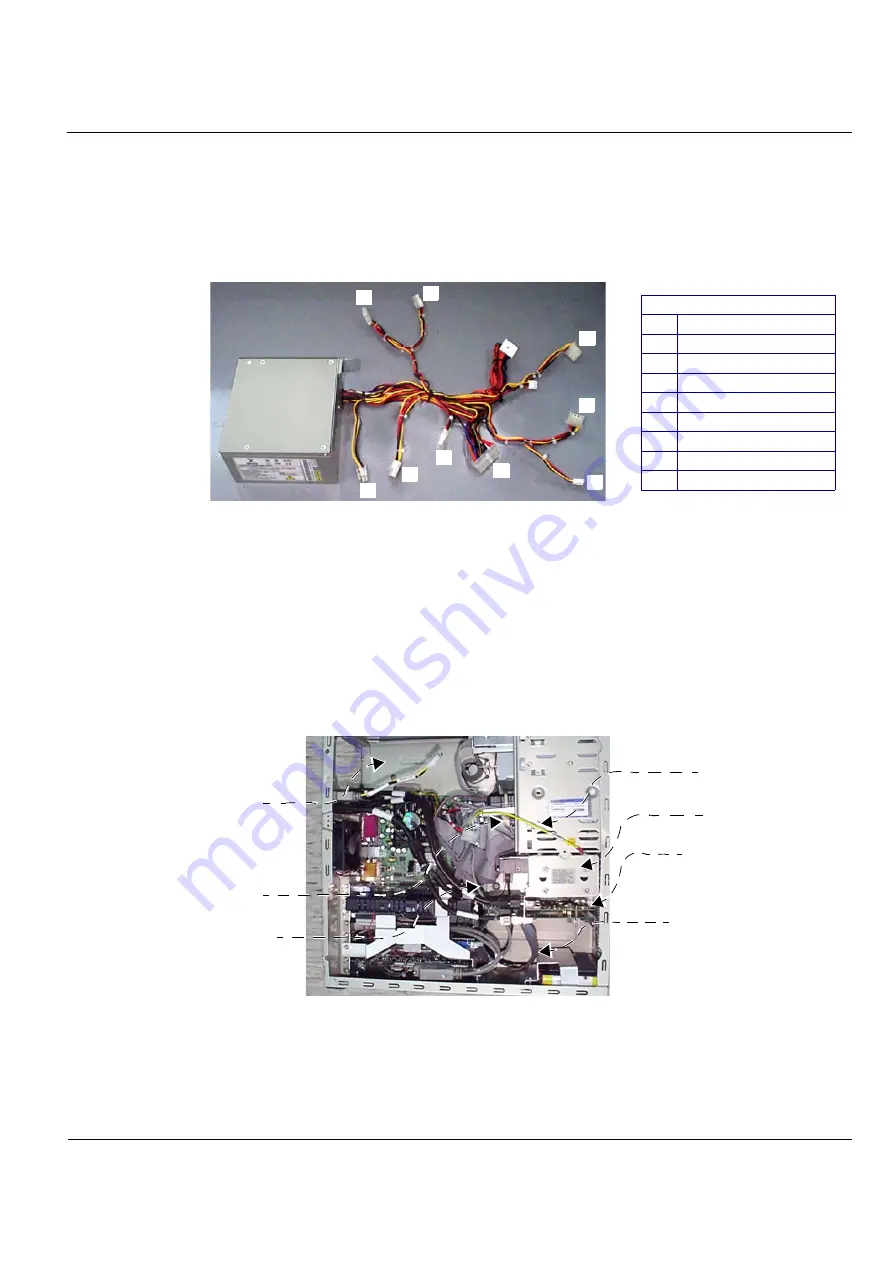
For clarification, the letters appearing in square brackets in the following steps correspond to the letters
shown in the illustration of the BEP2 Power Supply and cable connectors in
1.) Route the cable loom down into the cavity of the BEP casing (placing the cable labelled [
E
at the front of the loom) and arrange each of the cables in the approximate position. Carefully
feed the cable connectors underneath the data cables.
2.) Holding the new BEP2 power supply in one hand, connect the 4-pin external connector [
A
] to the
motherboard (beside the CPU).
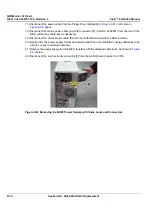
3.) Slide the power supply into the BEP power supply location (see
below) and push the
metal stabilizing bracket (located on the side of the power supply)
downwards
to hold the power
supply in position.
Figure 8-64 BEP2 Power Supply with Cable Loom and Connectors
Figure 8-65 BEP2 Power Supply Location
A
Not used
Cable Connections
A
Motherboard (beside CPU)
B
Motherboard (beside ECG)
C
BEP rear
D
Floppy Disk
E
PC-VIC
F
Hard Disk
G
CD-RW
H
MOD
I
ECG
B
C
D
E
F
G
H
I
Power Supply Location
Power Cable to PC-VIC
Data Cable to PC-VIC
Power Cable to Floppy Disk
Power Cable to Hard Disk
Ground Cable
PC-VIC


