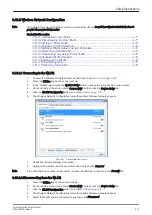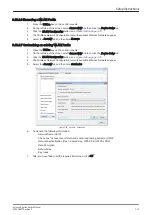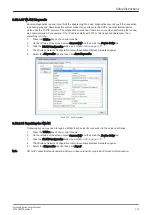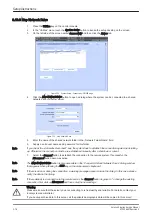
4.2.1 Power On / Boot Up
Note
After turning off a system, wait at least 10 seconds before turning it on again. The system may not be able to
boot if power is recycled too quickly.
1.
Connect the main power cable to the back of the system.
2.
If not already done, screw on the pull-out protection of the mains power cable with the 2 screws.
3.
Connect the main power cable to a hospital grade power outlet with the proper rated voltage. Never
use an adapter that would defeat the safety ground.
4.
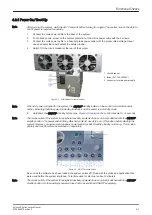
Switch ON the circuit breaker at the rear of the system.
Figure 4-1 Circuit Breaker at rear of system
1 circuit breaker
2 fuses (2x T10A H/250V)
3 connector for main power cable
Note
When AC power is applied to the system, the ON/OFF standby button on the control console illuminates
amber, indicating that the system (including the Back-end Processor) is in standby mode.
5.
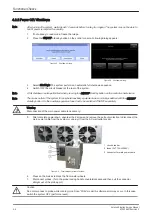
Hold down the ON/OFF standby button (see:
) on the control console for ~3 seconds.
Note
The mains outlet of the system for peripheral auxiliary equipment are commonly switched with the ON/OFF
standby button. The power switch of any attached printer(s) needs to be in ON position before starting the
system. However, be aware some auxiliary equipment may switch itself to standby mode (e.g., Color video
printer) and must therefore be switched on separately.
Figure 4-2 ON/OFF standby button
As soon as the software has been loaded, the system enters 2D-Mode with the probe and application that
were used before the system shutdown. Total time used for start-up is about 2 minutes.
Note
The mains outlet of the system for peripheral auxiliary equipment are commonly switched with the ON/OFF
standby button. So the auxiliary equipment need not to be switched ON/OFF separately.
Functional Checks
Voluson E-Series Service Manual
KTD106657 Revision 2
4-3
Summary of Contents for H48681XB
Page 11: ...Introduction Voluson E Series Service Manual KTD106657 Revision 2 1 3 ...
Page 12: ...Introduction 1 4 Voluson E Series Service Manual KTD106657 Revision 2 ...
Page 13: ...Introduction Voluson E Series Service Manual KTD106657 Revision 2 1 5 ...
Page 14: ...Introduction 1 6 Voluson E Series Service Manual KTD106657 Revision 2 ...
Page 15: ...Introduction Voluson E Series Service Manual KTD106657 Revision 2 1 7 ...
Page 16: ...Introduction 1 8 Voluson E Series Service Manual KTD106657 Revision 2 ...
Page 17: ...Introduction Voluson E Series Service Manual KTD106657 Revision 2 1 9 ...
Page 365: ......
Page 366: ...GE Healthcare Austria GmbH Co OG Tiefenbach 15 4871 Zipf Austria www gehealthcare com ...

