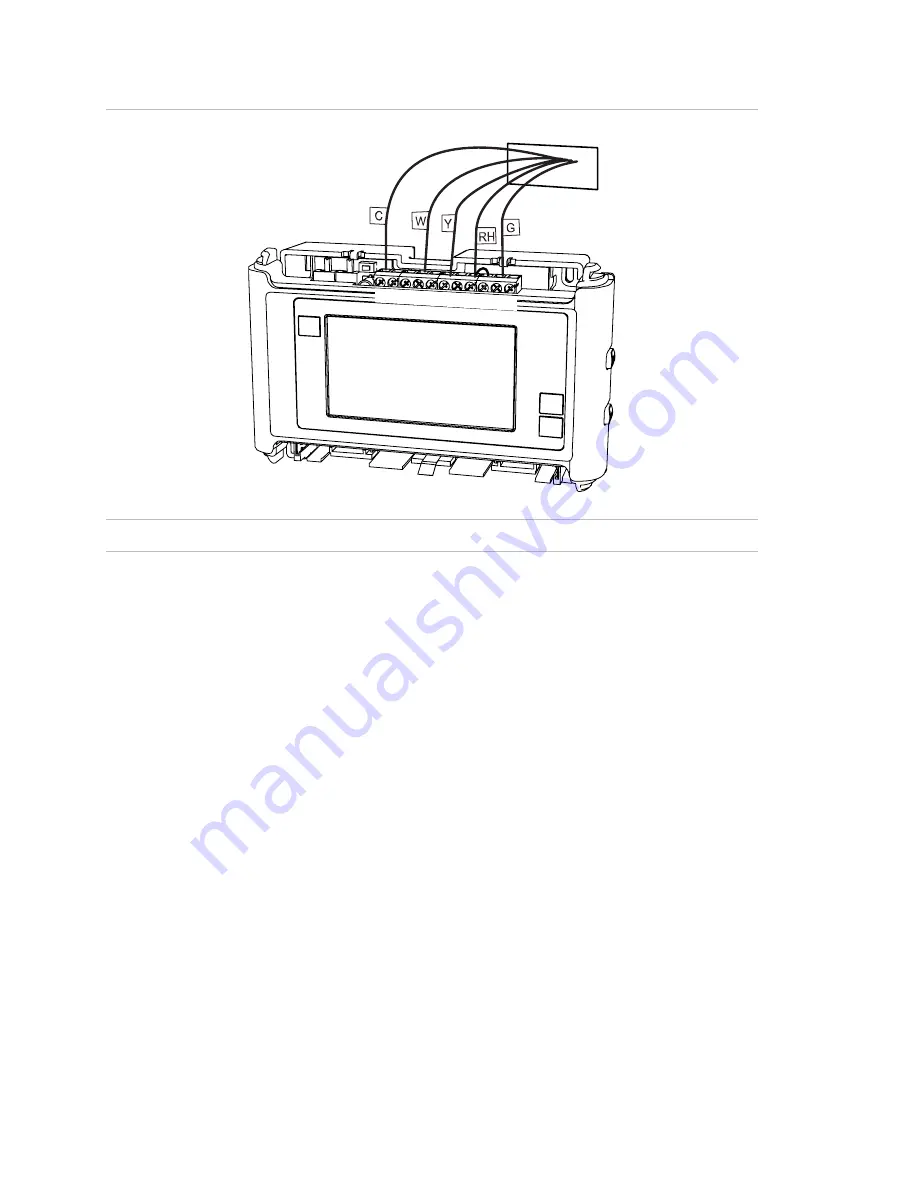
Figure 4: Thermostat terminals
From HVAC
C B O W W2 Y Y2 RH RC G A
Caution:
Do not allow wires to touch each other or parts of the thermostat.
Connect your wires
Connect the labeled wires only to a terminal with the same letter label. Insert the
wire in the terminal well and tighten the screw securely.
Note:
If you prefer, you can mount the thermostat to the wall first, and then
connect the wires.
The thermostat can be externally powered with a power source rated 12 V to 24
V AC or DC, at 300 ma or greater. If used, connect to the C and RH terminals (no
polarity).
Mount the thermostat to the wall
1. Hold the thermostat against the wall, with the wires coming over the top
above the terminal block. The thermostat will cover the hole in the wall.
Position the thermostat for best appearance.
2. Mark first and drill a 3/16 in. (4.8 mm) hole for the insert at each screw
location, then mount the unit.
3. Attach the thermostat to the wall with the screws provided. If you are
mounting the thermostat to sheet rock or if you are using the old mounting
holes, use the plastic anchors provided.
6
IS-ZW-TSTAT-300 Advanced Thermostat Installation Guide


