background image

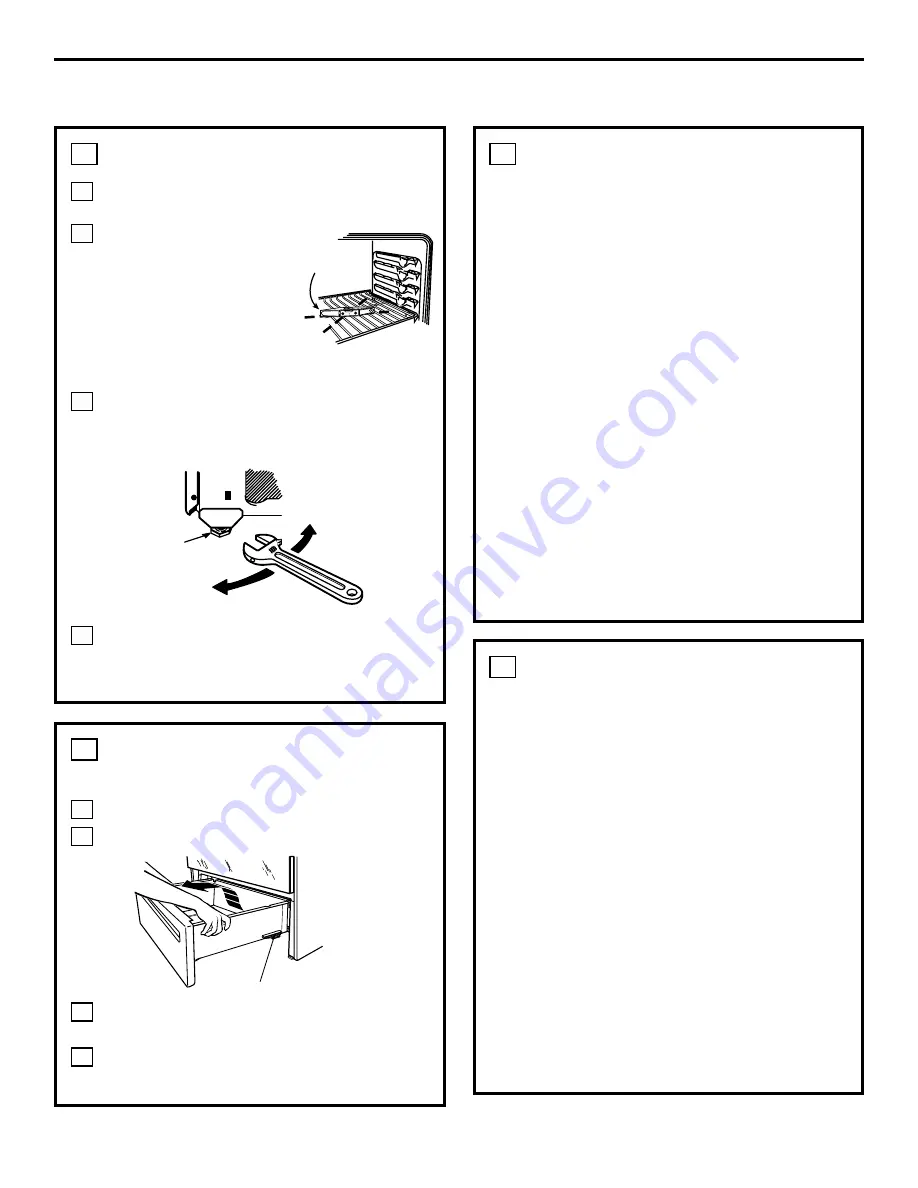
LEVEL THE RANGE

Install the oven shelves in the oven and
position the range where it will be installed.

Check for levelness by
placing a spirit level or a
cup, partially filled with
water, on one of the
oven shelves. If using a
spirit level, take two
readings—with the level
placed diagonally first in one direction
and then the other.

The front leveling legs can be adjusted
from the bottom and the rear legs can be
adjusted from the top or the bottom.

Use an open-end or adjustable wrench 
to adjust the leveling legs until the range
is level.

D

C

B

A

11

Leg
leveler

Lower
range

Raise
range

Spirit level

Installation Instructions

FINAL INSTALLATION

CHECKLIST

Check to make sure the circuit breaker is

closed (RESET) or the circuit fuses are

replaced.

Be sure power is in service to the building.

Check to be sure that all packing materials

and tape have been removed. This will

include tape on metal panel under control

knobs (if applicable), adhesive tape, wire

ties, cardboard and protective plastic.

Failure to remove these materials could

result in damage to the appliance once the

appliance has been turned on and surfaces

have heated.

Check to make sure that the door and

drawer are parallel to each other and that

both operate smoothly. If they do not, see

the Owner’s Manual for proper replacement.

Check to make sure that the rear range arm

is fully inserted into the Anti-Tip bracket

and that the bracket is securely installed.

13

OPERATION CHECKLIST

• 

Turn on one of the surface units to observe
that the element glows within 60 seconds.
Turn the unit off when glow is detected. If
the glow is not detected within the time
limit, recheck the range wiring connections.
If change is required, retest again. If no
change is required, have building wiring
checked for proper connections and voltage.

• 

Check to make sure the Clock (on models
so equipped) display is energized. If a series
of horizontal red lines appear in the display,
disconnect power immediately. Recheck the
range wiring connections. If change is
made to connections, retest again. If no
change is required, have building wiring
checked for proper connections and
voltage. It is recommended that the clock
be changed if the red lines appear.

• 

Be sure all range controls are in the OFF
position before leaving the range.

14

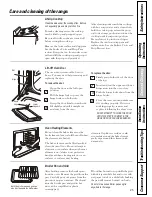
REPLACE THE 
STORAGE DRAWER

Place the drawer rail on the guides.

Push the drawer in until it stops.

Lift the front of the drawer and push in
until the stops clear the guides.

Lower the front of the drawer and push
in until it closes.

D

C

B

A

12

38

Stop

Summary of Contents for JAP02SNSS

Page 1: ...ic Coil Radiant ge com JAS02 JAP02 183D9541P008 Pub number 31 21389 Safety Information 2 6 Operating Instructions Surface Units 7 8 Cookware 9 Controls 10 Oven 11 12 Clock and timer 13 14 Timed Baking...

Page 2: ...ions should be followed including the following Use this appliance only for its intended purpose as described in this Owner s Manual Be sure your aplliance is properly installed and grounded by a qual...

Page 3: ...cal or foam type fire extinguisher Flame in the oven can be smothered completely by closing the door and turning the oven off or by using a multi purpose dry chemical or foam type fire extinguisher Do...

Page 4: ...RUCTIONS BEFORE USING 4 Stand away from the range when opening the oven door Hot air or steam which escapes can cause burns to hands face and or eyes Do not heat unopened food containers Pressure coul...

Page 5: ...center of the range without extending over nearby surface units Always turn the surface units off before removing cookware Do not flame foods on the cooktop If you do flame foods under the hood turn t...

Page 6: ...aning cream to clean the cooktop To avoid possible damage to the cooking surface do not apply cleaning cream to the glass surface when it is hot After cleaning use a dry cloth or paper towel to remove...

Page 7: ...tart for cooking bring water to boil MEDIUM HIGH Fast fry pan broil maintain fast boil on large amount of food MED Saute and brown maintain slow boil on large amount of food MEDIUM LOW Cereal maintain...

Page 8: ...ass surface when the surface is cool Even after the surface units are turned off the glass cooktop retains enough heat to continue cooking To avoid over cooking remove pans from the surface units when...

Page 9: ...procedures from reputable sources These are available from manufacturers such as Ball and Kerr and the Department of Agriculture Extension Service To prevent burns from steam or heat use caution when...

Page 10: ...ct the timer feature Then press and pads to adjust time To set the clock touch this pad twice and hold 3 seconds and then touch the and pads The time of day will flash in the display when the oven is...

Page 11: ...he support tilt up the front and push the shelf in NOTE The shelf is not designed to slide out at the special low shelf R position Turn this knob to the setting you want The oven cycling light glows u...

Page 12: ...o one is not directly above the other and leave approximately 11 2 between pans from the front back and sides of the wall Safety Instructions Operating Instructions Care and Cleaning Troubleshooting T...

Page 13: ...fect the timer Using the clock and timer on some models To Set the Clock The clock must be set to the correct time of day for the automatic oven timing functions to work properly The time of day canno...

Page 14: ...y If the remaining time is not in the display clock delay start or cooking time are in the display recall the remaining time by touching the TIMER pad and then touching the or pads to enter the new ti...

Page 15: ...n shut off automatically Touch the CLEAR OFF pad to clear the display How to Set a Delayed Start and Automatic Stop You can set the oven control to delay start the oven cook for a specific length of t...

Page 16: ...play will show no shdn no shut off Touch the START pad to activate the no shut off and leave the control set in this special features mode Fahrenheit or Celsius Temperature Selection Your oven control...

Page 17: ...ery 6 seconds Touch the START pad 12 Hour 24 Hour or Clock Black Out Your control is set to use a 12 hour clock If you would prefer to have a 24 hour military time clock or black out the clock display...

Page 18: ...he COOKING TIME pad The display will show Hld OFF Touch the COOKING TIME pad again to activate the feature The display will show Hld ON Touch the START pad to activate the cook and hold feature and le...

Page 19: ...th Feature Designed for use on the Jewish Sabbath and Holidays on some models The Sabbath feature can be used for baking roasting only It cannot be used for broiling self cleaning or Delay Start cooki...

Page 20: ...hours no shdn indicates that the oven will not automatically turn off Touch the START pad NOTE If a power outage occurred while the oven was in Sabbath mode the oven will automatically turn off and th...

Page 21: ...est results with your old favorite recipes use margarine butter or stick spreads containing at least 70 vegetable oil Pull the Oven Temp knob off the shaft look at the back of the knob and note the cu...

Page 22: ...nsitive to the fumes given off during the self cleaning cycle of any oven Move birds to another well ventilated room Wipe up heavy soil on the oven bottom appearance may vary How to Set the Oven for C...

Page 23: ...ll not be possible to open the oven door until the temperature drops below the lock temperature and the LOCKED DOOR light goes off When the LOCKED DOOR light is off open the door After a Clean Cycle Y...

Page 24: ...range The porcelain enamel finish is sturdy but breakable if misused This finish is acid resistant However any acidic foods spilled such as fruit juices tomato or vinegar should not be permitted to r...

Page 25: ...or oven surfaces or surfaces near heating Oven Heating Elements Do not clean the bake element or the broil element Any soil will burn off when the elements are heated After broiling remove the broiler...

Page 26: ...owel and wipe the edges of the oven shelves with the paper towel Wire cover holder Oven Shelves Oven Light Replacement on some models To remove the storage drawer Pull the drawer out all the way Tilt...

Page 27: ...the opening in the pan lines up with the receptacle Insert the terminals of the surface unit through the opening in the drip pan and into the receptacle Guide the surface unit into place so it rests e...

Page 28: ...of the cooktop On coil cooktop models the oven is vented through an opening under the right rear surface unit Never cover the opening with aluminum foil or any other material Oven Vent To clean the ou...

Page 29: ...rs may not be as effective To maintain and protect the surface of your glass cooktop follow these steps Before using the cooktop for the first time clean it with Ceramic Cooktop Cleaner This helps pro...

Page 30: ...ttom of pans for roughness that would scratch the cooktop Metal Marks and Scratches To clean the cooktop seal around the edges of the glass lay a wet cloth on it for a few minutes then wipe clean with...

Page 31: ...ep these instructions for future reference Completion time 1 to 3 hours Proper installation is the responsability of the installer Product failure due to improper installation is not covered under the...

Page 32: ...ike many other household items is heavy and can settle into soft floor coverings such as cushioned vinyl or carpeting When moving the range on this type of flooring it should be installed on a 1 4 thi...

Page 33: ...to an individual properly grounded branch circuit protected by a circuit breaker or fuse having amperage as specified on the rating plate The rating plate is located above the storage drawer on the o...

Page 34: ...strain relief they can be removed for better fit NOTE Do not install the power cord without a strain relief The strain relief bracket should be installed before reinstalling the rear range wiring cove...

Page 35: ...WS Insert the one ground screw into the power cord ground wire terminal ring through the ground plate and into the frame of the range Insert the 3 power cord rings into each one of the teminals of the...

Page 36: ...s Skip to Step 8 and proceed with the installation B A 6 4 WIRE CONDUIT INSTALLATION Loosen the three lower terminal screws from the terminal block Remove the ground screw and ground plate and retain...

Page 37: ...anti tip bracket See installation instructions shipped with bracket for complete details before attempting to install To check the bracket is installed and engaged properly carefully tip the range for...

Page 38: ...door and drawer are parallel to each other and that both operate smoothly If they do not see the Owner s Manual for proper replacement Check to make sure that the rear range arm is fully inserted into...

Page 39: ...used or coarse particles procedures Make sure bottoms of cookware are clean salt or sand were between before use and use cookware with smooth bottoms the cookware and the surface of the cooktop Cookw...

Page 40: ...Oven light does not work Light bulb is loose or defective Tighten or replace the bulb Switch operating light is broken Call for service Oven will not work Plug on range is not completely Make sure ele...

Page 41: ...for broiling Use the broiling pan and grid that came with your range Aluminum foil used on the See the Using the oven section broiling pan and grid has not been fitted properly and slit as recommende...

Page 42: ...s gets out of position during installation To straighten the door push down on the high corner Oven makes This is the sound of the This is normal clicking noise heating element turning off and on duri...

Page 43: ...ion Oven door is not in the locked Make sure the door is closed position Oven starts a self clean Oven door locked during Turn the Oven Temperature to OFF Allow the cycle when you wanted cooking oven...

Page 44: ...l 800 626 2002 during normal business hours Have your model number ready Surface Elements Drip Pans Oven Racks Broiler Pan Oven Elements Light Bulbs Knobs Cleaner Cleaning Pads Scraper Operating Instr...

Page 45: ...tection or you may request your money back on the remaining value of your contract No questions asked It s that simple Protect your refrigerator dishwasher washer and dryer range TV VCR and much more...

Page 46: ...Consumer Product Ownership Registration today Have the peace of mind of knowing we can contact you in the unlikely event of a safety modification After mailing the registration below store this docume...

Page 47: ...in an area where service by a GE Authorized Servicer is not available you may be responsible for a trip charge or you may be required to bring the product to an Authorized GE Service location for ser...

Page 48: ...special discounts that are available while your warranty is still in effect You can purchase it on line anytime or call 800 626 2224 during normal business hours GE Consumer Home Services will still...

Reviews: