background image

4

49-2000999  Rev. 2

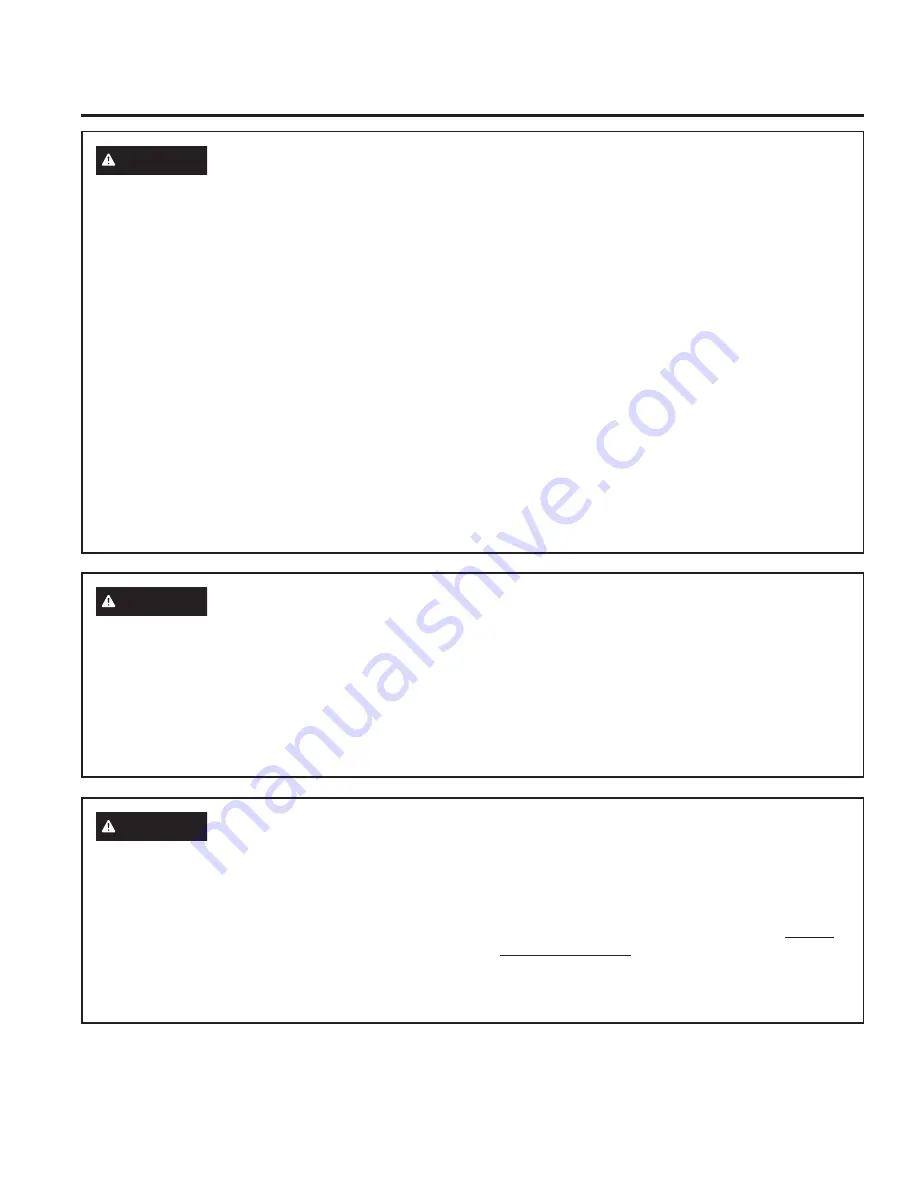
WARNING

  KEEP FLAMMABLE MATERIALS AWAY FROM THE RANGE 

Failure to do so may result in fire or personal injury.

■  Do not store or use flammable materials in an oven 

or near the cooktop, including paper, plastic, pot 

holders, linens, wall coverings, curtains, drapes and 

gasoline or other flammable vapors and liquids.

■  Never wear loose-fitting or hanging garments while 

using the appliance. These garments may ignite if 

they contact hot surfaces causing severe burns.

■  Do not let cooking grease or other flammable 

materials accumulate in or near the range. Grease 

in the oven or on the cooktop may ignite. 

■  Clean ventilating hoods frequently. Grease should 

not be allowed to accumulate on the hood or filter.

SAFETY

 INFORMA

TION

READ AND SAVE THESE INSTRUCTIONS

WARNING

  IN THE EVENT OF A FIRE, TAKE THE FOLLOWING 

STEPS TO PREVENT INJURY AND FIRE SPREADING

■  Do not use water on grease fires. Never pick up 

a flaming pan. Turn the controls off. Smother a 

flaming pan on a surface unit by covering the pan 

completely with a well-fitting lid, cookie sheet or flat 

tray. Use a multi-purpose dry chemical or foam-type 

fire extinguisher.

■  If there is a fire in the oven during baking, smother 

the fire by closing the oven door and turning the 

oven off or by using a multi-purpose dry chemical or 

foam-type fire extinguisher.

■  If there is a fire in the oven during self-clean, turn 

the oven off and wait for the fire to go out. 

Do not 

force the door open. Introduction of fresh air at self-

clean temperatures may lead to a burst of flame 

from the oven. Failure to follow this instruction may 

result in severe burns. 

IMPORTANT SAFETY INFORMATION

READ ALL INSTRUCTIONS BEFORE USING THE APPLIANCE

WARNING

 GENERAL SAFETY INSTRUCTIONS (Cont.)

■  Use only dry pot holders—moist or damp pot 

holders on hot surfaces may result in burns from 

steam. Do not let pot holders touch hot surface 

units or heating elements. Do not use a towel or 

other bulky cloth in place of pot holders.

■  Never use your appliance for warming or heating 

the room.

■  Do not touch the surface units, the heating elements 

or the interior surface of the oven. These surfaces 

may be hot enough to burn even though they are 

dark in color. During and after use, do not touch, 

or let clothing or other flammable materials contact 

the surface units, areas nearby the surface units or 

any interior area of the oven; allow sufficient time 

for cooling first. Other surfaces of the appliance 

may become hot enough to cause burns. Potentially 

hot surfaces include the cooktop, areas facing the 

cooktop, oven vent opening, surfaces near the 

opening and crevices around the oven door.

■  Do not heat unopened food containers. Pressure 

could build up and the container could burst, 

causing an injury.

■  Do not use any type of foil or liner to cover the 

oven bottom or anywhere in the oven, except as 

described in this manual. Oven liners can trap heat 

or melt, resulting in damage to the product and risk 

of shock, smoke or fire.

■  Avoid scratching or impacting glass doors, cook 

tops or control panels. Doing so may lead to glass 

breakage. Do not cook on a product with broken 

glass. Shock, fire or cuts may occur.

■  Cook meat and poultry thoroughly—meat to at least 

an internal temperature of 160°F and poultry to at 

least an internal temperature of 180°F. Cooking 

to these temperatures usually protects against 

foodborne illness.

Summary of Contents for JB735FPDS

Page 1: ...ectric Company Manufactured under trademark license SAFETY INFORMATION 3 USING THE RANGE Surface Units 7 Cookware for Radiant Glass Cooktop 9 WiFi Connect 10 Oven Controls 11 Special Features 12 Sabba...

Page 2: ...s into every GE Appliances product and we think you will too Among other things registration of your appliance ensures that we can deliver important product information and warranty details when you n...

Page 3: ...trical shock serious injury or death A child or adult can tip the range and be killed Install the anti tip bracket to the wall or floor Engage the range to the anti tip bracket by sliding the range ba...

Page 4: ...ruction may result in severe burns IMPORTANT SAFETY INFORMATION READ ALL INSTRUCTIONS BEFORE USING THE APPLIANCE WARNING GENERAL SAFETY INSTRUCTIONS Cont Use only dry pot holders moist or damp pot hol...

Page 5: ...is lost to an electric cooktop while a surface unit is ON the surface unit will turn back on as soon as power is restored In the event of power loss failure to turn all surface unit knobs to the OFF...

Page 6: ...ct the power supply Have it serviced by a qualified technician Do not clean the door gasket The door gasket is essential for a good seal Care should be taken not to rub damage or move the gasket Do no...

Page 7: ...o OFF when you finish cooking Models with a Dual Ring surface element only Models with a Tri Ring surface element only Melt setting on some models will melt chocolate or butter Knob appearance may var...

Page 8: ...nd will disappear in a short time NOTE On models with light colored glass cooktops it is normal for the cooking zones to change color when hot or cooling down This is temporary and will disappear as t...

Page 9: ...ans can cause permanent damage to cooktop glass The enamel can melt and bond to the ceramic cooktop Glass ceramic Poor performance Will scratch the surface Stoneware Poor performance May scratch the s...

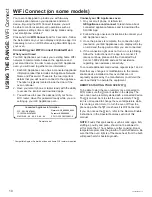
Page 10: ...Appliances oven 3 Once the process is complete the connection light located on your GE Appliances oven display will stay on solid and the app will confirm you are connected 4 If the connection light d...

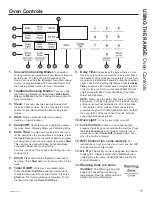
Page 11: ...Start pad The timer countdown is complete To turn the timer off press the Timer On Off pad 9 Delay Time Delays when the oven will turn on Use this to set a time when you want the oven to start Press...

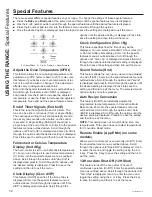
Page 12: ...y CLoc diSP This feature On Off specifies if the time of day is displayed Enter into the special features menu as outlined above Scroll through the options until Cloc diSP is displayed and press 6 Scr...

Page 13: ...ature changes Starting a Timed Bake 1 Press the Bake pad 2 If the desired temperature is 350 F use the 6 through 0 number pads or the Lock Control pad to select a cooking time If a cooking temperature...

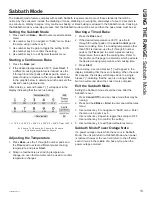
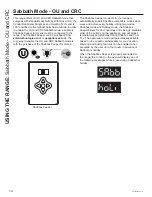
Page 14: ...er for Ovens The Shabbos Keeper connects to your range to automatically enable Shabbos compatible modes each week and before every holiday Using two modes Shabbos mode and Holiday mode the Shabbos Kee...

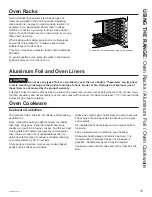
Page 15: ...If undesirable results are obtained with this type of cookware consider reducing oven temperature by 25 F next time Shiny pans can produce more evenly cooked baked goods such as cakes and cookies Gla...

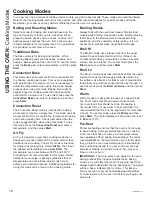
Page 16: ...itional oven recipe or package guidelines for set temperatures and cook times adjust cook time to achieve your desired crispness Additional guidelines for using this mode can be found in the Cooking G...

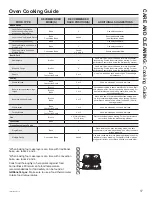
Page 17: ...iling For best performance when broiling center food below the broil heating element Broil Lo Bake 2 or 3 Boneless chicken breasts Broil Lo Bake 2 or 3 Move food down for more doneness less searing an...

Page 18: ...during cooking Arrange food in a single layer on the pan do not overload the pan Always check internal food temperature to confirm minimum safe temperatures have been reached Minimum safe food temper...

Page 19: ...tion Rinse with clean water and dry with a soft cloth When cleaning surfaces make sure that they are at room temperature and not in direct sunlight If stain on the door vent trim is persistent use a m...

Page 20: ...fault self clean time is displayed The clean time can be changed to any time between 3 00 and 5 00 hours by using the number pads to enter a different time and pressing Start For heavily soiled ovens...

Page 21: ...l be necessary to apply pressure to the razor scraper in order to remove the residue 3 After scraping with the razor scraper spread a few drops of ceramic cooktop cleaner on the entire burned residue...

Page 22: ...are should be taken when removing hot substances Be sure to use a new sharp razor scraper Do not use a dull or nicked blade 1 Turn off all surface units Remove hot pans 2 Wearing an oven mitt a Use a...

Page 23: ...he glass cover clear the grooves of the socket Wearing latex gloves may offer a better grip 2 Remove the bulb by turning it counter clockwise To replace 1 Replace bulb with a new 40 watt appliance bul...

Page 24: ...nge arm into the bottom edge of the hinge slot The notch in the hinge arm must be fully seated into the bottom of the slot Repeat for right side 3 Fully open the door If the door will not fully open t...

Page 25: ...e Drawer for models that do not have release tabs 1 Pull drawer straight out until it stops 2 Continue to pull the drawer until it is detached from the oven Replacing the Storage Drawer 1 Rest the lef...

Page 26: ...Food spillovers not cleaned before next use See the Cleaning the glass cooktop section Hot surface on a model with a light colored cooktop This is normal The surface may appear discolored when it is h...

Page 27: ...making a clicking noise when using my oven Your range cycles the heating elements by turning relays on and off to maintain the oven temperature This is normal Clock and timer do not work A fuse in you...

Page 28: ...code repeats Disconnect all power to the oven for at least 30 seconds and then reconnect power If the function error code repeats call for service Display goes blank A fuse in your home may be blown o...

Page 29: ...oil to a paper towel and wipe the edges of the oven racks with the paper towel Do not spray with Pam or other lubricant sprays Drawer does not slide smoothly or drags The drawer is out of alignment F...

Page 30: ...ve January 1 2022 cosmetic damage to the glass cooktop such as but not limited to chips scratches or baked on residue not reported within 90 days of installation Effective January 1 2022 damage to the...

Page 31: ...ge Broiler Pan 12 x 1 x 16 XL Broiler Pan 17 x 1 x 19 1 4 Parts Oven racks Oven elements Light bulbs Cleaning Supplies CitruShine Stainless Steel Wipes Stainless Steel Appliance Cleaner Non scratch Cl...

Page 32: ...counts that are available while your warranty is still in effect You can purchase it on line anytime GE Appliances Services will still be there after your warranty expires In the US GEAppliances com e...

Reviews: