background image

Summary of Contents for JBP15

Page 1: ...leaning Instructions l 9 21 Surface Cooking 6 8 Cooktop Comparison 6 Cookware Tips 7 Home Canning Tips 8 Surface Controls 6 7 Problem Soiver 27 28 Thermostat Adjustment Do it Yourse f l4 Care and clea...

Page 2: ...lace any part of your range unless it is specifically recommended in this guide All other servicing shouldbe referredto a qualifiedtechnician Before performing any service DISCONNECT THE RANGE POWER S...

Page 3: ...her lamein the ovencan be smotheredcompletely by closingthe ovendoorand turningthe ovenoff or by usinga multi purposedry chemicalor foam type fire extinguisher Teach children not to play with the cont...

Page 4: ...in place Their absenceduring cookingcoulddamagerangeparts and wiring 4 Do not use aluminum foil to line the drip pans or anywherein the ovenexceptas describedin lhi guide Misusecouldresultilla sl ock...

Page 5: ...eaning only 17 20 1 Drip Pans 4 22 11 Plug In Surface UnitsMay be 4 6 8 removed when cleaning under unit 12 12 Oven TempControl 10 11 13 15 17 23 Feature Index 13 Oven CleaningLight 14 SurfaceUnit Con...

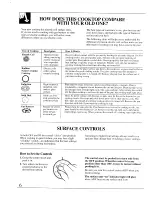
Page 6: ...e cooking after it is turned off Remove the pan from the su Jce unit i you want cooking to stop Pans must be made of ferrous metals metal that attracts a rn gnet Heat is produced by a magnetic circuit...

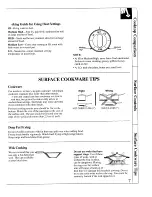
Page 7: ...heat settings Steel pans may cook unevenly if not combined with other metals For best cooking results pans should be flat on the bottom Match the size of the saucepan to the size of the surface unit...

Page 8: ...location doe not allow the canner to be centered on the surface unit use smaller diameter nts for good canning results 2 Flat bottomed canners must be used Do not use canners with flanged or rippled...

Page 9: ...es such as duringthe night See the Operatingthe Self CleaningOven section NOTE Before beginning Timed Baking or Self Cleaning make sure the oven clock shows the correct time of day TimedBakingUsestheA...

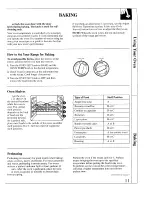
Page 10: ...red setting the proper heating elements are then activated for that operation OvenShelves The shelves are designed with stop locks so when placed correctly on the shelf supports they will stop before...

Page 11: ...ves n e theOven ior shelves in the desired locations while the oven is cool The correct shelf position depends on the kind of food and the browning desired As a general rule Type of Food Shelf Positio...

Page 12: ...recipe or instructions for the best baking results Cookies When bakingcookies flat cookie sheets without sides produce better looking cookies Cookies baked in a jelly roll pan short sides all around...

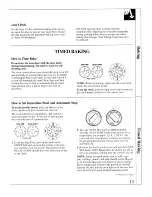
Page 13: ...orrect time 1 1 Howto Set ImmediateStartand AutomaticStop I To avoid possible burns place the shelves in the correct position before you turn the oven on The oven will turn on immediately and cook for...

Page 14: ...rom the bulb will speed harmful bacteria growth The oven indicator light s at the TIMED BAKE setting may work differently than it does at the BAKE setting ADJUSTTHE OVEN THERMOSTAT DO ZTYOURSELF Youma...

Page 15: ...imed Baking You may hear a slight clicking sound hot oven and therefore should be removed when indicatingthe oven is working properly Timed the desired internal temperature has been reached Baking wil...

Page 16: ...ound Latnb leg or bone in shoulder Vealshoulder leg or loin Pork loin rib or shoulder Ham precooked Poultry Chicken or Duck Chicken pieces Turkev Oven Temperature 163CC 325 F 163 C 325 F 163 C 325 F 1...

Page 17: ...r easiest cleaning Useof AluminumFoil Ucan use aluminum foil to line Withoutthe slits the foil will ur broiler pan and broiler rack prevent fat and meatjuices from However you must mold the foil drain...

Page 18: ...ooking time given in this guide IY times per side If your range is connected to 20S volts rare steaks may be broiled by preheating the broiIer and positioning the oven shelf one position higher Quanti...

Page 19: ...ar and water solution This will help prevent a brown residue from forming when the oven is heated Buff these areas with a dry cloth Do not clean the gasket Clean the top sides and outside front of the...

Page 20: ...ng cleaning has started This light cycles on and off with the oven heating elements after the oven reaches cleaning temperature The oven door and windowget hot during self cleaning DO NOT TOUCH 4 Afte...

Page 21: ...is caused by excessive soil and you should turn the OVEN SET knob to OFF Open the windows to rid the room of smoke Allow the oven to cool until the latch slides easily before opening the door Wipe up...

Page 22: ...ce a surface unit Replace the drip pan into the recess in the cooktop Make sure opening in the pan lines up with the receptacle Insert the terminals of the surface unit through the opening in the drip...

Page 23: ...vinegar should not be permitted to remain on the finish If acids spill on the cooktop while it is hot use a dry paper towel or cloth to wipe it up right away When the surface has cooled wash with soa...

Page 24: ...Clean the shelves with a mild abrasive cleanser or steel wool After cleaning rinse the shelves with clean water and dry with a clean cloth NOTE The oven shelves may also be cleaned in the self cleanin...

Page 25: ...resistance to abrasion An intact and wcl fitting oven door gasket is essential for energy efficient oven operation and good baking results 1f j oLl no iceIhe gasket becoming worn frayed or damaged in...

Page 26: ...ed outside panel will be Place the bracket with its outside edge at this location and against the back wall a Outside edge of bracket to be flush with left or right side of range Adjacent cabinet or f...

Page 27: ...cookware of improper size is being used The oven thermostat needs adjustment See the Adjust the Oven Thcrmostat D It yOl r Se f SeCtiOn The surface units are not plugged in solidly The surface unit co...

Page 28: ...hours See the Operating the Self Cleaning Oven section The oven thermostat needs adjustment See the Adjust the Oven Thermosta Do ItYollrself section The oven controls are not set properly Heavily soil...

Reviews: