background image

The Sabbath feature can be used for baking/roasting only. It cannot be used for convection, broiling, self-cleaning or 
Delay Start cooking. 

NOTE: 

The oven light comes on automatically (on some models) when the door is opened and goes off when the door is closed. The bulb may be

removed. See the Oven Light Replacement section. On models with a light switch on the control panel, the oven light may be turned on and left on.

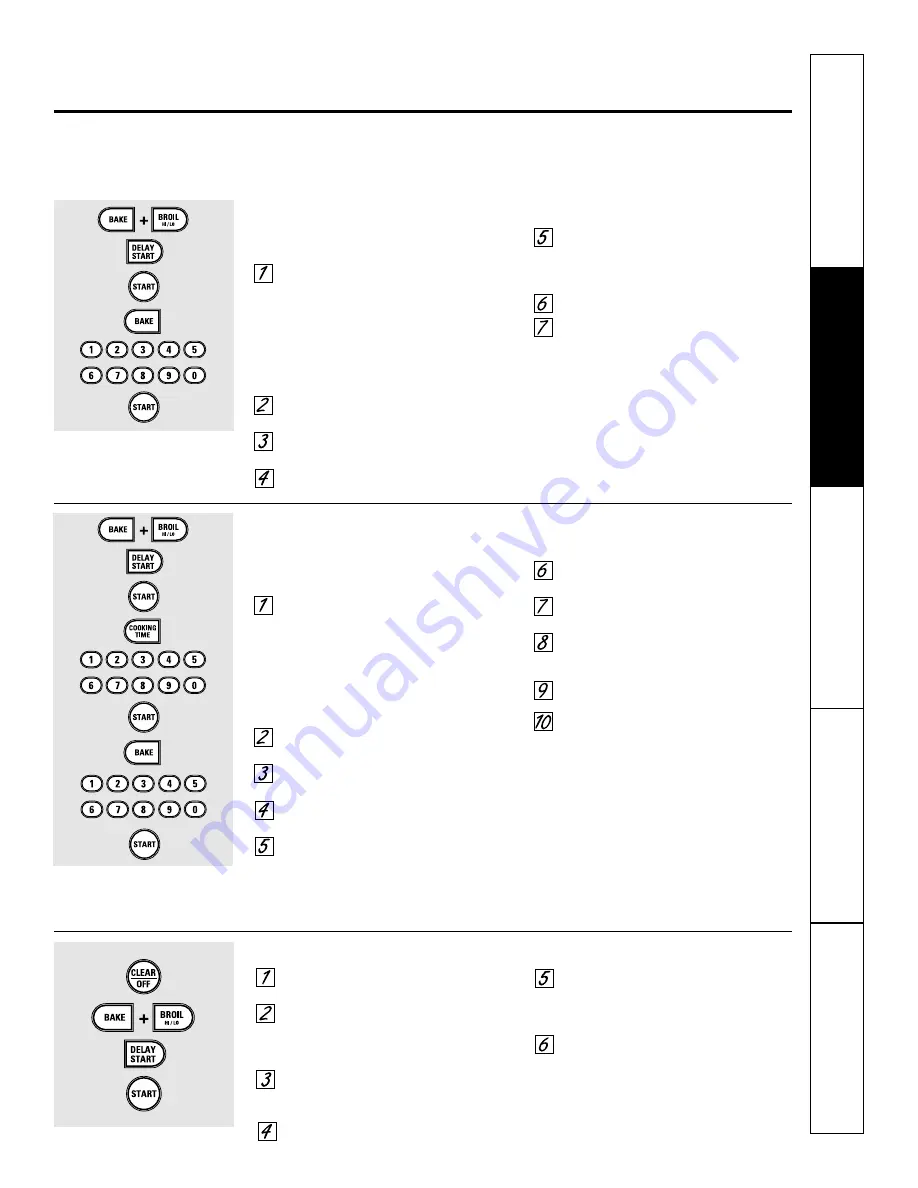
How to Set Sabbath Feature for Regular Baking/Roasting

Make sure the clock shows the correct time of day and
the oven is off.

Touch and hold 

both

the 

BAKE 

and

BROIL HI/LO

pads, 

at the same time

, until

the display shows 

SF.

NOTE:

If bake or broil appears in the

display, the

BAKE 

and 

BROIL HI/LO 

pads

were not touched at the same time.
Touch the 

CLEAR/OFF

pad and begin

again.

Tap the 

DELAY START

pad until 

SAb bAtH

appears in the display.

Touch the 

START

pad and 

⊃ 

will appear

in the display. 

Touch the 

BAKE

pad. No signal will 

be given.

Using the number pads, enter the
desired temperature between 170°F and
550°F. No signal or temperature will be
given.

Touch the 

START

pad.

After a random delay period of
approximately 30 seconds to 1 minute,

will appear in the display

indicating that the oven is baking/
roasting. If 

doesn’t appear in the

display, start again at Step 4.

To adjust the oven temperature, touch the

BAKE

pad, enter the new temperature using

the number pads and touch the 

START 

pad.

NOTE:

The 

CLEAR/OFF

and 

COOKING TIME 

pads

are active during the Sabbath feature.

How to Set Sabbath Feature for Timed Baking/Roasting—
Immediate Start and Automatic Stop

Make sure the clock shows the correct time of day and
the oven is off.

Touch and hold 

both

the 

BAKE 

and

BROIL HI/LO

pads, 

at the same time

, until

the display shows 

SF.

NOTE:

If bake or broil appears in the

display, the

BAKE 

and

BROIL HI/LO 

pads

were not touched at the same time.
Touch the 

CLEAR/OFF

pad and begin

again.

Tap the 

DELAY START

pad until

SAb bAtH

appears in the display.

Touch the 

START

pad and 

⊃ 

will appear

in the display. 

Touch the 

COOKING TIME

pad. 

Touch the number pads to set the
desired length of cooking time between 
1 minute and 9 hours and 59 minutes.
The cooking time that you entered will 
be displayed.

Touch the 

START

pad.

Touch the 

BAKE

pad. No signal will be

given.

Using the number pads, enter the
desired temperature. No signal or
temperature will be given. 
Touch the 

START

pad.

After a random delay period of
approximately 30 seconds to 1 minute,

will appear in the display indicating

that the oven is baking/roasting. If 

doesn’t appear in the display, start again
at Step 7.

To adjust the oven temperature, touch the

BAKE

pad, enter the new temperature using

the number pads and touch the 

START

pad.

When cooking is finished, the display will
change from 

to 

and 

0:00 

will appear,

indicating that the oven has turned

OFF 

but is

still set in Sabbath. Remove the cooked food.

How to Exit the Sabbath Feature

Touch the 

CLEAR/OFF

pad.

If the oven is cooking, wait for a random
delay period of approximately 30
seconds to 1 minute, until only 

⊃ 

is in the display.

Touch and hold 

both

the 

BAKE 

and

BROIL HI/LO

pads, 

at the same time

, until

the display shows 

SF.

Tap the 

DELAY START

pad until

12 shdn

or 

no shdn 

appears in the display.

Choose 

12 shdn

, indicating that the oven

will automatically turn off after 12 hours
or 

no shdn

, indicating that the oven will

not automatically turn off after 12 hours.

Touch 

START

when the option that you

want is in the display (

12 shdn

or 

no shdn

).

NOTE:

If a power outage occurred while 

the oven was in Sabbath, the oven will
automatically turn off and stay off even 
when the power returns. The oven 
control must be reset.

When the display shows 

⊃ 

the 

oven is set in Sabbath. When the
display shows 

the oven is

baking/roasting.

When the display shows 

⊃ 

the 

oven is set in Sabbath. When the
display shows 

the oven is

baking/roasting.

Using the Sabbath feature.

(Designed for use on the Jewish Sabbath and Holidays)  (On some models)

www.GEAppliances.com

Safety Instructions

Operating Instructions

Care and Cleaning

Tr

oubleshooting T

ips

Consumer Support

15

Summary of Contents for JBP48

Page 1: ...d Roasting Features 12 Care and Cleaning Broiler Pan and Grid 21 Control Knobs 19 Drip Pans 22 Heating Elements 19 Lift Off Oven Door 20 Lift Up Cooktop 23 Light 21 Painted Surfaces 21 Shelves 20 Storage Drawer 21 Surface Units 22 Vent 23 Troubleshooting Tips 24 26 Accessories 30 Consumer Support Consumer Support Back Cover Product Registration 27 28 Warranty 31 Write the model and serial numbers ...

Page 2: ...909 To check if the device is installed and engaged properly remove the kick panel or storage drawer and inspect the rear leveling leg Make sure it fits securely into the slot If you pull the range out from the wall for any reason make sure the device is properly engaged when you push the range back against the wall If it is not there is a possible risk of the range tipping over and causing injury...

Page 3: ...se this appliance only for its intended purpose as described in this Owner s Manual Be sure your appliance is properly installed and grounded by a qualified installer in accordance with the provided installation instructions Have the installer show you the location of the circuit breaker or fuse Mark it for easy reference Do not attempt to repair or replace any part of your range unless it is spec...

Page 4: ...ff Smother a flaming pan on a surface unit by covering the pan completely with a well fitting lid cookie sheet or flat tray Use a multi purpose dry chemical or foam type fire extinguisher Flaming grease outside a pan can be put out by covering it with baking soda or if available by using a multi purpose dry chemical or foam type fire extinguisher Flame in the oven can be smothered completely by cl...

Page 5: ...k the removable surface units Do not put them in a dishwasher Do not self clean the surface units in the oven Do not place or store items that can melt or catch fire on the glass cooktop even when it is not being used Be careful when placing spoons or other stirring utensils on the glass cooktop surface when it is in use They may become hot and could cause burns When preparing flaming foods under ...

Page 6: ...paper products cooking utensils or food in the oven when not in use Do not use aluminum foil to line oven bottoms except as suggested in this manual Improper installation of aluminum foil may result in a risk of electric shock or fire Stand away from the range when opening the oven door Hot air or steam that escapes can cause burns to hands face and or eyes WARNING OVEN Do not use oven cleaners No...

Page 7: ... coated cast iron cookware are slow to absorb heat but generally cook evenly at low to medium heat settings Steel pans may cook unevenly if not combined with other metals For best cooking results pans should be flat on the bottom Match the size of the saucepan to the size of the surface unit The pan should not extend over the edge of the surface unit more than 1 Not over 1 inch Home Canning Tips B...

Page 8: ...wer outage START Pad Must be touched to start any cooking or cleaning function COOKING TIME Pad Touch and then touch the number pads to set the amount of time you want your food to cook The oven will shut off when the cooking time has run out DELAY START Pad Use along with COOKING TIME or SELF CLEAN STD LO pads to set the oven to start and stop automatically at a time you set OVEN LIGHT ON OFF Pad...

Page 9: ...ull the shelf out several inches and then using two pot holders pull the shelf out by holding the sides of it The shelf is low and you could be burned if you place your hand in the middle of the shelf and pull all the way out Be very careful not to burn your hand on the door when using the shelf in the lowest position A The oven has 6 shelf positions How to Set the Oven for Baking or Roasting Touc...

Page 10: ...ngthwise Broil skin side down Breast C 25 15 first Bakery Product Bread toast 2 to 4 slices E 3 1 Space evenly Place English Muffin 2 split F 3 4 English muffins cut side up and brush with butter if desired Lobster Tails 2 4 C 18 20 Do not Cut through back of turn shell Spread open over Brush with melted butter before broiling and after half of broiling time Fish Fillets 1 lb 1 4 to 1 2 thick E 5 ...

Page 11: ...d The 6 second tone can be canceled by following the steps in the Special features of your oven control section under Tones at the End of a Timed Cycle The Kitchen Timer is a minute timer only The Kitchen Timer does not control oven operations The maximum setting on the Kitchen Timer is 9 hours and 59 minutes To Reset the Kitchen Timer If the display is still showing the time remaining you may cha...

Page 12: ...e of day Touch the BAKE pad Touch the number pads to set the desired oven temperature Touch the COOKING TIME pad NOTE If your recipe requires preheating you may need to add additional time to the length of the cooking time Touch the number pads to set the desired length of cooking time The minimum cooking time you can set is 1 minute The oven temperature that you set and the cooking time that you ...

Page 13: ...and BROIL HI LO pads at the same time for 3 seconds until the display shows SF Touch the KITCHEN TIMER ON OFF pad The display shows CON BEEP continuous beep Touch the KITCHEN TIMER ON OFF pad again The display shows BEEP This cancels the one beep every 6 seconds Touch the START pad Cook and Hold Your new control has a cook and hold feature that keeps cooked foods warm for up to 3 hours after the c...

Page 14: ...TE If the clock is in the black out mode you will not be able to use the Delay Start function Control Lockout Your control will allow you to lock out the touch pads so they cannot be activated when touched Touch the BAKE and BROIL HI LO pads at the same time for 3 seconds until the display shows SF Touch the SELF CLEAN STD LO pad The display will show LOC OFF Touch the SELF CLEAN STD LO pad again ...

Page 15: ...bAtH appears in the display Touch the START pad and will appear in the display Touch the COOKING TIME pad Touch the number pads to set the desired length of cooking time between 1 minute and 9 hours and 59 minutes The cooking time that you entered will be displayed Touch the START pad Touch the BAKE pad No signal will be given Using the number pads enter the desired temperature No signal or temper...

Page 16: ... oven These thermometers may vary 20 40 degrees NOTE This adjustment will only affect baking and roasting temperatures it will not affect broiling convection or self cleaning temperatures The adjustment will be retained in memory after a power failure The type of margarine will affect baking performance Most recipes for baking have been developed using high fat products such as butter or margarine...

Page 17: ...commend venting your kitchen with an open window or using a ventilation fan or hood during the first self clean cycle Remove the shelves broiler pan broiler grid all cookware and any aluminum foil from the oven The oven shelves can be self cleaned but they will darken lose their luster and become hard to slide Soil on the front frame of the range and outside the gasket on the door will need to be ...

Page 18: ... CLEAN STD LO pad once for a 3 hour clean time or twice for a 4 hour clean time A 3 hour self clean time is recommended for use when cleaning small contained spills A self clean time of 4 hours or longer is recommended for a dirtier oven If a time other than 4 hours or 3 hours is needed use the number pads and enter the desired clean time You can change the clean time to any time between 21 2 hour...

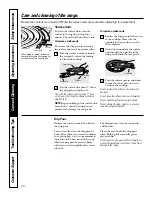
Page 19: ... to thoroughly clean and protect the surface NOTE The plastic tape on some models must be removed from all chrome trim It cannot be removed if it is baked on Oven Heating Elements Do not clean the bake element or the broil element Any soil will burn off when the elements are heated To clean the oven floor gently lift the bake element Clean with warm soapy water 19 Control Knobs Control Panel Molde...

Page 20: ...e slot To replace the door Firmly grasp both sides of the door at the top With the door at the same angle as the removal position seat the indentation of the hinge arm into the bottom edge of the hinge slot The notch in the hinge arm must be fully seated into the bottom of the slot Fully open the door If the door will not fully open the indentation is not seated correctly in the bottom edge of the...

Page 21: ...e from the pan into a proper container Wash and rinse the broiler pan and grid in hot water with a soap filled or plastic scouring pad If food has burned on sprinkle the grid with detergent while hot and cover with wet paper towels or a dishcloth Soaking the pan will remove burned on foods Both the broiler pan and grid may be cleaned with a commercial oven cleaner Both the broiler pan and grid can...

Page 22: ...t the terminals of the surface unit through the opening in the drip pan and into the receptacle Push the surface unit in and down to lock the tab in place so it rests evenly in the cooktop Do not immerse the surface units in liquids of any kind Do not clean the surface units in a dishwasher Do not bend the surface unit plug terminals Do not attempt to clean adjust or in any way repair the plug in ...

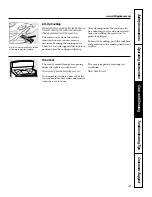
Page 23: ...ck into position when the cooktop is lifted up After cleaning under the cooktop with hot mild soapy water and a clean cloth lower the cooktop Be careful not to pinch your fingers To lower the cooktop push the rods back and gently lower the cooktop until it rests in place Be sure all surface units are turned off before raising the cooktop Oven Vent The oven is vented through an opening under the ri...

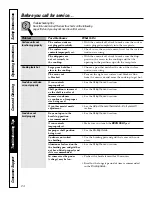
Page 24: ...sing The oven vent Pans on the right rear surface unit block air flow is blocked from the oven vent and cause the cooktop to get hot Food does not bake Oven controls See the Using the oven section or roast properly improperly set Shelf position is incorrect See the Using the oven section or the shelf is not level Incorrect cookware See the Using the oven section or cookware of improper size being ...

Page 25: ...ed Oven controls See the Using the oven section improperly set Plug on range is not Make sure electrical plug is plugged into a live completely inserted in the properly grounded outlet electrical outlet Oven too hot Allow the oven to cool to below locking temperature Oven will not Oven controls See the Using the self cleaning oven section self clean improperly set Crackling or This is the sound of...

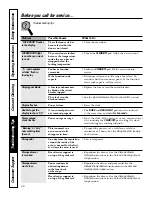
Page 26: ...e to get the Oven control pads were The BAKE and BROIL HI LO pads must be touched display to show SF not touched properly at the same time and held for 3 seconds Power outage Power outage or surge Reset the clock If the oven was in use you must reset clock flashes it by touching the CLEAR OFF pad setting the clock and resetting any cooking function Burning or oily This is normal in a To speed the ...

Page 27: ...otection or you may request your money back on the remaining value of your contract No questions asked It s that simple Protect your refrigerator dishwasher washer and dryer range TV VCR and much more any brand Plus there s no extra charge for emergency service and low monthly financing is available Even icemaker coverage and food spoilage protection is offered You can rest easy knowing that all y...

Page 28: ...er Cut here Complete and mail your Consumer Product Ownership Registration today Have the peace of mind of knowing we can contact you in the unlikely event of a safety modification After mailing the registration below store this document in a safe place It contains information you will need should you require service Our service number is 800 GE CARES 800 432 2737 Read your Owner s Manual carefull...

Page 29: ...Notes Safety Instructions Operating Instructions Care and Cleaning Troubleshooting Tips Consumer Support 29 ...

Page 30: ...ring normal business hours Have your model number ready Tired of discolored racks Wishing you had extra heavy duty oven racks NOW AVAILABLE for your range GE s innovative self cleanable porcelain coated oven racks Heavy Duty Durable Able to be cleaned in a self cleaning oven Visit www GEAppliances com for more information Surface Elements Drip Pans Oven Racks Broiler Pan Oven Elements Light Bulbs ...

Page 31: ... consequential damage caused by possible defects with this appliance Damage caused after delivery What GE Will Not Cover This warranty is extended to the original purchaser and any succeeding owner for products purchased for home use within the USA In Alaska the warranty excludes the cost of shipping or service calls to your home Some states do not allow the exclusion or limitation of incidental o...

Page 32: ...y and learn about special discounts that are available while your warranty is still in effect You can purchase it on line anytime or call 800 626 2224 during normal business hours GE Consumer Home Services will still be there after your warranty expires Parts and Accessories www GEAppliances com Individuals qualified to service their own appliances can have parts or accessories sent directly to th...

Reviews: