background image

35

Regular Roasting

Regular Roasting with the Pr

obe

REGULAR ROASTING WITH THE PROBE

See the Regular Roasting Guide.

Correct Placement of the Temperature Probe

A temperature probe has been provided for use in your
new oven. This probe is designed to withstand high
temperatures. Temperature probes provided with other
products, such as those used for microwave ovens,
may not be designed to withstand high temperatures.
Use of probes other than the one provided with this
product may result in damage to the probe.

Never leave your probe inside the oven during a self-
cleaning cycle.

For many foods, especially roasts and poultry, internal
food temperature is the best test for doneness. The
temperature probe takes the guesswork out of roasting
by cooking foods to the exact doneness you want.
When the internal temperature of the food reaches the
temperature you set, the oven automatically shuts off.

The temperature probe has a skewer-like probe at
one end and a plug at the other end that goes into the
outlet on the oven wall. 

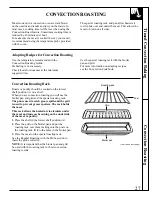
Use the handles of the probe and plug when 
inserting and removing them from the meat and 
wall outlet. Do not use tongs to pull on the cable
when removing the probe—they might damage it. 
TO AVOID BREAKING THE PROBE, MAKE
SURE FOOD IS COMPLETELY DEFROSTED
BEFORE INSERTING.

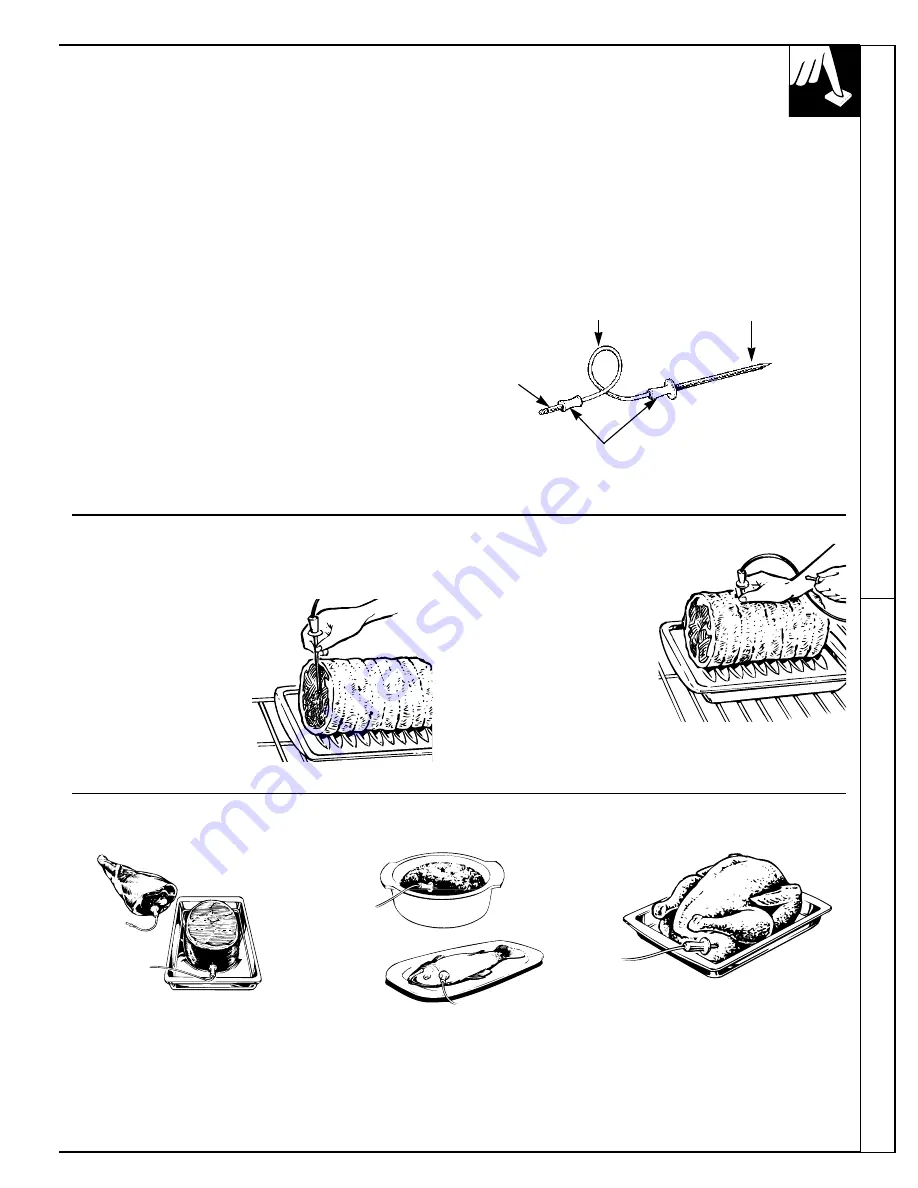
Ham or Lamb

Casseroles or Fish

Poultry

For roasts with no bone, insert the
probe into the meatiest part of the
roast. For bone-in ham or lamb,
insert the probe into the center of
the lowest large muscle or joint.

Insert the probe into the center of
dishes such as meat loaf or
casseroles. When cooking fish,
insert the probe from just above
the gill into the meatiest area,
parallel to the backbone.

Insert the probe into the meatiest
part of the inner thigh from below
and parallel to the leg of a whole
turkey.

(continued next page)

After preparing the meat and placing it on a trivet or
on the broiler pan grid, follow these directions for
proper probe placement.

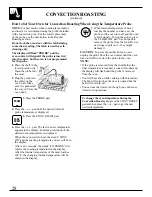
1. Lay the probe on the

outside of the meat
along the top or side 
and mark with your
finger where the edge 
of the meat comes to 
on the probe. The point
should rest in the center
of the thickest meaty
part of the roast.

2. Insert the probe into 

the meat up to the
point marked off 
with your finger. It
should not touch the
bone, fat or gristle. 

No more than 2 inches
of the probe, not
counting the handle,
should be left exposed
outside the meat.

Plug

Cable

Probe

Handles

(appearance may vary)

Summary of Contents for JBP95

Page 1: ...Instructions 41 43 Timed Baking 32 33 Power Outage 19 Surface Cooking 10 17 Canning Tips 12 Coil Surface Units 10 12 15 Cooktop Comparison 10 Cookware Tips 14 16 Halogen Radiant Surface Cleaning 17 H...

Page 2: ...le enhances the styling of the range while providing a comfortable grip and feel Big View Window An exclusive feature from GE the big window makes it easy to check baking progress without opening the...

Page 3: ...range Immediately contact the dealer or builder that sold you the range Save time and money Before you request service Check the Problem Solver in the back of this guide It lists causes of minor opera...

Page 4: ...ontact with hot surface units or heating elements and may cause severe burns WARNING All ranges can tip and injury could result To prevent accidental tipping of the range attach it to the wall and flo...

Page 5: ...at in the remote possibility that trichina may be present in the meat it will be killed and the meat will be safe to eat Oven Stand away from the range when opening the oven door Hot air or steam whic...

Page 6: ...container should be turned toward the center of the range without extending over the nearby surface units Always turn the surface units off before removing cookware To avoid the possibility of a burn...

Page 7: ...s turn the surface units off before removing the cookware Keep an eye on foods being fried at high or medium high heat settings When flaming foods are under the hood turn the fan off The fan if operat...

Page 8: ...nce may vary 7 36 36 8 9 10 11 12 13 14 15 16 17 18 18 8 7 29 30 31 32 JBP90 JBP95 Drip wells Support Rods Electric coil models have lift up cooktops for easier cleaning Broiler pan and grid 1 3 4 5 6...

Page 9: ...ement 5 38 47 20 Oven Interior Light 21 41 45 Comes on automatically when the door is opened Explained Feature Index on page 21 Oven Shelf Supports 22 24 Shelf positions for cooking are 34 40 suggeste...

Page 10: ...right away under a glass and changes heat settings right away like a gas cooktop After turning the control surface off the glass cooktop is hot from the heat of the pan but cooking stops right away So...

Page 11: ...ace unit is turned on coils beneath the surface unit radiate heat through the glass to the cookware The red glow of the coils will be visible through the glass It will take the surface unit a few mome...

Page 12: ...ent of Agriculture Extension Service 4 Remember that canning is a process that generates large amounts of steam To avoid burns from steam or heat be careful when canning NOTE If your house has low vol...

Page 13: ...cator light may glow between LO and OFF but there is no power to the surface units Appearance may vary slightly Special Notes for Glass Cooktops Cooktop temperatures increase with the number of surfac...

Page 14: ...to select from so you can match the size of the unit to the size of the cookware you are using To use the large 9 inch surface unit push in the right portion of the COIL SIZE switch next to the contro...

Page 15: ...ended Good conductivity Aluminum residues sometimes appear as scratches on the cooktop but can be removed if cleaned immediately Because of its low melting point thin weight aluminum should not be use...

Page 16: ...uneven contact of the pan to the surface unit uneven heat transfer or an unsuitable pan Use pans that match the diameter of the surface unit Cooking performance will not be as good if the cookware is...

Page 17: ...mitt hold the razor scraper at a 30 angle to the cooktop and scrape hot spill to a cool area outside the surface unit 3 With the spill in a cool area use a dry paper towel to remove any excess Any spi...

Page 18: ...ROAST Press this pad to select roasting with convection 12 AUTO SELF CLEAN Press this pad to select the self cleaning function See the Operating the Self Cleaning Oven section 13 INCREASE Short taps...

Page 19: ...til the word TIMER disappears from the display End of Cycle Tones Power Outage The end of cycle tone is a series of 3 beeps followed by 1 beep every 6 seconds If you would like to remove the signal th...

Page 20: ...o the time of day display 20 Child Lockout Feature Your range has a special feature that allows you to lock the oven control preventing children from turning on the oven accidentally or without your p...

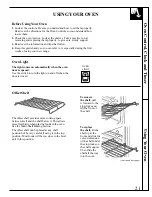
Page 21: ...d extension of the shelf under the stop locks on the shelf support Then slide the shelf all the way into the oven continued next page Oven Light The light comes on automatically when the oven door is...

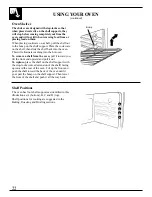
Page 22: ...ching into the hot oven To remove a shelf from the oven pull it toward you tilt the front end upward and pull it out To replace place the shelf on the shelf support with the stop locks curved extensio...

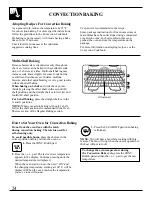
Page 23: ...ts if you use a flat cookie sheet instead of a pan with low sides For recipes like oven baked chicken you should use a pan with low sides Hot air cannot circulate well around food in a pan with high s...

Page 24: ...hen the oven starts to heat the word ON and the changing temperature starting at 100 F will be displayed When the oven reaches the temperature you set a tone will sound 3 Press the CLEAR OFF pad when...

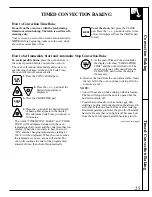
Page 25: ...minutes The words TIMED CONV BAKE and COOK TIME will be displayed along with the oven temperature that you set and the cook time that you entered When the oven starts to heat the word ON and the chan...

Page 26: ...r in the display At 4 00 the oven will turn on automatically When the oven starts to heat the word ON and the changing oven temperature starting at 100 F will be displayed The oven will continue to co...

Page 27: ...e Convection Cookbook Convection Roasting Rack Roasts or poultry should be cooked on the lowest shelf position A on a shelf When you are convection roasting you will use the broiler pan and grid and t...

Page 28: ...at the words CONV ON and the roasting temperature you set will be in the display After a few seconds the words LO PROBE will replace the roasting temperature in the display After the internal temperat...

Page 29: ...uld know that cooking it to only 140 F means some food poisoning organisms may survive Source Safe Food Book Your Kitchen Guide USDA Rev June 1985 How to Set Your Oven for Baking To avoid possible bur...

Page 30: ...casseroles and roasts preheating is not necessary For ovens without a preheat indicator light or tone preheat 10 minutes After the oven is preheated place the food in the oven as quickly as possible t...

Page 31: ...d or bent pans will cause uneven baking results and poorly shaped products A cake baked in a pan larger than the recipe recommends will usually be crisper thinner and drier than it should be If baked...

Page 32: ...COOK TIME will be displayed along with the oven temperature that you set and the cook time that you entered When the oven starts to heat the word ON and the changing temperature starting at 100 F wil...

Page 33: ...owth of harmful bacteria Be sure that the oven light is off because heat from the bulb will speed harmful bacteria growth How to Set Delay Start and Automatic Stop Quick Reminder 1 Press the BAKE pad...

Page 34: ...en and therefore should be removed when the desired internal temperature has been reached 34 1 Place the shelf in A or B position No preheating is necessary 2 Check the weight of the meat Place it fat...

Page 35: ...outlet Do not use tongs to pull on the cable when removing the probe they might damage it TO AVOID BREAKING THE PROBE MAKE SURE FOOD IS COMPLETELY DEFROSTED BEFORE INSERTING Ham or Lamb Casseroles or...

Page 36: ...LO PROBE will replace the roasting temperature in the display After the internal temperature of the meat reaches 100 F the changing internal temperature will be shown in the display 7 When the intern...

Page 37: ...bs Tender cuts rib high quality 325 Rare 24 33 18 22 140 150 sirloin tip rump or top round Medium 35 39 22 29 150 160 Well Done 40 45 30 35 170 185 Lamb leg or bone in shoulder 325 Rare 21 25 20 23 14...

Page 38: ...about 2 inches apart If desired the fat may be trimmed leaving a layer about 1 8 inch thick 2 Place the meat on the broiler grid in the broiler pan Always use the grid so the fat drips into the broile...

Page 39: ...these cases preheat the broil element for 10 minutes before placing broiler pan with food in oven Check to see if you are using the recommended shelf position Broil for longest period of time indicat...

Page 40: ...is recommended Rare 11 2 inch thick C 10 7 8 Slash fat Medium 2 to 21 2 lbs C 15 14 16 Well Done C 25 20 25 Chicken 1 whole A 35 10 15 Reduce time about 5 to 10 minutes 2 to 21 2 lbs per side for cut...

Page 41: ...le On these areas use detergent and hot water or a soap filled steel wool pad Rinse well with a vinegar and water solution This will help prevent a brown residue from forming when the oven is heated B...

Page 42: ...ar in the display Allow additional time for cooling before you try to set the cycle 1 Follow the directions to prepare the oven for cleaning 2 Close the oven door and slide the latch handle to the rig...

Page 43: ...clean to end at a specific time Q Can I use commercial oven cleaners on any part of my self cleaning oven A No cleaners or coatings should be used around any part of this oven If you do use them and...

Page 44: ...ning To remove a knob pull it straight off the stem Wash the knobs in soap and water but do not soak Cooktop Surface Light When changing a cooktop light do not touch the metal at the ends of the light...

Page 45: ...bottom to allow for proper air circulation Outside of the door Use soap and water to thoroughly clean the top sides and front of the oven door Rinse well You may also use a glass cleaner to clean the...

Page 46: ...n it Both the broiler pan and grid can also be cleaned in the dishwasher Do not store a soiled broiler pan and grid anywhere in the range Oven Shelves and Convection Roasting Rack Clean the oven shelv...

Page 47: ...ith a dry cloth Porcelain Enamel Cooktop Electric Coil Models The porcelain enamel finish is sturdy but breakable if misused This finish is acid resistant However any acidic foods spilled such as frui...

Page 48: ...eceptacle Guide the surface unit into place so it rests evenly Drip Pans Remove the surface units Then lift out the drip pans For best results clean the drip pans by hand Place them in a covered conta...

Page 49: ...jects horizontally a min of 5 beyond the bottom of the cabinets Make sure the wall coverings countertops and cabinets around the range can withstand heat generated by the range oven or cooktop up to 2...

Page 50: ...T RING REMOVED KNOCKOUT RING BRACKET STEP 2 PREPARE FOR ELECTRICAL CONNECTION Effective January 1 1996 the National Electric Code requires that new construction not existing utilize a 4 conductor conn...

Page 51: ...STALLATION A Remove the 3 screws from the connector block B Remove the grounding screw and strap from the connector block middle location and the screw connection to the frame of the range C Insert sc...

Page 52: ...the connector block Remove the grounding strap from the connector block middle location and the screw connecting it to the frame of the range Insert bare wires between the connector block terminals an...

Page 53: ...ed at each corner of the base of the range Remove the storage drawer or kick panel depending on your model and using channel locks rotate the leveling feet in and out as required to level the range Fo...

Page 54: ...is loose or defective Tighten or replace DOES NOT WORK The switch operating the oven light is broken Call for service SURFACE LIGHT The fluorescent light is loose or defective Adjust or replace DOES...

Page 55: ...not properly set COOKTOP FEELS HOT Large pans hold heat close to the cooktop Pans on the right rear surface unit block air flow from the oven vent and cause the cooktop to get hot Glass Cooktop Models...

Page 56: ...L MARKINGS Do not slide aluminum cookware across the surface Use the recommended may appear as scratches cleaning procedure to remove marks Incorrect cleaning materials have been used or encrusted boi...

Page 57: ...57 The Problem Solver NOTES...

Page 58: ...NOTES 58...

Page 59: ...ur call and your question will be answered promptly and courteously And you can call any time GE Answer Center service is open 24 hours a day 7 days a week Service Contracts 800 626 2224 You can have...

Page 60: ...he directions in the Use and Care Guide Damage to the product due to misuse or abuse Failure of the product if it is used for other than its intended purpose or used commercially Damage to product cau...

Reviews: