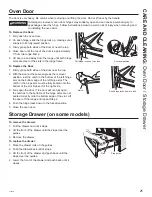
49-88075
19
Surface Units
WARNING
Ŷ
Be sure the controls are turned to OFF and the surface
units are cool before attempting to remove them.
Ŷ 'RQRWLPPHUVHWKHVXUIDFHXQLWVLQOLTXLGVRIDQ\NLQG
Ŷ 'RQRWFOHDQWKHVXUIDFHXQLWVLQDGLVKZDVKHU
Ŷ 'RQRWEHQGWKHVXUIDFHXQLWSOXJWHUPLQDOV
Ŷ 'RQRWDWWHPSWWRFOHDQDGMXVWRULQDQ\ZD\UHSDLU
the plug-in receptacle.
Ŷ 'RQRWSXOORQWKH6(16,7(037(&+12/2*<
sensor cap.
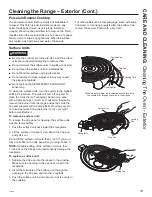
To clean the surface units, turn the control to the highest
setting for a minute. The coils will burn off any soil. To
clean the Sensi-Temp Technology Sensor cap, wipe
with a damp sponge or cloth. For cooked-on food spills,
remove the burner from the range and gently scrub the
FDSDQGVXSSRUWVZLWKDGDPSSODVWLFVFRXULQJSDG'R
not use steel wool. Allow the burner to dry over night
before re-installing it.
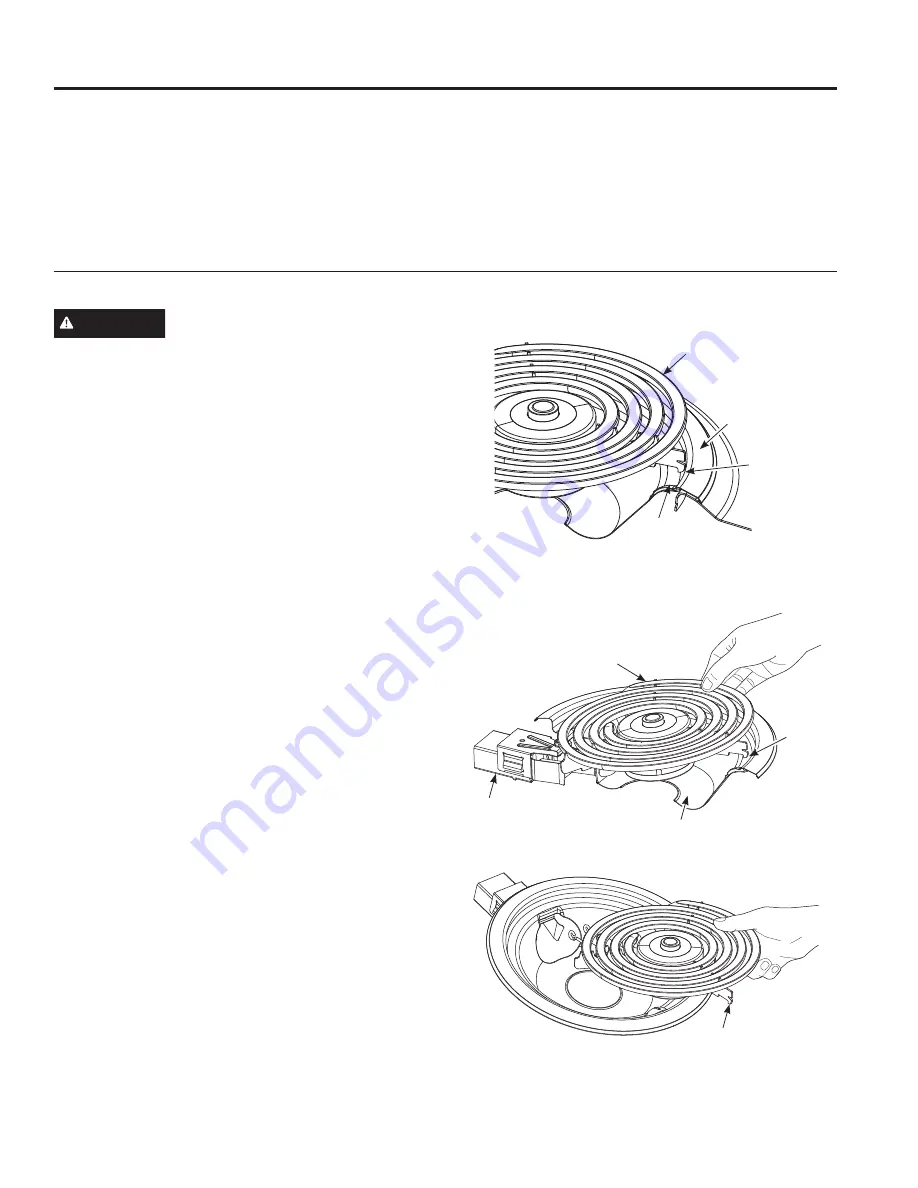
To remove a surface unit:
To remove the drip pans for cleaning, the surface units
must be removed first.
1. Push the surface unit back toward the receptacle.
2. Lift the surface unit about 1 inch above the drip pan
and pull it out.
'RQRWOLIWWKHVXUIDFHXQLWPRUHWKDQLQFK,I\RXGRLW
may not lie flat on the drip pan when you plug it back in.
NOTE:
Repeated lifting of the surface unit more than
1 inch above the drip pan can permanently damage the
receptacle.
To replace a surface unit:
1. Replace the drip pan into the recess in the cooktop.
Make sure the opening in the pan lines up with the
receptacle.
2. Insert the terminals of the surface unit through the
opening in the drip pan and into the receptacle.
3. Push the surface unit in and down so it rests evenly in
the cooktop.
Porcelain Enamel Cooktop
The porcelain enamel finish is sturdy but breakable if
misused. This finish is acid-resistant. However, any
DFLGLFIRRGVVSLOOHGVXFKDVIUXLWMXLFHVWRPDWRRU
YLQHJDUVKRXOGQRWEHSHUPLWWHGWRUHPDLQRQWKHILQLVK
If acids spill on the cooktop while it is hot, use a dry paper
towel or cloth to wipe it up right away. When the surface
has cooled, wash with soap and water. Rinse well.
For other spills such as fat spatterings, wash with soap
and water or cleansing powders after the surface has
cooled. Rinse well. Polish with a dry cloth.
Cleaning the Range – Exterior (Cont.)
CARE AND CLEANING:
Cleaning The Oven - Exterior
6XUIDFH8QLW
'ULS3DQ
Locking Tab
Cooktop Rim
6XUIDFH8QLW
Locking
Tab
'ULS3DQ
Receptacle
Locking Tab
When properly seated, the locking tab should lock onto
the cooktop rim through the notch in the drip pan.


