background image

7

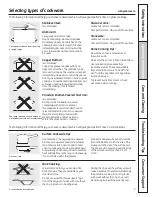
Selecting types of cookware.

GEAppliances.ca

The following information will help you choose cookware which will give good performance on glass cooktops.

Stainless Steel: 

recommended

Aluminum: 

heavy weight recommended

Good conductivity. Aluminum residues

sometimes appear as scratches on the

cooktop, but can be removed if cleaned

immediately. Because of its low melting

point, thin-weight aluminum should not 

be used.

Copper Bottom:

recommended

Copper may leave residues which can

appear as scratches. The residues can be

removed, as long as the cooktop is cleaned

immediately. However, do not let these pots

boil dry. Overheated metal can bond to glass

cooktops. An overheated copper bottom pot

will leave a residue that will permanently

stain the cooktop if not removed

immediately.

Porcelain Enamel-Covered Cast Iron: 

recommended

As long as the cookware is covered

completely with porcelain enamel, 

this cookware is recommended. Caution 

is recommended for cast-iron cookware 

that is not completely covered with 

smooth porcelain enamel, as it may 

scratch the glass-ceramic cooktop.

Glass-Ceramic: 

usable, but not recommended

Poor performance. May scratch the surface. 

Stoneware: 

usable, but not recommended

Poor performance. May scratch the surface.

Home Canning Tips: 

Be sure the canner is centered over 

the surface unit.
Make sure the canner is flat on the bottom.
Use recipes and procedures from 

reputable sources. These are available 

from manufacturers such as Ball

®

and 

Kerr

®

and the Department of Agriculture

Extension Service.
To prevent burns from steam or heat, 

use caution when canning.

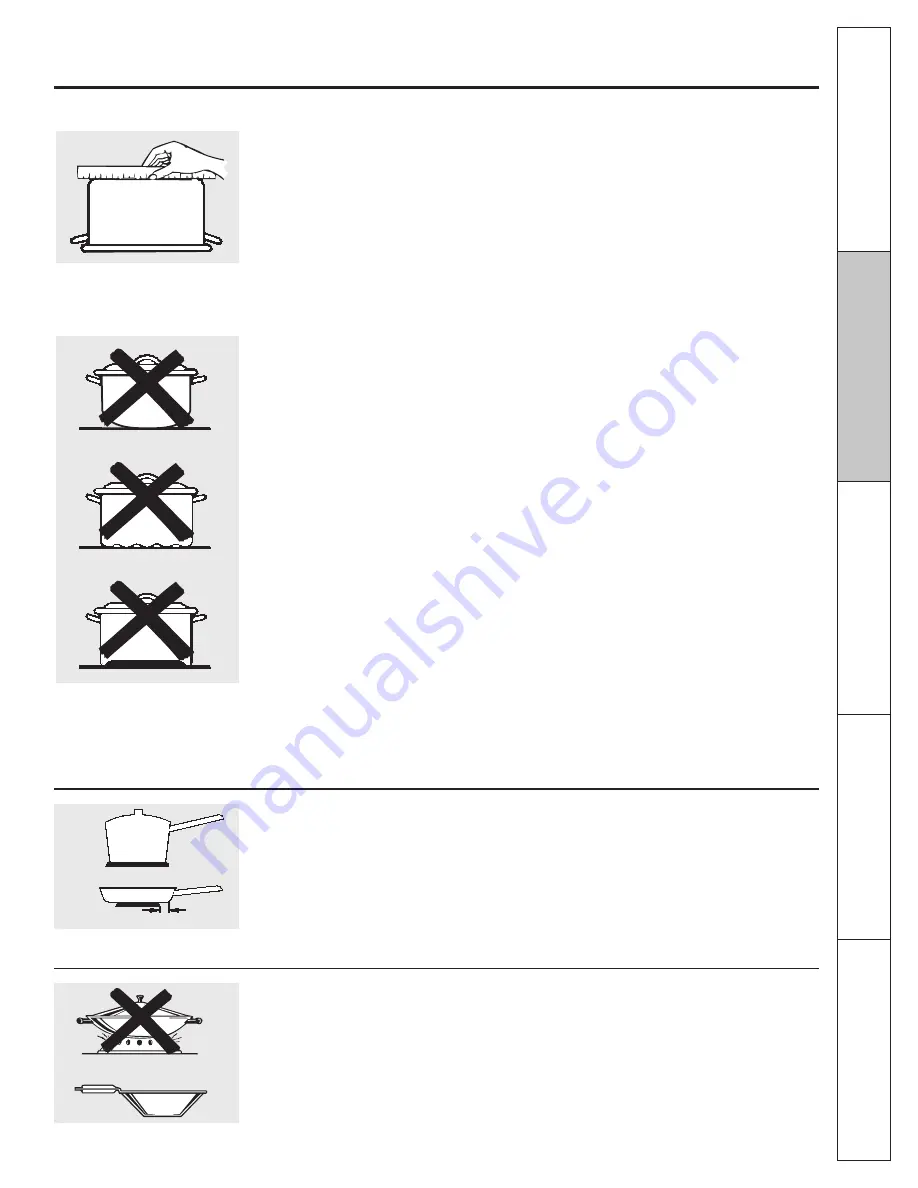
Check pans for flat bottoms by using 

a straight edge.

Pans with rounded, curved, ridged or

warped bottoms are not recommended.

Wok Cooking 

We recommend that you use only a flat-

bottomed wok. They are available at your

local retail store.

Do not use woks that have support rings. 

Use of these types of woks, with or without

the ring in place, can be dangerous. 

Placing the ring over the surface unit will

cause a buildup of heat that will damage 

the porcelain cooktop. Do not try to use 

such woks without the ring. You could 

be seriously burned if the wok tips over.

Use only flat-bottomed woks.

Use medium- or heavy-weight cookware.

Aluminum cookware conducts heat faster

than other metals. Cast-iron and coated

cast-iron cookware are slow to absorb heat,

but generally cook evenly at low to medium

heat settings. Steel pans may cook unevenly

if not combined with other metals.

For best cooking results, pans should be 

flat on the bottom. Match the size of the

saucepan to the size of the surface unit. 

The pan should not extend over the edge 

of the surface unit more than 2.5 cm 

1 inch.

Not over 1 inch

1

?

The following information will help you choose cookware which will give good performance on coil cooktops.

Surface Cookware Tips

Sa

fet

y I

ns

tru

cti

on

s

O

pe

ra

tin

g I

ns

tru

cti

on

s

Ca

re

 a

nd

 C

lea

nin

g

Tro

ub

les

ho

oti

ng

 Tip

s

Co

ns

um

er 

Su

pp

or

t

Summary of Contents for JCBS660

Page 1: ...pecial Steam Clean Features 18 Surface Units 24 6 8 Temperature Conversions 11 Thermostat 21 Timed Baking and Roasting 17 Care and Cleaning 31 Troubleshooting Tips 32 36 Accessories 37 Consumer Suppor...

Page 2: ...if the bracket is installed and engaged properly remove the storage drawer or kick panel and look underneath the range to see that the leveling leg is engaged in the bracket On models without a storag...

Page 3: ...scratching or impacting glass doors cook tops or control panels Doing so may lead to glass breakage Do not cook on a product with broken glass Shock fire or cuts may occur Cook meat and poultry thorou...

Page 4: ...king point oil may ignite resulting in fire that may spread to surrounding cabinets Use a deep fat thermometer whenever possible to monitor oil temperature To avoid oil spillover and fire use a minimu...

Page 5: ...catch fire on the glass cooktop even when it is not being used If the cooktop is inadvertentlyturned on theymayignite Heat from the cooktop or oven vent after it is turned off maycause them to ignite...

Page 6: ...its corresponding radiant element is turned on and will remain on until the surface has cooled below 65 5 C 150 F NOTE Hot surface indicator light will Come on when the surface unit is hot to the touc...

Page 7: ...om Use recipes and procedures from reputable sources These are available from manufacturers such as Ball and Kerr and the Department of Agriculture Extension Service To prevent burns from steam or hea...

Page 8: ...etween the surface control settings of Min and OFF but there is no power to the surface units Using the surface units Throughout this manual features and appearance may vary from your model How to Set...

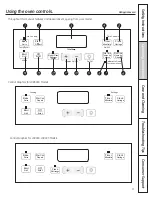
Page 9: ...635 Models Clock Horloge Minuterie Timer Display On Off TrueTemp Steam Clean Start Time Heure de D part Cook Time Nettoyage Vapeur Automatic Oven Four Automatique Temps de Cuisson Arr t Off Grill Broi...

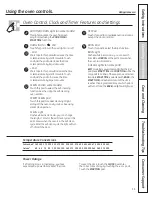
Page 10: ...ven was set for a timed oven operation and a power outage occurred the clock and all programmed functions must be reset The time of day will flash in the display when there has been a power outage Res...

Page 11: ...an cycle the light will turn off Unlatch the door OFF Pad Touch this pad to cancel ALL oven operations except the clock and timer BROIL Pad Touch this pad to select the broil function BROILLight Flash...

Page 12: ...roles B or C Turkey R or A Roasting R A or B The oven has aspecial lower rack R position just above theoven bottom Use it when extra cooking space is needed for example when cooking a large turkey The...

Page 13: ...wer rack several inches below the food Never entirely cover a rack with aluminum foil This will disturb the heat circulation and result in poor baking Do not place foods directly on the oven r Preheat...

Page 14: ...6 8 10 10 15 20 4 6 7 10 8 10 12 20 Steaks less than 1 9 cm 3 4 thick are difficult to cook rare Slash fat Chicken 1 whole cut up 900 g to 1 14 kg 2 to 21 2 lbs split lengthwise Breast B B 25 25 25 15...

Page 15: ...oven timing functions to work properly The time of day cannot be changed during a timed baking or self cleaning cycle Touch the CLOCK pad twice Touch the or pads If the or pads are not touched within...

Page 16: ...e tones by pressing the pad of the function you are using Power Outage If a flashing time is in the display you have experienced a power failure Reset the clock To reset the clock touch the CLOCK pad...

Page 17: ...urn off automatically Touch the OFF pad to clear the display if necessary Remove the food from the oven Remember even though the oven shuts off automatically foods continue cooking after controls are...

Page 18: ...he following sections Special features of your oven control 12 Hour Shut Off With this feature should you forget and leave the oven on the control will automatically turn off the oven after 12 hours d...

Page 19: ...ch the BAKE pad and tap the or pads to increase or decrease the temperature in 25F increments Touch the START ON pad When cooking is finished the display will change from to indicating that the oven h...

Page 20: ...e CLOCK pad until ON or OFF appears in the display ON indicates that the oven will automatically turn off after 12 hours OFF indicates that the oven will not automatically turn off See the Special Fea...

Page 21: ...e texture and flavor of baked goods For best results with your old favorite recipes use margarine butter or stick spreads containing at least 70 vegetable oil To Adjust the Thermostat NOTE 21 Safety I...

Page 22: ...remely sensitive to the fumes given off during the self cleaning cycle of any range Move birds to another well ventilated room Never force the latch handle Forcing the handle will damage the door lock...

Page 23: ...the Before a Clean Cycle section Latch the door NOTE Never force the latch If the oven is too hot you will not be able to slide the latch Allow the oven to cool Touch the CLEAN pad Touch the or pads...

Page 24: ...to count down on the display It will not be possible to open the door until the cycle ends or you press the Clear Off If door is opened during steam clean cycle dor will appear on the display and an...

Page 25: ...range is removed for cleaning servicing or any reason be sure the anti tip device is re engaged properly when the range is replaced Failure to take this precaution could result in tipping of the rang...

Page 26: ...If the door will not fully open the notches in the bottoms of the hinge arms are not seated correctly onto the bottom edge of the slot Lift the door off the range and repeat Step 2 Push the hinge lock...

Page 27: ...ge Storage Drawer Removal on some models Care and cleaning of the range To remove the storage drawer To replace the storage drawer Oven Heating Elements on some models Oven rack Do not clean the bake...

Page 28: ...hat lock into position when the cooktop is lifted up After cleaning under the cooktop with hot mild soapy water and a clean cloth lower the cooktop Be careful not to pinch your fingers To lower the co...

Page 29: ...ol pad it will scratch the surface To clean the stainless steel surface use warm sudsy water or a stainless steel cleaner or polish Always wipe the surface in the direction of the grain Follow the cle...

Page 30: ...s Before using the cooktop for the first time clean it with Ceramic Cooktop Cleaner This helps protect the top and makes cleanup easier Daily use of Ceramic Cooktop Cleaner will help keep the cooktop...

Page 31: ...f the glass lay a wet cloth on it for a few minutes then wipe clean with nonabrasive cleaners Cooktop Seal Glass surface potential for permanent damage Damage from Sugary Spills and Melted Plastic Tur...

Page 32: ...Cookware has been slid across the cooktop surface Areas of discoloration Food spillovers not cleaned See the Cleaning the glass cooktop section on the cooktop before next use Hot surface on a model T...

Page 33: ...home may Replace fuse or reset circuit breaker be blown or the circuit breaker tripped Oven controls improperly set See the Using the oven section On self cleaning models door If necessary allow the...

Page 34: ...cooking time temperature or cleaning time pad and desired clean time or delay start Display flashes bAd The installed connection Contact installer or electrician to correct miswire then linE with a fr...

Page 35: ...and on during cooking functions F and a number You have a function error code Press the OFF pad Put the oven back into or letter flash in operation the display If the function code repeats Disconnect...

Page 36: ...ean Oven door locked during Turn the Oven Temperature knob to OFF Allow cycle when you wanted cooking the oven to cool Never force the door latch handle to bake roast or broil Crackling or This is the...

Page 37: ...ad extra heavy duty oven racks NOW AVAILABLE for your range GE s innovative self cleanable porcelain coated oven racks Heavy Duty Durable Able to be cleaned in a self cleaning oven Visit www GEApplian...

Page 38: ...OWNERSHIP REGISTRATION P O BOX 1780 MISSISSAUGA ONTARIO L4Y 4G1 FOR CANADIAN CONSUMERS ONLY Please place in envelope and mail to Veuillez mettre dans une enveloppe et envoyez 38...

Page 39: ...39...

Page 40: ...damage caused by possible defects with this appliance Damage caused after delivery Product not accessible to provide required service What Mabe Will Not Cover Staple your receipt here Proof of the or...

Page 41: ...referred to qualified service personnel Caution must be exercised since improper servicing may cause unsafe operation You will find the nearest Mabe Service Center number in the yellow pages of your p...

Reviews: