background image

49-80669-2   04-13   GE

GEAppliances.com

Safety Information 

  . . . . . . . . . 2

Warranty

  . . . . . . . . . . . . . . . . . . . . . 4

Assistance / Accessories

  . . . 5

Using The Oven

Oven  Controls . . . . . . . . . . . . . . . . . . . 6
Special  Features   . . . . . . . . . . . . . . . . 8
Oven Racks . . . . . . . . . . . . . . . . . . . . . 9
Cookware . . . . . . . . . . . . . . . . . . . . . . . 9
Cooking Modes  . . . . . . . . . . . . . . . . 10

Cooking Guide . . . . . . . . . . . . . . . . . 11

Care and Cleaning

Control  Panel   . . . . . . . . . . . . . . . . . . 12
Oven  Exterior   . . . . . . . . . . . . . . . . . . 12
Stainless Steel Surfaces  . . . . . . . . 12
Oven  Interior . . . . . . . . . . . . . . . . . . . 12
Flat Racks . . . . . . . . . . . . . . . . . . . . . . 12
Maintenance . . . . . . . . . . . . . . . . . . . 13

Troubleshooting Tips

  . . . . . . 14

W

all O

ven

Built-In Electric

Write the model and serial  
numbers here:

Model #  __________________

Serial # ___________________

You can find them on a label  

on the side trim or on the front of 

the (lower) oven behind the oven 

door. 

Printed in the United States

Printed on 

Recycled Paper

For a Spanish version of this 
manual, visit our Website at 
GEAppliances.com.

Para consultar una version  
en español de este manual 
de instrucciones, visite 
nuestro sitio de internet 
GEAppliances.com.

JK5000 - 27" Single Wall Oven
JT5000 - 30" Single Wall Oven
JK5500 - 27" Double Wall Oven
JT5500 - 30" Double Wall Oven

Owner’s Manual

Summary of Contents for JK5000SFSS

Page 1: ...ectric Write the model and serial numbers here Model __________________ Serial ___________________ You can find them on a label on the side trim or on the front of the lower oven behind the oven door...

Page 2: ...the oven allow sufficient time for cooling first Other surfaces of the appliance may become hot enough to cause burns Potentially hot surfaces include the oven vent opening surfaces near the opening a...

Page 3: ...oven When using cooking or roasting bags in the oven follow the manufacturer s directions Pulling out the standard racks to their stop locks or the extension rack to its fully open position is a conv...

Page 4: ...d exclusive remedy is product repair as provided in this Limited Warranty Any implied warranties including the implied warranties of merchantability or fitness for a particular purpose are limited to...

Page 5: ...ice_and_support 24 hours a day any day of the year For greater convenience and faster service you can now download Owner s Manuals order parts or even schedule service on line Have a question or need...

Page 6: ...a countdown timer Press the Timer pad and the number pads to program the time in hours and minutes Press the Start pad The oven will continue to operate when the timer countdown is complete To turn th...

Page 7: ...tart pad The oven will continue to operate when the timer countdown is complete To turn the timer off press the Timer pad 9 Delay Time Delays when the oven will turn on Use this to set a time when you...

Page 8: ...ff Con oFF Sound Volume This feature allows the oven tone volume to be adjusted between high HI bEEP HI medium Std bEEP Std low Lo bEEP Lo and off oFF bEEP oFF Press the number 1 and 5 pads at the sam...

Page 9: ...ems on the oven floor may cause the oven to overheat resulting in damage to the oven and risk of damage or fire to cabinets Aluminum Foil Do not use aluminum foil to line oven bottoms The foil will tr...

Page 10: ...ong with air movement from the convection fan to improve browning and reduce cooking time It is not necessary to convert temperature Check food earlier than the recipe suggested time when using this m...

Page 11: ...avoid Broil Hi modes Broil skin side down first Watch food closely when broiling For best performance when broiling center food below the broil heating element Broil Lo Traditional Bake Convection Bak...

Page 12: ...When cleaning surfaces make sure that they are at room temperature Steam Clean Mode Steam clean is intended to clean small spills using water and a lower cleaning temperature than Self Clean To use t...

Page 13: ...l the bulb is securely in the ceramic socket 9 Slide the protective lens into the holder and push until the clips snap into the housing 10 Reconnect power Do not lift the door by the handle To remove...

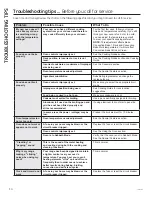
Page 14: ...r rack location suggestions Food being cooked in a hot pan Make sure cookware is cool Cookware not suited for broiling Use a pan specifically designed for broiling Aluminum foil used on the broiling p...

Page 15: ...the display You have a function error code Press the Cancel Off pad Allow the oven to cool for one hour Put the oven back into operation If the function code repeats Disconnect all power to the oven f...

Page 16: ...are or food in the oven will cause the oven to take longer to preheat Remove items to reduce preheat time Number of racks in oven Adding more racks to the oven will cause the oven to take longer to pr...

Reviews: