background image

Technical 
Publication

Direction 5162630
R

EVISION

 3

GE Healthcare
LOGIQ™ S6 

Service

 Manual

Copyright

©

 2006-2008 by General Electric Co.

GE Healthcare

Summary of Contents for LOGIQ S6

Page 1: ...Technical Publication Direction 5162630 REVISION 3 GE Healthcare LOGIQ S6 Service Manual Copyright 2006 2008 by General Electric Co GE Healthcare...

Page 2: ......

Page 3: ...E QUE L ANGLAIS IL INCOMBE AU CLIENT DE LE FAIRE TRADUIRE NE PAS TENTER D INTERVENTION SUR LES QUIPEMENTS TANT QUE LE MANUEL DE MAINTENANCE N A PAS T CONSULT ET COMPRIS LE NON RESPECT DE CET AVERTISSE...

Page 4: ...P R EM PERIGO A SEGURAN A DO T CNICO OPERADOR OU PACIENTE DEVIDO A CHOQUES EL TRICOS MEC NICOS OU OUTROS IL PRESENTE MANUALE DI MANUTENZIONE DISPONIBILE SOLTANTO IN INGLESE SE UN ADDETTO ALLA MANUTENZ...

Page 5: ...EN RHET EL HA A VEV SZOLG LTAT JA ANGOLT L ELT R NYELVRE TART IG NYT AKKOR A VEV FELEL SS GE A FORD T S ELK SZ TTET SE NE PR B LJA ELKEZDENI HASZN LNI A BERENDEZ ST AM G A KARBANTART SI K ZIK NYVBEN L...

Page 6: ...DELSE AF DENNE ADVARSEL KAN MEDF RE SKADE P GRUND AF ELEKTRISK MEKANISK ELLER ANDEN FARE FOR TEKNIKEREN OPERAT REN ELLER PATIENTEN DEZE ONDERHOUDSHANDLEIDING IS ENKEL IN HET ENGELS VERKRIJGBAAR ALS HE...

Page 7: ...E ELLER ANDRE FARER NINIEJSZY PODR CZNIK SERWISOWY DOST PNY JEST JEDYNIE W J ZYKU ANGIELSKIM JE LI FIRMA WIADCZ CA KLIENTOWI US UGI SERWISOWE WYMAGA UDOST PNIENIA PODR CZNIKA W J ZYKU INNYM NI ANGIELS...

Page 8: ...HAR BEHOV AV ETT ANNAT SPR K N ENGELSKA ANSVARAR KUNDEN F R ATT TILLHANDAH LLA VERS TTNINGSTJ NSTER F RS K INTE UTF RA SERVICE P UTRUSTNINGEN OM DU INTE HAR L ST OCH F RST R DEN H R SERVICEHANDBOKEN...

Page 9: ...vii GE HEALTHCARE DIRECTION 5162630 REVISION 3 LOGIQ S6 SERVICE MANUAL...

Page 10: ...r connections between pieces of electrical equipment calibrations and testing shall be performed by qualified GE Medical Systems personnel In performing all electrical work on these products GE will u...

Page 11: ...in any form in whole or in part without prior written permission of GE Medical Systems GE Medical Systems may revise this publication from time to time without written notice TRADEMARKS All products...

Page 12: ...GE HEALTHCARE DIRECTION 5162630 REVISION 3 LOGIQ S6 SERVICE MANUAL x This page was intentionally left blank...

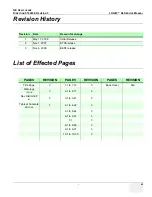
Page 13: ...2006 Initial Release 2 Nov 1 2007 BT08 release 3 Nov 6 2008 BEP4 release PAGES REVISION PAGES REVISION PAGES REVISION Title Page 3 1 1 to 1 16 3 Back Cover N A Warnings i to ix 3 2 1 to 2 11 3 Rev Hi...

Page 14: ...GE HEALTHCARE DIRECTION 5162630 REVISION 3 LOGIQ S6 SERVICE MANUAL xii...

Page 15: ...1 2 Purpose of Operator Manual s 1 3 Important Conventions 1 4 Conventions Used in Book 1 4 Product Icons 1 6 Introduction 1 9 Human Safety 1 9 Mechanical Safety 1 9 Electrical Safety 1 10 Lockout Ta...

Page 16: ...d Room Layout 2 9 CHAPTER 3 Installation Overview 3 1 Purpose of Chapter 3 3 1 Average Installation Time 3 1 Installation Warnings 3 2 Safety Reminders 3 5 Moving into Position 3 6 LCD Monitor Tilt Ca...

Page 17: ...g and Loading Presets for R6 x x 4 14 Basic Controls 4 17 Performance Tests 4 17 Mode Checks QG 4 18 Basic Measurements QG 4 18 ECG Checks 4 18 Cineloop Check QG 4 19 Backend Processor Checks 4 19 Pro...

Page 18: ...Rear Panel 5 17 Peripherals 5 17 Interconnect Cabling For forward production of BT08 or later with BEP4 5 18 Interconnect Cabling For forward production of BT08 or later 5 19 Interconnect Cabling 5 2...

Page 19: ...237 Brightness Adjustment BT08 or later and LS6 17 inch IPS Pro type LCD Upgrade systems 6 12 LCD Monitor 5169935 Contrast and Brightness Adjustment 6 15 LCD Touch Panel Adjustment 6 16 Cleaning the T...

Page 20: ...oading Steering Guide 8 6 Pre installation Procedures 8 9 Base System Installation Ghost and Application Load 8 13 Install Base System 8 13 Modify System Windows Settings 8 16 Installing R7 7 x Applic...

Page 21: ...emblies 9 24 Power Supply 9 25 Other Mechanical Assemblies 9 27 Misc Cables 9 29 Option 9 35 Probes 9 37 CHAPTER 10 Periodic Maintenance Overview 10 1 Purpose of Chapter 10 10 1 Why do Periodic Mainte...

Page 22: ...UAL xx Safety Test Overview 10 12 Grounding Continuity 10 15 Isolated Patient Lead Source Leakage Lead to Ground 10 19 Isolated Patient Lead Source Leakage Lead to Lead 10 22 Isolated Patient Lead Sin...

Page 23: ...ist 4 Chapter 4 Functional Checks Contains functional checks that must be performed as part of the installation or as required during servicing and periodic maintenance 5 Chapter 5 Theory Contains blo...

Page 24: ...U ASIA220 L6 220V PAL LCD Initial Release 5170314 OP CSL TYPE_A LCD KOREA L6 220V NTSC LCD Initial Release 5170218 OP CSL TYPE_A LCD ASIA120 L6 120V NTSC LCD Initial Release 5170354 OP CSL TYPE_A LCD...

Page 25: ...REVISION 3 LOGIQ S6 SERVICE MANUAL Section 1 1 Overview 1 3 1 1 6 Purpose of Operator Manual s The Operator Manual s should be fully read and understood before operating the LOGIQ S6 and also kept ne...

Page 26: ...Known or potential hazards are labeled in one of three ways NOTE Notes are used to provide important information about an item or a procedure Be sure to read the notes the information contained in a n...

Page 27: ...symbols may be used to make you aware of specific types of hazards that could possibly cause harm Some others make you aware of specific procedures that should be followed Some others make you aware o...

Page 28: ...ype CF heart in the box symbol IEC 878 02 05 indicates equipment having a floating applied part having a degree of protection suitable for direct cardiac contact ECG connector and Probes marked Type C...

Page 29: ...ition of the mains power switch Rear of system adjustment to mains switch ON indicates the power on position of the power switch CAUTION This Power Switch DOES NOT ISOLATE Mains Supply Standby indicat...

Page 30: ...e environmental pollution bodily injury or damage to any assets Probe BT08 or later Indicates the presence of hazardous substance s above the maximum concentration value Maximum concentration values f...

Page 31: ...Drive if installed WARNING WARNING WHEN THE UNIT IS RAISED FOR A REPAIR OR MOVED ALONG ANY INCLINE USE EXTREME CAUTION SINCE IT MAY BECAUSE UNSTABLE AND TIP OVER WARNING WARNING ULTRASOUND PROBES ARE...

Page 32: ...d with a three conductor AC power cable This must be plugged into an approved electrical outlet with safety ground If an extension cord is used with the system make sure that the total current rating...

Page 33: ...rks may be white depending on the system shipment timing 1 Possible Shock Hazard 2 Caution for devices near by the equipment 3 Caution for Transportation 4 Prescription Devices For USA Only 5 CE Marki...

Page 34: ...h i T o k y o J a p a n M O D E L S E R I A L M A N U F A C T U R E D V O L T S 120V 1P H A S E P O W E R 1200V A F R E Q U E N C Y 50 60H z C L A S S1 M O D E LN U M B E R C l a s s 1 C l a s s e 1...

Page 35: ...e NOTE The US Department of Transportation DOT has ruled that items that were saturated and or dripping with human blood that are now caked with dried blood or which were used or intended for use in p...

Page 36: ...ts from electrical fields magnetic fields electrostatic discharge and disturbances in the electrical power supply 1 4 2 Electrostatic Discharge ESD Prevention 1 4 3 CE Compliance The LOGIQ S6 unit con...

Page 37: ...okyo 191 8503 JAPAN Table 1 7 Phone Numbers for Customer Assistance Location Phone Number USA Canada GE Medical Systems Ultrasound Service Engineering 4855 W Electric Avenue Milwaukee WI 53219 Custome...

Page 38: ...GIQ S6 SERVICE MANUAL 1 16 Section 1 5 Customer Assistance 1 5 2 Contact Information cont d NOTE If this equipment does not work as indicated in the Operator Manual s contact your support center Have...

Page 39: ...llation of a LOGIQ S6 Included are descriptions of the facility and electrical needs to be met by the purchaser of the unit A checklist is also provided at the end of this section to help determine wh...

Page 40: ...and diameters can be a source of EMI which could degrade image quality These controls should be selected to minimize possible interface Table 2 9 Environmental Requirements for LOGIQ S6 Scanners Oper...

Page 41: ...ation We recommend that you use an analyzer Dranetz Model 606 3 or Dranetz Model 626 2 2 2 3 Inrush Current Inrush Current is not a factor to consider due to the inrush current limiting properties of...

Page 42: ...al installation must meet all current local state and national electrical codes 2 2 2 6 Unit Power Plug If the unit arrives without the power plug or with the wrong plug you must contact your GE deale...

Page 43: ...reason a unit will have noisy images Check grounding of the power cord and power outlet Replace all screws RF gaskets covers cores After you finish repairing or updating the system replace all covers...

Page 44: ...10 40 oC 50 104 oF 10 60 oC 14 140oF 40 60 oC 40 140 oF Humidity 30 85 non condensing 30 90 non condensing 30 90 non condensing Pressure 700 1060hPa 700 1060hPa 700 1060hPa Table 2 14 Operation and st...

Page 45: ...nections between pieces of electrical equipment products involved and the accompanying electrical installations are highly sophisticated and special engineering competence is required All electrical w...

Page 46: ...OGIQ S6 has three outlets inside the unit for on board peripherals Power outlets for other medical equipment and gel warmer Power outlets for test equipment and modem within 1 m 3 2 ft of unit Clean a...

Page 47: ...IQ S6 SERVICE MANUAL Section 2 3 Facility Needs 2 9 2 3 4 Recommended and Alternate Ultrasound Room Layout Recommended standard floor plan and a minimal floor plan for ultrasound equipment Figure 2 3...

Page 48: ...done while scanning continues With DICOM images can be archived stored and retrieved faster easier and at a lower cost 2 3 5 2 DICOM Option Pre installation Requirements To configure the LOGIQ S6 to w...

Page 49: ...gure 2 4 Worksheet for DICOM Network Information LOGIQ S6 Host Name AE Title Local Port IP Address Net Mask ROUTING INFORMATION ROUTER2 ROUTER3 ROUTER1 Destination IP Addresses GATEWAY IP Addresses De...

Page 50: ...GE HEALTHCARE DIRECTION 5162630 REVISION 3 LOGIQ S6 SERVICE MANUAL 2 12 Section 2 3 Facility Needs This page was intentionally left blank...

Page 51: ...lines for transporting the unit to a new site 3 1 2 Average Installation Time The LOGIQ S6 has been designed to be installed and checked out by an experienced service technician in approximately four...

Page 52: ...y be very cold or hot If this is the case allow the unit to acclimate before you turn it on It requires one hour for each 2 5 C increment it s temperature is below 10 C or above 40 C 3 1 3 1 Brake Ped...

Page 53: ...Bands 2 Lift the Cap up and off 3 Remove the six 6 Plastic Joints from the Outer Sleeves 4 Remove the Outer Sleeves 5 Remove the Monitor Sleeve 6 Remove the Box for Peripherals 7 Remove the Front and...

Page 54: ...packing sleeve whenever possible in case of shipment after unpacking Figure 3 6 Labels on Package Secure the LCD Sleeve with adhesive tape after placing it to the proper location Adhesive Tape Each s...

Page 55: ...n 30 V peak is present CAUTION Do not use a 20 Amp to 15 Amp adapter on the 120 Vac unit s power cord This unit requires a dedicated 20 A circuit and can have a 15 A plug if the on board peripherals d...

Page 56: ...of the unit Before moving store all loose parts in the unit Wrap transducers in soft cloth or foam to prevent damage Although LOGIQ S6 is a compact and mobile machine two people should move it over r...

Page 57: ...2630 REVISION 3 LOGIQ S6 SERVICE MANUAL Section 3 1 Overview 3 7 3 2 3 LCD Monitor Tilt Caution CAUTION Do NOT put your hand here Your fingers might be pinched when adjusting angle of the LCD monitor...

Page 58: ...IQ S6 Scanner is found on the label onto the rear lower of the scanner 3 3 3 EMI Protection This Unit has been designed to minimize the effects of Electro Magnetic Interference EMI Many of the covers...

Page 59: ...the transducer connector on the receptacle guide pin until it touches the receptacle mating surface c Twist the transducer twist lock lever to vertical position to lock it in place Twist the lever to...

Page 60: ...s already has been installed onto the scanner before shipment If it does not select the proper location to install the peripherals following the table below Figure 3 8 Peripherals Locations Table 3 18...

Page 61: ...pheral Connection cont d Check if the fixing belts are loosen If it is tighten the belts again to secure the peripheral s If necessary remove the peripheral from the device room to tighten the belts F...

Page 62: ...wer Supply Cable P9509EE Connected to power USB Serial Bridge Cable 2304621 For converting the signal of RS232C cable to USB cable connected to VCR1 on the Rear Panel AV Cable 2119874 Connected to Vid...

Page 63: ...0412LC 2294513 2294514 M12L PBT SMALL PARTS LINEAR H79842P H40412LD 2294510 2294511 7L NORYL ABDOMINAL SUPERFICIAL LINEAR H79862P H40412LF 2294520 2294521 10L NORYL SUPERFICIAL LINEAR H79872P H40412LG...

Page 64: ...supported by BT08 and later LOGIQ S6 models 4D10L SUPERFICIAL LINEAR Volume H44801GB 5121651 KTZ156836 4C ABDOMINAL CONVEX H4904PC 5131944 5123455 12L SUPERFICIAL LINEAR H40412LH 2295375 2295377 P2D C...

Page 65: ...iod s 21 33 Horizontal Period s 15 625 Pixel Clock MHz 49 50 Pixel Clock MHz 108 H Blank Width s 5 17 H Blank Width s 3 778 408dots H Sync Width s 1 62 H Sync Width s 1 037 112dots H Front Porch s 0 3...

Page 66: ...t be kept as part of the original system documentation This will ensure that all relevant safety and user informations are available during the operation and service of the complete system 3 5 1 Perip...

Page 67: ...amera expose connectors footswitch connector power connector and control connections for VCR printer and service tools This section indicates the pin assignment for each connector VZS Figure 3 10 Rear...

Page 68: ...Description 1 SVIDEO OUT IN YG Y Luma GND 2 SVIDEO OUT IN CG C Chroma GND 3 SVIDEO OUT IN Y Y Luma SIGNAL 4 SVIDEO OUT IN C C Chroma SIGNAL Table 3 24 Pin Assignment of VGA Connector Pin No Output Si...

Page 69: ...J 11 Modular 6 pin Table 3 26 Pin Assignment of Mini Jack for Footswitch Pin No Output Signal 1 SW1 WH 2 SW2 RD 3 SW3 GN 4 SW1 BK SW2 BK SW3 BK 5 Frame GND Table 3 27 Pin Assignment of Ethernet Connec...

Page 70: ...Pin Assignment of Composite Out B W BNC Connector Table 3 29 Pin Assignment of Mini Jack for Controlling B W Camera Pin No Output Signal 1 PRINT 2 Signal GND Table 3 30 Pin Assignment of Mini Jack fo...

Page 71: ...r Outlet Connector Circuit Breaker Circuit Breaker Table 3 33 Pin Assignment of BNC Connector Pin No Output Signal Description 1 Composite Video Color 2 Composite Video GND Table 3 34 Power Outlet Con...

Page 72: ...GE HEALTHCARE DIRECTION 5162630 REVISION 3 LOGIQ S6 SERVICE MANUAL 3 22 Section 3 5 Installation Paperwork This page was intentionally left blank...

Page 73: ...or DVD R Disk At least one transducer normally you should check all the transducers used on the system Table 4 36 Contents in chapter 4 Section Description Page Number 4 1 Overview 4 1 4 2 General Pro...

Page 74: ...ircuit Breaker Equipotential terminal at the rear of the System When power is applied to the Scanner and the Rear Circuit breaker is turned ON Power is distributed to the Fans Control panel Monitor In...

Page 75: ...B Mode screen or Patient screen no probes are connected is displayed on the monitor display 4 2 2 2 Power Up Sequence 1 The Start Up Screen will be shown on the Monitor display when the system is tur...

Page 76: ...EVISION 3 LOGIQ S6 SERVICE MANUAL 4 4 Section 4 2 General Procedure 4 2 2 3 Entering the Maintenance Mode cont d 4 Click on Exit 5 Enter the proper password to enter the maintenance mode 6 Click on OK...

Page 77: ...5162630 REVISION 3 LOGIQ S6 SERVICE MANUAL Section 4 2 General Procedure 4 5 4 2 2 3 Entering the Maintenance Mode cont d 7 Click on maintenance 8 Click on Exit to window Figure 4 15 Maintenance Figu...

Page 78: ...cription on how to Shutdown the system 4 2 3 1 Complete Power Shutdown 1 Press the ON OFF key at the front of the System for about two 2 seconds Refer to Figure 4 12 on page 4 3 2 Switch OFF the Main...

Page 79: ...while the system is booting c Mechanical ejection Insert the end of a paper clip into the hole while system power is OFF NOTE Be careful not to scratch the disk when wiping it off for cleaning NOTE Ke...

Page 80: ...omatic in some cases Manual ejection methods listed in preferred order of use are a Press EJECT button on the MOD while system is ON b Press and hold EJECT button while the system is booting c Mechani...

Page 81: ...ed on the same CD R MO DVD R disk as images The Archive Menu lists the images but does NOT list the presets stored on a CD R MO DVD R disk NOTICE Do not attempt to change use Regional Preset buttons f...

Page 82: ...stalling R7 x x Application Software for details Current Regional Preset is displayed under Utility System About Factory Default Regional Preset can be re loaded from Utility Systme About Additional A...

Page 83: ...blank CD R DVD R disk into the CD R DVD R device 2 Access to the Utility Menu on the Touch Panel and select Connectivity Removable Media 3 Select the removable media from media list 4 Type a name for...

Page 84: ...R DVD R device 2 Access to the Utility Menu on the Touch Panel and select System Backup Restore The Backup screen will be shown on the monitor 3 Select the item to back up either from Resource Files...

Page 85: ...e sure the restore process is displayed on the monitor Click OK The restore status for each item is displayed on the Result column 5 Make sure Finished OK is displayed on the Result column 4 2 5 7 Reg...

Page 86: ...ding on the system 4 2 6 1 Formatting MO DVD R Disk 1 Insert an empty blank MO DVD R disk into the MO DVD R device 2 Access to the Utility Menu on the Touch Panel and select Connectivity Tools The Too...

Page 87: ...MO DVD R device 2 Access to the Utility Menu on the Touch Panel and select System Backup Restore The Backup screen will be shown on the monitor 3 Select the item to back up either from Resource Files...

Page 88: ...s to the Utility Menu on the Touch Panel and select System Backup Restore The Restore sheet will be shown on the monitor 3 Select the item to restore either from resource Files 4 Click on Restore A me...

Page 89: ...mance Tests 4 3 2 1 Recommended Test Phantoms GE Healthcare recommends the RMI 430GS phantom but it is not required It is the most current phantom recommended to our field service personnel and provid...

Page 90: ...that affect this mode of operation M Mode Verify basic M Mode operation Check the basic system controls that affect this mode of operation Applicable Software Options Verify the basic operation of all...

Page 91: ...ripheral checks Step Task to do Expected Result s 1 Press Freeze Stop image acquisition 2 Press P1 or P4 on the Control panel The image displayed on the screen is printed on B W or Color printer depen...

Page 92: ...Services Destination Buttons Views Verifying and Printing a Device 4 3 11 Mechanical Functions 4 3 11 1 Brakes and Direction Locks Checks Check that brakes and direction swivel locks function as desc...

Page 93: ...ON 5162630 REVISION 3 LOGIQ S6 SERVICE MANUAL Section 4 2 General Procedure 4 21 4 Shift pedal no 3 to the right To engage swivel lock Table 4 42 Brakes and Direction swivel Lock Check Step Task to do...

Page 94: ...ARE DIRECTION 5162630 REVISION 3 LOGIQ S6 SERVICE MANUAL 4 22 Section 4 2 General Procedure 4 3 11 1 Brakes and Direction Locks Checks cont d Figure 4 29 Brake and Swivel Location Swivel Lock Brake Sw...

Page 95: ...ure 4 23 4 3 11 2 Caster and Caster Link Checks Check if For Caster No loose caster with it jacked up Smooth operation when moving the scanner For Caster Link Assy Effective brake and direction lock f...

Page 96: ...fore returning the scanner to customer for use 4 4 1 Software Configuration Checks Table 4 43 Software Configuration Checks Step Task to do Expected Result s 1 Check Date and Time setting Date and Tim...

Page 97: ...630 REVISION 3 LOGIQ S6 SERVICE MANUAL Section 4 5 Diagnostics 4 25 Section 4 5 Diagnostics 4 5 1 Service Software Menu Refer to Section 5 5 Common Service Platform 4 5 2 Utility Menu Refer to Section...

Page 98: ...ecial tests on the Power Supplies if there does not seem to be a problem that may be related to the Power Supplies 4 6 2 Power Supply Adjustment There are no adjustments on the power supplies The DC P...

Page 99: ...GE HEALTHCARE DIRECTION 5162630 REVISION 3 LOGIQ S6 SERVICE MANUAL Section 4 7 Site Log 4 27 Section 4 7 Site Log Table 4 44 Site Log DATE SERVICE PERSON PROBLEM COMMENTS...

Page 100: ...GE HEALTHCARE DIRECTION 5162630 REVISION 3 LOGIQ S6 SERVICE MANUAL 4 28 Section 4 7 Site Log Table 4 44 Site Log DATE SERVICE PERSON PROBLEM COMMENTS...

Page 101: ...ponent arrangement and subsystem function It also describes the Power Distribution System PDS and probes Table 5 45 Contents in Chapter 5 Section Description Page Number 5 1 Overview 5 1 5 2 Hardware...

Page 102: ...2630 REVISION 3 LOGIQ S6 SERVICE MANUAL 5 2 Section 5 2 Hardware Compatibility Matrix Section 5 2 Hardware Compatibility Matrix 5 2 1 Hardware Comaptibility BT06 or later 5 2 1 1 Plastic Mechanics Fig...

Page 103: ...GE HEALTHCARE DIRECTION 5162630 REVISION 3 LOGIQ S6 SERVICE MANUAL Section 5 2 Hardware Compatibility Matrix 5 3 5 2 1 2 Monitor Figure 5 31 Monitor...

Page 104: ...GE HEALTHCARE DIRECTION 5162630 REVISION 3 LOGIQ S6 SERVICE MANUAL 5 4 Section 5 2 Hardware Compatibility Matrix 5 2 1 3 Keyboard Figure 5 32 Keyboard...

Page 105: ...GE HEALTHCARE DIRECTION 5162630 REVISION 3 LOGIQ S6 SERVICE MANUAL Section 5 2 Hardware Compatibility Matrix 5 5 5 2 1 4 NEST boards Figure 5 33 NEST boards...

Page 106: ...449 MO Drive LOGIQ7 Y Y Y Y Y Y Y Y Y N Y Y N 1 3G PATA 5169668 MO Panel CSL LS6 Y Y Y Y Y Y Y Y Y Y Y Y Y 5122012 HDD Extension Cable LOGIQ7 Y Y Y Y Y Y Y Y Y Y N N N Used with 80GByte HDD only 23890...

Page 107: ...GE HEALTHCARE DIRECTION 5162630 REVISION 3 LOGIQ S6 SERVICE MANUAL Section 5 2 Hardware Compatibility Matrix 5 7 5 2 1 6 Rear I O Figure 5 35 Rear I O...

Page 108: ...GE HEALTHCARE DIRECTION 5162630 REVISION 3 LOGIQ S6 SERVICE MANUAL 5 8 Section 5 2 Hardware Compatibility Matrix 5 2 1 7 Power Supply Figure 5 36 Power Supply...

Page 109: ...GE HEALTHCARE DIRECTION 5162630 REVISION 3 LOGIQ S6 SERVICE MANUAL Section 5 2 Hardware Compatibility Matrix 5 9 5 2 1 8 Other Mechanics Figure 5 37 Other Mechanics...

Page 110: ...GE HEALTHCARE DIRECTION 5162630 REVISION 3 LOGIQ S6 SERVICE MANUAL 5 10 Section 5 2 Hardware Compatibility Matrix 5 2 1 9 Cables Figure 5 38 Cables...

Page 111: ...GE HEALTHCARE DIRECTION 5162630 REVISION 3 LOGIQ S6 SERVICE MANUAL Section 5 2 Hardware Compatibility Matrix 5 11 5 2 1 10 Option FRU Figure 5 39 Option FRU...

Page 112: ...uipped with BECOMP4 replaced Console is equipped with BECOMP3 5324060 5324065 5324064 5324062 5324063 5324061 5324059 LOGIQ S6 BT08 with BECOMP4 Model Numbers 5324060 5324065 5324064 5324062 5324063 5...

Page 113: ...r Differences The flowchart below describes how to differentiate LCD monitor type 5 2 2 3 How to identify MD 3000USB The label RS232C Not Available is attached on the back side of the printer Figure 5...

Page 114: ...I DSP PCI I F CHACOM I F TIDSP I F ADI DSP I F EUSC I F DDR SDRAM CHACOM CHACOM FPGA SPI I F Link Port Link Port EMIF MID BUS PCI Doppler Audio PCI PCI Bridge Intel 21152 PCI Cable to BEP SDRAM SH4 PC...

Page 115: ...tion 5 3 Block Diagrams and Theory 5 15 5 3 2 Block Diagram LOGIQ S6 For original HW config systems including initial release and upgraded BT08 systems Figure 5 44 Block Diagram LOGIQ S6 For original...

Page 116: ...ystem can be used for 2D Black and White imaging 2D Color Flow M Mode Black and White imaging Color M Mode Doppler a number of combinations of the above LOGIQ S6 is a digital beam forming system that...

Page 117: ...ls for manipulating the picture quality controls for use in Measure Analyze M A and loudspeakers for stereo sound output used during Doppler scanning inside the CRT monitor cover 5 3 6 External I O Re...

Page 118: ...wer Switch HD LED Foot Switch AC in AC out AC out RS232C MAB OP Panel OP Panel MAB Foot SW cont Power Switch HD LED J31 J32 J21 J16 J3 J33 Foot SW S Video in 7 USB_A7 J100 J102 Voice Command Mic 1 Mic...

Page 119: ...162630 REVISION 3 LOGIQ S6 SERVICE MANUAL Section 5 3 Block Diagrams and Theory 5 19 5 3 9 Interconnect Cabling For forward production of BT08 or later Figure 5 46 Interconnect Cabling For forward pro...

Page 120: ...SERVICE MANUAL 5 20 Section 5 3 Block Diagrams and Theory 5 3 10 Interconnect Cabling Figure 5 47 Internal Cable Connection CRT type for backward production before BT08 For original HW config systems...

Page 121: ...VICE MANUAL Section 5 3 Block Diagrams and Theory 5 21 5 3 10 Interconnect Cabling cont d Figure 5 48 Internal Cable Connection LCD type for backward production before BT08 For original HW config syst...

Page 122: ...GE HEALTHCARE DIRECTION 5162630 REVISION 3 LOGIQ S6 SERVICE MANUAL 5 22 Section 5 3 Block Diagrams and Theory 5 3 10 Interconnect Cabling cont d Figure 5 49 USB Connection For LS6 BECOMP4...

Page 123: ...GE HEALTHCARE DIRECTION 5162630 REVISION 3 LOGIQ S6 SERVICE MANUAL Section 5 3 Block Diagrams and Theory 5 23 5 3 10 Interconnect Cabling cont d Figure 5 50 USB Connection For CRT LCD...

Page 124: ...GE HEALTHCARE DIRECTION 5162630 REVISION 3 LOGIQ S6 SERVICE MANUAL 5 24 Section 5 4 Peripheral Compatibility Section 5 4 Peripheral Compatibility Figure 5 51 List of all supported printers...

Page 125: ...tion with iLinq The following sections contain a brief introduction of iLinq s features Detailed information can be found in the LOGIQ S6 User Manual Direction 2286866 100 5 5 2 1 Web Server Browser T...

Page 126: ...lish only At this time there is no multi lingual capability built into the Common Service Interface 5 5 3 2 Service Login 1 Touch Utility Service It will take about ten 10 seconds for activating 2 Mak...

Page 127: ...iLinq all access to the service interface is via the Network port A modem on the scanner is specifically intended for iLinq use Every access request whether successful or not will be logged into a se...

Page 128: ...the latest System Health Information The navigation bar at the top of the screen allows the user to select from several tools and applications NOTE When using the Common Service Desktop do NOT iconify...

Page 129: ...riven by the following high level requirements Simple filtering of the scanner log s with filtering capabilities being a function of login access permissions Logs are viewable by all service modes All...

Page 130: ...e System Power Temperature Probe Board and DICOM Figure 5 56 Error Log Sub Menus System Table 5 47 Error Log Descriptions Logs Descriptions System Software bug information for software engineering to...

Page 131: ...warning occurs 70 degrees or higher for Rack Temperature 1 60 degrees or higher for Rack Temperature 2 60 degrees or higher for HV Temperature Info The information occurred in the temperature with mar...

Page 132: ...entries for severity levels Severity 1 Color coded Green Severity 2 Color coded Blue Severity 3 Color coded Red Support the transfer of logs to local and or remote destinations 5 5 5 1 2 Informatics I...

Page 133: ...e sub menu System Logs to enter Filter menu Filtering is used to extract select data from the Error Logs There are four different error levels and 11 packages that can be filtered 5 5 5 5 Exit The sub...

Page 134: ...c tests return a report to the Service Platform The platform retains the report and allows for future viewing of the diagnostic logs 5 5 6 2 Proactive Diagnostics A system of self monitoring is largel...

Page 135: ...ality issues 5 5 8 Calibration The Calibration page is used to calibrate the system 5 5 9 Configuration The Configuration page is used to setup various configuration files on the system The Service Pl...

Page 136: ...36 Section 5 5 Common Service Platform 5 5 10 Utilities The Utilities page contains several miscellaneous tools These includes access to the problem solution database at the Online center 5 5 11 Repl...

Page 137: ...e Supports software upload via remote transmission Supports software upload via Service Platform Supports partial upgrades Supports de installs of the latest partial upgrade Supports remote activation...

Page 138: ...h a different user level this window is open You can modify the user level and password without restraint using one of the Utility function Utility Admin Users 5 6 2 For Service Login Window When you...

Page 139: ...ows desktop for maintenance access this window is open The user name and password are preset They can NOT be modified Figure 5 69 Service Login window Table 5 49 Password to enter windows desktop User...

Page 140: ...wer TRICON Front Upper for TRICON cooling Path B Bottom right Filter LV HV unit Bottom left for LV and HV unit cooling Path C Bottom right Filter NEST Assy Duct Rear upper for NEST Assy cooling Path D...

Page 141: ...tom of the NEST Assy for air flow path C One fan PC box inlet On the bottom of the PC Box for air flow path D Two fan PC box outlet On the upper of the PC Box for air flow path D One fan In the ATX PS...

Page 142: ...n 5 8 Monitor Video Specification 5 8 1 Input 5 8 1 1 CRT 5 8 1 2 LCD Table 5 50 CRT Specifidations Standard Format Signal Sync DDC Termination SVGA 800 x 600 75 Hz RGB 0 700 mV H TTL V TTL VESA DDC2...

Page 143: ...and PAL BDGHI 75 ohms General SVHS luma SVHS croma Composite RGB B W Line field 625 50 FH 15625 Hz FV 50 Hz Bandwidth 6MHz luma Signal 100 IRE 100 amplitude Sync 43 IRE Burst amplitude 21 5 IRE 10 cy...

Page 144: ...Video Specification 5 8 3 SVHS and Composite Video 5 8 3 1 Basic DC Parameters Parameters NTSC PAL White relative to blank 714 7 mV 700 7 mV Black relative to blank 54 7 mV 0 Sync relative to blank 28...

Page 145: ...and adjust the scanner These tests are optional You may use them to check the system for errors Table 6 57 Contents in chapter Section Description Page Number 6 1 Overview 6 1 6 2 Caster Brake Swivel...

Page 146: ...unction Adjustments Section 6 2 Caster Brake Swivel Function Adjustments 6 2 1 Brake Function Adjustment The LOGIQ S6 contains front Brake Swivel lock adjusters NOTICE The rear swivel lock function ca...

Page 147: ...ve the followings to access the brake swivel lock adjusters Crescent cover two rubber caps and screws Crescent Cover Bracket two screws Front lower cover four screws Pedal covers screws Figure 6 74 Cr...

Page 148: ...VICE MANUAL 6 4 Section 6 2 Caster Brake Swivel Function Adjustments 6 2 1 2 The Pedal does NOT lock even if the pedal is depressed 1 Loosen the left and right adjuster lock bolts Figure 6 76 The Left...

Page 149: ...wn Perform this procedure at the left adjusting bolt 3 Tighten the left and right adjusting lock bolts 4 Verify that lock is applied when the brake pedal is depressed If it is not repeat steps 1 to 3...

Page 150: ...NOT lock even if the pedal is locked in position cont d 2 Rotate the right adjusting bolts two turns as shown Perform this procedure at the left adjusting bolt 3 Tighten the left and right adjusting l...

Page 151: ...refer to Section 7 Troubleshooting This rewrites the probe data probe delay data for beam forming saved on the flash memories of DDBF 64 DDBF128 and BTRAP boards 1 Insert the Service Dongle into the...

Page 152: ...S6 SERVICE MANUAL 6 8 Section 6 3 Reloading the Probe Data Section 6 3 Reloading the Probe Data cont d 5 Enter the proper password to enter the maintenance mode 6 Click on OK 7 Click on maintenance Fi...

Page 153: ...ection 6 3 Reloading the Probe Data cont d 8 Click on Exit to window 9 The Windows Desktop screen is displayed 10 Erase the file D Pegasus target resources Pegasus ProbeInfo res 11 Erase the above fil...

Page 154: ...the Monitor check your DGVIC Part Number on the Utility Screen The typical setting value changes with its Part Number To enter this screen select Utility System About Additional About Information To...

Page 155: ...t according to the table below 5 Set the Brightness at 100 Then slowly decrease the Brightness until the inner box is no longer visible Please note that the monitor response to this adjustment logs be...

Page 156: ...80 Adjustment Change the value by directly pressing the button 2 and 3 and press the button 1 to exit 6 4 2 1 2 Contrast Range 0 100 Property Less Contrast More Contrast Factory default 100 Adjustmen...

Page 157: ...he value in Advanced Menu according to the procedure below Go into the Color Temperature Menu 1 Press and hold the button 1 for 15 seconds and the Advanced Menu appears 2 Press the button 3 once to se...

Page 158: ...Press the button 3 3 times to select Return at the lower left end 9 Press the button 1 to go back to the Advanced Menu 10 Press the button 3 4 times to select Exit at the lower left end 11 Press the...

Page 159: ...u c Verify that Temperature is 15000 If it is not increase or decrease temperature to press the adjustment button 3 or 2 d Press the button 1 again for confirmation e Press the button 3 Once The secon...

Page 160: ...e 17 inch LCD monitor you can use Auto Adjust function Also 640 x 480 dots pictures must be displayed on the LCD monitor to function Auto Adjust correctly The LCD touch panel screen is not practically...

Page 161: ...LCD Adjustments 6 17 6 4 4 LCD Touch Panel Adjustment cont d 1 Remove the OP side R Cover to access 2 Access to the OSD Menu display button located at backside of the LCD Figure 6 92 Accessing to OSD...

Page 162: ...ection 6 4 Monitor and LCD Adjustments 6 4 4 LCD Touch Panel Adjustment cont d 3 OSD Menu is shown on the LCD screen Figure 6 93 OSD Menu Brightness Control Menu Contrast Adjust Menu Color Adjust Menu...

Page 163: ...LCD Touch Panel Adjustment cont d 4 Move the cursor to execute Auto Adjust 5 Make sure that the Geometry is selected then the Menu Selection Button 6 LCD display Auto Adjustment procedures will be st...

Page 164: ...the Auto Adjustment procedures the following menu is displayed on the LCD 8 Make sure that the LCD displacement is fixed and shown at the center location 9 If it is fixed appropriately go on to the n...

Page 165: ...he scanner 2 Place your fingers onto the notches of the trackball retainer ring 3 Rotate the retainer ring counterclockwise until it can be removed from the keyboard 4 Lift off the inner retainer and...

Page 166: ...or dust from the trackball housing rollers and small ball using a cleaner or cotton bud NOTICE When cleaning the trackball housing make sure not to spill or spray any liquid into the trackball housing...

Page 167: ...two rollers using a cleaner or cotton bud NOTICE When cleaning the roller make sure not to spill or spray any liquid into the trackball housing Keyboard or system Use either ethanol isopropyl alcohol...

Page 168: ...er into the housing with its stopper facing down Lift off the inner retainer and trackball from the keyboard 10 Install the trackball retainer ring onto the inner retainer then rotate it clockwise unt...

Page 169: ...from the factory In case of special needs such as scanner upgrade refer to each instructions documentations for proper setting Figure 6 103 A Example of DipSwitch Setting Figure 6 104 Bit Setting for...

Page 170: ...5 h 6 h 7 h O N 1 2 3 4 5 6 7 8 O N 1 2 3 4 5 6 7 8 O N 1 2 3 4 5 6 7 8 O N 1 2 3 4 5 6 7 8 O N 1 2 3 4 5 6 7 8 O N 1 2 3 4 5 6 7 8 O N 1 2 3 4 5 6 7 8 O N 1 2 3 4 5 6 7 8 O N 1 2 3 4 5 6 7 8 O N 1 2...

Page 171: ...nd Dip Switch Setting 6 27 6 6 2 Jumper Setting 6 6 2 1 HDD Parallel Type Always set the jumper between MASTER pins 6 6 2 2 HDD SATA Type Always set the jumper between 1 5Gb s operation pins Figure 6...

Page 172: ...E is not allowed to modify dip switch setting Following setting is documented for purpose of troubleshooting by FSE 6 6 3 1 Mitsubishi MD 3000 VCR Dip Switch Setting 6 6 3 2 Accessing Dip Switch Modul...

Page 173: ...e VCR to access the dip switch 6 6 4 CP30D Dip Switch Setting This section describes CP30D Dip Switch setting Field Service Engineer FSE is not allowed to modify dip switch setting Following setting i...

Page 174: ...the system s location site is affected Issue 1 Adjust the system time manually at the start of DST and again at the conclusion Issue 2 If the system relies on the automatic DST feature in Microsoft Wi...

Page 175: ...ng Time DST New Dates 6 31 6 7 4 2 To check or set the system time 1 From the touch panel press Utility System 2 Select Date Time 3 On the Date and Time Properties screen select the Date Time tab 4 Se...

Page 176: ...GE HEALTHCARE DIRECTION 5162630 REVISION 3 LOGIQ S6 SERVICE MANUAL 6 32 Section 6 7 Daylight Saving Time DST New Dates This page was intentionally left blank...

Page 177: ...tic testability can be discussed Provides a top level model that describes the confidence building aspect of the diagnostics Provides a logical step by step approach to system check out and fault isol...

Page 178: ...GE HEALTHCARE DIRECTION 5162630 REVISION 3 LOGIQ S6 SERVICE MANUAL 7 2 Section 7 1 Overview This page was intentionally left blank...

Page 179: ...prior to shipment Under no circumstance should a part or equipment with visible body fluids be taken or shipped from a clinic or site for example body coils or an ultrasound probe The purpose of the r...

Page 180: ...NG DO NOT TOUCH ANY BOARDS WITH INTEGRATED CIRCUITS PRIOR TO TAKING THE NECESSARY ESD PRECAUTIONS 1 Always connect yourself via an arm wrist strap to the dedicated ground point located on the rear of...

Page 181: ...for software loading Table 8 61 Software Loading Procedure Guide BTxx BT06 BT08 Release Version R6 1 2 R6 2 2 R6 2 3 R7 6 0 R7 6 1 R7 7 0 BECOMP Type BECOMP3 BECOMP4 See Note Application CD GPN 51769...

Page 182: ...GE HEALTHCARE DIRECTION 5162630 REVISION 3 LOGIQ S6 SERVICE MANUAL 8 4 Section 8 2 Software Loading Procedure Guide This page was intentionally left blank...

Page 183: ...pplication load This procedure is NOT intended for upgrades Follow appropriate manuals for upgrade procedures 8 3 2 Parts Required Refer to Section 8 2 Software Loading Procedure Guide 8 3 3 Time Requ...

Page 184: ...ages should provide detailed guide of the system and application installation procedures Figure 8 112 BT08 Software Loading Procedures 8 3 5 PRE INSTALLATION PROCEDURES 8 3 6 BASE SYSTEM INSTALLATION...

Page 185: ...n such case patient image data preset parameters and customer data will be maintained Nonetheless for safe keeping customer data it is recommended to back up all data prior to R7 7 x installation In c...

Page 186: ...value is no password just press enter key 5 If FE cannot see login window for Service Platform then installation of the platform have failed FE must double check the installation setting and repeat gh...

Page 187: ...he current version All Not Finalized Media must be finalized before the system is upgraded to BT08 8 3 5 3 Operator Login Password 1 The Operator Login Password will be deleted even if the BECOMP is n...

Page 188: ...on the touch panel and click the TCP IP tab 2 Write down the following parameters Figure 8 117 TCP IP Screen Table 8 63 Saving Connectivity Parameters Descriptions Entry for Stand Alone System Comput...

Page 189: ...re Loading Procedures R7 7 x or later with BEP4 8 11 8 3 5 5 Software Option 1 Touch Utility Admin 2 Click on System Admin tab and write down HW Number and Installed Option Keys Figure 8 118 System Ad...

Page 190: ...istration 1 Select Utility Connectivity Button 2 Write down the printer names which are registered to Print1 through Print4 3 Click on to add Printflow View Figure 8 119 Button Setting Screen Table 8...

Page 191: ...s NOTE It takes approx 25 minutes to complete software loading It is longer than software loading to the BEP3 installed system Slow response or delayed display is normal during software loading 8 3 7...

Page 192: ...later with BEP4 8 3 7 Install Base System cont d 4 The following screen appears Press B then Enter to initialize the C drive Starting loading Base Image Software The following appears CAUTION If you s...

Page 193: ...em cont d 5 When complete Ghost installation the following screen appears Eject the Base System Software Load Image DVD from the drive 6 To restart the system press Ctrl Alt DEL key at the same time T...

Page 194: ...7 Audio Load from c windows system32 drivers n a just load Restart System Drive Letter Automatic Setting but check desktop icon if not DVD Drive G Matrox for CRT Check off automatic pop up window Set...

Page 195: ...P4 8 17 8 3 8 1 UPS Setting UPS setting is done by Ghost automatically and no manual setting is necessary The following window appears Click on OK The following screen may appears few times Click on Y...

Page 196: ...following message appears 1 Click on OK 2 Check the Drive Letter is set as below from Windows Explorer DVD Drive is assigned to G MOD Drive is assigned to H Drive F Swap is removed 3 If any Drive Let...

Page 197: ...8 3 Matrox for CRT Resolution setup For CRT Monitor System ONLY 1 Drag and drop the taskbar into the desktop 2 Click on in the task tray to show the MatroxPowerDesk SE icon 3 Right click on MatroxPow...

Page 198: ...on setup cont d 4 Select Multi Desplay Setup 5 When the setting dialog is displayed click on Use advanced Matrox display controls option then click on Independent mode 6 Set 800 x 600 75Hz as Display...

Page 199: ...tup cont d 9 Click on Yes button on the confirmation dialog 10 Right click on the Desktop and select Properties from the popup menu 11 When the Display Properties Dialog is displayed select the Settin...

Page 200: ...refresh rate is 75Hertz 16 Click on Cancel button to close the Advanced Settings dialog 17 Click on the icon that is displayed as 2 18 Verify that Screen Resolution for Display2 is 640x480 19 Click on...

Page 201: ...k on My Computer then right click on Properties 2 The System Properties window appears Select Hardware Divice Manager 3 Verify that X or is not displayed Figure 8 135 My Computer Properties Figure 8 1...

Page 202: ...tories of C WINDOWS SYSTEM32 or C WINDOWS SYSTEM32 DRIVERS If they are not found search them using a windows search function 5 Close the window 6 Go to 8 3 8 4 Hardware Device Check 8 3 8 5 LAN Parame...

Page 203: ...RVICE MANUAL Section 8 3 Software Loading Procedures R7 7 x or later with BEP4 8 25 8 3 8 5 LAN Parameter Setting cont d 5 When the following window appears right click on Cancel 6 Close all windows F...

Page 204: ...3 8 6 TCP IP Filter Setup 1 On the desktop left click on My Network Places then right click on Properties 2 Double click Local Area Connection or Local Area Connection 2 if you do NOT find Local Area...

Page 205: ...E DIRECTION 5162630 REVISION 3 LOGIQ S6 SERVICE MANUAL Section 8 3 Software Loading Procedures R7 7 x or later with BEP4 8 27 8 3 8 6 TCP IP Filter Setup cont d 4 Click Advanced button Figure 8 142 Go...

Page 206: ...CARE DIRECTION 5162630 REVISION 3 LOGIQ S6 SERVICE MANUAL 8 28 Section 8 3 Software Loading Procedures R7 7 x or later with BEP4 8 3 8 6 TCP IP Filter Setup cont d 5 Click Options tab Figure 8 143 Opt...

Page 207: ...30 REVISION 3 LOGIQ S6 SERVICE MANUAL Section 8 3 Software Loading Procedures R7 7 x or later with BEP4 8 29 8 3 8 6 TCP IP Filter Setup cont d 6 Select TCP IP Filtering then click Properties button F...

Page 208: ...ends on the network card installed in the PC box At first check mark Enable TCP IP Filtering All adapters Check mark Permit Only in TCP ports box Click Add button Enter 21 port number as the TCP Port...

Page 209: ...OK buttons for all opened window to complete the TCP IP Filter Setup 9 The following dialog box appears Click No to proceed the other settings After completion of all system checks the system is shut...

Page 210: ...are Loading Procedures R7 7 x or later with BEP4 8 3 8 7 Date and Time Setting 1 Select Start Settings Control Panel Date and Time I 2 Click on Time Zone tab 3 Select the appropriate time zone Then cl...

Page 211: ...Loading Procedures R7 7 x or later with BEP4 8 33 8 3 8 7 Date and Time Setting cont d 5 Set the current date and time 6 Click on Apply 7 Click on OK to close the Date and Time window 8 Select Start...

Page 212: ...anner The windows desktop appears 2 Insert the Application Software CD ROM into the DVD drive 3 Click on My Computer then double click on G Drive icon NOTICE You must install BT08 Base image before Ap...

Page 213: ...firmation Are you sure press the Y key again NOTE Press the N key to cancel this procedures and to power OFF the system NOTE When the Information Window appears asking you to select OK do nothing This...

Page 214: ...me Enable DHCP IP Address Subnet Mask Default Gateway Same as Serial Number OFF restore customer setting restore customer setting restore customer setting Patient Database Check Utility Connectivity D...

Page 215: ...s tab Installed Service Default Input Language Advanced tab Language JPN Japanese Japan Japanese Keyboard Japanese Japanese Language For Russian Greek Only Utility System General Language Regional Opt...

Page 216: ...version 1 Touch the Utility button on the Touch Panel NOTE The Operator Login window appears Select adm Administrator for the Operator field Adm Administrator will be shown in the Operator field as d...

Page 217: ...About tab The software version will be shown on the monitor as shown Confirm the following Software Version R7 7 x Preset Region Americas Europe Asia Japan or None Image Part Number described on the B...

Page 218: ...omputer name IP Address Subnet Mask and Default Gateway are proper ones which you wrote down in section 1 5 5 Saving Connectivity 6 Click on OK for confirmation dialog box NOTICE The computer name is...

Page 219: ...g Procedures R7 7 x or later with BEP4 8 41 8 3 10 2 Computer Name and Connection Settings cont d 7 Touch Scan on the Touch Panel to return to the scan screen 8 Shut down the scanner 9 Power ON the sc...

Page 220: ...cover of LCD as shown in the figure below NOTE GA500C s GPN 5261237 is on the Identification Label If the Identification label is not on the LCD rear cover it is conventional LCD GA500 Go to 8 3 10 3...

Page 221: ...ture menu c Verify that Temperature is 15000 If it is not increase or decrease temperature to press the adjustment button 3 or 2 d Press the button 1 again for confirmation e Press the button 3 Once T...

Page 222: ...adjustment button 2 b Press the button 1 Once The brightness display disappears NOTE Only brightness adjustment is necessary on new LCD GA500C 8 3 10 4 Software Option Check 1 Touch Utility Admin 2 Cl...

Page 223: ...ith BEP4 8 45 8 3 10 5 VCR Parameters Setting for the VCR equipped system ONLY 1 Touch Utility System 2 Click on Peripherals tab 3 Set the proper parameters PAL or NTSC VCR type 4 Shut down the scanne...

Page 224: ...y or enter by Japanese Patient name Exam comment in Patient screen and Worksheet Report Direct Report free text Insert Text Annotation Annotation Library Error Warning message DICOM Worklist Query Ret...

Page 225: ...x or later with BEP4 8 47 6 In Utility System General set the Language as JPN Save this setting but do not reboot the system yet 8 3 10 6 Regional Setup For the system with language other than English...

Page 226: ...guage other than English ONLY cont d 7 Press Regional Options under Standards and Formats select Japanese under Location select Japan Press Apply 8 Select the Language tab press Details under Installe...

Page 227: ...system yet press OK Press Save and Exit the Utility screen 10 Reboot the system 11 In Utility System General press Regional Options Select Language Tab and press Details Remove English under Installe...

Page 228: ...h ONLY cont d 15 To type Japanese press Alt right side of the Escape key to start IME Input Method Editor You can use the following short cut keys F6 key Hiragana F7 key Katakana F9 key alphameric two...

Page 229: ...e other than English ONLY cont d For Russian or Greek Languages 1 In Utility System General set the Language as Russian or Greek Save this setting but do not reboot the system yet 2 Press Regional Opt...

Page 230: ...then select Russian or Greek in the Language for non Unicode programs pull down menu Press Apply Answer Yes to use files already loaded on the hard disk then answer No to not reboot the system yet pr...

Page 231: ...language other than English ONLY cont d For non Russian Greek Languages 1 Press Regional Options select the Language tab press Details and comfirm default input Languarge to English United States Int...

Page 232: ...nguage for non Unicode programs pull down menu Press Apply Answer Yes to use files already loaded on the hard disk then answer No to not reboot the system yet press OK Press Save and Exit the Utility...

Page 233: ...R7 7 x or later with BEP4 8 55 8 3 10 7 Regional Setup For the system with English language only 1 Go to Utility System General 2 Press Regional Options button 3 The Regional and Language Options scr...

Page 234: ...ith BEP4 8 3 10 7 Regional Setup For the system with English language only cont d 5 The Text Services and Input Languages window pops up On BT08 or later version Default input language becomes English...

Page 235: ...glish language only cont d 6 If Default input language was English United States US before installing the application change the setting to English United States US and press OK to close the window Fi...

Page 236: ...e power switches of the printer and scanner are turned ON 2 Select Utility Connectivity Button 3 Select the Printer1 button and select the user defined printer which has been recorded in 1 5 7 Printer...

Page 237: ...ify that the user defined printer is added in Printflow View Example shown UP D23MD 6 For UP D23 When upgrading to BT08 updated printer driver may be loaded and assigned Before assigning Print Button...

Page 238: ...lick Additional About Information 11 Check the region name of Preset Region Rquires reboot If it is None skip this section 12 Click Reload Factory Default button 13 Click OK on confirmation dialog box...

Page 239: ...VICE MANUAL Section 8 3 Software Loading Procedures R7 7 x or later with BEP4 8 61 8 3 10 9 Regional Preset cont d 14 Click the button Reload Preset corresponding you noted 15 Click OK on confirmation...

Page 240: ...REVISION 3 LOGIQ S6 SERVICE MANUAL 8 62 Section 8 3 Software Loading Procedures R7 7 x or later with BEP4 8 3 10 9 Regional Preset cont d 16 Check Preset Region Requires reboot is right region you sel...

Page 241: ...3 11 Functional Check 8 3 11 1 Service Platform 1 Click on Utility Service It will take about ten 10 seconds for activating 2 Make sure that CAPS is OFF should be dimmed for password entry performed l...

Page 242: ...Platform Version is 2 2 0Q 9 Click on x located at the upper right corner of the service platform screen to close the Service Platform and return to the scan panel CAUTION If the Login window for Ser...

Page 243: ...in the following modes and ensure that no artifacts or no problems are found in B mode Color FLow Pulsed Doppler M mode CW option 4 Install the removed parts in the reverse order of removal 8 3 11 3...

Page 244: ...GE HEALTHCARE DIRECTION 5162630 REVISION 3 LOGIQ S6 SERVICE MANUAL 8 66 Section 8 3 Software Loading Procedures R7 7 x or later with BEP4 This page was intentionally left blank...

Page 245: ...available in part hub FRU 2 Replacement part available from the manufacturer lead time involved Int Internal I O Input Output KB Keyboard LCD Liquid Crystal Display MON Monitor PAT Patient PC Persona...

Page 246: ...1 GELAQUASONIC GEL U0403BD 1 1 1 1 1 1 1 1 1 1 1 1 1 1 1 MSDS FOR KAO ACOUSTIC GEL 5306541 1 MSDS FOR PARKER AQUASONIC100 2384142 1 1 1 1 1 1 1 1 1 1 1 1 1 1 1 CD R Media 700MB 5118386 1 1 1 1 1 1 1...

Page 247: ...V PAL Tall Height OP CSL TYPE_C KOREA LS6 220V NTSC LCD 5324065 1 220V NTSC Standard Height OP CSL TYPE_C CHINA LS6 5324060 1 220V PAL Standard Height LS6 BT08 JPN 5324066 LS6 BT08 ASIA 120 5324066 9...

Page 248: ...GB 5306528 DDR 2 667 1GBx1 1 1 3 SATA HDD 160GB 5306526 Serial ATA interface both Signal and Power connectors are SATA 1 1 4 PCI Express Graphic board 5306525 Matrox P690 PCI Express Slot 1 1 SVP BECO...

Page 249: ...9384 1 GELAQUASONIC GEL U0403BD 1 1 1 1 1 1 1 1 1 1 1 1 1 1 1 MSDS FOR KAO ACOUSTIC GEL 2384010 1 MSDS FOR PARKER AQUASONIC100 2384142 1 1 1 1 1 1 1 1 1 1 1 1 1 1 1 CD R Media 700MB 5118386 1 1 1 1 1...

Page 250: ...ASIA CALA220 TALL LS6 5264909 1 1 1 1 220V PAL Tall Height OP CSL TYPE_B KOREA LS6 5265707 1 220V NTSC Standard Height OP CSL TYPE_B CHINA LS6 5272246 1 220V PAL Standard Height LS6 BT08 JPN 5265960...

Page 251: ...tion of BT08 or later including the LCD field Upgrade system to BT08 or later Model Name GA500C 1 1 1 LCD ARM2 5257403 for use with 17 IPS PRO type monitor only 1 1 2 EBUS 4T ASSY 5182215 Upper EBUS f...

Page 252: ...ead for L7 and LS6 5257226 for forward production of BT08 or later 1 1 8 Cable13 for BulkHead 5257231 for forward production of BT08 or later 1 1 9 Cable25 for BulkHead 5257233 for forward production...

Page 253: ...1 LOGIQ 7 WEEE instruction 5143413 1 1 1 1 1 1 1 1 1 WARRANTY CARD C ASSY P9889AH 1 LOGIQ S6 Highlight Document with all probe data 5165006 1 AIUM Safety Pamphlet 5118349 1 1 AIUM Safety Pamphlet Lice...

Page 254: ...ASSY P9889AH 1 LOGIQ S6 Highlight Document with all probe data 5165006 1 AIUM Safety Pamphlet 5118349 1 1 AIUM Safety Pamphlet License 5123992 1 1 AC CORD 100V JPN W CLAMP 2371416 1 AC CORD 100V USA...

Page 255: ...N 5162630 REVISION 3 LOGIQ S6 SERVICE MANUAL Section 9 5 Renewal Parts List for Original LOGIQ S6 BT06 9 11 9 5 2 Plastic Covers Figure 9 193 Plastic Covers 1 2 3 4 5 6 7 8 9 10 11 12 13 14 15 16 17 1...

Page 256: ...T BUMPER L6 5168868 1 2 9 OP PROBE HOLDER L6 5175882 without gel holder 1 2 10 FRONT COVER ASSY L6 5168957 1 2 11 FRONT BASE COVER ASSY L6 5170181 1 2 12 SIDE COVER R ASSY L6 5169002 1 2 13 SIDE COVER...

Page 257: ...ing parts 31 41 1 1 31 MON REAR WSP ASSY 2303930 rear cover of monitor 1 1 32 MON CAP ASSY 2303932 cap to cover screws 1 2 33 MON FRONT ASSY 2303929 3 front cover of monitor 1 2 34 SPEAKER BRACKET ASS...

Page 258: ...THCARE DIRECTION 5162630 REVISION 3 LOGIQ S6 SERVICE MANUAL 9 14 Section 9 5 Renewal Parts List for Original LOGIQ S6 BT06 9 5 4 LCD Monitor Figure 9 195 LCD Monitor 50 51 52 53 54 55 56 57 58 59 60 6...

Page 259: ...REAR LCD L7 5132573 17inch IPS PRO Type cannot be used 1 1 53 COVER VESA LCD L7 5170026 Korea is excluded 1 2 54 SWITCH MIC_ASSY LCD_MONITOR 5137744 Set of SWITCH and MIC 1 1 55 SPEAKER SET L R LCD L7...

Page 260: ...TION 5162630 REVISION 3 LOGIQ S6 SERVICE MANUAL 9 16 Section 9 5 Renewal Parts List for Original LOGIQ S6 BT06 9 5 5 OP Panel and Keys Figure 9 196 OP Panel and Keys 70 71 72 73 74 75 76 77 78 79 80 8...

Page 261: ...USSIAN AN KEYTOP OPTION 5181031 1 1 77 OP PANEL TRACKBALL 2317344 LOGIQ3 common 1 1 78 OP PANLE LCD Assy 2317346 3 CIRCUIT board 1 1 79 LCD ENCODER Assy 5122999 for keyboard Assy version 2299986 8 or...

Page 262: ...RE DIRECTION 5162630 REVISION 3 LOGIQ S6 SERVICE MANUAL 9 18 Section 9 5 Renewal Parts List for Original LOGIQ S6 BT06 9 5 6 Front End Assemblies Figure 9 197 Front End Assemblies 90 91 94 97 100 101...

Page 263: ...stem to BT08 or later 1 1 94 PREA2F ASSY 5119039 board in nest slot 1 1 1 95 BTRAPP5AHV Assy 5154321 board in nest slot 3 4 1 1 96 BTxCW ASSY 5111346 Installed on the HBTRAP Option 1 1 97 DDBF64 ASSY...

Page 264: ...REVISION 3 LOGIQ S6 SERVICE MANUAL 9 20 Section 9 5 Renewal Parts List for Original LOGIQ S6 BT06 9 5 7 Back End Assemblies Figure 9 198 Back End Assemblies 110 111 112 119 115 116 120 117 128 129 130...

Page 265: ...GE HEALTHCARE DIRECTION 5162630 REVISION 3 LOGIQ S6 SERVICE MANUAL Section 9 5 Renewal Parts List for Original LOGIQ S6 BT06 9 21 122 136 127 135 127 LS6 BT08 BECOMP Cable Connection...

Page 266: ...ION 3 LOGIQ S6 SERVICE MANUAL 9 22 Section 9 5 Renewal Parts List for Original LOGIQ S6 BT06 122 127 127 124 LS6 BECOMP Cable Connection For backward production before BT08 including the software LCD...

Page 267: ...em to BT08 or later 1 1 116 Capture Board 5147460 1 1 117 AGP BOARD ASSY 2362887 for CRT monitor system and forward production of BT08 or later 1 1 118 PAT I O FA200801 option ECG 1 1 119 DVD drive 6...

Page 268: ...rt Name Part Number Description Qty FRU 150 REAR Assy 100V 120V 5170173 1 1 151 REAR PANLEL CABLE Assy CSL L6 5152284 2 1 1 152 FOOT SW CONNECTOR CSL L6 5165834 1 1 153 PROTECTOR 100V 120V U0026EK 1 1...

Page 269: ...RU 170 LV UNIT 5168931 LV with cables 1 1 171 HV UNIT 5168761 2 with sheet metal 1 1 173 SSR BOARD 5118606 1 1 174 TRANS 2373331 2 1 1 175 FAN Assy 5168756 1 1 176 AC INLET Assy 100V 120V 5169662 1 1...

Page 270: ...OGIQ S6 BT06 180 HV TRICON CABLE CSL L6 5152274 1 1 181 FUSE 2315585 1 1 182 SSR CABLE Assy CSL L6 5152285 1 1 183 FAN CONNECT CABLE CSL L6 5159703 1 1 184 AC INLET Assy 220V 5169695 1 1 185 FUSE HOLD...

Page 271: ...ber Description Qty FRU 200 Side Air Filter 5147508 1 1 201 Bottom Air Filter 5147506 1 1 204 Air Filter tray Side 5176611 1 1 205 Air Filter tray Bottom 5147505 1 1 206 Caster Free 5233772 Not Shown...

Page 272: ...enewal Parts List for Original LOGIQ S6 BT06 212 Front Pedal Cover Park 5172857 1 2 213 Front Pedal Cover Release 5172962 1 2 214 Caster Assy 3 2381035 3 Caster Set Free 1 Swivel 1 Lock 2 Screw 16 1 2...

Page 273: ...TION 5162630 REVISION 3 LOGIQ S6 SERVICE MANUAL Section 9 5 Renewal Parts List for Original LOGIQ S6 BT06 9 29 9 5 11 Misc Cables Figure 9 202 Misc Cables 221 222 223 224 225 226 227 228 229 230 231 2...

Page 274: ...C Out MAB CRT Monitor MAB BECOMP Speaker ACin VGA Micout MAB BACK PLANE VGA Speaker VGA Foot SW cont Power Switch HD LED Foot Switch AC in AC out AC out J7 J6 J8 J2 CN47A CN48A CN49A CN42B CN41A J12 C...

Page 275: ...6A CN57A CN42B CN41A J12 J13 CN25A J10 CN24A DC out J14 CN29B J9 J3 CN30B J5 CN28B J4 ATXDC CN26B J1 CB42 CB26 CB29 CB31 CB24 CB25 CB41 CB28 CB30 CB56 CB57 CN31B J2 Mic J11 CN57B CN54BCN55B CB54 CB55...

Page 276: ...NE MAB BACK PLANE REARIO REARIO BACK PLANE REARIO BECOMP LAN CompB W Shutter Color ShutterB W 13 14 J16 J15 11 17 Shutter B W CompB W out CompColor out S Video out S Video in Audio in Audio out VGA ou...

Page 277: ...Qty FRU 221 ATX POWER CABLE CSL L6 5152269 CB35 1 1 222 BP PC CABLE CSL L6 5152270 CB34 1 1 223 BP REARIO CABLE CSL L6 5152271 CB36 1 1 224 BW CABLE Assy CLS L6 5152272 2 CB21 CB45 1 1 225 KEYBOARD AC...

Page 278: ...68059 CB51 1 1 231 REARIO PC CABLE CSL L6 5168576 CB32 1 1 232 LAN CABLE CSL L6 5168194 CB33 1 1 234 USB LAMP CABLE CSL L6 5152286 CB41 1 1 235 MAIN MONITOR CABLE Assy CSL L6 5155276 CB28 CB30 1 1 237...

Page 279: ...ot Shown 1 2 267 4D MOTHER2 CABLE 5138724 1 1 268 4DBOX CABLE ASSY 5138723 1 1 269 4D AC Cable CSL L7 5147891 1 1 270 4D MOTOR CONTROLLER BOX 2372904 1 1 271 MOTOR CONTROL CABLE with BRKT L6 5171790 1...

Page 280: ...R STYLE 2383779 Not Shown 283 BATTERY RECHARGER STATION FOR WIRELESS TRANSMITTER 5116446 SENNHEISER L2015G2 Not Shown 284 INTERNATIONAL POWER CONNECTOR KIT 2392844 Not Shown 285 Wireless Receiver for...

Page 281: ...GE HEALTHCARE DIRECTION 5162630 REVISION 3 LOGIQ S6 SERVICE MANUAL Section 9 6 Probes 9 37 Section 9 6 Probes Refer to Section 3 4 Completing the Installation for available probe list...

Page 282: ...GE HEALTHCARE DIRECTION 5162630 REVISION 3 LOGIQ S6 SERVICE MANUAL 9 38 Section 9 6 Probes This page was intentionally left blank...

Page 283: ...2 10 4 Tools Required 10 4 10 5 System Periodic Maintenance 10 7 10 6 Using a Phantom 10 11 10 7 Electrical Safety Tests 10 12 10 1 When There s Too Much Leakage Current 10 31 PM Inspection Certifica...

Page 284: ...ing must occur regularly The same tests are performed during each period so that changes can be monitored over time and effective corrective action can be taken Testing results corrective action and t...

Page 285: ...nspect AC Mains Cable Mobile Unit Check Weekly Inspect Cables and Connectors Clean Console Clean Monitor and Touch Panel Inspect Wheels Casters brakes and Swivel Locks Mobile Unit Check Daily Check Co...

Page 286: ...9 4151 Screwdriver Blade Stubby 9 41322 Pickup Tool Claw type 9 41421 Screwdriver Blade Pocket clip 9 6757 6 pc Needle File Set 9 41594 Screwdriver Blade 1 8 in x 4 in 9 9487 Utility Knife 9 41581 Scr...

Page 287: ...9 45381 Pliers Arc Joint 9 1 2 inch 9 44067 Socket 1 1 16 in for 1 2 in drive 9 45092 Pliers Linesman 8 1 2 inch 9 42679 Socket 10MM Hex for 1 2 in drive 2273333 9 42882 Punch Pin 3 32 inch 9 44262 E...

Page 288: ...adjustable wrist strap 3M 2214 Small adjustable wrist strap 3M 3051 conductive ground cord Anti Static Vacuum Cleaner 46 194427P278 46 194427P279 120V 230V Air Filter air intake Safety Analyzer 46 28...

Page 289: ...Ask Listen Ask the customer if they have any problems or questions about the equipment 2 Paperwork Fill in the top of the Periodic Maintenance PM Inspection Certificate Note all probes and system opti...

Page 290: ...m controls that affect this mode of operation Applicable Software Options Verify the basic operation of all optional modes such as Multi Image 3D Contrast Harmonics Cine Stress Echo etc Check the basi...

Page 291: ...M device 5 InSite iLinq Verify that InSite is functioning properly Ensure two way remote communications Warranty Contract Customers only 6 Camera Verify hardcopy output of the film camera Clean as nec...

Page 292: ...ol Panel Inspect keyboard and control panel Note any damaged or missing items 4 Control Panel Movement Verify ease of control panel Operator I O Panel movement in all acceptable directions Ensure that...

Page 293: ...sockets before plugging in a probe TEE Interoperative and TV TR probes often have special considerations and individual probe user manuals For TEE Interoperative and TV TR probes also refer to their...

Page 294: ...ssive leakage current To minimize the risk that a probe may shock someone the customer should Not use a probe that is cracked or damaged in any way Check probe leakage current once a year on surface p...

Page 295: ...be leakage current and ECG leakage current All measurements are made with an electrical safety analyzer Model 600 600E built by Dale Technology Corporation or equivalent device Table 10 14 Chassis Lea...

Page 296: ...e Dale 600 has self contained lamps designed for testing the outlet wiring arrangement Plug the Dale 600 into each outlet to be tested comparing the lamp status NOTE No outlet tester can detect the co...

Page 297: ...st the ground wire resistance 1 Turn the LOGIQ S6 unit OFF 2 Plug the unit into the meter and the meter into the tested AC wall outlet 3 Plug the black chassis cable into the meter s CHASSIS connector...

Page 298: ...hment plug to the meter s Chassis Cable clamp Test the grounding continuity of the system to all exposed metal parts in accordance with the IEC 60601 1 procedure as above Refer to the Dale 600 Instruc...

Page 299: ...e unit ON and OFF with the power line polarity Normal and Reversed Record the highest reading of current When using the Microguard or a similar test instrument its power plug may be inserted into the...

Page 300: ...Q S6 unit OFF 2 Plug the unit into the meter and the meter into the tested AC wall outlet 3 Plug the black chassis cable into the meter s CHASSIS connector and attach the black chassis cable clamp to...

Page 301: ...made with the ground open and closed with power line polarity normal and reversed and with the ultrasound console Off and On For each combination the operating controls such as the lead switch should...

Page 302: ...he meter into the tested AC wall outlet 3 Plug the black chassis cable into the meter s CHASSIS connector and attach the black chassis cable clamp to an exposed metal part of the LOGIQ S6 unit 4 Conne...

Page 303: ...t lead to ground leakage current 6 Select and test each ECG lead positions except ALL of the LEAD selector testing each to the power condition combinations Figure 10 1 ECG Leakage Current Test Table 1...

Page 304: ...d isolation current measured on the data sheet 10 7 7 Isolated Patient Lead Source Leakage Lead to Lead Reference the procedure in the IEC 60601 1 When using the Dale 600 switch the meter s function s...

Page 305: ...mit GROUND OPEN GROUND CLOSED Patient Lead to Ground Leakage Current Test and Patient Lead to Lead Leakage Current Test 115V 10uA 10uA 220 240V 500uA 10uA Table 10 21 Maximum Allowance Limit for ECG L...

Page 306: ...Contents 46 285652G1 Dale 601 ULTRASOUND SAFETY ANALYZER FIELD KIT for 120V unit ELECTRICAL SAFETY ANALYZER DALE MODEL 601 for 120V unit Vendor MODEL 600 100 8FT CHASSIS GROUND CABLE Vendor MODEL 600...

Page 307: ...r Saline Bath Ground Cable Measures earth resistance and enclosure leakage current Also used for grounding saline baths for isolation testing of probes Used on DALE601 601E This probe may be substitut...

Page 308: ...e test meter and plug the test meter into the tested AC wall outlet 3 Plug the Chassis Ground Probe saline probe into the test meter s CHASSIS connector 4 Set the test meter s FUNCTION switch to CHASS...

Page 309: ...ter NEUTRAL Switch Tester GROUND Switch Measurement Start with System Powered OFF OFF NORMAL OPEN CLOSED OFF NORMAL OPEN OPEN OFF NORMAL CLOSED CLOSED OFF NORMAL CLOSED OPEN Open Neutral first then at...

Page 310: ...ach probe for leakage current 1 Plug the test meter into the tested AC wall outlet 2 Plug the Chassis Ground Probe saline probe in diagram into the test meter s CHASSIS connector 3 Connect the probe t...

Page 311: ...ure Probe Isolation Sink Current cont d 8 Test every probe and record in Table 10 26 the test results for every probe The test passes when all readings measure less than the values in Table 10 30 9 Ke...

Page 312: ...t will pass or sink to ground if a patient contacted mains voltage Table 10 27 Chassis Leakage Current Limits Accessible Metal Surfaces Country Normal Condition Open Ground Reverse Polarity Open Neutr...

Page 313: ...the probe or the scanner NOTE Each probe will have some amount of leakage dependent on its design Small variations in probe leakage currents are normal from probe to probe Other variations will result...

Page 314: ...Model Number Serial Number Probe 2 Frequency Scan Format Model Number Serial Number Probe 3 Frequency Scan Format Model Number Serial Number Probe 4 Frequency Scan Format Model Number Serial Number Pr...

Page 315: ...nfig System Ground Continuity Chassis Source Leakage Current Probe Chassis Source Leakage Current Wheel Chassis Source Leakage Current CRT Patient Lead Source Leakage Lead to Ground Patient Lead Sourc...

Page 316: ...GE HEALTHCARE DIRECTION 5162630 REVISION 3 LOGIQ S6 SERVICE MANUAL 10 34 Section 10 7 Electrical Safety Tests This page was intentionally left blank...

Page 317: ......

Page 318: ...re Telex 3797371 P O Box 414 Milwaukee Wisconsin 53201 U S A Asia Pacific Latin America North America GE Ultraschall Tel 49 0 212 28 02 208 Deutschland GmbH Co KG Beethovenstrabe 239 Postfach 11 05 60...

Reviews: