background image

GE Monogram

®

Assembly Instructions

Before you Begin – Read these instructions completely and carefully.
Note To Installer: Be sure to leave these instructions with the Consumer.
Note to Consumer: Keep these instructions with your Use and Care Book for future reference.

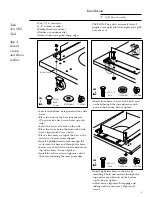
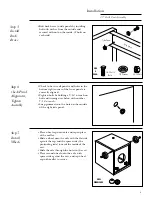
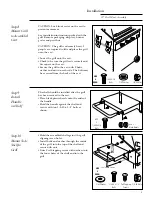
Assembly of this grill cart requires basic mechanical
skills. Proper assembly is the responsibility of the
installer.

NOTE:
This cart must be completely assembled before any
gas connections are made.

If you have questions concerning the installation of
this product, call the GE Answer Center

®

 Consumer

Information Service at 800.626.2000, 24 hours a day,
7 days a week.

If you received a damaged Grill Cart, you should
contact your dealer.
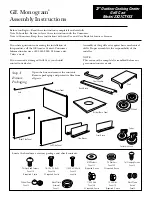
Step 1:
Remove
Packaging

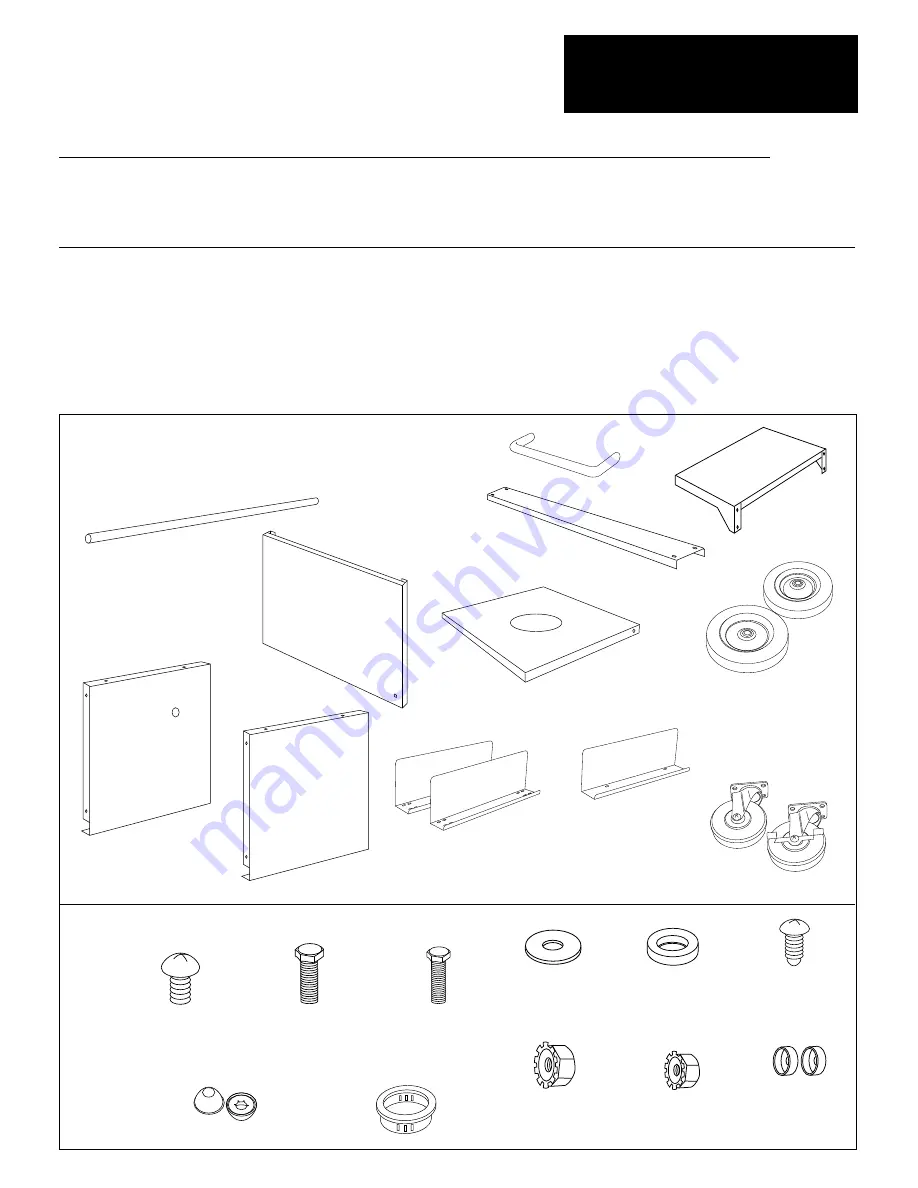
Open the box and remove the contents.
Remove packaging and protective film from
all parts.

Shelf Handle

Shelf

Back Brace

Bottom/Base Panel

Wheels

Front Panel

Caster with Lock

Locate the hardware accessory package and check contents.

Side Braces

Front Brace

Left Side Panel

Right Side Panel

Axle

1/4-20 x 1/2 Bolts

Count 36

32 required, 4 extra

1/4-20 x 3/4 Bolts

Count 2

no extra

Wheel Caps

Count 2

Black Plastic

Grommet

Count 1

#10 Washers

Count 12

8 required, 4 extra

1/4 Washers

Count 40

32 required, 8 extra

Self-tapping Screws

Count 2

1/4-20 Nuts

Count 36

32 required, 4 extra

10-24 Nuts

Count 10

8 required, 2 extra

Black Plastic

Bezels

Count 2

Phillips Head Screws

Count 10

8 required, 2 extra

Caster

27" Outdoor Cooking Center

Grill Cart

Model ZX27CTYSS

Summary of Contents for Monogram ZX27CTYSS

Page 1: ...eceived a damaged Grill Cart you should contact your dealer Step 1 Remove Packaging Open the box and remove the contents Remove packaging and protective film from all parts Shelf Handle Shelf Back Brace Bottom Base Panel Wheels Front Panel Caster with Lock Locate the hardware accessory package and check contents Side Braces Front Brace Left Side Panel Right Side Panel Axle 1 4 20 x 1 2 Bolts Count...

Page 2: ...ase and through the brace Secure screws with flat washers and nuts on top of the brace Do not tighten Install the other caster to opposite end of the brace following the same procedure Bottom Panel 1 4 20 x 1 2 Bolts 1 4 Washer 1 4 20 Nuts USE 4 EACH Install front brace to base with 4 bolts and washers through the top and secure with nuts on the bottom Do not tighten 1 4 20 x 1 2 Bolts 1 4 Washer ...

Page 3: ...e with nuts inside Do not tighten 1 4 20 x 1 2 Bolts 1 4 Washer 1 4 20 Nuts USE 4 EACH Step 4 Install Front Panel to Base 1 4 20 x 1 2 Bolts 1 4 Washer 1 4 20 Nuts USE 2 EACH Place the front panel on the assembly Install bolt with washer from the bottom into the base and secure with nuts Do not tighten Front Panel Side Panel Bottom Panel Right Side Panel Bottom Panel Front Panel 1 4 20 x 1 2 Bolts...

Page 4: ...6 wrench on bolt and turning nuts below with another 7 16 wrench Snap grommet into the hole on the outside of the right side panel Place wheel cap onto axle and tap in place with a mallot Slide a wheel onto the axle with the flat side against the cap and the spacer side the protruding side towards the inside of the cart Slide the axle through the holes in the cart Place second wheel onto the axle ...

Page 5: ... 4 Washer 1 4 20 Nuts USE 4 EACH The shelf should be installed after the grill has been secured to the cart Place black plastic bezels onto the ends of the handle Hold the handle against the shelf and secure with two 1 4 20 x 3 4 bolts as shown Use 2 Black Bezels Hold the assembled shelf against the grill aligning screw holes Install bolts and washer through the inside of the grill into the top of...

Page 6: ...6 Notes 27 Grill Cart Assembly ...

Page 7: ...7 Notes 27 Grill Cart Assembly ...

Page 8: ...y or night For Monogram local service in your area call 1 800 444 1845 NOTE Product improvement is a continuing endeavor at General Electric Therefore materials appearance and specifications are subject to change without notice Monogram General Electric Company Louisville KY 40225 Pub No 49 8840 Dwg No 164D3333P080 1997 GE Appliances N D 723 4 97 10744 ...

Reviews: