GE H
EALTHCARE
O
PTIMA
XR200
AMX
/XR220
AMX
D
IRECTION
5336113-1EN, R
EVISION
10
I
NSTALLATION
M
ANUAL
Page 50
Section 3.6 Installing the digital detector
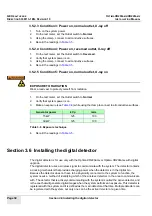
3.5.2.3 Condition 3: Power on, normal outlet, X-ray off
1.
Turn on the system power.
2.
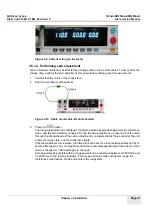
On the test meter, set the Outlet switch to
Normal
.
3.
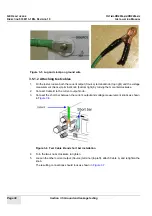
Using the clamp, connect to all conductive surfaces.
4.
Record the readings in
.
3.5.2.4 Condition 4: Power on, reversed outlet, X-ray off
1.
On the test meter, set the Outlet switch to
Reversed
.
2.
Verify that system power is on.
3.
Using the clamp, connect to all conductive surfaces.
4.
Record the readings in
.
3.5.2.5 Condition 5: Power on, normal outlet, X-ray on
EXPOSURE TO RADIATION
Wear a lead vest to protect yourself from radiation.
1.
On the test meter, set the Outlet switch to
Normal
.
2.
Verify that system power is on.
3.
Make an exposure (see
) while using the clamp to connect to all conductive surfaces.
Table 3-6 Exposure technique
4.
Record the readings in
.
Section 3.6 Installing the digital detector
The digital detector is for use only with the Optima XR220amx or Optima XR200amx with digital
upgrade.
The digital detector uses a wireless signal to communicate with the system. The detector contains
a docking mechanism that provides charging power when the detector is in the digital bin.
Because the detector does not have to be physically connected to the system to function, the
system needs a method of identifying which of the wireless detectors in the area to communicate
with. The detector that is actively communicating with the system is called the active detector, and
is the one that will generate digital images when the system performs an exposure. This detector is
registered with the system and it is defined as the main detector at that time. Multiple detectors can
be registered with the system, but only one can be the active detector at a given time.
Generator power
kVp
mAs
15 kW
125
100
30 kW
125
100
Summary of Contents for Optima XR200amx
Page 129: ......

