Appendix E: Installing Wall Mount Units
Bumper Installation (for Installations with Bassinets)
E-6
Service Manual
E.3 Bumper Installation (for Installations with Bassinets)
The bumper is intended to help the clinician properly position the bassinet during use. Bassinets are
available in many different sizes and configurations. Confirm that the center of the mattress is 19” (48.3 cm)
away from the front of the rails on the warmer with the bumper installed. If the included bumper is not the
right dimension for the facility’s bassinets, the facility may use an alternative bumper design to ensure
proper positioning.
1.
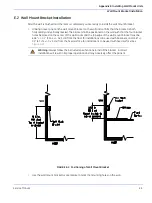
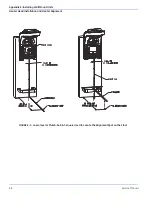
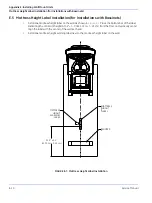
Position the bumper on the wall such that it is leveled horizontally and its center is aligned with the
center of wall mount bracket and the bumper holes are 7” (17.8 cm) from the floor.
Note:
For bassinets with a bumper being at a height different from 7” (17.8 cm), the bumper distance from
the floor can be adjusted to match the bassinet bumper height.
2.
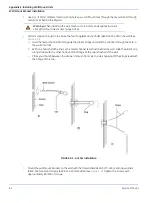
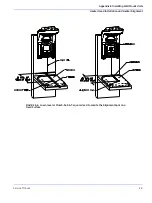
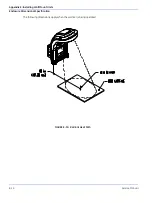
Use the bumper as a template to mark the mounting holes on the wall.
3.
Use a ¾” (19mm) diameter metal cutting hole saw or drill four holes through the dry wall and through
metal drywall tracks behind the wall.
4.
Secure the two Toggler® anchor bolts as instructed in step 4 of
5.
Mount the bumper on the wall with the flat washers (6600-0173-400), split ring washers
(6600-0440-400) and screws (660-0414-400) and screws provided (see
). Tighten the screws
with approximately 80 lb-in of torque.
Summary of Contents for PANDA
Page 4: ...RH 2 Service Manual...
Page 12: ...ii Service Manual About this Manual User Responsibility...
Page 38: ...Chapter 1 Functional Description System Functions 1 14 Service Manual FIGURE 1 8 Power Failure...
Page 60: ...Chapter 2 Installation Maintenance and Checkout Scale Checkout Procedures 2 8 Service Manual...
Page 62: ...Chapter 3 Calibration Scale Calibration Bedded Models Only 3 2 Service Manual...
Page 172: ...Chapter 6 Illustrated Parts Wiring Diagrams 6 40 Service Manual...
Page 180: ...Appendix A Specifications SpO2 Specifications A 8 Service Manual...


