


11
Installation Preparation
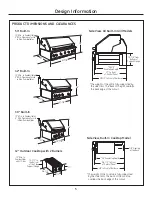
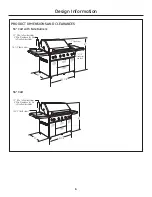
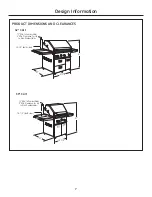
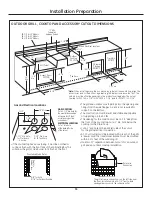
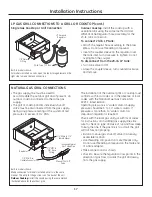
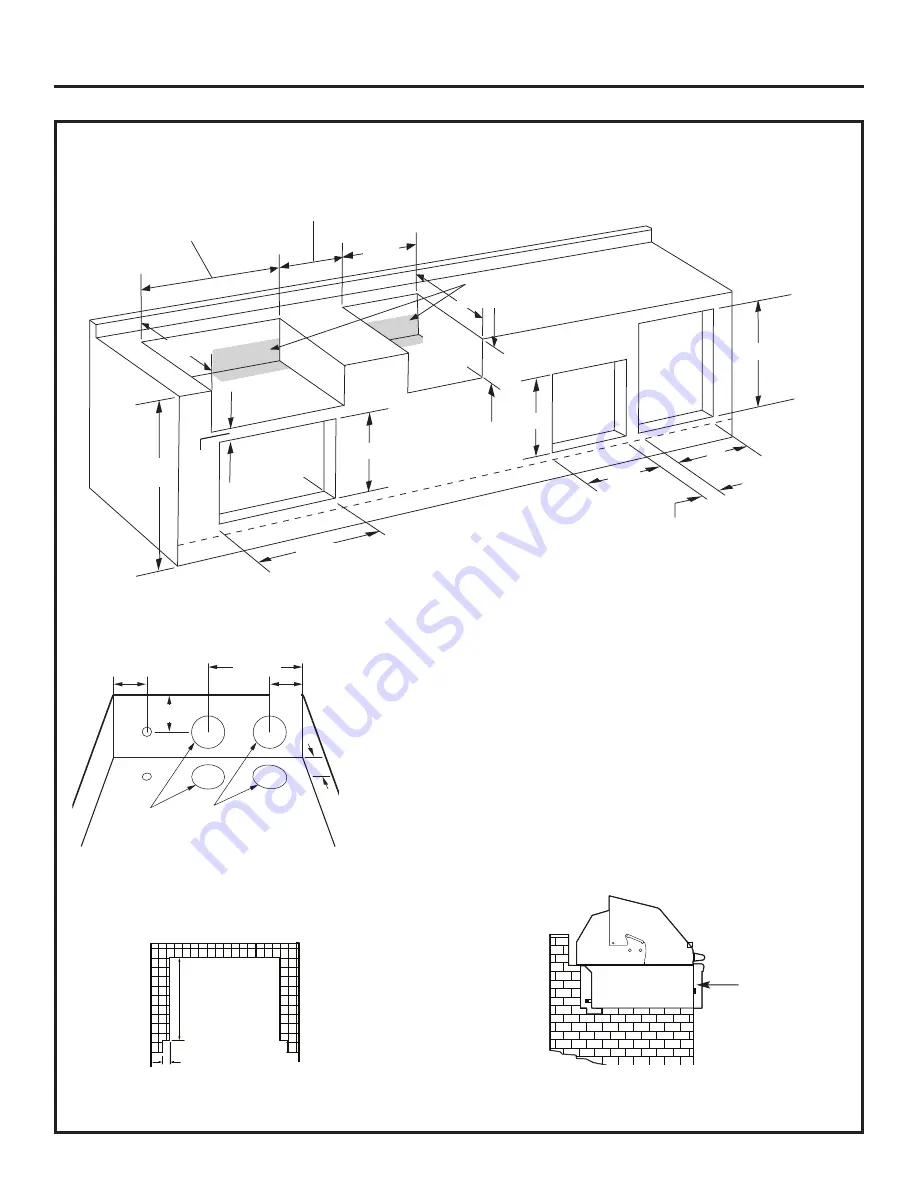
OUTDOOR GRILL, COOKTOP AND ACCESSORY CUTOUT DIMENSIONS
12" Min.
Separation
Between Cutouts
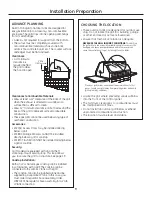
• If the countertop has an overhang, it must be notched or
cut back flush with the front face of the cabinet below. This
will allow the grill or side burner to fit flush at the front.
Countertop Notch Detail
5/8" for Grills
9/16" for Outdoor Cooktop
Depth to
Cabinet Face
• The grill and outdoor cooktop drops into the opening and
hangs from the side flanges. A deck is not required for
support on the bottom.
• The construction must be level and stable and capable
of supporting up to 400 lbs.
• The opening for the cooktop must be 24-1/2" deep from
the front of the countertop. Cut a 1" dia. hole below the
cooktop for the drain hose.
• Cut a 1" dia. hole at the back left side of the cutout
for the grill’s electrical connection.
• A 120 volt outlet must be located within reach of the grill’s
6' power cord. The transformer bracket must be mounted
within 3-1/2 feet of the outdoor grill.
• Maintain 12" separation between cutouts for an outdoor
grill and an outdoor cooktop installation.
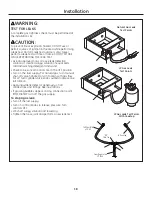
Rotisserie
Connection
11-7/8"
24-1/8"
1-1/8"
Min.
24-1/2"
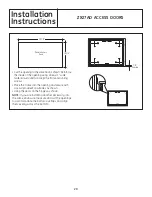
Access Doors
ZX27AD
24"
16"
17-1/4"
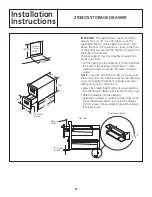
2-Drawer
Storage
ZX18DS
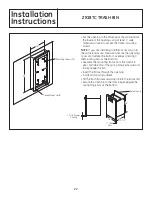
Trash Bin
ZX18TC
18-1/4"
Grill Cutout
Outdoor
Cooktop
ZGU122
10-7/8"
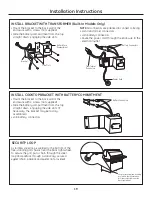
Gas and Electrical Locations
28-3/4" for 30" Models
40-3/4" for 42" Models
52-3/4" for 54" Models
24-1/2"
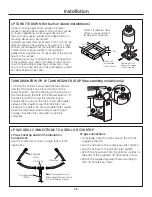
GAS LOCATION:
Cut a 3-1/2" dia. hole for
the manifold connection
as shown for LP tank
or stationary gas line
connections.
ELECTRICAL LOCATION:
Cut a 1" dia. hole
at the back left side
of the cutout.
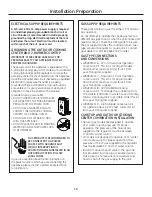
Gas and Electrical Locations
36"
Min.
3-1/2"
2"
3-1/2"
7-3/8"
10" Min.
3-1/2" Dia. Hole
for Stationary
Gas Line
3-1/2" Dia. Hole
for LP Tank Hose
18-9/16"
2-1/4" min.
The grill rotisserie connection is on the left side near
the front. Installation into a 24-1/2" front-to-back
opening allows access to the rotisserie outlet.
*See Note.
*
Note:
When installing more than one accessory below the countertop, align the
accessories across the bottom by adjusting the dimension above the floor. The
cutouts must be offset depending on the product overlap below the cutout.
Overlap for ZX27AD is 7/8", for ZX18DS is 1-1/4" and for ZX18TC is 1-3/16".


