PSW26SGN – GE Profile Arctica
™
25.5 Cu. Ft. Side-By-Side Refrigerator with Dispenser
Specification Created 4/02
TM
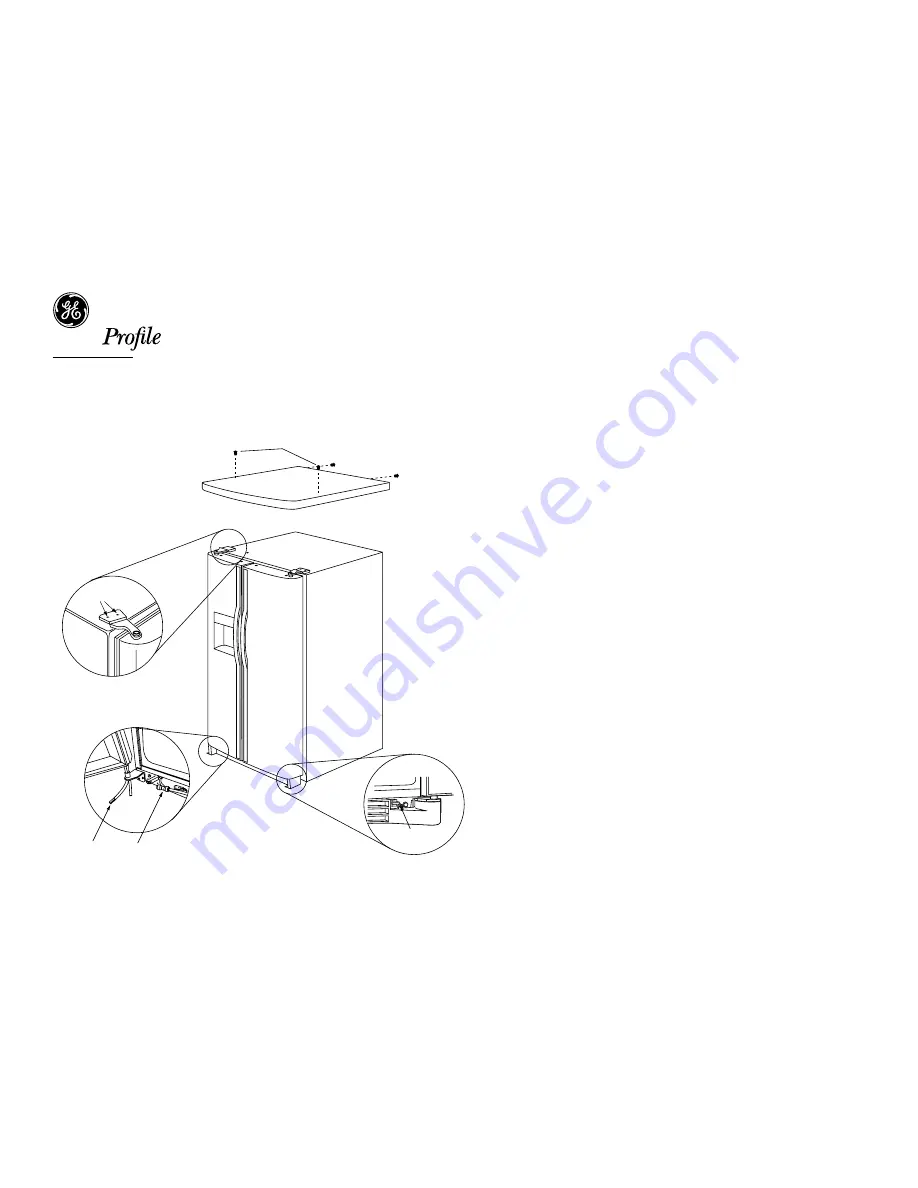
Water Line Coupler
1.
Hinge Screws
Wire Harness
Toekick Screw
4.
3.
2.
To Remove Top Cap and Doors on PSW26SGNBS
Step 1: Locate and remove two Phillips head screws on the top of
the refrigerator. Remove two screws, one on each side at
the rear of the top cap. Lift off and remove top cap.
Step 2: Open both doors. Remove one screw on each side of the
toekick. Pull forward to remove toekick.
Step 3: On the freezer door, disconnect water line coupler by pushing
against the collar on the left side. Disconnect wire harness.
Step 4: Use a Torx T-20 screwdriver to remove 2 screws holding
the top hinge. Carefully remove hinge while supporting
door. Lift door up and off bottom hinge. Remove fresh
food door in the same manner. Note: Do not remove
bottom hinges! Door alignment will be difficult if bottom
hinges are removed.
Step 5: Place refrigerator onto a hand truck, upright and against
one side. Move refrigerator to the installation location.
Reinstall Doors, Top Cap
Step 6: Carefully lower doors onto bottom hinges. Be sure to route
the tubing and electrical connector through the bottom
hinge. Reinstall top hinges.
Step 7: Place cap over the top of the refrigerator. Reinstall the
original screws in the top and back of the cap.
Step 8: Reconnect the wiring harness and waterline.
For answers to your Monogram,
®
GE Profile
™
or
GE appliance questions, visit our website at
GEAppliances.com or call
GE Answer Center
®
service, 800.626.2000.


