background image

Summary of Contents for Profile Harmony WPGT9360

Page 1: ...tart Feature 5 Stain Inspector 7 8 Summa_ T Screen 9 10 Installation Instructions Before You Begin 19 21 Stop by Stop Instructions 21 24 Switching the _4 asher and Dvver Backsplashes 25 28 Troubleshooting Tips 29 32 Consumer Support Consumer Support 34 Warranty 33 Write the model and serial numbers here Model Serial You can find them on the rear cover of the washer backsplash 3828EA3023B 175D1807P...

Page 2: ...ter system This simple procedure will allow any built up hydrogen gas to escape Since the gas is flammable do not smoke or use an open flanle or appliance during this process PROPER INS TALIA TION Thi s wa sher mu st be p_qJedy ir_stallal arm localed in acmrdam e with tlu h_ slallation h_ slruclior_ sbqfim_il is u w d h_slallation h_slrltctior_s aw b_chMal in the bm k _ thi s mar_ual Install or st...

Page 3: ...void such a result carefldlv follow the gam ent inanufilcturer s wash and care instructions To minimize the possibili_ _ff electric shock tmplug this appliance from the power supply or disconnect the washer at the household distribution panel by removing the fllse or switching off the circuit breaker befin e attempting any maintenance or cleaning NOTF Pressing START STOP or POWER does NOT disconne...

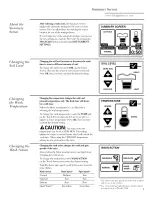
Page 4: ...ln _lsl cycles BACK Press to return to the l revious screen TOUCH SCREEN Press the graphics on the interactive display to use the washer ti_atui es Do not use shaq objects to press the Touch Screen NOTE If the washer is inactive for 5 minutes the Touch Screen will go into staa_dby mode m_d the display will be dark Press the Touch Screen or mV button to wake up the display HOME Press to returt_ to ...

Page 5: ...hl o_fly cycle Press STAIN INSPECTOR to wash imms with specific types of stains _Mter selecting a wash method use the Touch Screen to select a specNc wash cycle to Illatch VO lI load Change any of the automatic settings if desired by pressing the Touch Screen and tollowing the on screen instructions By changing the settings you can Remove heavier soil Change the water temi erature Change the wash ...

Page 6: ...its I ingerie Mixed Garn_ents Play _lothes Sweaters Swimwear Underwear Silks Xa ashable BY GARMENT Washing by l zbric Type Select By Fabric to wash loads sorted by fabric type L_BRIC WCI ES include Blends Delicates Polxester on some models Easx Care Silks Washable _ottons on some models Knits Washing Using the Special Cycles Select SPECIAL CYCLES to wash loads of nongarment items or to select a ri...

Page 7: ...c type of stain CHOCOLATE ADDAN ENZYMECONTAINING DETERGENT LIKE LIQUIDTIDE HE R TO THEPRE TREAT DISPENSER AND A NIGH EFFICIENCY DETERGENT TOTHE DETERGENT DISPENSER 5 Select COTTONS from the list of fabric types and select WHITES from the list of coloi_ 6 Fill the detergent tray with a lo_sudsing high etticiency liquid detergent such as Tide HE Fill the Pretreat tray with the proper pretreatment ad...

Page 8: ...bber cement Shoe polish Food DaJry Cookhlg Animal tilt Baby fl rm ula Barbecue sauce Blueberry Butter margarine Chocolate Cooking oil Cream cheese sauce Egg Frozen Popsicle lEi i O I _IVV Grease Maple sylup Mavonnaise Milk Mustard Pudding Salad dressing Nov Satlce Tomato based Vegetable oil Heavy Oils Grease Gasoline Motor oil I ube Ointment Salve Outdoor Carbon Clav Dingy white socks I _ISS Mud d...

Page 9: ...s be a cold rinse Follo_ the thbric manldlmturer s care label d_en selecting the wash tempenmlre To change die wash mmperamre touch fl_e TEMP pad on die Touch Screen then use file arro_ts to select a higher or lo_r temI eratm Press OK dlen you hme reached the desired setting ACAUTION O somec c es he temperature can be set at _ERY HOT This setting utilizes file washer s internal hearer dfich will e...

Page 10: ...l OlIl VO lI clothes NOTE Tile water level Mll my depending on tile load size and _ pe Tile washer uses adaptive filling and load sensing to provide tile ai propfiate water level flw effective and efficient wash pe_imnance and energy usage NOTE X4 ater may not cover tile top level of tile clothes This is nomml fi r high efficiency washe_ The water fill is optimized by the system fiw better wash pe...

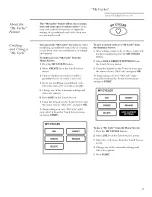
Page 11: ...ons 6 Press SAVE on tile Touch Screen 7 Using tile keypad on tile Touch Screen Q l e tile name of your Mv vcle and press OK To begin using your new My Cycle right awaB select it fl om the Touch Screen menu and press START To save a current cycle as a My Cycle from the Smmnaacy Screen 1 dter setting a wash cycle or alter a wash cycle hasj ust completed press the MY CYCLES b lttoIl 2 Select SAVE CLr...

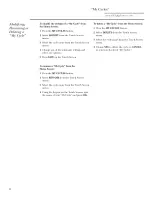
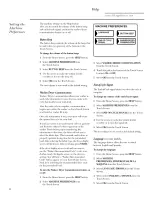
Page 12: ... SAVE on the Touch Screen To delete a My Cycle from the Home Screen 1 Press the MY CYCLES button 2 Select DELETE fi om the Touch Screen Illell I 3 Select the cycle name fl om the Touch Screen II eIl I 4 Choose YES to delete the cycle or CANCEL to i eturn to the list of Mv Cycles To renmne a My Cycle from the Home Screen 1 Press the MY CYCLE S button 2 Select RENAME fi om the Touch Screen Inelltl 3...

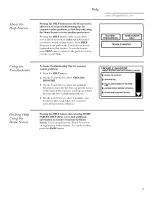
Page 13: ...n washer problems 1 Press the I _7 LP button 2 On the Touch Screen select TROUBLE SHOOTER 3 On the Touch Screen select the problem description fl om the list _m can use the arrows at the right of the screen to scroll up and down through the list of additional problems 4 On the Touch Screen select a possible cause fin the problem and fi llow the on screen instructions to find a solution TROUBLE SHO...

Page 14: ...r selecting the tabfic type the h er displa screen will be sho_n Mier x iewing px ss START If the dr er fispla screen is off and you _ li t to use tile Washer Recommended 5 c e to dr your clothes touch the display sc_ en on the dryer to activate 51m will have a Washer Recommended kcle N_tton appear on _ ur hver Home Screen Push it tor retfie ing the recommended h er cycle tot the just _ ashed load...

Page 15: ...the bleach is added to the wash load This ensures pertormance _xm t be diminished T _o sequential flushes through the bleach dispenser completely remo es the bleach fi om the dispenser Any residual liqukl lett in file dispenser at the end of the cycle is water not Neach To pxevent sell siphoning of the Neach into file _sh basket and damage to your clothes never add more than the maximum fill level...

Page 16: ...hand compartment Use only liquid lid tic soflene_ Dilute with water to the maximmn fill line Do not exceed the maximumfill line OxeHilling can cause early dispensing of the lid tic softener which could stain clothes NOTF Do not i om rid tic softener directly on the wash load It may stain the clothes Adding Prvtreat Additives 16 The Pretreat dispenser may be used to clean heavily soiled or stained ...

Page 17: ...Do not wash fabrics eontainingflammable materials waxes eleaningfluids etc 7he washer will notfill or operate with the lid open l _tbric Ca e Labels Below are tid ric care label symbols that afle ct the clothing you will be latmdering Bleach Labels Bleach _ Z_ Symu01_ A v Heooh O v h o_ e Heoch Do not He oh when needed when needed For Model WPG T9360 only Category Target Temperature 11 Cold Varied...

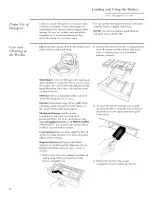
Page 18: ... _terior hmnediately wipe off any spills _ pe with damp cloth Do not touch tile surli_ce or the Touch Screen with shaq objects Movhag mad Storage _ skthe service technician to remove water fl om drain pmnp and hoses For more intommtion visit www GFAppliaa_ces com or call 800 GF CARES 800 439 2737 Do not store the washer where it will be exposed to the weather Long Vacations Be sure water supply is...

Page 19: ...UIREMENTS CAUTION For personal safety do not use an extension cord or adapter plug with this appliance Do not under any circumstances cut or remove the third grounding prong from the power cord Follow national electrical codes and ordinances This appliance must be supplied with the voltage and frequency indicated on the rating plate located on the rear cover of the backsplash and connected to an i...

Page 20: ... approved for installation in an alcove or closet as stated on a label on the back of the machine Minimum clearance between washer and adjacent walls or other surfaces 0 either side 2 front 3 rear Minimum vertical space from floor to overhead shelves cabinets ceilings etc is 52 Closet doors must be Iouvered or otherwise ventilated and have at least 60 square inches of open area for washer only or ...

Page 21: ...arton and Styrofoam shipping base from the washer UNPACK THE WASHER CONT Remove the Styrofoam block containing the Owner s Manual parts water hoses and laundry product samples Remove the power cord from the back of the washer SWITCH WASHER AND DRYER BACKSPLASHES OPTIONAL If necessary switch the backsplashes for the washer and dryer see Switching the Washer and Dryer Backsplashes 21 ...

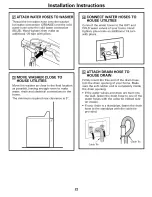
Page 22: ...E UTILITIES Move the washer as close to the final location as possible leaving enough room to make water drain and electrical connections to the home The minimum required rear clearance is 3 3 ATTACH DRAIN HOSE TO HOUSE DRAIN Firmly insert the free end of the drain hose into the drain opening of your home Make sure the soft rubber end is completely inside the drain opening If the water valves and ...

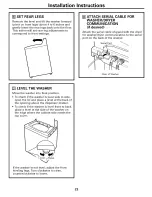
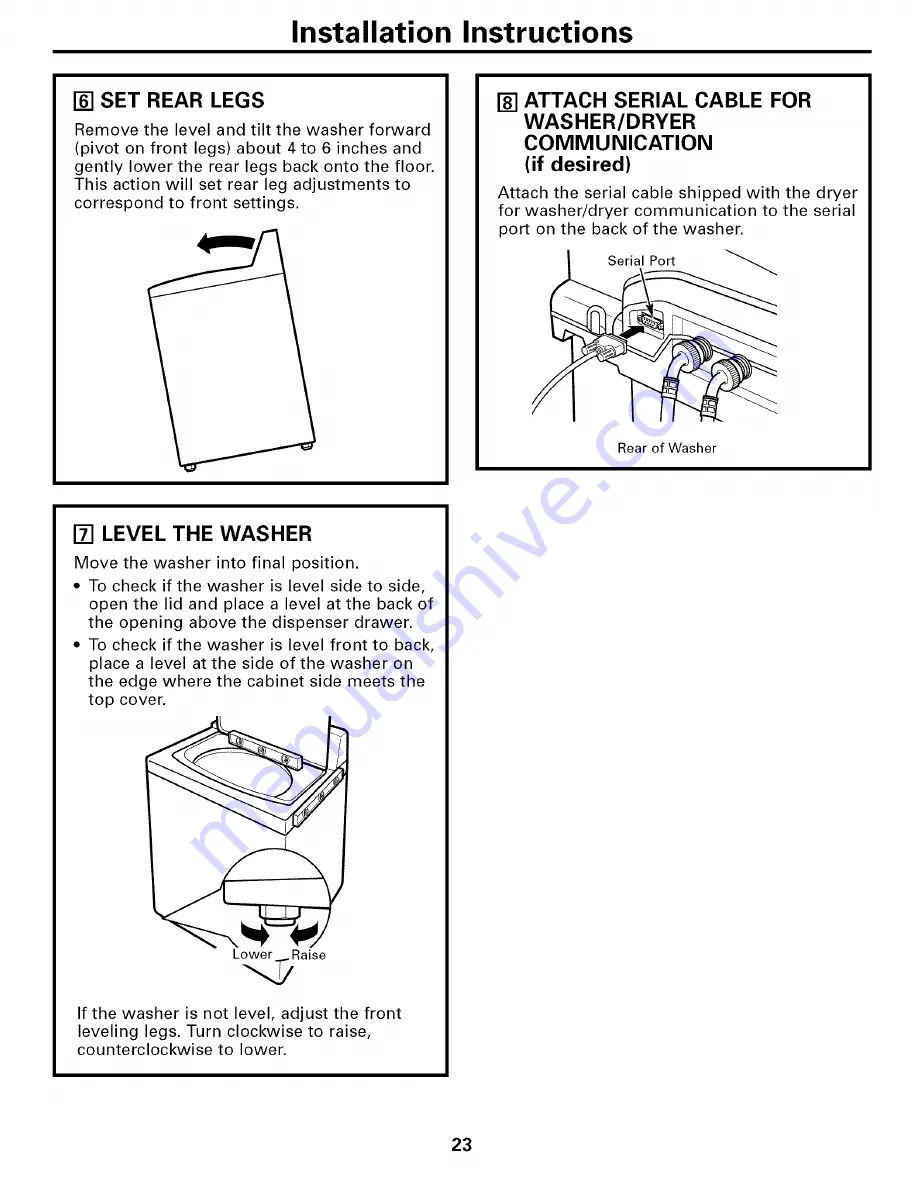
Page 23: ...e dryer for washer dryer communication to the serial port on the back of the washer Serial Port Rear of Washer LEVEL THE WASHER Move the washer into final position To check if the washer is level side to side open the lid and place a level at the back of the opening above the dispenser drawer To check if the washer is level front to back place a level at the side of the washer on the edge where th...

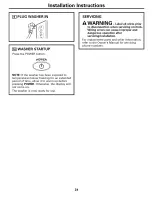
Page 24: ... allow it to warm up before pressing POWER Otherwise the display will not come on The washer is now ready for use SERVICING WARNING Label all wires prior to disconnection when servicing controls Wiring errors can cause improper and dangerous operation after servicing installation For replacement parts and other information refer to the Owner s Manual for servicing phone numbers 24 ...

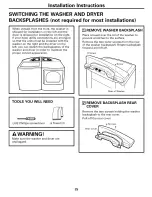
Page 25: ...ou can switch the backsplashes of the washer and dryer in order to maintain the proper curved appearance J REMOVE WASHER BACKSPLASH Place a towel over the lid of the washer to prevent scratches to the surface Remove the two outer screws from the rear of the washer backsplash Rotate backsplash forward and lift off _ Screw Rear of Washer TOOLS YOU WILL NEED 2 Phillips screwdriver Towel 2 WARNING Mak...

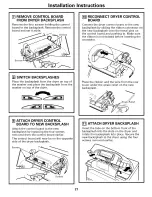
Page 26: ...r to prevent scratches to the surface Remove the four screws from the rear of the dryer backsplash Rotate backsplash forward and lift off Rear of Dryer REMOVE CONTROL BOARD FROM WASHER BACKSPLASH Remove the four screws holding the control board to the backsplash Remove the control board and set it aside Screws DISCONNECT DRYER CONTROL BOARD Disconnect the ribbon at the right of the control board b...

Page 27: ...e metal pins on the control board and pushing in Make sure the ribbon is not twisted before inserting the connector Place the ribbon and the wire from the rear cover under the strain relief on the new backsplash ATTACH DRYER CONTROL BOARD TO NEW BACKSPLASH Attach the control board to the new backsplash by replacing the four screws removed from the control board earlier The control board will now b...

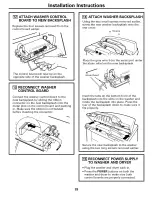
Page 28: ...r ATTACH WASHER BACKSPLASH Using the two small screws removed earlier screw the new washer backsplash onto the rear cover Screws E I Place the gray wire from the serial port under the strain relief on the new backsplash Insert the tabs on the bottom front of the backsplash into the slots on the washer and rotate the backsplash into place Press the rear of the backsplash down to make sure it fits p...

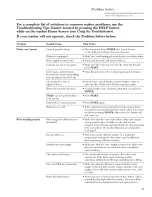
Page 29: ...T again _ _sher is too cold If tile washer has been exposed to temperatm es below fl eezing fi r an extended period of time allow it to waml up betiwe pressing POWER Otherwise the display will IlOt COllie oil Water not filling propedy Filter clogged or fill hoses may Make sm e that tile water live filte_ blue and orange be kinked screen must be fl ee of solids on the trait are not clogged Tm n off...

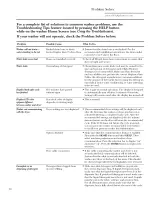
Page 30: ...ml appears different depends on xiewing angle belween washer mM dryer Washer not communicaling Dryer settings are not displayed Tile recommended d_yer settings will be displayed only with the dr _ r atter the fi_t time the washer or dover touchscreen is acfi _Ked fi llowing a completed wash cycle _Mter the recommended settings are displayed the five minum tinleout feature on the dryer will erase t...

Page 31: ...bin to hel I avoid overfilling Clo_ing ofbleaz h Bleach bin is not seated Make stlre that the bleach cover is properly seated and snapped into place betore the start ot the cycle Insufficient cleaning You may remove and clean the bleach cover with wam_ water and a scrub brush to clear clogging Poor stain removal Stain inspector not used Tly using the stain inspector recommended cycle The system op...

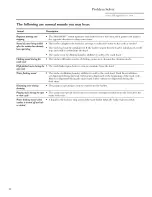
Page 32: ... make a series of clicking noises as it changes the cleaning mode wash c3_te High pitched noise during the The wash basket spins iiaster to remove moistm e fi om theload spin c3rle Water flushing sound The washer is diluting lmmch T additives to add to the wash load Wash Boost additives are dispensed dining presoak Detergent is dispensed at the begimfing of the wash cycle Bleach is disi ensed dini...

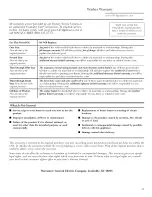
Page 33: ...r related service costs The direct drive motor and outer washer tub if any of these parts should tifil due to a defect in materials or workmanship During this additional eight year limited warrant you will be responsible fl r anv labor or related service costs The washer basher if it should tifil due to a detect in materials or workmanship During this product lifetime limited warranly you will be ...

Page 34: ...d learn about special discounts that are axailable while your warranty is still in effect Ybu can purchase it on line an 0me or call 800 626 2224 during nomml business hours GE Consumer Home Services will still be there alter our warran_ expires Parts and Accessories www GEAppliances com Individuals qualified to service their own appliances can have parts or accessories sent directly to their home...

Reviews: