– 25 –
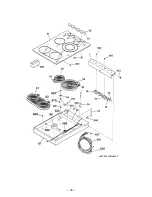
Surface Element Replacement
Note: The surface element, pan sensor, and
temperature sensor are
only replaceable as an
assembly, which includes the sensor wire harness
and connector.
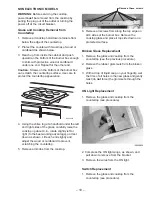
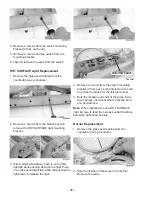
1. Remove the glass and cooktop from the
countertop (see the procedure).
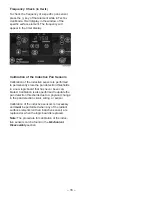
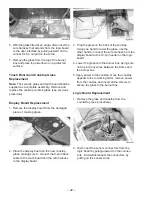
5. When the TIMER window displays
DISC and
the U symbol stops flashing in the LF surface
element power window,
center the aluminum
disk on the LF surface element.
6. Press the PAN and LF (+) keys at the same
time. The electronic control will perform the
calibration on the LF sensor and then proceed
to the next surface element. The TIMER
window will flash
CAL and the U symbol will
flash in the LR surface element power window.
7. Repeat steps 5 and 6 for the LR, CR (if
present), RR, and RF surface elements.
8. After the RF surface element has been cali-
brated, the timer window will display a PASS or
FAIL message for the entire calibration proce-
dure. An
F will be displayed in the surface
element power window of any sensor that fails
the process. Acknowledge this message and
exit the calibration procedure by pressing the
PAN and RF (+) keys at the same time.
Note: If the calibration proceedure is interupted for
any reason, exit the calibration proceedure by
pressing the PAN and RF (+) keys at the same
time.
Note: Failure of the calibration procedure may
occur for several reasons. If the calibration proce-
dure fails, follow these steps:
• Try calibrating the cooktop again, beginning with
step 1 from above.
• Identify the sensor(s) that fails the calibration
procedure.
• If multiple sensors fail the calibration procedure,
replace the logic board.
• If only one sensor fails the calibration procedure,
replace the corresponding surface element.
Caution: Do not cut the wire ties from the wire
harness. Care
must be taken to ensure that
only the sensor wires to the surface element
being replaced are cut.
Caution: Routing of the wires is extremely
critical. Care must be taken to ensure the wires
are routed exactly the way they were originally.
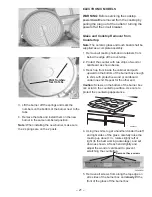
GEA00756
Sensor Wire
Harness
Surface Element
Power Wires
Remove Cut Wires
From Wire Bundle
Tie Wrap (Do Not Cut)
To Power Board
Old Heating
Element
3. Using diagonal cutters, snip
both the tempera-
ture sensor and the pan sensor wires and
remove them from the wire harness leading
from the logic board to the surface element.
Note: When installing the new surface element,
tie-wrap temperature sensor and pan sensor wires
to the existing wire harness. Do
not cut existing
wire harness. Do
not cut existing tie wraps.
GEA00861
Surface Element
Power Wires
Existing Wire Ties
(Do Not Cut)
To Power Board
New Heating
Element
Tie-Wrap New Wires
To Wire Bundle
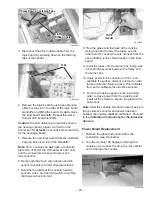
2.
Disconnect the appropriate sensor connector
from the logic board by pulling
upward on the
connector. (Do
not disconnect the connector by
pulling on the sensor wires.) Trace the sensor
wires back to the appropriate surface element,
making note of where and how the wires are
routed.
Summary of Contents for Profile JP938
Page 19: ...17 Fault Code Behavior Table...
Page 33: ...31 Notes...
Page 34: ...32 Parts List...
Page 36: ...34...
Page 38: ......
Page 39: ......

