– 55 –
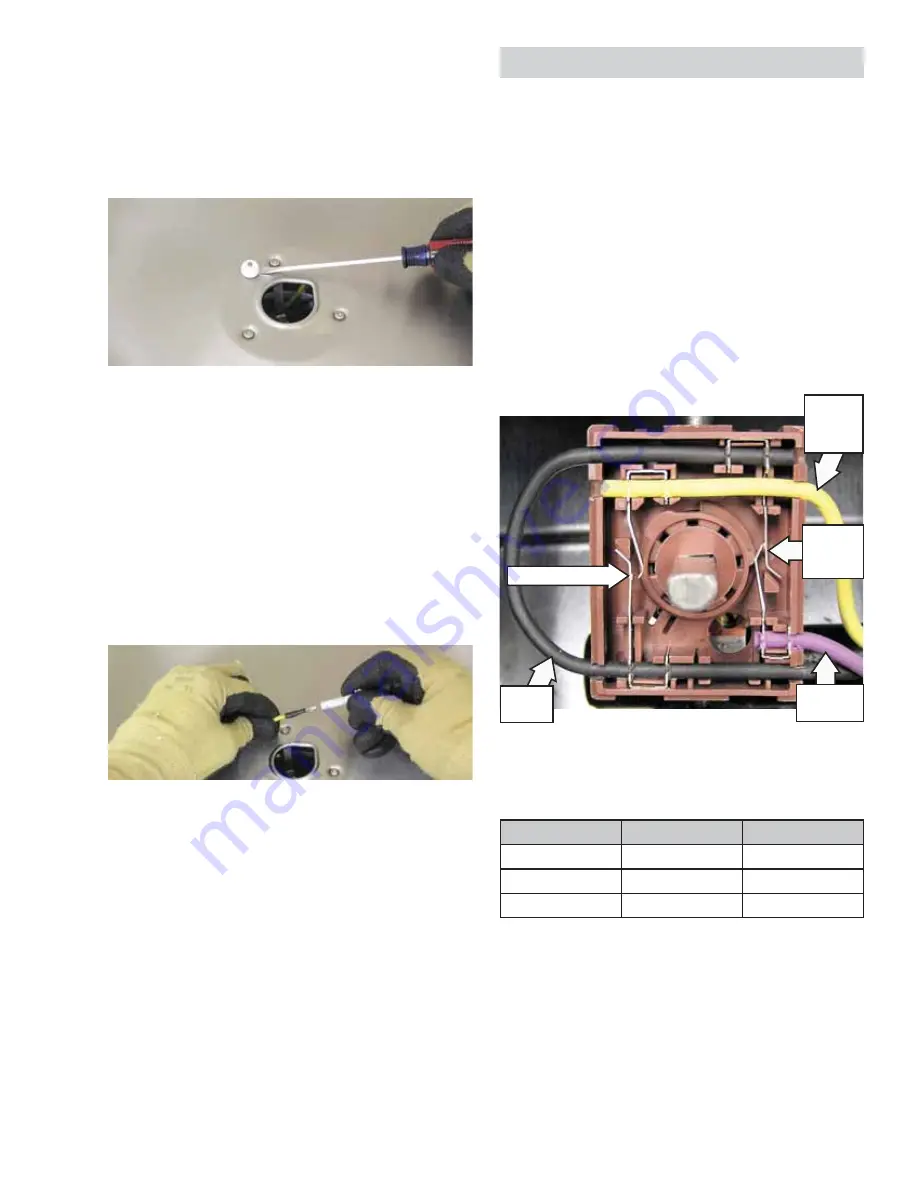
To remove the single burner igniter:
Remove the burner cap and head.
1.
Carefully insert a small,
fl
at screwdriver blade
2.
between the edge of the igniter and the main
top and gently pry igniter up.
Grasp and pull igniter straight out from the main
3.
top.
Unplug the wire from the back of the igniter.
4.
Caution:
When removing the wire from the igniter,
make sure not to damage the heat shrink insulation
on the wire. If damaged, repair insulation with
fi
berglass tape.
Note:
When connecting the igniter, ensure the wire is
pressed as far as possible into the igniter base.
Igniter Switch Assembly
Each surface burner utilizes a switch housing that
is wired to a single harness. Inside each housing
are 2 switches. When the burner valve is advanced
from the OFF position to the LITE position, the igniter
switch closes. The closed igniter switch sends line
voltage to the spark module and all the surface
burner igniters are activated. At the same time, the
lockout error switch opens and removes previously
applied line voltage from the ERC at location IN-
WM. When the cooktop is locked out, this removed
voltage allows the ERC to display ERR and sound
a continuous error tone. Displayed ERR and tone
informs the user that it is an error to attempt to
operate the cooktop in the lockout mode.
Left Rear Switch Housing shown in off position
(Cover removed for clarity)
Igniter Switch
Lockout
Error
Switch
Voltage
to Spark
Module
Voltage to
IM-WM
Line
Voltage
Valve Position
Igniter Switch
Lockout Switch
Off
O
X
Lite
X
O
On
O
O
X - Closed
O - Open
(
Continued next page
)


