


49-4000214 Rev 0
11
Dispensers
USING THE DISHW
ASHER
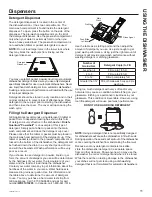
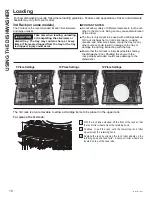
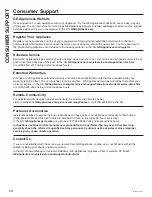
Detergent Dispenser
The detergent dispenser is located in the center of
the dishwasher door. It has two compartments. The
main wash compartment is found inside the detergent
dispenser. To open, press the button on the side of the
dispenser. The pre-wash compartment is on the lid of
the detergent dispenser. Use the pre-wash compartment
only when your water is extremely hard or when you
have a heavy soiled load. The pre-wash compartment is
not used when tablet or packet detergents are used.
NOTE:
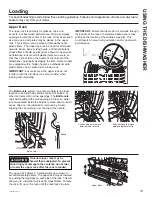
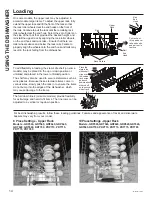
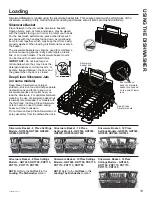
Do not load large items in the lower rack where
they may block the wash jets from rinsing out the
detergent dispenser.
You may use tablet, packet, powder, liquid or gel automatic
dishwasher detergent. Make sure you use only detergents
specifically labeled for use in automatic dishwashers. Never
use liquid hand dish detergent in an automatic dishwasher.
Sudsing and poor wash performance will result with the use
of improper detergents.
Detergents should be stored in a dry location and in their
original container to prevent loss of effectiveness. Place
detergent in the cup just prior to starting the dishwasher
and then close the cover. The cover will open during the
wash cycle.
Filling the Detergent Dispenser
GE Appliances recommends using detergent in tablet or
packet form. Independent testing has shown this form
of detergent is very effective in the dishwasher.
Finish
®
Quantum
®
Powerball
®
is an example of this type of
detergent. Simply put a tablet or packet into the main
wash compartment and close the detergent cup cover.
Please notice that the tablet or packet must be placed in
the main wash compartment of the detergent cup. If the
tablet or packet is placed in the prewash compartment or
tossed in the bottom of the dishwasher, the detergent will
be flushed down the drain in a very short period of time
and will thus be wasted. Wash performance will be very
poor as a result.
If you choose to use detergent in powder, liquid or gel
form, the amount of detergent you use will be determined
by the hardness of your water, the temperature of your
water, and the food soil load inside the dishwasher.
Contact your water company to get information about the
hardness of the water in your area. Water hardness is
measured in grains per gallon. Use this information and
the table above to determine the amount of detergent
to use. You may purchase a hard water test strip from
GE Appliances. Call 1-877-959-8688 and ask for part
number
WD01X10295
. In Canada, call 1-800-661-1616.
Use the table as a starting point and then adjust the
amount of detergent you use. Use just enough to get
good wash performance. Using just the right amount of
detergent will provide great wash performance without
wasting detergent or etching glassware.
Using too much detergent with very soft and/or very
hot water may cause a condition called etching on your
glassware. Etching is a permanent cloudiness in your
glassware. This condition is irreversible. However, using
too little detergent will cause poor wash performance.
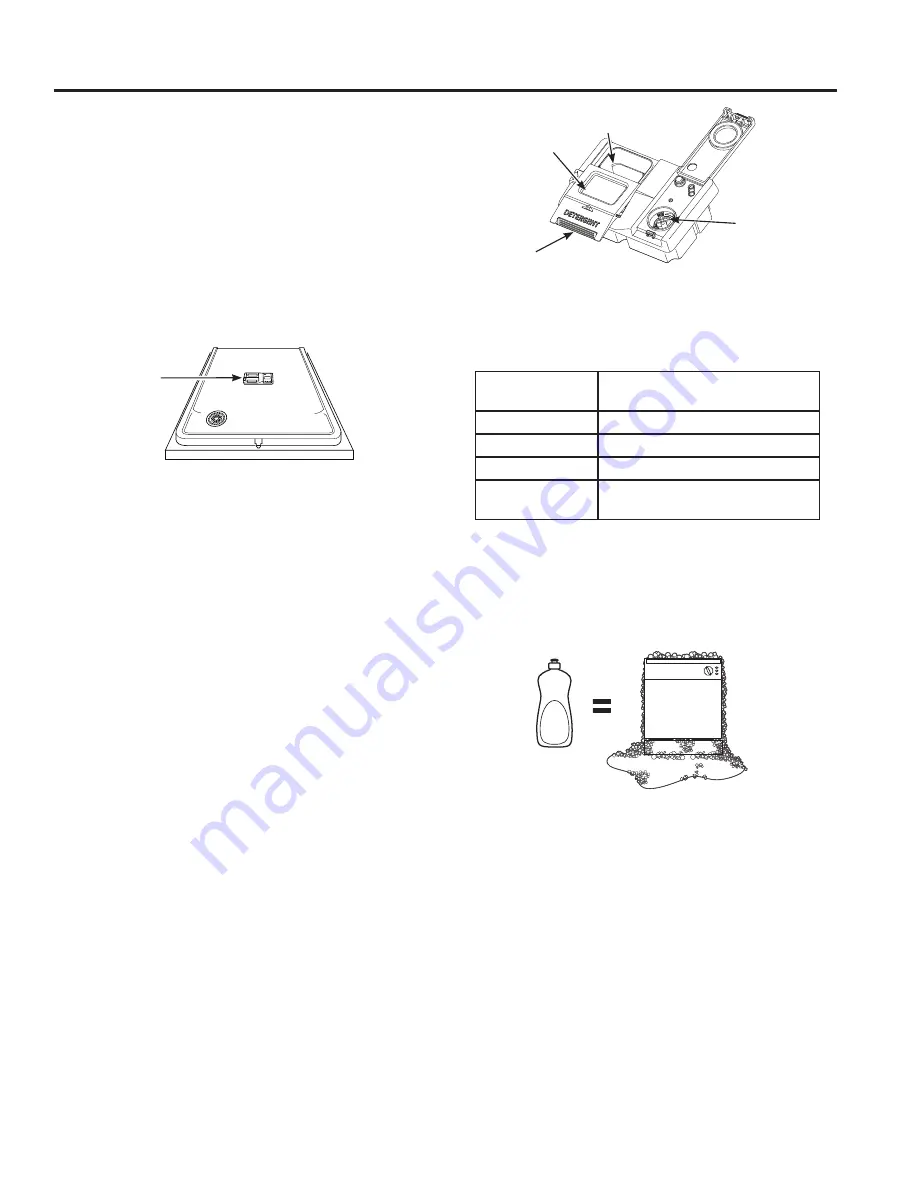
DO NOT USE HAND DISH DETERGENT
NOTE:
Using a detergent that is not specifically designed
for dishwashers will cause the dishwasher to fill with suds.
During operation, these suds will spill out of the dishwasher
vents, covering the kitchen floor and making the floor wet.
Because so many detergent containers look alike,
store the dishwasher detergent in a separate space
from all other cleaners. Show anyone who may use the
dishwasher the correct detergent and where it is stored.
While there will be no lasting damage to the dishwasher,
your dishes will not get clean using a dishwashing
detergent that is not formulated for automatic dishwashers.
Detergent
Dispenser
Number of
Grains/Gal.
Detergent Cup(s) to Fill
Less than 4
Fill cup to 1/3 full
4 to 8
Fill cup to 2/3 full
8 to 12
Fill cup completely full
Greater than 12
Fill both main wash cup and pre
wash cup
Pre-Wash
Main
Wash
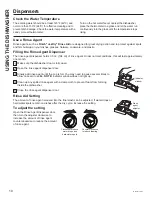
Rinse Agent
Push/Slide
to Close


