background image

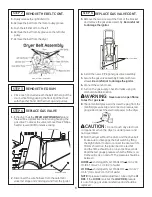
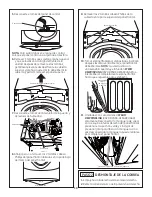
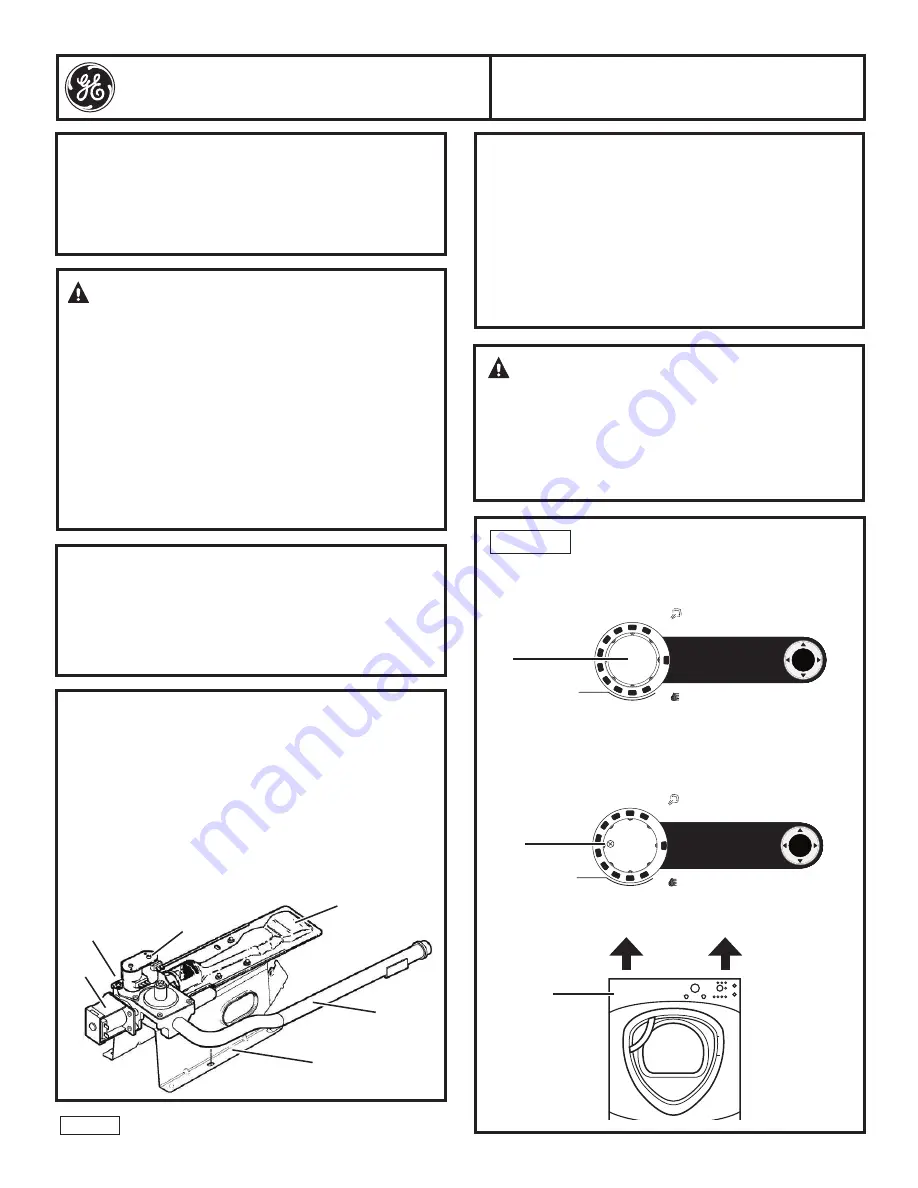
   REMOVE THE FRONT AND TOP

1. Disconnect gas inlet from the dryer. Unscrew gas 

flexible connector or gas pipe line.

2. Remove the rotary knob by pulling straight out.
3. Remove the Phillips-head screw located inside
  the control knob recess.

4. Raise the control panel vertically to disengage the 

four key slots from the four grommets.

ENTER

S

TEAM

R

EFRESH

S

PEED

 D

RY

W

ARM

 U

P

A

CTIVE 

W

EAR

W

RINKLE 

F

REE

D

ELICATES

N

ORMAL / 

M

IXED

 L

OADS

SENSOR DRY

TIME DRY

C

OTTONS

S

PECIALTY

C

YCLES

T

IMED

 D

RY

S

TEAM

D

EWRINKLE

Remove 

screw


06-11  GE      

Printed in Mexico

Installation Instructions

31-16671

BEFORE YOU BEGIN

Read these instructions completely and carefully.
 This kit contains the necessary parts for conversion, 

from Natural Gas to LP (Propane) Gas, of GE Dryer 

models with “KIT M46” specified on the rating plate.

PARTS INCLUDED IN THE KIT

•  Gas Valve for LP (Propane) Gas
•  Instructions (English, French & Spanish)
•  Conversion Rating Plate (English/French/Spanish)
•  Responsibility Label (English/French/Spanish)


WARNING: 

This conversion kit shall be 

installed by a qualified service agency in 

accordance with the manufacturer’s instructions, 

CAN/CGA-B149-1 and CAN/CGA-B149-2 

installation codes and the requirements of the 

authorities having jurisdiction. The information in 

these instructions must be followed to minimize 

the risk of fire or explosion or to prevent property 

damage, personal injury or death. The qualified 

service agency is responsible for the proper 

installation of this kit. The installation is not proper 

and complete until the operation of the converted 

appliance is checked as specified in the 

manufacturer’s instruction supplied with the kit.

  GAS VALVE FOR LP (PROPANE) GAS

•  The valve is equipped with a nozzle #54 (1.4 mm 

dia. (0.055” dia.) orifice and a pressure regulator set 

at 22.35±0.7cm (8.8±0.3”) of water column for an 

output energy of 21,400 BTU/hr on LP (Propane) gas. 

•  Required inlet pressure: minimum 22.89 cm (9.0”) 

of water, maximum 35.5 cm (14.0”) of water.

•  For operation at elevation above 610 m (2,000 

ft), input rating should be reduced at a rate of 4 

percent for each 305 m (1,000 ft) above sea level.

  IMPORTANT SAFETY NOTICE:

This information is intended for use by individuals 

possessing adequate backgrounds of electrical, 

electronic and mechanical experience. Any 

attempt to repair a major appliance may result in 

personal injury and property damage. Neither the 

manufacturer nor the seller can be responsible for 

the interpretation of this information or any liability in 

connection with its use.

LP (PROPANE) GAS 

CONVERSION KIT - WE25M46

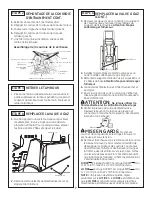
STEP 1

1/8 NPT manifold 

pressure tap Not 

visible

Automatic valve 

Dual Coil, 2nd 

Stage

1st 

Stage 

Coil

Gas Pipe

Bracket

Burner


WARNING:

Before beginning the installation, turn off the 

circuit breaker(s) or remove the dryer’s circuit 

fuse(s) at the electrical box. Be sure the dryer cord 

is unplugged from the wall.
Turn the dryer’s gas shutoff valve in the supply 

line to the OFF position.

ENTER

S

TEAM

R

EFRESH

S

PEED

 D

RY

W

ARM

 U

P

A

CTIVE 

W

EAR

W

RINKLE 

F

REE

D

ELICATES

N

ORMAL / 

M

IXED

 L

OADS

SENSOR DRY

TIME DRY

C

OTTONS

S

PECIALTY

C

YCLES

T

IMED

 D

RY

S

TEAM

D

EWRINKLE

Pull knob 

straight 

out and 

off

Lift and 

remove

1

Summary of Contents for Profile WE25M46

Page 1: ...he installation is not proper and complete until the operation of the converted appliance is checked as specified in the manufacturer s instruction supplied with the kit GAS VALVE FOR LP PROPANE GAS The valve is equipped with a nozzle 54 1 4 mm dia 0 055 dia orifice and a pressure regulator set at 22 35 0 7cm 8 8 0 3 of water column for an output energy of 21 400 BTU hr on LP Propane gas Required ...

Page 2: ...oard NOTE To avoid marring the control panel place the panel face up on a protective surface 6 Remove the three screws along the top front of the dryer Lift the front of the top cover pull and remove it 7 Disconnect the door switch wire harness and the sensor rod wire harness 8 Loosen but do not remove the two Phillips head screws that attach the bottom of the front panel to the frame REMOVE THE B...

Page 3: ...Be careful not to damage the ignitor 6 Connect the wire harness 7 Turn on the gas supply Check for leaks using an ammonia bubble solution WARNING Never use an open flame to test for gas leaks 8 Check manifold pressure Unscrew the plug from the manifold pressure tap and connect a pressure test gauge Reconnect the electrical power to the dryer CAUTION Do not touch any electrical components when the ...

Page 4: ...ght idler arm until the belt is taut Slowly turn drum by hand to ensure belt is aligned and not twisted 14 Remount front and top 15 Reconnect the electrical power and start the dryer Flame appearance may be observed by using a mirror and looking through the viewer located in the base on the right side Flame observation side panel removed for viewing purpose 16 Open dryer door Apply the Conversion ...

Page 5: ...t coch e comme indiqué dans les instrucructions du fabricant fournies avec cette trousse VALVE A GAZ POUR GAZ PROPANE LIQUIDE LP La valve est munie d une buse 54 1 4 mm dia 0 055 dia et d un régulateur de pression ajusté à 22 35 0 7cm 8 8 0 3 colonne d eau pour une énergie de sortie de 21 400 BTU hr pour le gaz LP Pression d entrée demandée min 22 89 cm 9 0 colonne d eau max 35 5 cm 14 0 colonne d...

Page 6: ...ommande sur un panneau de protection 6 Retirez les 3 vis qui maintiennent le panneau supérieur et qui sont situées le long du front de l unité Après avoir retiré les vis soulevez doucement le devant du couvercle et tirez le vers vous Cela devrait libérer le couvercle et vavous permettre de l enlever 7 Débrancher le harnais du commutateur de la porte et le capteur d humidité 8 Desserrez mais ne pas...

Page 7: ...7 Ouvrir la valve à gaz sur le tuyau à gaz Vérifier les fuites de gaz en utilisant une solution mousseuse à base d ammoniac ATTENTION Ne jamais utiliser de flamme directe pour la vérification de fuites de gaz 8 Vérifier la pression de sortie de l électrovalve Dévisser le bouchon de la prise de pression et connecter un manomètre de pression Reconnecter la tension à la sécheuse MISE EN GARDE Ne jama...

Page 8: ...necter la sécheuse à la prise de tension et démarrer la sécheuse bouton MARCHE L apparence de la flamme peut être observée à travers l ouverture spéciale dans le châssis de base Observation de la flamme panneau latéral enlever pour faciliter le visionnement 16 Ouvrer la porte de la sécheuse Coller l étiquette sur la plaque signalétique dans le coin droit en bas Collez l étiquette de responsabilité...

Page 9: ...sta que la operación de la conversión sea verificada tal cual lo indican las instrucciones del fabricante proporcionadas en este kit VÁLVULA PARA GAS LP PROPANO La válvula se equipa de un orificio 54 diámetro de 1 4 milímetros 0 055 y un regulador de presión fijado a 22 35 0 7 centímetros 8 8 0 3 columna del agua para una energía de salida de 21 400 BTU hr con gas propano Presión requerida de la e...

Page 10: ... de control NOTA Para evitar daños en el panel de control coloque el panel contra una superficie protectora 6 Remover 3 tornillos que sujetan el panel superior y que se localizan a lo largo del frente de la unidad Después de remover estos tornillos gentilmente levante desde el frente la cubierta superior y jale hacia usted Esto debe liberar la cubierta y permitir remover el panel superior 7 Descon...

Page 11: ... retroceda suavemente el montaje del soporte de la válvula y retirarlo de la secadora Precaución no dañar el encendedor 4 Cambie la válvula por otro modelo calibrado para gas propano 5 Ajuste el soporte con ayuda de 2 tornillos en su posición sobre la base de la secadora Precaución no dañar el encendedor 6 Conectar arnés Conectar de nuevo los cables a la válvula 1era y 2da etapa y al encendedor 7 ...

Page 12: ...x 14 22 cm 5 6 columna del agua NOTA Si la presión debiera ser ajustada el ajuste tendrá que realizarse en modo HI FIRE Si el modo HI FIRE es correcto pero la presión para el modo LO FIRE se encuentra fuera de valores pre establecidos la válvula de gas se encontraría defectuosa y por lo tanto será necesario remplazarla 10 Desconecte la secadora de la corriente eléctrica 11 Reinstale el tapón de pr...

Reviews: